


点击下方卡片,关注“小白玩转Python”公众号
在深度学习中有几件重要的事情,我认为数据是最关键的。如果没有合适的数据,要取得好的结果是非常困难的。即使你用强大的预训练模型和GPU训练模型,你的模型也可能表现不佳。在本文中,我将讨论如何获取数据集、分析数据集并使用简单的OpenCV GUI应用程序对其进行清理。我将使用Python作为编程语言。
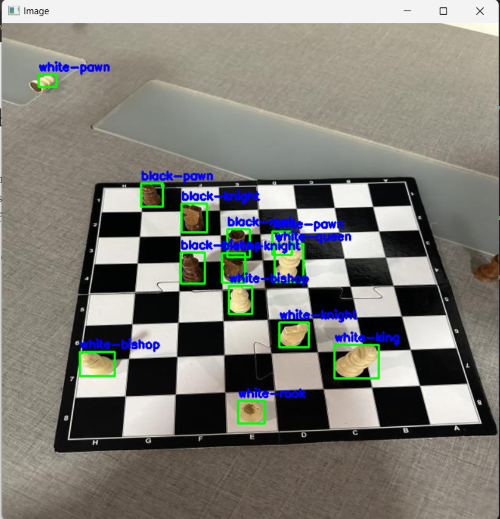
标记的图像
获取数据的最佳网站
有两种主要方法可以获取数据。第一种方法是生成自己的数据。你可以使用手机相机拍照,或者从互联网上抓取。获取图像后,你需要为它们标记(用于目标检测),这个过程可能需要很长时间。第二种方法更容易,你可以从网站上获取数据,互联网上有许多免费的数据集。
Kaggle:https://www.kaggle.com/datasets
Roboflow:https://universe.roboflow.com/
在选择数据集之前,我总是检查这两个网站。如果我找不到合适的数据集,我就会使用第一种方法。
如何判断一个数据集是否可以直接使用?
如果你创建了自己的数据集,你可能不需要清理它,因为你自己拍摄了照片并对它们进行了标记。你可以在创建过程中清理它,无需额外的清理步骤。
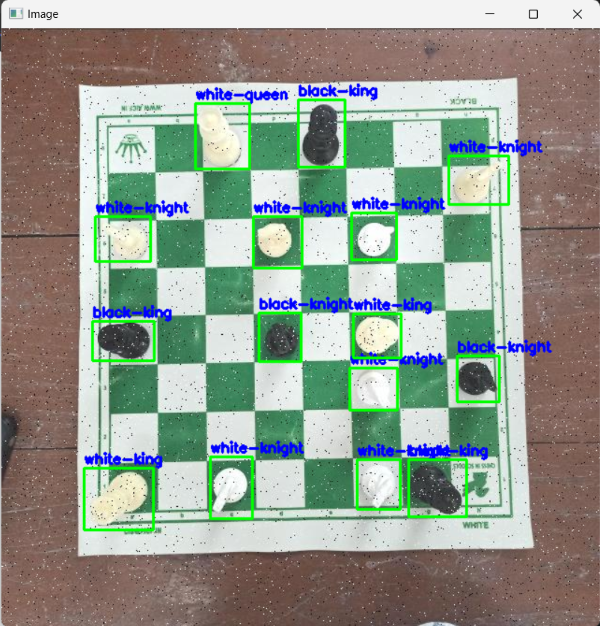
如果你直接从互联网上下载数据集,你将需要检查它。可能会有无关的图像、错误的标签或低质量的图像。
我通常从随机检查数据集开始。我只是检查图像的质量,并观察对象的分布,我不太关注数据集。如果一切都看起来可以接受,我就训练一个小模型。在评估结果之后,我通常可以理解数据是否需要清理或是否可以用于训练。
如果我决定数据还不准备好使用,我会使用我创建的简单OpenCV GUI对其进行清理。现在我将向你展示如何创建此GUI并用于清理数据集。
清理数据的GUI
这个GUI非常简单易用,而且非常有效。用户可以在一个屏幕上看到标签、边界框和图像本身,决定是否可以将其用于数据集。
如果用户决定图像是合适的,图像和标签将被复制到另一个文件夹中,稍后将用于训练。(按“s”键)
如果用户认为图像不合适,图像和标签将被删除。(按空格键)
实际上,这非常有效,因为你可以看到图像,同时也可以看到标签。使用此GUI,用户可以将不同的数据集合并到一个文件夹中,并为其选择最佳图像。
代码
导入必要的库
import cv2
import os
import shutil
import random
创建图像和标签的文件夹
# Define the path to your folder containing images


# folders for all images and labels
image_folder = 'original-images'
label_folder = 'original-labels'


# folders for selected images and labels
saved_images_folder= 'saved-images'
saved_labels_folder = 'saved-labels'
获取图像文件路径并对它们进行随机排序
注意:在目标检测数据集中,每个图像文件都有一个相应的带有相同名称的标签文件。这种命名约定是通用的。例如,如果有一个名为“image23.jpg”的图像文件,则存在一个名为“image23.txt”的文件,其中包含关于标签和边界框的信息。
# Get a list of all image files in the folder
image_files = [f for f in os.listdir(image_folder) if f.endswith(('.jpg', '.png', '.jpeg'))]


# Randomly shuffle the list of image files
random.shuffle(image_files)
显示图像、标签和边界框的函数
# Function to display image and handle keypress
def display_image(image_path, label_path):
    img = cv2.imread(image_path)
    with open(label_path, 'r') as f:
        lines = f.readlines()


    for line in lines:
        class_id, x_center, y_center, width, height = map(float, line.strip().split())
        # Convert YOLO format to pixel coordinates
        img_h, img_w, _ = img.shape
        x_center *= img_w
        y_center *= img_h
        width *= img_w
        height *= img_h
        x_min = int(x_center - (width / 2))
        y_min = int(y_center - (height / 2))
        x_max = int(x_center + (width / 2))
        y_max = int(y_center + (height / 2))

        # Draw bounding box
        cv2.rectangle(img, (x_min, y_min), (x_max, y_max), (0, 255, 0), 2)

        # Get class name based on class_id
        class_names =   ['black-bishop', 'black-king', 'black-knight', 'black-pawn', 'black-queen', 'black-rook', 'white-bishop', 'white-king', 'white-knight', 'white-pawn', 'white-queen', 'white-rook']
        class_name = class_names[int(class_id)]

        # Write class name
        cv2.putText(img, class_name, (x_min, y_min - 5), cv2.FONT_HERSHEY_SIMPLEX, 0.5, (255, 0, 0), 2)

    cv2.imshow('Image', img)
    key = cv2.waitKey(0)
    return key
主循环
# Main loop to display images and handle selection
for image_file in image_files:
    image_path = os.path.join(image_folder, image_file)
    label_path = os.path.join(label_folder, image_file.replace('.jpg', '.txt'))  # Assuming label files have the same name as image files with a .txt extension

    # Check if the label file exists
    if os.path.exists(label_path):
        key = display_image(image_path,label_path)

        # Press 's' to save the image and its corresponding label file to the selected folder
        if key == ord('s'):
            selected_image_path = os.path.join(saved_images_folder, image_file)
            selected_label_path = os.path.join(saved_labels_folder, image_file.replace('.jpg', '.txt'))

            shutil.move(image_path, selected_image_path)  # Move the image file to the selected folder
            shutil.move(label_path, selected_label_path)  # Move the label file to the saved labels folder

            print(f"Image '{image_file}' and its corresponding label file saved.")

        elif key == ord(' '):
            os.remove(image_path)
            os.remove(label_path)
            continue  # Move to the next image


        elif key == ord('q'):
            break


    else:
        print(f"No label file found for image '{image_file}'.")
        continue  # Skip to the next image


cv2.destroyAllWindows()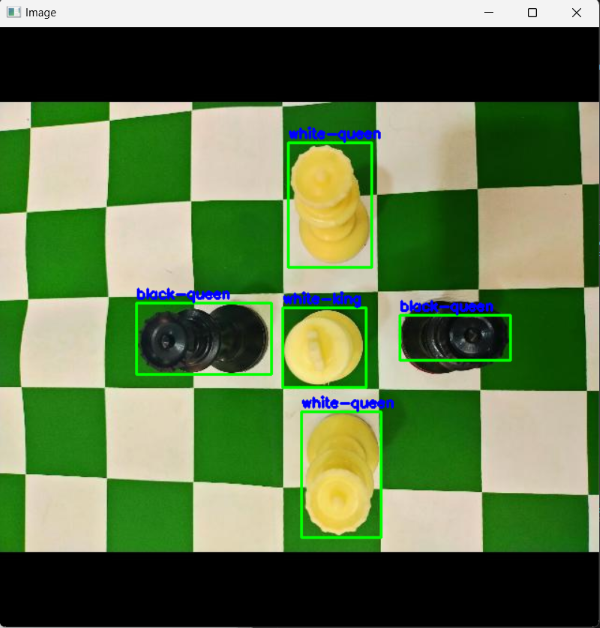
按下“q”后,GUI将关闭。然后用户可以在“saved-images”和“saved-labels”文件夹中找到保存的图像和标签。
· END ·
HAPPY LIFE

本文仅供学习交流使用,如有侵权请联系作者删除


 1208
1208


 被折叠的 条评论
为什么被折叠?
被折叠的 条评论
为什么被折叠?
 到【灌水乐园】发言


