


最近在寻找分割练手数据集的时候正好在阿里天池上看到了牙齿分割任务的数据集和代码。
于是当作练习mmsegmentation的练手项目,并且写下完整的文档来记录学习过程。
为什么要用框架
框架的作用相当于是别人写好了一堆的模型,你只需要用命令调用他们完成任务就行。当然你也可以直接去写自己的模型放到框架里跑,还可以使用框架中写好的一些图像处理算法。
其实是可以直接从python写分割任务的代码的,但是使用框架的好处是能够很方便的测试多个主流的分割模型在任务上的表现。
这里我使用的是mmsegmentation,官方github代码:https://github.com/SwanHubX/mmsegmentation
环境安装
参考我另一篇博客从CUDA开始的mmsegmentation安装教程(尽量不受版本影响)
当然更推荐大家直接跟着官方教程走mmsegmentation官方教程
准备天池数据
天池的官方提供了下载链接
一共四个压缩包,这里我们仅用初赛的压缩包train.zip作为案例教程。
下载完成后接下来就是解压,转换为mmsegmentation的格式,官方格式的样式可以参考官方文档。
这边提供了自动解压+转换为mmsegmentation通用格式的脚本:
# Copyright (c) OpenMMLab. All rights reserved.
import argparse
import os
import os.path as osp
import tempfile
import zipfile
import mmcv
from mmengine.utils import mkdir_or_exist
from tqdm import tqdm
def parse_args():
parser = argparse.ArgumentParser(
description="Convert MICCAI dataset to mmsegmentation format"
)
parser.add_argument("dataset_path", help="path of MICCAI train.zip)")
parser.add_argument("--tmp_dir", help="path of the temporary directory")
parser.add_argument("-o", "--out_dir", default=None, help="output path")
parser.add_argument(
"-s", "--split_rate", type=float, help="splite rate for train val"
)
args = parser.parse_args()
return args
def main():
args = parse_args()
dataset_path = args.dataset_path
if args.out_dir is None:
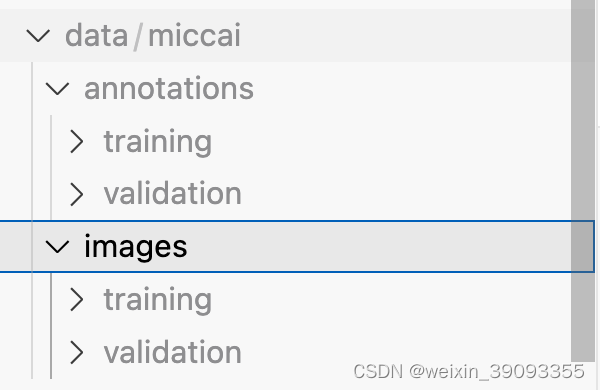
out_dir = osp.join("data", "miccai")
else:
out_dir = args.out_dir
print("Making directories...")
mkdir_or_exist(out_dir)
mkdir_or_exist(osp.join(out_dir, "images"))
mkdir_or_exist(osp.join(out_dir, "images", "training"))
mkdir_or_exist(osp.join(out_dir, "images", "validation"))
mkdir_or_exist(osp.join(out_dir, "annotations"))
mkdir_or_exist(osp.join(out_dir, "annotations", "training"))
mkdir_or_exist(osp.join(out_dir, "annotations", "validation"))
with tempfile.TemporaryDirectory(dir=args.tmp_dir) as tmp_dir:
print("Extracting train.zip...")
zip_file = zipfile.ZipFile(dataset_path)
zip_file.extractall(tmp_dir)
# split
train_img_path = osp.join(tmp_dir, "train/image")
train_anno_path = osp.join(tmp_dir, "train/mask")
image_num = len(os.listdir(train_img_path))
training_len = int(image_num * args.split_rate)
print("Processing train data...")
for img_name in tqdm(sorted(os.listdir(train_img_path))[:training_len]):
img = mmcv.imread(osp.join(train_img_path, img_name))
mmcv.imwrite(
img,
osp.join(
out_dir,
"images",
"training",
osp.splitext(img_name)[0] + ".png",
),
)
print("Processing train anno data...")
for img_name in tqdm(sorted(os.listdir(train_anno_path))[:training_len]):
# The annotation img should be divided by 128, because some of
# the annotation imgs are not standard. We should set a
# threshold to convert the nonstandard annotation imgs. The
# value divided by 128 is equivalent to '1 if value >= 128
# else 0'
img = mmcv.imread(osp.join(train_anno_path, img_name))
mmcv.imwrite(
img[:, :, 0] // 128,
osp.join(
out_dir,
"annotations",
"training",
osp.splitext(img_name)[0] + ".png",
),
)
print("Processing val data...")
for img_name in tqdm(sorted(os.listdir(train_img_path))[training_len:]):
img = mmcv.imread(osp.join(train_img_path, img_name))
mmcv.imwrite(
img,
osp.join(
out_dir,
"images",
"validation",
osp.splitext(img_name)[0] + ".png",
),
)
print("Processing val anno data...")
for img_name in tqdm(sorted(os.listdir(train_anno_path))[training_len:]):
img = mmcv.imread(osp.join(train_anno_path, img_name))
mmcv.imwrite(
img[:, :, 0] // 128,
osp.join(
out_dir,
"annotations",
"validation",
osp.splitext(img_name)[0] + ".png",
),
)
print("Removing the temporary files...")
print("Done!")
if __name__ == "__main__":
main()
按照mmsegmentation的官方建议,建议将上述代码命名并保存在<mmsegmentation root>/tools/dataset_converters/miccai.py
使用如下命令完成转换
python tools/dataset_converters/miccai.py <train.zip的路径> -s <训练集和测试集的切分比例,推荐为0.7>
完成后即可在<mmsegmentation root>/data/miccai/文件夹中看到转换的结果
实现mmsegmentation数据读取代码
这里可以安装mmsegmentation的官方教程实现,此处不多赘述,就把我实现的代码和路径粘贴出来,路径我统一使用相对于mmsegmentation项目的相对路径。
实现一个简单mmsegmentation数据读取类的代码,代码位置:./mmseg/datasets/miccai.py
from mmseg.registry import DATASETS
from .basesegdataset import BaseSegDataset


@DATASETS.register_module()
class MICCAIDataset(BaseSegDataset):

    METAINFO = dict(
        classes=("unlabelled", "tooth"), palette=[[120, 120, 120], [6, 230, 230]]
    )

    def __init__(
        self,
        img_suffix=".png",
        seg_map_suffix=".png",
        reduce_zero_label=False,
        **kwargs
    ) -> None:
        super().__init__(
            img_suffix=img_suffix,
            seg_map_suffix=seg_map_suffix,
            reduce_zero_label=reduce_zero_label,
            **kwargs
        )
注册该数据读取类,在./mmseg/datasets/__init__.py 最后一行添加代码
from .miccai import MICCAIDataset
__all__.append("MICCAIDataset")
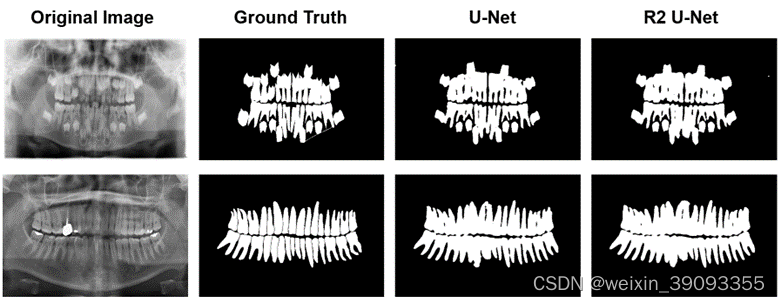
以UNet为例对牙齿数据进行分割
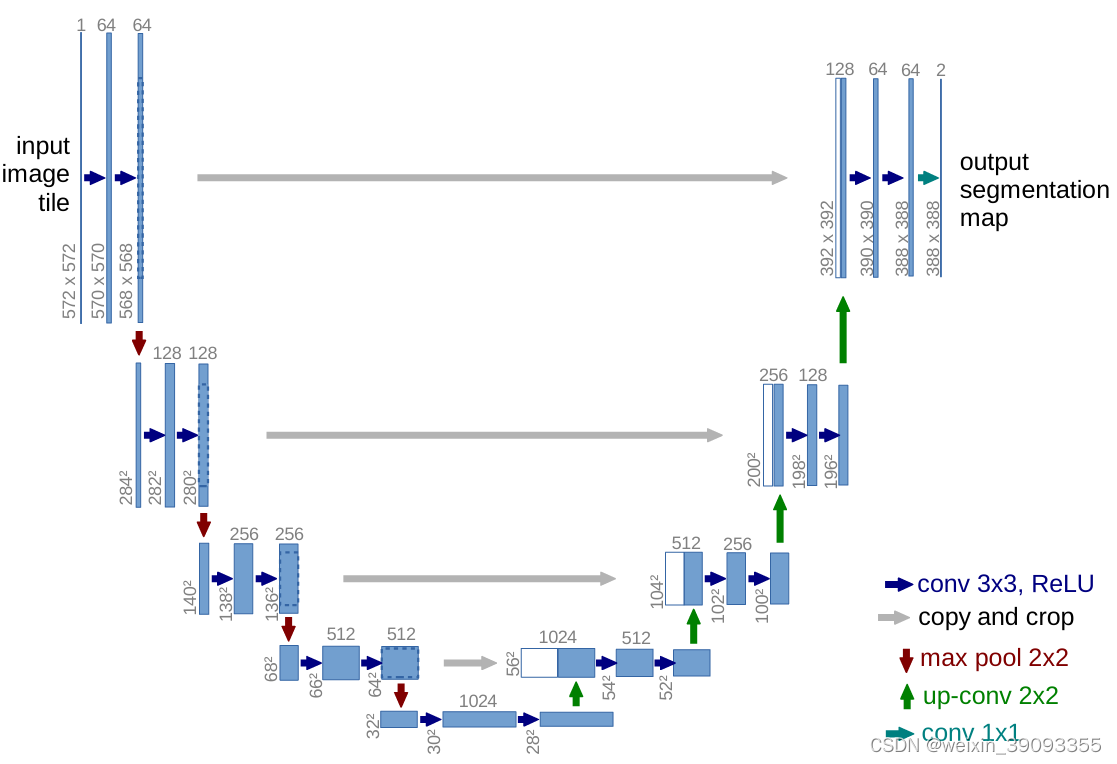
这里境以Unet为例,创建一个文件在configs/unet/unet-s5-d16_fcn_4xb4-20k_miccai-128x128.py
代码如下:
_base_ = [
    "../_base_/datasets/miccai_128x128.py",
    "../_base_/default_runtime.py",
    "../_base_/schedules/schedule_20k.py",
]
# 数据集配置
# dataset settings
dataset_type = "MICCAIDataset"
data_root = "data/miccai"
img_scale = (640, 320)
crop_size = (128, 128)
train_pipeline = [
    dict(type="LoadImageFromFile"),
    dict(type="LoadAnnotations"),
    dict(type="RandomResize", scale=img_scale, ratio_range=(0.5, 2.0), keep_ratio=True),
    dict(type="RandomCrop", crop_size=crop_size, cat_max_ratio=0.75),
    dict(type="RandomFlip", prob=0.5),
    dict(type="PhotoMetricDistortion"),
    dict(type="PackSegInputs"),
]
test_pipeline = [
    dict(type="LoadImageFromFile"),
    dict(type="Resize", scale=img_scale, keep_ratio=True),
    # add loading annotation after ``Resize`` because ground truth
    # does not need to do resize data transform
    dict(type="LoadAnnotations"),
    dict(type="PackSegInputs"),
]
img_ratios = [0.5, 0.75, 1.0, 1.25, 1.5, 1.75]
tta_pipeline = [
    dict(type="LoadImageFromFile", backend_args=None),
    dict(
        type="TestTimeAug",
        transforms=[
            [dict(type="Resize", scale_factor=r, keep_ratio=True) for r in img_ratios],
            [
                dict(type="RandomFlip", prob=0.0, direction="horizontal"),
                dict(type="RandomFlip", prob=1.0, direction="horizontal"),
            ],
            [dict(type="LoadAnnotations")],
            [dict(type="PackSegInputs")],
        ],
    ),
]

train_dataloader = dict(
    batch_size=4,
    num_workers=4,
    persistent_workers=True,
    sampler=dict(type="InfiniteSampler", shuffle=True),
    dataset=dict(
        type=dataset_type,
        data_root=data_root,
        data_prefix=dict(
            img_path="images/training", seg_map_path="annotations/training"
        ),
        pipeline=train_pipeline,
    ),
)
val_dataloader = dict(
    batch_size=1,
    num_workers=4,
    persistent_workers=True,
    sampler=dict(type="DefaultSampler", shuffle=False),
    dataset=dict(
        type=dataset_type,
        data_root=data_root,
        data_prefix=dict(
            img_path="images/validation", seg_map_path="annotations/validation"
        ),
        pipeline=test_pipeline,
    ),
)
test_dataloader = val_dataloader

val_evaluator = dict(type="IoUMetric", iou_metrics=["mIoU", "mDice"])
test_evaluator = val_evaluator

# 模型设置
crop_size = (128, 128)
data_preprocessor = dict(size=crop_size)
model = dict(
    data_preprocessor=data_preprocessor,
    test_cfg=dict(crop_size=(128, 128), stride=(85, 85)),
)

# SwanLab
custom_imports = dict(
    imports=["swanlab.integration.mmengine"], allow_failed_imports=False
)
import sys

vis_backends = [
    dict(
        type="SwanlabVisBackend",
        save_dir="runs/swanlab",
        init_kwargs={
            "project": "MICCAI",
            "experiment_name": "unet baseline",
            "description": "unet-s5-d16_fcn_4xb4-20k_miccai-128x128.py"
        },
    ),
]

visualizer = dict(
    type="Visualizer",
    vis_backends=vis_backends,
)
这里分享我实现的config文件,功能包括:
- 读取牙齿图片,随机crop成128x128分辨率,使用一些随机翻转,增强等。
- 使用U2Net网络进行训练,训练20k个epoch,batch数是4
- 计算测试指标:mIoU和Dice
- 配置文件使用了swanlab作为日志跟踪工具,一个开源的在线日志记录工具:https://github.com/SwanHubX/SwanLab
SwanLab安装+配置

SwanLab是一个开源的在线日志记录软件,可以参考SwanLab快速上手(Wandb国产平替)安装,这里附上安装命令,方便我们等等查看训练进度:
pip install -U swanlab
github地址:https://github.com/SwanHubX/SwanLab
官方网站:https://swanlab.cn/
训练以及结果
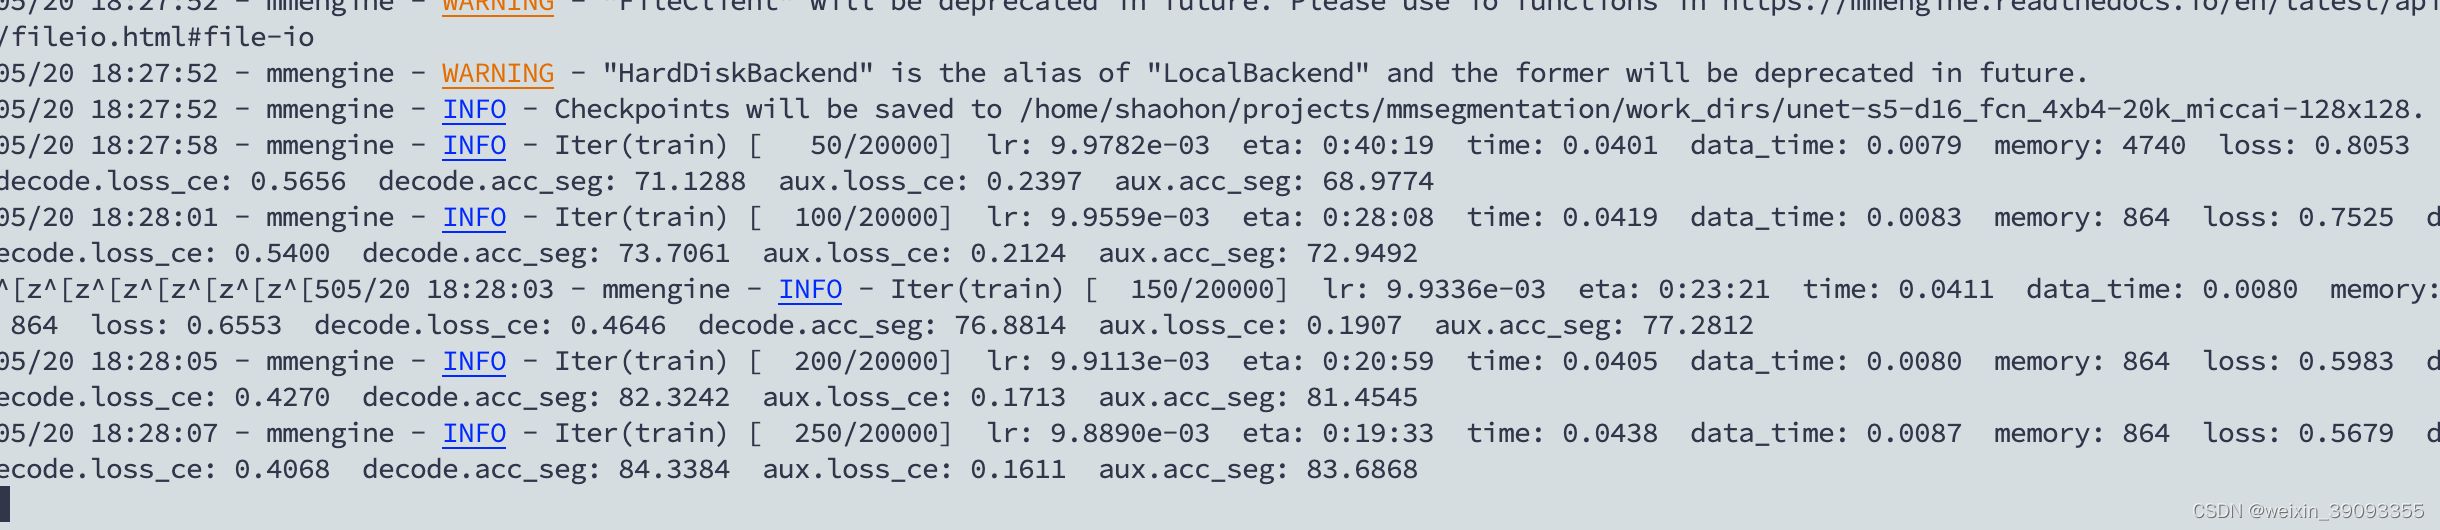
使用如下命令开启训练
单卡训练:
python tools/train.py configs/unet/unet-s5-d16_fcn_4xb4-20k_miccai-128x128.py
4卡训练:
CUDA_VISIBLE_DEVICES=0,1,2,3 bash tools/dist_train.sh configs/unet/unet-s5-d16_fcn_4xb4-20k_miccai-128x128.py 4
如果你选择了SwanLab作为可视化工具,会出现下面的提示你粘贴Key的情况
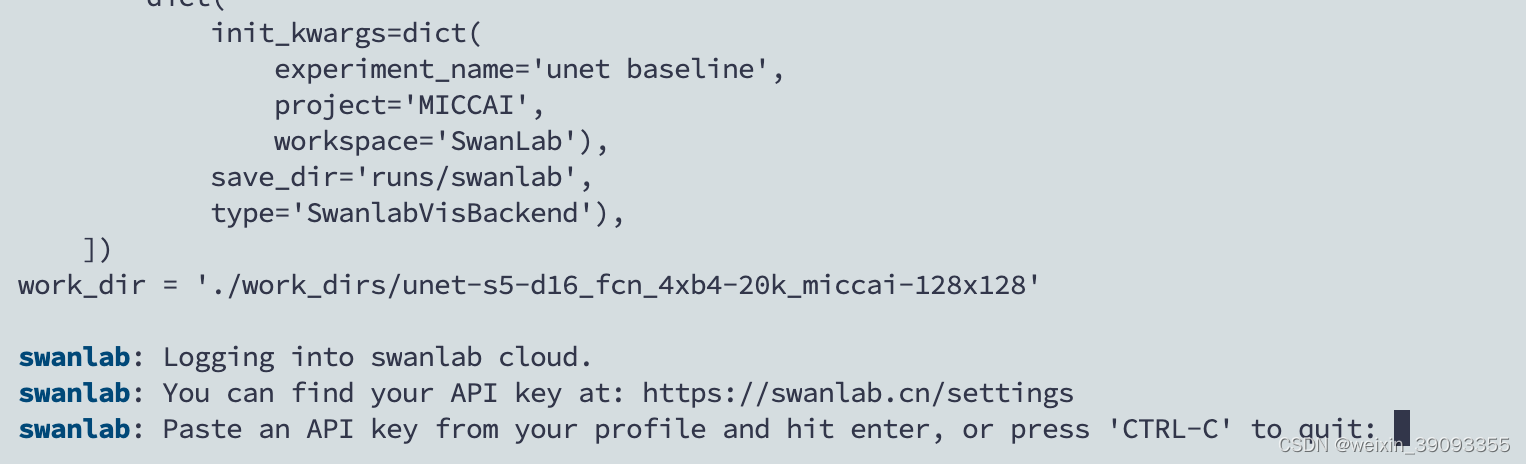
可以在这里获得Key来让训练日志可以在线观看:https://swanlab.cn/settings
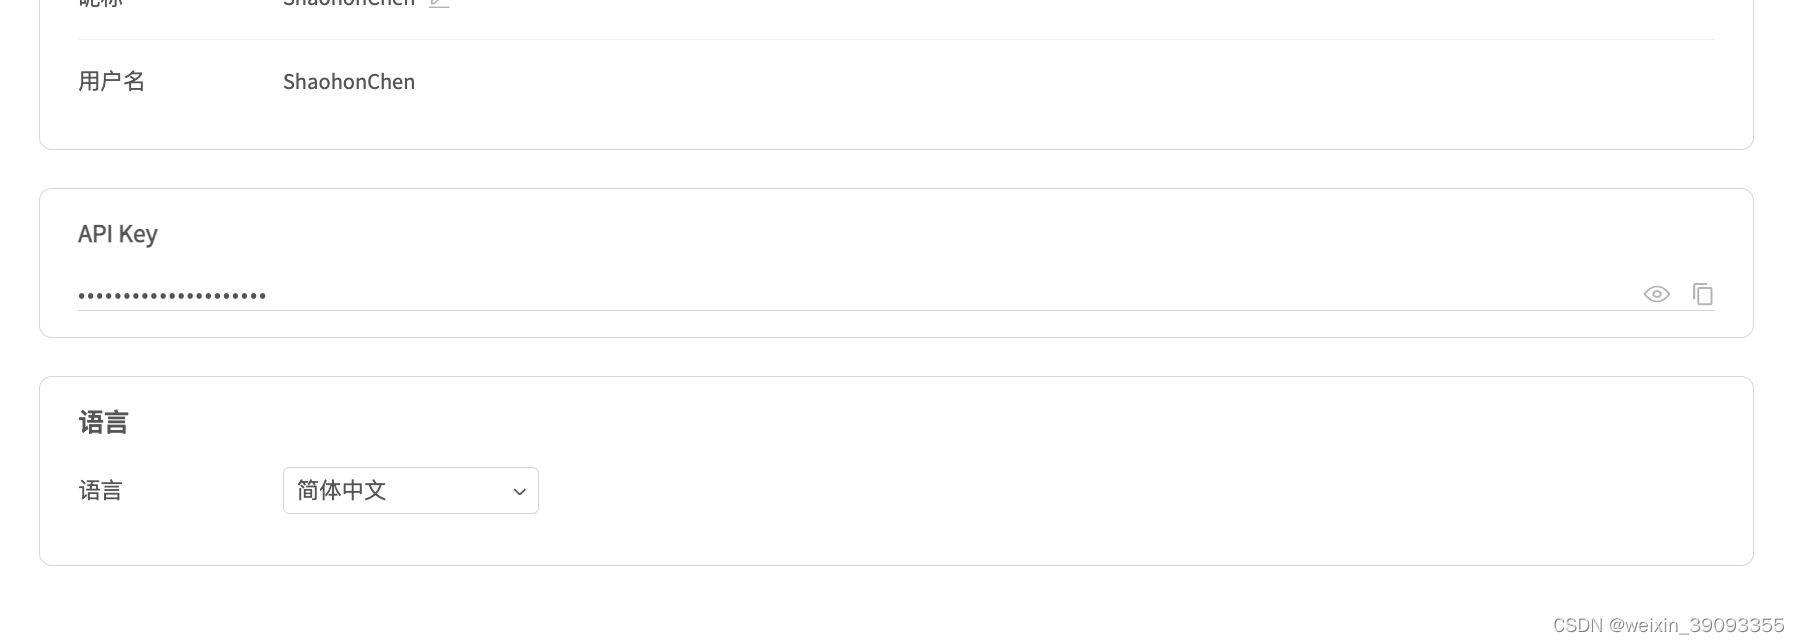
填写完成后便可以成功训练
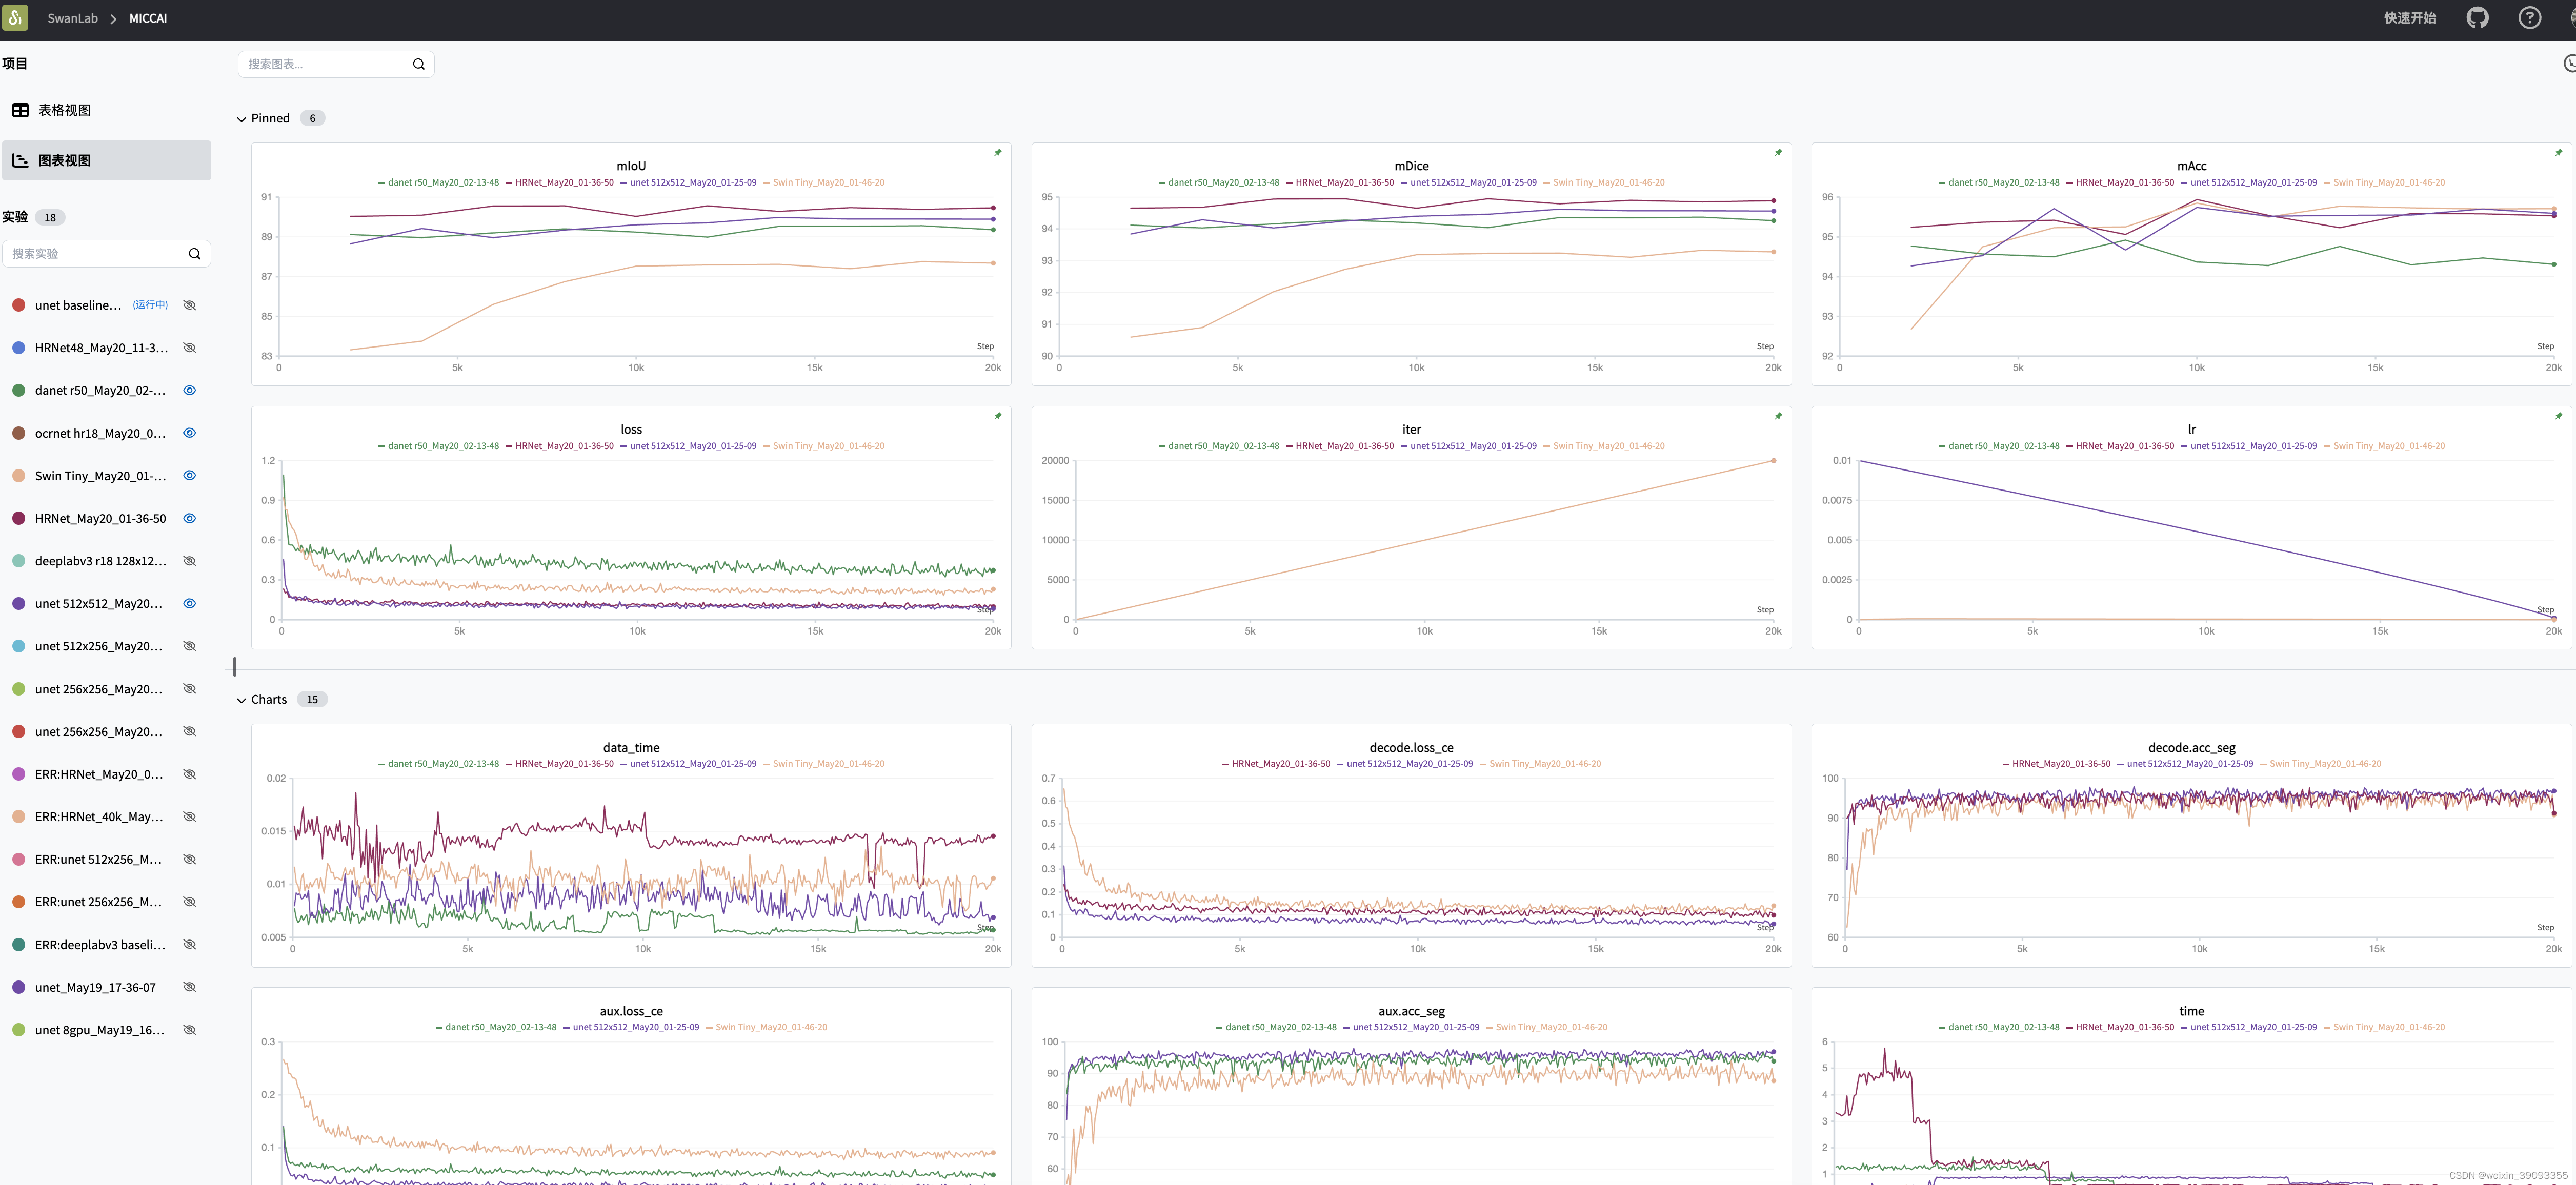
训练日志可以在swanlab.cn上看到:


 1279
1279

 被折叠的 条评论
为什么被折叠?
被折叠的 条评论
为什么被折叠?
 到【灌水乐园】发言


