


具体介绍参考 关于MLPerf的一些调查
MLPerf最初定位的时候并没有把自己限制在Training系统的评估上,而是希望MLPerf也能够覆盖Inference系统的评估。对于Training的评估,MLPerf已经提供了一个相对完备和公平的方法,软硬件厂商通过运行MLPerf的Training Benchmark测试集,比较将模型训练到特定精度时所花费的时间和成本。在MLPerf Training V0.5发布一年后,MLPerf发布了Inference V0.5版本,此版本增加了对ML Inference性能的评估。ML Inference目前还在不断迭代开发中。
在MLPerf Inference中,主要分为三个部分:
-
Load Generator:MLPerf使用负载生成器(LoadGen),生成不同的测试场景,对Inference进行测试。
-
Cloud:MLPerf专为Cloud场景设计的一系列Benchamrk,Cloud场景下的各种Inference Benchmark包括: 图像分类(resnet50-v1.5、mobilenet-v1)、物体检测(ssd-mobilenet 、ssd-resnet34)、Language Modeling(lstm)、翻译(gmnt)、语音识别(DeepSpeech2)、情感分析(Seq2CNN)等。
-
Edge:MLPerf专为Edge场景设计的一系列Benchamrk,包括:人脸识别(Sphereface20)、object classification(mobilenet、Shufflenet)、object detection(SSD-MobileNet)、object segmentation(MaskRCNN2GO)、语音识别(DeepSpeech2)、翻译(gmnt)等,Edge Benchmark侧重于小型model场景。
1开始实验
实验参考github资料
我们将所有推理模型封装到一个基准应用程序中。应用程序将使用后端接口对数据集进行预处理,并根据基准对其进行读取。流量由loadgen生成,loadgen根据所需模式将所需流量驱动到基准应用程序。
 cd github_file
 git clone https://github.com/mlperf/inference.git
想运行resnet50- v1.5的模型,这里用的是没有修改的imagennet2012验证集,故而首先下载数据集和模型,这里模型可以从如下链接下砸
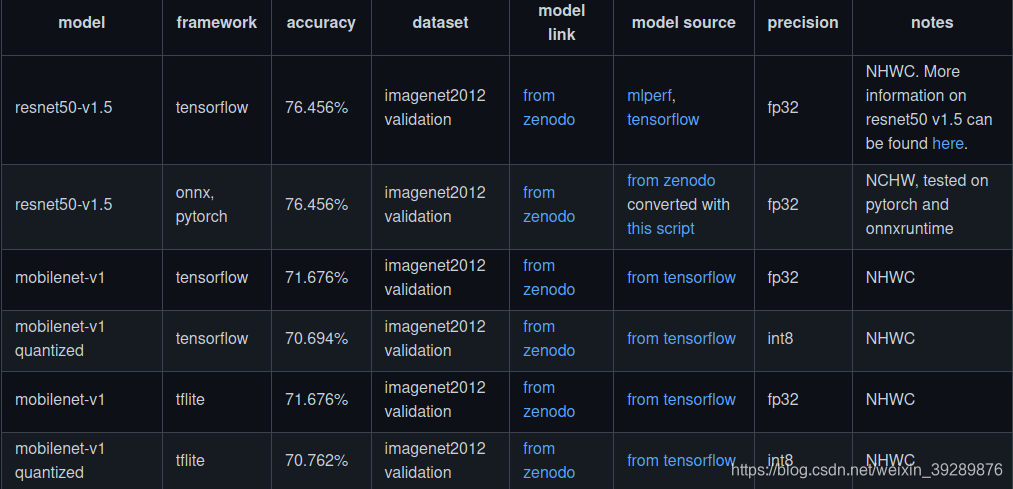
2教学
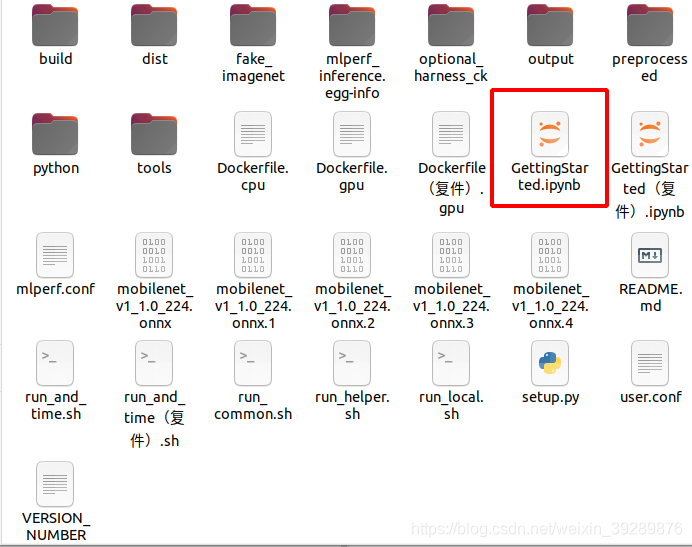
在/home/roy/github_file/inference/vision/classification_and_detection文件中有一个快速教学
 在这里要提交安装包
最好使用anaconda进行安装,具体说明在linux中安装anaconda
然后创建环境
conda create -n test_env python=3.6.6   # 创建新的虚拟环境
conda activate test_env     # 激活新建的虚拟环境
For tensorflow:
pip install tensorflow or pip install tensorflow-gpu
For onnxruntime:
pip install onnxruntime or pip install onnxruntime-gpu
然后使用jupyter打开文件
jupyter notebook GettingStarted.ipynb
进入脚本

这一步安装负载生成器,用到了c++与python联合使用,这里要安装pybind11,如果用conda和pip安装安装完会出现找不到pybind11/fuction.h类似错误,这里要如下安装pybind11
如何安装pybind11–在mlperf中应用成功
此时运行成功

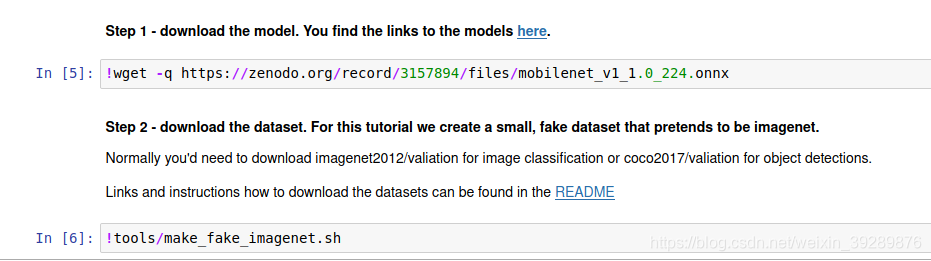
这部之前正常运行需要设置MODEL_DIR和DATA_DIR,这里是试验所以不需要设置后期会下载


下载模型和数据集,很小的一个假的imagenet
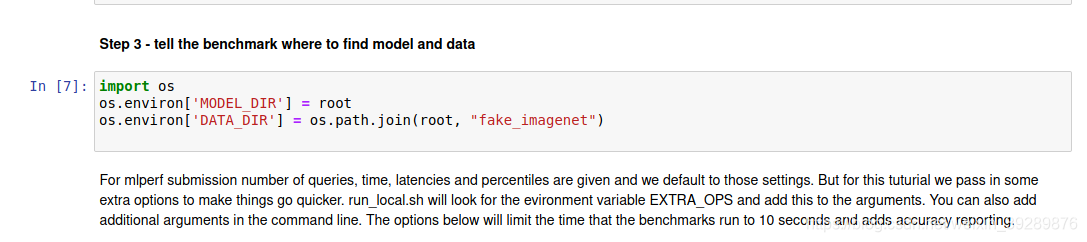
设置环境变量


运行benchmark


2下载数据集
| dataset | download link |
|---|---|
| imagenet2012 (validation) | http://image-net.org/challenges/LSVRC/2012/ |
| coco (validation) | http://images.cocodataset.org/zips/val2017.zip |
网上下载原版得到的文件,
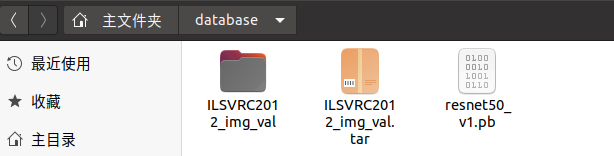
在这里通过脚本run_common.sh可知,model_dir要上一级故将模型放在database里

这里还差验证集的标签,使用caffe里的脚本进行下载,直接使用下面脚本也可以
DIR="$( cd "$(dirname "$0")" ; pwd -P )"
cd "$DIR"

echo "Downloading..."

wget -c http://dl.caffe.berkeleyvision.org/caffe_ilsvrc12.tar.gz

echo "Unzipping..."

tar -xf caffe_ilsvrc12.tar.gz && rm -f caffe_ilsvrc12.tar.gz

echo "Done."
这里下载完有val.txt文件,将其修改名字放入文件夹
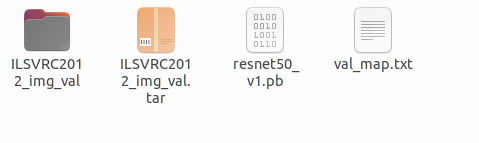
cp val_map.txt ILSVRC2012_img_val/
主要效果就是把文件放入LSVRC2012_img_val/中,效果如下

导出模型和文件位置
export MODEL_DIR=/home/roy/database
export DATA_DIR=/home/roy/database/ILSVRC2012_img_val
安装必要的包,这里已经安装过了
pip install tensorflow or pip install tensorflow-gpu
pip install onnxruntime or pip install onnxruntime-gpu
安装负载生成器,同样是pybind11的问题,具体参考如何安装pybind11–在mlperf中应用成功
在classification_and_detection文件价作为工作目录
cd ../../loadgen; CFLAGS="-std=c++14" python setup.py develop --user; cd ../vision/classification_and_detection

python setup.py develop
./run_local.sh backend model device

backend is one of [tf|onnxruntime|pytorch|tflite]
model is one of [resnet50|mobilenet|ssd-mobilenet|ssd-resnet34]
device is one of [cpu|gpu]

下图是2080ti运行resnet50的结果
For example:

./run_local.sh tf resnet50 gpu  --scenario  SingleStream
usage: main.py [-h]
    [--mlperf_conf ../../mlperf.conf]
    [--user_conf user.conf]
    [--dataset {imagenet,imagenet_mobilenet,coco,coco-300,coco-1200,coco-1200-onnx,coco-1200-pt,coco-1200-tf}]
    --dataset-path DATASET_PATH [--dataset-list DATASET_LIST]
    [--data-format {NCHW,NHWC}]
    [--profile {defaults,resnet50-tf,resnet50-onnxruntime,mobilenet-tf,mobilenet-onnxruntime,ssd-mobilenet-tf,ssd-mobilenet-onnxruntime,ssd-resnet34-tf,ssd-resnet34-pytorch,ssd-resnet34-onnxruntime}]
    [--scenario list of SingleStream,MultiStream,Server,Offline]
    [--max-batchsize MAX_BATCHSIZE]
    --model MODEL [--output OUTPUT] [--inputs INPUTS]
    [--outputs OUTPUTS] [--backend BACKEND] [--threads THREADS]
    [--time TIME] [--count COUNT] [--qps QPS]
    [--max-latency MAX_LATENCY] [--cache CACHE] [--accuracy]

./run_local.sh tf resnet50 gpu --scenario MultiStream

这个要看sample per query,这里没有显示,要看mlperf_log_summary.txt
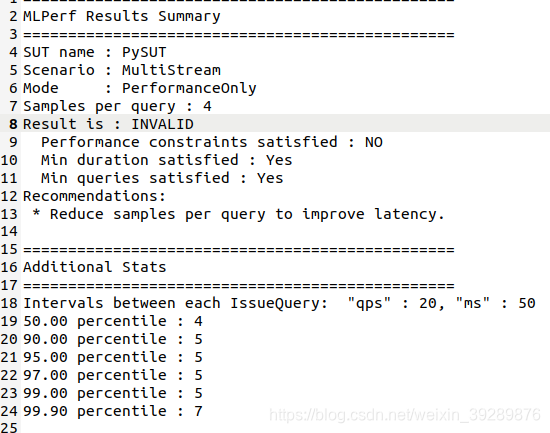
这里是4,相比之下一张A100有50
./run_local.sh tf resnet50 gpu --scenario Offline


 698
698

 被折叠的 条评论
为什么被折叠?
被折叠的 条评论
为什么被折叠?
 到【灌水乐园】发言


