


1: 完成课堂案例,掌握物理引擎的基本使用;
2: 了解Camera组件,完成Camera跟随玩家;

官方物理引擎案例
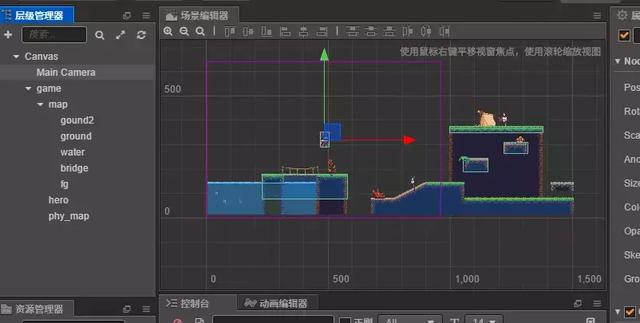
1: 准备好tiled地图;
2: 为tiled地图编辑好物理碰撞器;
3: 放出角色,为角色编辑好物理碰撞器;
4: 监听键盘消息:
cc.systemEvent.on(cc.SystemEvent.EventType.KEY_DOWN, this.on_key_down.bind(this), this);
cc.systemEvent.on(cc.SystemEvent.EventType.KEY_UP, this.on_key_up.bind(this), this);
5: 设置角色的水平和竖直速度; 竖直600,水平400
6: 设置cc.Camera组件,设置Camera跟谁玩家;
开启物理引擎和debug模式脚本enable_phy.js
cc.Class({
extends: cc.Component,
properties: {
// foo: {
// default: null, // The default value will be used only when the component attaching
// to a node for the first time
// url: cc.Texture2D, // optional, default is typeof default
// serializable: true, // optional, default is true
 最低0.47元/天 解锁文章


 8147
8147


 被折叠的 条评论
为什么被折叠?
被折叠的 条评论
为什么被折叠?
 到【灌水乐园】发言


