


文章目录
1. 正常官网下载vs code
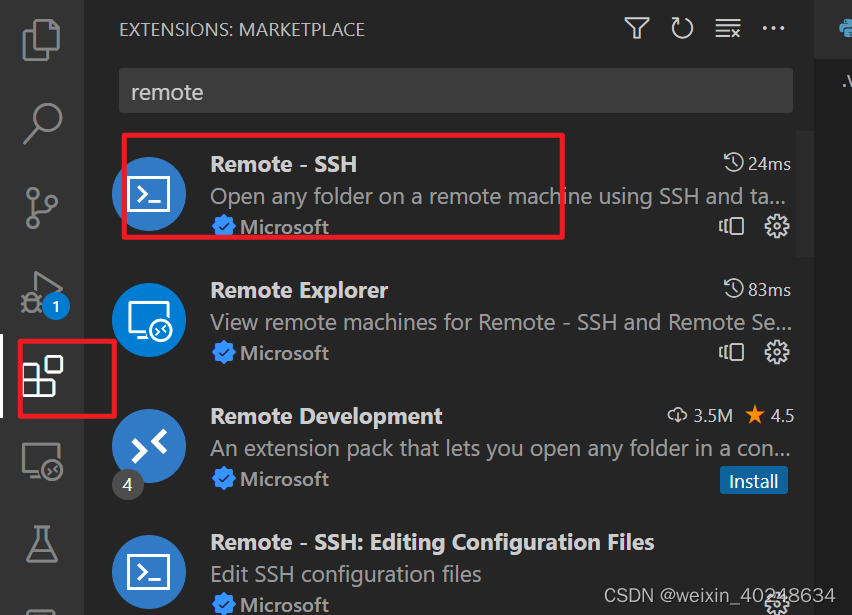
2. 使用remote SSH extension
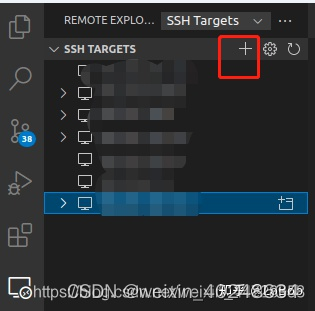
3. 连接远程服务器 (launch.json)
点击SSH 上面的加号,出现下面的图片,输入ssh username@IP地址,输入密码即可。
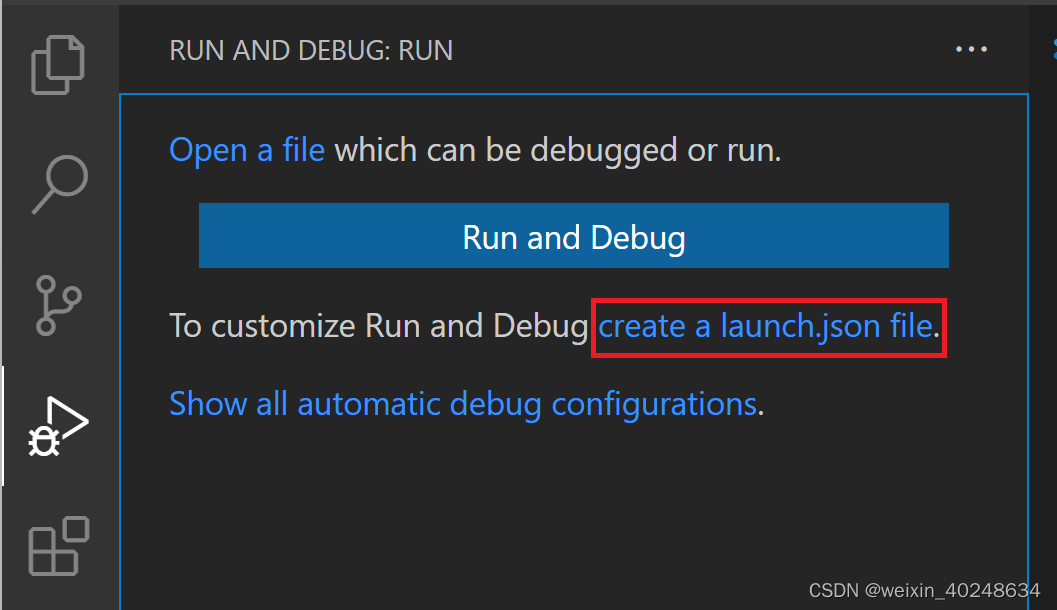
直接点击vscode的run进行调试:
重点来了,就是使用vscode进行调试,让我们在远程连接服务器的使用感与在本地上一样。没办法,pycharm据说连接远程服务器要收费啊,只能用vscode来做这个事情了。
首先在你项目的文件夹下,创建一个.vscode文件夹,其实也是也可以按按按键来生成的,在ubuntu下,mkdir不是更加便捷嘛hhhh~~。
launch.json、setting.json、task.json
然后,在.vscode文件夹下面创建3个json文件,launch.json、setting.json、task.json (这些文件通用的,一般直接用下面的就可以)
a).编写launch.json
{
    // Use IntelliSense to learn about possible attributes.
    // Hover to view descriptions of existing attributes.
    // For more information, visit: https://go.microsoft.com/fwlink/?linkid=830387
    "version": "0.2.0",
    "configurations": [

        {
            "name": "Python: Current File",
            "type": "python",
            "request": "launch",
            "program": "${file}",
            "python": "/home/ml/anaconda3/envs/py36/bin/python", #这个是虚拟环境 conda info --envs 可以看虚拟环境的地址
            "console": "integratedTerminal",
            "args": [
                "--lr",               "0.4",
                "--iter",             "4" ,
                "--epoch",            "30",
                "--model",            "CNN",
              ],
        }
    ]
}
加入python args的教程: https://blog.csdn.net/weixin_40248634/article/details/129138361
或者通过run and debug 部分 生成launch.json也可以
 b).编写setting.json
{
  "python.pythonPath": "/home/ml/anaconda3/envs/py36/bin/python" #这个是虚拟环境 conda info --envs 可以看虚拟环境的地址
}
c).编写task.json

{
    "version": "2.0.0",
    "tasks": [
        {
            "label": "python",
            "type": "shell",
            "command": "/home/ml/anaconda3/envs/py36/bin/python",  #这个是虚拟环境 conda info --envs 可以看虚拟环境的地址
            "args": [
                "${file}"
            ],
            "group": {
                "kind": "build",
                "isDefault": true
            },
            "problemMatcher": [
                "$eslint-compact"
            ]
        }
    ]
}
4、给调试传参数
加入python args的教程: https://blog.csdn.net/weixin_40248634/article/details/129138361
在args里面 传入你自己设定的参数。
5、 最后点击 Run and Debug
接下来就是选择python解释器,如果没有就直接点击install即可。
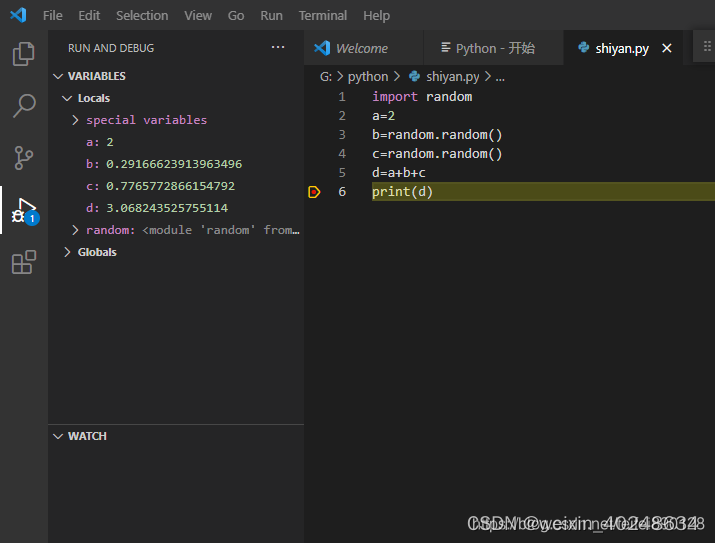
这样就完成了,可以跟pycharm 一样的debug了。
查看中间变量 VARIABLES
打了断点运行到断点后,可以在VARIABLES看到局部和全局的变量
官网文章: https://code.visualstudio.com/docs/python/debugging
参考:https://zhuanlan.zhihu.com/p/385073692
连接多个remote servers
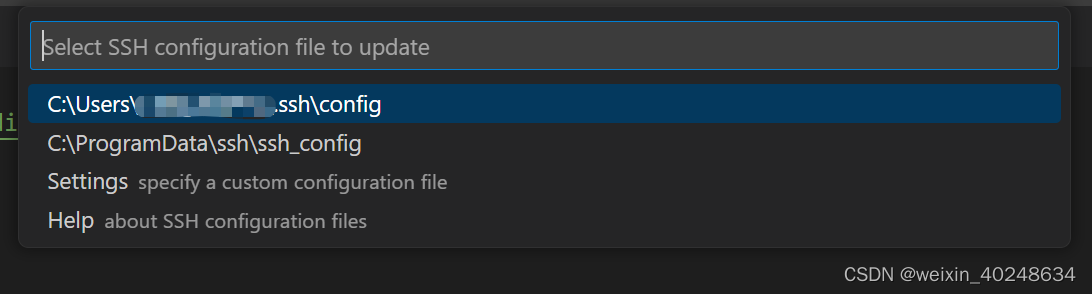
1. 打开设置,写入多个host config
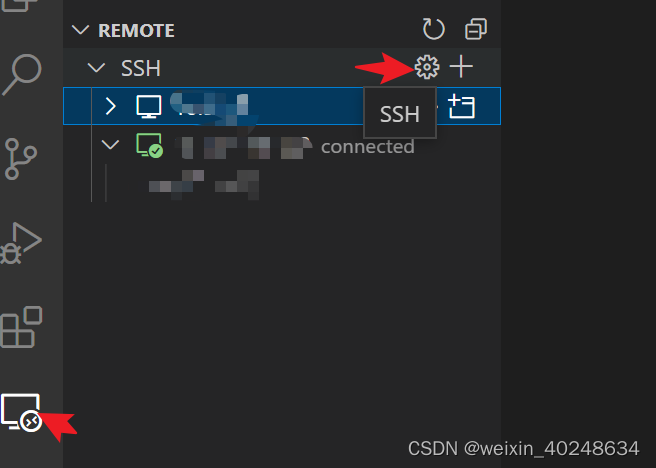
2 选第一个
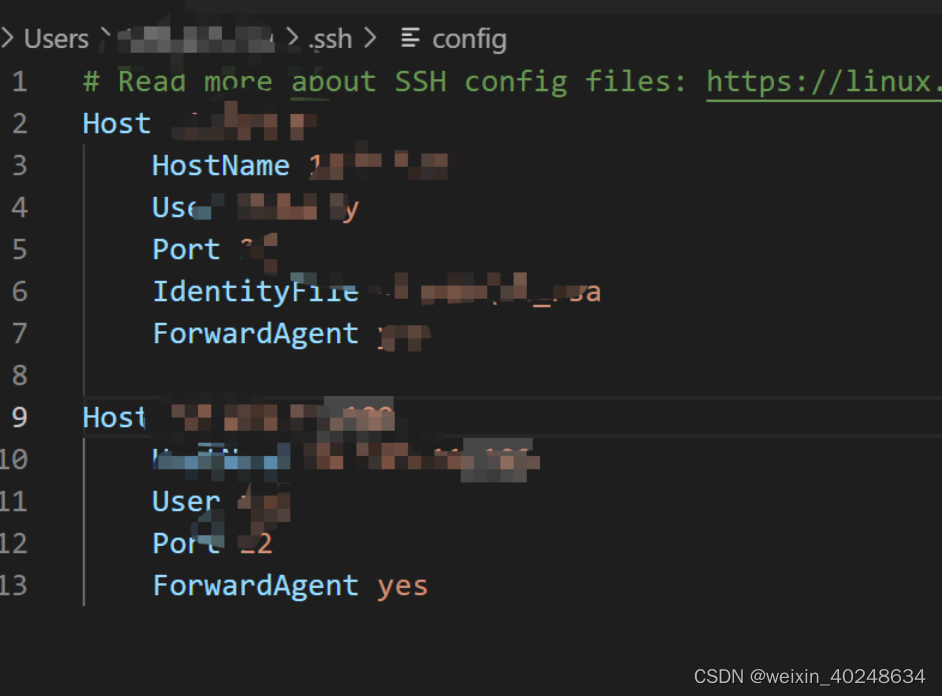
3 写入多个host config


 1562
1562

 被折叠的 条评论
为什么被折叠?
被折叠的 条评论
为什么被折叠?
 到【灌水乐园】发言


