


提示:文章写完后,目录可以自动生成,如何生成可参考右边的帮助文档
前言
CCTrans: Simplifying and Improving Crowd Counting with Transformer
论文地址:https://arxiv.org/pdf/2109.14483v1.pdf
代码:https://github.com/wfs123456/CCTrans
该论文使用的Twins-large模型权重链接已上传百度云:
链接:https://pan.baidu.com/s/1QSTA7P-81_uHD6wqzk93Og
提取码:8wd4
1. 论文
abstract:
最近用于人群计数的方法是基于卷积神经网络(CNN)的,它具有很强的提取局部特征的能力。但是,由于有限的接受域,CNN在建模全球背景方面天生就失败了。但是,transformer可以很容易地为全局上下文建模。在本文中,我们提出了一种称为CCTrans的简单方法来简化设计pipeline。具体来说,我们利用金字塔视觉transformer主干来捕获全局人群信息,即金字塔特征聚合(PFA)模型,以结合低级和高级特征,一个有效的回归头与多尺度扩张卷积(MDC)来预测密度图。此外,我们还为我们的管道定制了损失函数。在没有花哨功能的情况下,大量的实验表明,我们的方法在弱监督和完全监督的人群计数的几个基准上取得了新的最先进的结果。此外,我们目前在NWPU-Crowd的排行榜上排名为No. 1。
introduction:
从图像生成的人群计数中仍然存在两个挑战:
1)在相机附近的人群有更大的尺度和更低的密度;
2)在原理相机镜头附近人群有更小的尺度和更高的密度;
transformer的一大优点是能够捕获长上下文依赖关系并享受全局接受域。
本论文的贡献有4各方面:
1.To simplify the pipelines, we utilize the transformer to
construct a simple but high-performance crowd counting
model called CCTrans, which can extract semantic features with global context information.
构建了CCTrans,可以从全局上下文信息中提取语义特征。
2. We design an effective feature aggregation block and a simple regression head with multi-scale receptive fields. With two simple designed blocks, we can strengthen the captured features and get accurate regression results.
我们设计了一个有效的特征聚合块和一个简单的多尺度接受域回归头。通过两个简单的块设计,我们可以增强捕获的特征,得到准确的回归结果。
3. To further strengthen our method, we tailor the loss functions in both weakly and fully-supervised manners for our method. Specifically, we utilize a smooth weighted loss for the former and smooth L1 for the latter.
为了进一步加强我们的方法,我们以弱监督和全监督的方式为我们的方法定制损失函数。具体来说,我们对前者使用平滑加权损失,对后者使用平滑L1。
4. Extensive experiments across five popular benchmarks
including UCF CC 50, ShanghaiTech Part A and Part B,UCF QNRF, and NWPU-Crowd, show that our method
achieves new state-of-the-art results under both weakly and fully-supervised settings. Moreover, CCTrans ranks
No.1 on the leaderboard of NWPU-Crowd.
在很多数据集上表现的很好。
网络结构:

首先将输入图像变换成一维序列,然后将输出图像送入transformer-based骨干。我们采用了一个金字塔转换器(Chu et al. 2021a),通过各种方式捕捉全局上下文,将采样阶段。每个阶段的输出被重构成二维特征图,用于金字塔特征聚合。最后,使用一个简单的多尺度接受域回归头对最终结果进行回归。我们支持两种方式监督。1)对于完全监督的方式,CCTrans回归密度图。2)对于弱监管方式,CCTrans总结道将预测密度图的所有像素值作为计数回归的人群数。
Transformer Backbone:
a pyramid transformer backbone Twins 的特点:本地和全局交替的关注方案,拥有本地和全聚德感受野,捕获长短期关系。
2. 构建代码
----20230717----待续
代码:https://github.com/wfs123456/CCTrans
(py39_torch1.10.1) [jianming_ge@localhost CCTrans-CrownCount]$ python test_image_patch.py
Traceback (most recent call last):
  File "/home/jianming_ge/workplace/zhongwaiyun/CCTrans-CrownCount/test_image_patch.py", line 6, in <module>
    from Networks import ALTGVT
  File "/home/jianming_ge/workplace/zhongwaiyun/CCTrans-CrownCount/Networks/ALTGVT.py", line 11, in <module>
    from timm.models.layers import DropPath, to_2tuple, trunc_normal_
ModuleNotFoundError: No module named 'timm'
(py39_torch1.10.1) [jianming_ge@localhost CCTrans-CrownCount]$
(py39_torch1.10.1) [jianming_ge@localhost CCTrans-CrownCount]$
(py39_torch1.10.1) [jianming_ge@localhost CCTrans-CrownCount]$ pip install timm
Looking in indexes: https://pypi.tuna.tsinghua.edu.cn/simple/, https://pypi.ngc.nvidia.com
报错:No module named ‘timm’
安装:pip install timm
继续运行:
(py39_torch1.10.1) [jianming_ge@localhost CCTrans-CrownCount]$ python test_image_patch.py

usage: test_image_patch.py [-h] [--device DEVICE] [--batch-size BATCH_SIZE]
                           [--crop-size CROP_SIZE] --model-path MODEL_PATH
                           [--data-path DATA_PATH] [--dataset DATASET]
                           [--pred-density-map-path PRED_DENSITY_MAP_PATH]
test_image_patch.py: error: the following arguments are required: --model-path
要下载权重文件,哪索性就看看 test_image_patch.py 都需要前置哪些东西?
parser = argparse.ArgumentParser(description='Test ')
parser.add_argument('--device', default='0', help='assign device')
parser.add_argument('--batch-size', type=int, default=8,
                        help='train batch size')
parser.add_argument('--crop-size', type=int, default=256,
                    help='the crop size of the train image')
parser.add_argument('--model-path', type=str, required=True,
                    help='saved model path')
parser.add_argument('--data-path', type=str,
                    help='dataset path')
parser.add_argument('--dataset', type=str, default='sha',
                    help='dataset name: qnrf, nwpu, sha, shb, custom')
parser.add_argument('--pred-density-map-path', type=str, default='inference_results',
                    help='save predicted density maps when pred-density-map-path is not empty.')
所以命令应该是:
python test_image_patch.py --device 0 --batch-size 8 --model-path xxxx --data-path xxxx --pred-density-map-path xxxx
权重在git仓库的这个位置下载, 上载到项目目录的 weights/best_model_mae 54.36.pth
执行:
python test_image_patch.py --device 0 --batch-size 1 --model-path weights/best_model_mae\ 54.36.pth --data-path example_images
报错:
(py39_torch1.10.1) [jianming_ge@localhost CCTrans-CrownCount]$ python test_image_patch.py --device 0 --batch-size 1 --model-path weights/best_model_mae\ 54.36.pth  --data-path example_images
number of img [val]: 0
Traceback (most recent call last):
  File "/home/jianming_ge/workplace/zhongwaiyun/CCTrans-CrownCount/test_image_patch.py", line 127, in <module>
    test(args, isSave= True)
  File "/home/jianming_ge/workplace/zhongwaiyun/CCTrans-CrownCount/test_image_patch.py", line 60, in test
    model = ALTGVT.alt_gvt_large(pretrained=True)
  File "/home/jianming_ge/workplace/zhongwaiyun/CCTrans-CrownCount/Networks/ALTGVT.py", line 554, in alt_gvt_large
    model = ALTGVT(
  File "/home/jianming_ge/workplace/zhongwaiyun/CCTrans-CrownCount/Networks/ALTGVT.py", line 501, in __init__
    super(ALTGVT, self).__init__(img_size, patch_size, in_chans, num_classes, embed_dims, num_heads,
  File "/home/jianming_ge/workplace/zhongwaiyun/CCTrans-CrownCount/Networks/ALTGVT.py", line 488, in __init__
    super(PCPVT, self).__init__(img_size, patch_size, in_chans, num_classes, embed_dims, num_heads,
  File "/home/jianming_ge/workplace/zhongwaiyun/CCTrans-CrownCount/Networks/ALTGVT.py", line 422, in __init__
    super(CPVTV2, self).__init__(img_size, patch_size, in_chans, num_classes, embed_dims, num_heads, mlp_ratios,
  File "/home/jianming_ge/workplace/zhongwaiyun/CCTrans-CrownCount/Networks/ALTGVT.py", line 314, in __init__
    _block = nn.ModuleList([
  File "/home/jianming_ge/workplace/zhongwaiyun/CCTrans-CrownCount/Networks/ALTGVT.py", line 315, in <listcomp>
    block_cls(
  File "/home/jianming_ge/workplace/zhongwaiyun/CCTrans-CrownCount/Networks/ALTGVT.py", line 241, in __init__
    super(GroupBlock, self).__init__(dim, num_heads, mlp_ratio, qkv_bias, drop, attn_drop,
  File "/home/jianming_ge/miniconda3/envs/py39_torch1.10.1/lib/python3.9/site-packages/timm/models/vision_transformer.py", line 141, in __init__
    self.ls1 = LayerScale(dim, init_values=init_values) if init_values else nn.Identity()
  File "/home/jianming_ge/miniconda3/envs/py39_torch1.10.1/lib/python3.9/site-packages/timm/models/vision_transformer.py", line 107, in __init__
    self.gamma = nn.Parameter(init_values * torch.ones(dim))
TypeError: unsupported operand type(s) for *: 'type' and 'Tensor'
暂时搁置,这个代码的git仓库,是作者根据另外一个git仓库修改的,为的是复现论文。
3.另外一个git
git来源:https://github.com/cvlab-stonybrook/DM-Count
解压后运行,报错
(py39_torch1.10.1) [jianming_ge@localhost DM-Count]$ python demo.py
Traceback (most recent call last):
  File "/home/jianming_ge/workplace/zhongwaiyun/DM-Count/demo.py", line 3, in <module>
    import gdown
ModuleNotFoundError: No module named 'gdown'
(py39_torch1.10.1) [jianming_ge@localhost DM-Count]$ pip install gdown
pip install gdown
继续报错,需要安装gradio
pip install gradio
再运行还报错:
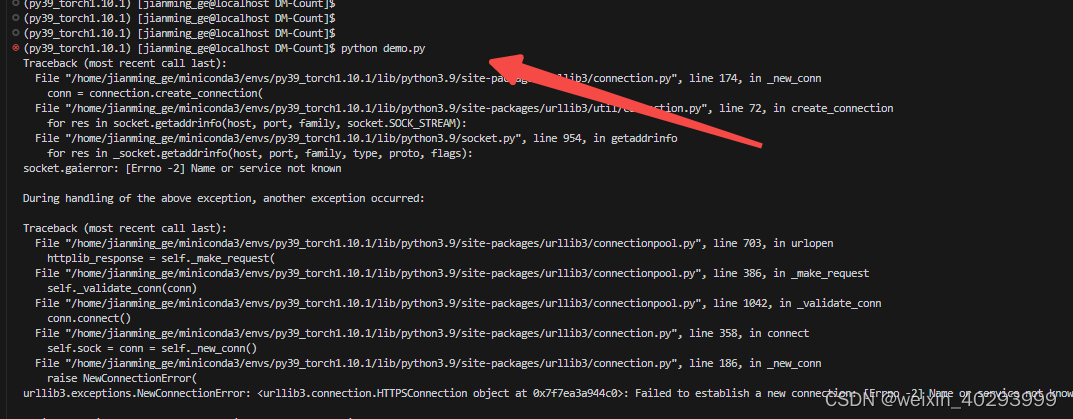
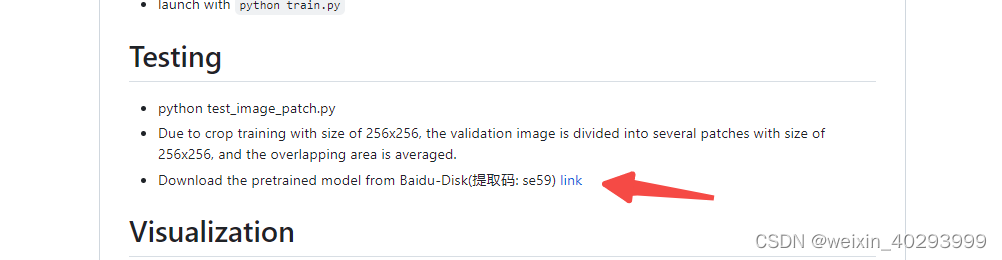
这应该是去下载权重文件了,没有权重文件。
手动下载下。
import torch
from models import vgg19
import gdown
from PIL import Image
from torchvision import transforms
import gradio as gr
import cv2
import numpy as np
import scipy
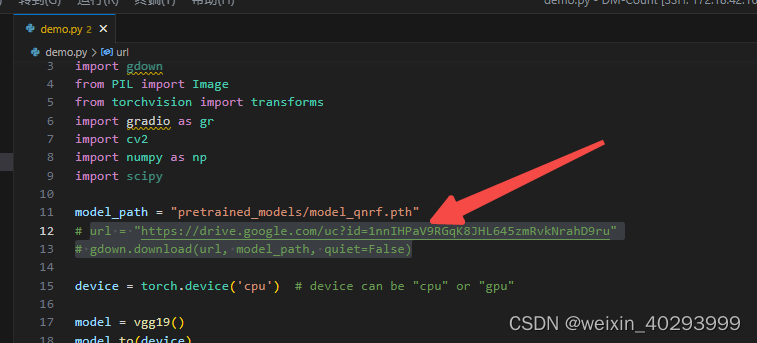
model_path = "pretrained_models/model_qnrf.pth"
url = "https://drive.google.com/uc?id=1nnIHPaV9RGqK8JHL645zmRvkNrahD9ru"
gdown.download(url, model_path, quiet=False)
device = torch.device('cpu') # device can be "cpu" or "gpu"
model = vgg19()
model.to(device)
model.load_state_dict(torch.load(model_path, device))
model.eval()
def predict(inp):
inp = Image.fromarray(inp.astype('uint8'), 'RGB')
inp = transforms.ToTensor()(inp).unsqueeze(0)
inp = inp.to(device)
with torch.set_grad_enabled(False):
outputs, _ = model(inp)
count = torch.sum(outputs).item()
vis_img = outputs[0, 0].cpu().numpy()
# normalize density map values from 0 to 1, then map it to 0-255.
vis_img = (vis_img - vis_img.min()) / (vis_img.max() - vis_img.min() + 1e-5)
vis_img = (vis_img * 255).astype(np.uint8)
vis_img = cv2.applyColorMap(vis_img, cv2.COLORMAP_JET)
vis_img = cv2.cvtColor(vis_img, cv2.COLOR_BGR2RGB)
return vis_img, int(count)
title = "Distribution Matching for Crowd Counting"
desc = "A demo of DM-Count, a NeurIPS 2020 paper by Wang et al. Outperforms the state-of-the-art methods by a " \
"large margin on four challenging crowd counting datasets: UCF-QNRF, NWPU, ShanghaiTech, and UCF-CC50. " \
"This demo uses the QNRF trained model. Try it by uploading an image or clicking on an example " \
"(could take up to 20s if running on CPU)."
examples = [
["example_images/3.png"],
["example_images/2.png"],
["example_images/1.png"],
]
inputs = gr.inputs.Image(label="Image of Crowd")
outputs = [gr.outputs.Image(label="Predicted Density Map"), gr.outputs.Label(label="Predicted Count")]
gr.Interface(fn=predict, inputs=inputs, outputs=outputs, title=title, description=desc, examples=examples,
allow_flagging=False).launch()
demo.py 已经给地址了。
model_path = “pretrained_models/model_qnrf.pth”
url = “https://drive.google.com/uc?id=1nnIHPaV9RGqK8JHL645zmRvkNrahD9ru”
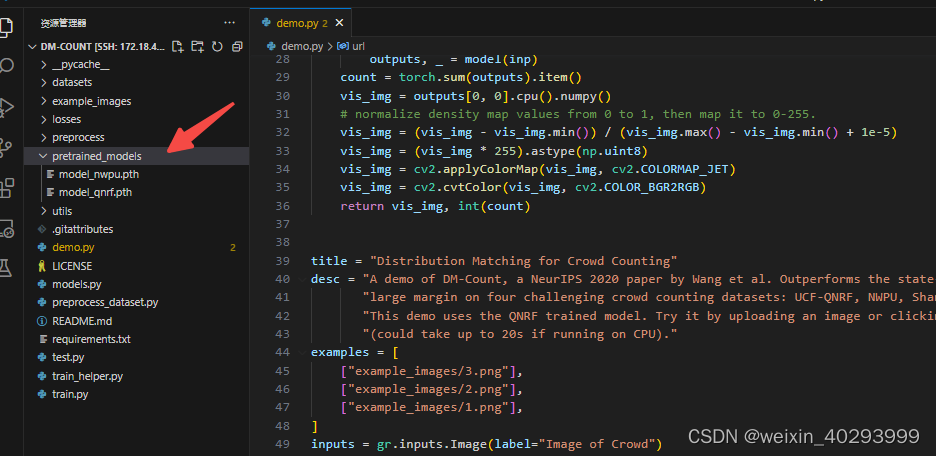
而且已经存在了,所以屏蔽这两行。
再次运行。
可以看到它去下载vgg的权重了。
cp pretrained_models/vgg19-dcbb9e9d.pth /home/jianming_ge/.cache/torch/hub/checkpoints/
修改一下demo.py,
import torch
from models import vgg19
from PIL import Image
from torchvision import transforms
import cv2
import numpy as np
import scipy
import os
import time
model_path = "pretrained_models/model_nwpu.pth"
# url = "https://drive.google.com/uc?id=1nnIHPaV9RGqK8JHL645zmRvkNrahD9ru"
# gdown.download(url, model_path, quiet=False)

device = torch.device('cuda')  # device can be "cpu" or "gpu"

model = vgg19()
model.to(device)
model.load_state_dict(torch.load(model_path, device))
model.eval()


def predict(inp):
    inp = Image.fromarray(inp.astype('uint8'), 'RGB')
    inp = transforms.ToTensor()(inp).unsqueeze(0)
    inp = inp.to(device)
    with torch.set_grad_enabled(False):
        outputs, _ = model(inp)
    count = torch.sum(outputs).item()
    vis_img = outputs[0, 0].cpu().numpy()
    # normalize density map values from 0 to 1, then map it to 0-255.
    vis_img = (vis_img - vis_img.min()) / (vis_img.max() - vis_img.min() + 1e-5)
    vis_img = (vis_img * 255).astype(np.uint8)
    vis_img = cv2.applyColorMap(vis_img, cv2.COLORMAP_JET)
    vis_img = cv2.cvtColor(vis_img, cv2.COLOR_BGR2RGB)
    return vis_img, int(count)


root = "./example_images/"
examples = os.listdir(root)


for k, i in enumerate(examples):
    t0 = time.time()
    img = cv2.imread(root + i)
    img = cv2.cvtColor(img, cv2.COLOR_BGR2RGB)
    vis_img, count = predict(img)
    cv2.imwrite("ni" + i, vis_img)
    print(i,"       ", count, time.time()-t0)
问题处理完成,
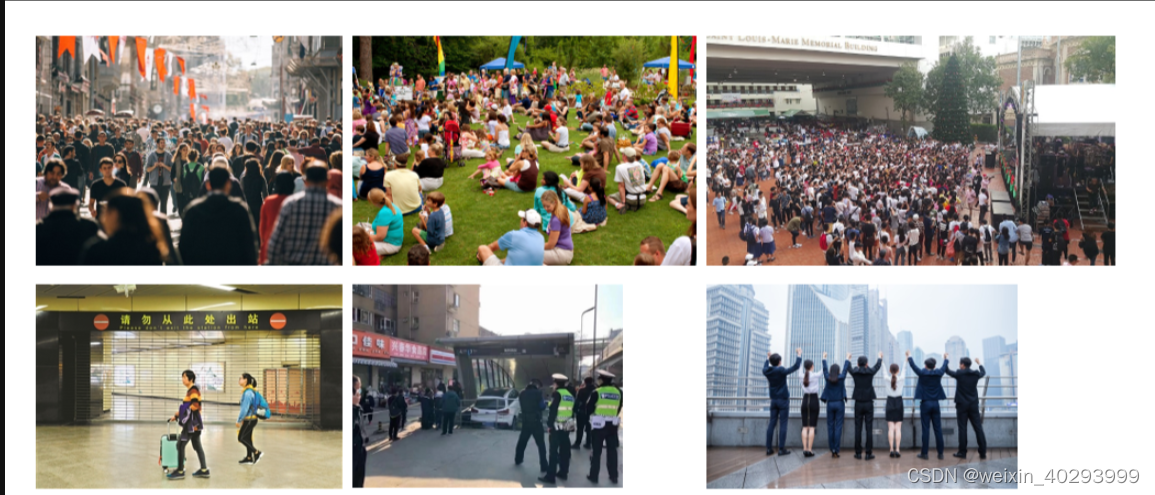
使用的样本数据
model:
model_sh_A.pth
1.png 167 0.20009064674377441
2.png 108 0.07396221160888672
3.png 973 0.06588959693908691
4.png 1 0.01804351806640625
5.png 5 0.036794185638427734
6.png 5 0.03268027305603027
model_sh_B.pth
1.png 28 0.20793676376342773
2.png 11 0.08083581924438477
3.png 59 0.06795501708984375
4.png 1 0.029388427734375
5.png 0 0.03298187255859375
6.png 4 0.03132462501525879
model_qnrf.pth
1.png 181 0.20715713500976562
2.png 451 0.08031249046325684
3.png 789 0.05513763427734375
4.png 2 0.031174182891845703
5.png 26 0.03781270980834961
6.png 7 0.0357813835144043
model_nwpu.pth
1.png 199 0.2031877040863037
2.png 314 0.06879138946533203
3.png 1321 0.054349422454833984
4.png 2 0.013224124908447266
5.png 36 0.025160789489746094
6.png 7 0.0295562744140625


model_nwpu.pth 和 model_qnrf.pth 的效果是不错的。
ref:https://zhuanlan.zhihu.com/p/417535737


 910
910


 被折叠的 条评论
为什么被折叠?
被折叠的 条评论
为什么被折叠?
 到【灌水乐园】发言


