


1.推理工具推理
hrt_model_exec 是一个模型执行工具,可直接在开发板上评测模型的推理性能、获取模型信息。具体信息可参考hrt_model_exec工具介绍。
安装
把该工具安装到板端,安装脚本在/open_explorer/ddk/package/board路径下
cd /open_explorer/ddk/package/board
sh install.sh 192.168.1.10 #脚本后加上板子的IP地址
查看
用Xshell或者Winscp等工具登录到板子进行查看有没有安装好(需要开发板的网络IP和电脑IP在同一网段内) 。
修改板子网络固定IP有两种方法,一种方法就是使用指令修改,指令如下:
hrut_ipfull s eth0 192.168.1.10 255.255.255.0 192.168.1.1
#eth0后面跟着需要修改的*IP+子网掩码+网关地址*
另一种方法是进入到开发板的userdata/app目录下,里面有一个init.sh脚本,在这个脚本中添加如下内容(放在第几行随意):
ifconfig eth0 192.168.1.10
该脚本也是作为自启服务的脚本,用户把自己需要开机自启动的脚本程序等加到init.sh中即可实现开机自启服务。
/*************************************************************************************************************************/
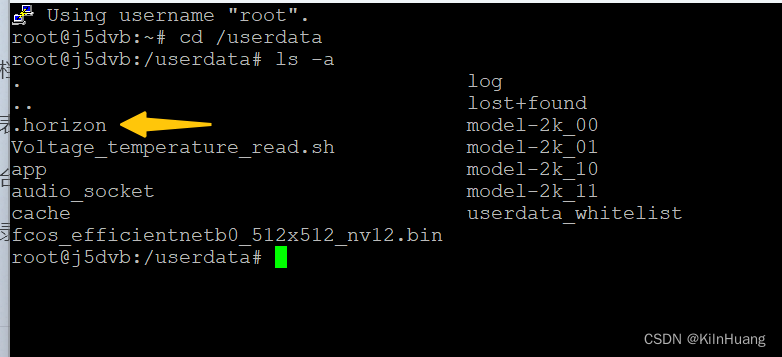
登录板子以后我们cd /userdata下,然后使用ls -a查看,可以看到推理工具已经被安装到userdata下(userdata这个文件夹也是用户工作空间,可读可写,掉电也不会丢失),可以看到一个.horizon的文件,如下:
可以使用下面命令查看版本和帮助信息:
cd /userdata
./.horizon/hrt_model_exec -v
./.horizon/hrt_model_exec --version
./.horizon/hrt_model_exec -h
./.horizon/hrt_model_exec --help
我这里的是1.22.6版本的,如下,工具就安装成功了

推理
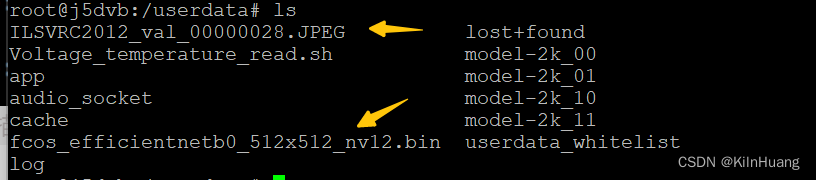
我这里以fcos_efficientnetb0_512x512_nv12.bin这个模型为例进行推理测试,这个模型在工具链的model_zoo仓库中,把该模型copy到userdata下,同时准备一张图片也copy到userdata下,准备好后如下所示:
这个时候我们进行推理测试,输入下面命令:
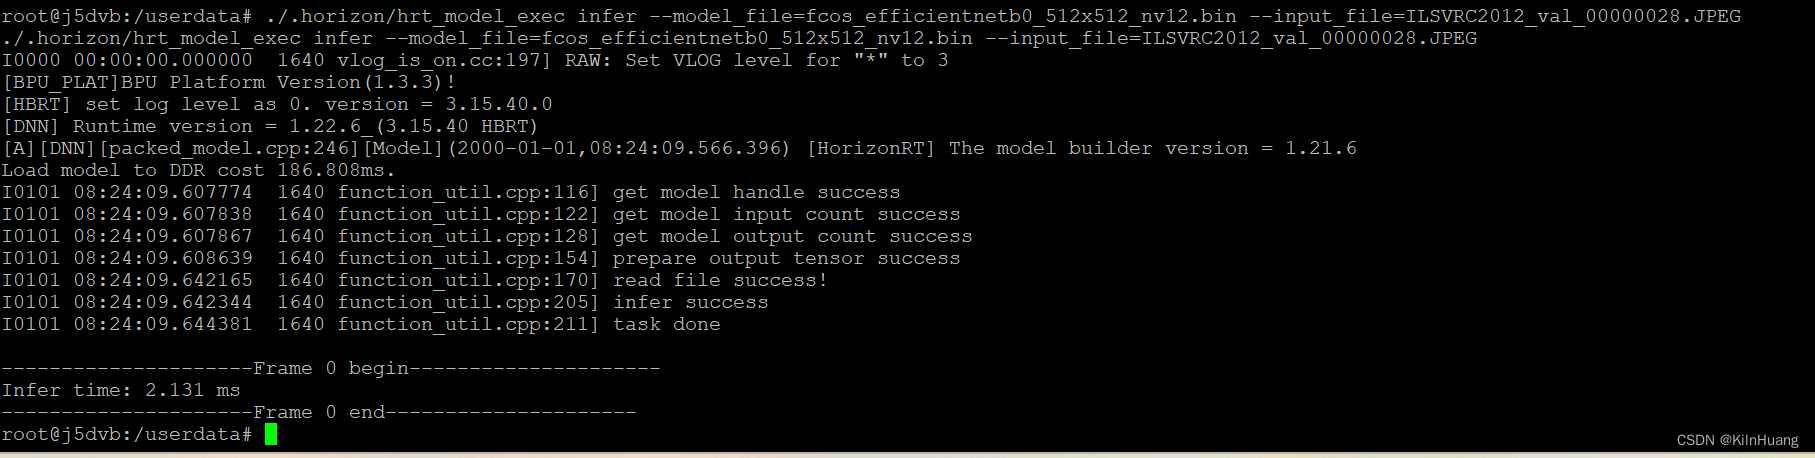
./.horizon/hrt_model_exec infer --model_file=fcos_efficientnetb0_512x512_nv12.bin --input_file=ILSVRC2012_val_00000028.JPEG
可以看到推理这张图片的时间为2.131ms,通常单张图片推理性能不如多张图片推理性能好。
使用小工具进行模型推理就不再叨叨了,可以查看关于该工具的介绍,以及其他的应用,在模型部署的过程中这个工具会经常用到的,用来验证或者查看模型信息。
2.C++推理
在J5上用C++进行单张图片推理工具链中有一个历程,在如下路径 /open_explorer/ddk/samples/ai_toolchain/horizon_runtime_sample/code/00_quick_start
学习这个历程主要是了解推理函数的使用,代码和我写的中文注释贴出来,就不用分段介绍了,分段看着繁琐(我也和大多数人一样自己学会了就会了,不爱详细的写文档,这个毛病得改,哈哈哈哈)
// Copyright (c) 2020 Horizon Robotics.All Rights Reserved.
//
// The material in this file is confidential and contains trade secrets
// of Horizon Robotics Inc. This is proprietary information owned by
// Horizon Robotics Inc. No part of this work may be disclosed,
// reproduced, copied, transmitted, or used in any way for any purpose,
// without the express written permission of Horizon Robotics Inc.

// This is a simple program that describes how to run MobileNetV1 classification
// on an image and get its top k results by predict score.
// Should be noted: Only mobileNetV1-nv12 is supported here.

#include <algorithm>
#include <iomanip>
#include <iostream>
#include <iterator>
#include <map>
#include <queue>
#include <utility>

#include "dnn/hb_dnn.h"
#include "gflags/gflags.h"
#include "glog/logging.h"
#include "opencv2/core/mat.hpp"
#include "opencv2/imgcodecs.hpp"
#include "opencv2/imgproc.hpp"
#define EMPTY ""

//定义接收从命令行输入的参数
DEFINE_string(model_file, EMPTY, "model file path");
DEFINE_string(image_file, EMPTY, "Test image path");
DEFINE_int32(top_k, 5, "Top k classes, 5 by default");

enum VLOG_LEVEL {
  EXAMPLE_SYSTEM = 0,
  EXAMPLE_REPORT = 1,
  EXAMPLE_DETAIL = 2,
  EXAMPLE_DEBUG = 3
};

#define HB_CHECK_SUCCESS(value, errmsg)                              \
  do {                                                               \
    /*value can be call of function*/                                \
    auto ret_code = value;                                           \
    if (ret_code != 0) {                                             \
      VLOG(EXAMPLE_SYSTEM) << errmsg << ", error code:" << ret_code; \
      return ret_code;                                               \
    }                                                                \
  } while (0);

typedef struct Classification {
  int id;
  float score;
  const char *class_name;

  Classification() : class_name(0), id(0), score(0.0) {}
  /**
   * @brief 分类对象构造函数
   *
   * 用于创建分类对象的构造函数。
   *
   * @param id 分类ID
   * @param score 分类分数
   * @param class_name 分类名称
   */
  Classification(int id, float score, const char *class_name)
      : id(id), score(score), class_name(class_name) {}

  /**
   * @brief 判断两个 Classification 对象的大小关系
   *
   * 判断两个 Classification 对象的大小关系,返回一个布尔值。
   *
   * @param lhs 左侧 Classification 对象
   * @param rhs 右侧 Classification 对象
   *
   * @return 如果左侧对象大于右侧对象,则返回 true;否则返回 false。
   */
  friend bool operator>(const Classification &lhs, const Classification &rhs) {
    return (lhs.score > rhs.score);
  }

  ~Classification() {}
} Classification;

std::map<int32_t, int32_t> element_size{{HB_DNN_IMG_TYPE_Y, 1},
                                        {HB_DNN_IMG_TYPE_NV12, 1},
                                        {HB_DNN_IMG_TYPE_NV12_SEPARATE, 1},
                                        {HB_DNN_IMG_TYPE_YUV444, 1},
                                        {HB_DNN_IMG_TYPE_RGB, 1},
                                        {HB_DNN_IMG_TYPE_BGR, 1},
                                        {HB_DNN_TENSOR_TYPE_S8, 1},
                                        {HB_DNN_TENSOR_TYPE_U8, 1},
                                        {HB_DNN_TENSOR_TYPE_F16, 2},
                                        {HB_DNN_TENSOR_TYPE_S16, 2},
                                        {HB_DNN_TENSOR_TYPE_U16, 2},
                                        {HB_DNN_TENSOR_TYPE_F32, 4},
                                        {HB_DNN_TENSOR_TYPE_S32, 4},
                                        {HB_DNN_TENSOR_TYPE_U32, 4},
                                        {HB_DNN_TENSOR_TYPE_F64, 8},
                                        {HB_DNN_TENSOR_TYPE_S64, 8},
                                        {HB_DNN_TENSOR_TYPE_U64, 8}};

int prepare_tensor(hbDNNTensor *input_tensor,
                   hbDNNTensor *output_tensor,
                   hbDNNHandle_t dnn_handle);

int32_t read_image_2_tensor_as_nv12(std::string &image_file,
                                    hbDNNTensor *input_tensor);

void get_topk_result(hbDNNTensor *tensor,
                     std::vector<Classification> &top_k_cls,
                     int top_k);

/**
 * Step1: get model handle
 * Step2: prepare input and output tensor
 * Step3: set input data to input tensor
 * Step4: run inference
 * Step5: do postprocess with output data
 * Step6: release resources
 */
/**
 * @brief 主函数,执行整个流程
 *
 * @param argc 命令行参数数量
 * @param argv 命令行参数数组
 * @return 返回执行结果
 */
int main(int argc, char **argv) {
  // Parsing command line arguments
  gflags::SetUsageMessage(argv[0]);
  gflags::ParseCommandLineFlags(&argc, &argv, true);
  std::cout << gflags::GetArgv() << std::endl;

  // Init logging
  google::InitGoogleLogging("");
  google::SetStderrLogging(0);
  google::SetVLOGLevel("*", 3);
  FLAGS_colorlogtostderr = true;
  FLAGS_minloglevel = google::INFO;
  FLAGS_logtostderr = true;

  hbPackedDNNHandle_t packed_dnn_handle;
  hbDNNHandle_t dnn_handle;
  const char **model_name_list;
  auto modelFileName = FLAGS_model_file.c_str();
  int model_count = 0;
  // Step1: get model handle
  {
    HB_CHECK_SUCCESS(
        hbDNNInitializeFromFiles(&packed_dnn_handle, &modelFileName, 1),
        "hbDNNInitializeFromFiles failed");
    HB_CHECK_SUCCESS(hbDNNGetModelNameList(
                         &model_name_list, &model_count, packed_dnn_handle),
                     "hbDNNGetModelNameList failed");
    HB_CHECK_SUCCESS(
        hbDNNGetModelHandle(&dnn_handle, packed_dnn_handle, model_name_list[0]),
        "hbDNNGetModelHandle failed");
  }
  // Show how to get dnn version
  VLOG(EXAMPLE_DEBUG) << "DNN runtime version: " << hbDNNGetVersion();

  std::vector<hbDNNTensor> input_tensors;
  std::vector<hbDNNTensor> output_tensors;
  int input_count = 0;
  int output_count = 0;
  // Step2: prepare input and output tensor
   // 步骤2:准备输入和输出张量
  {
    // 获取输入张量的数量
    HB_CHECK_SUCCESS(hbDNNGetInputCount(&input_count, dnn_handle),
                     "hbDNNGetInputCount failed");
    // 获取输出张量的数量
    HB_CHECK_SUCCESS(hbDNNGetOutputCount(&output_count, dnn_handle),
                     "hbDNNGetOutputCount failed");
    // 根据输入和输出张量的数量调整容器的大小
    input_tensors.resize(input_count);
    output_tensors.resize(output_count);
    // 准备输入和输出张量
    prepare_tensor(input_tensors.data(), output_tensors.data(), dnn_handle);
  }

  // Step3: set input data to input tensor
    // 步骤3:将输入数据设置到输入张量中
  {
    // 读取一张图片作为input_tensor[0]的输入,对于多输入模型,你应该根据模型输入属性设置其他输入数据。
    // read a single picture for input_tensor[0], for multi_input model, you
    // should set other input data according to model input properties.
    HB_CHECK_SUCCESS(
        read_image_2_tensor_as_nv12(FLAGS_image_file, input_tensors.data()),
        "read_image_2_tensor_as_nv12 failed");
    VLOG(EXAMPLE_DEBUG) << "read image to tensor as nv12 success";

  hbDNNTaskHandle_t task_handle = nullptr;
  hbDNNTensor *output = output_tensors.data();
  // Step4: run inference
  {
    // make sure memory data is flushed to DDR before inference
    for (int i = 0; i < input_count; i++) {
      hbSysFlushMem(&input_tensors[i].sysMem[0], HB_SYS_MEM_CACHE_CLEAN);
    }

    hbDNNInferCtrlParam infer_ctrl_param;
    HB_DNN_INITIALIZE_INFER_CTRL_PARAM(&infer_ctrl_param);
    HB_CHECK_SUCCESS(hbDNNInfer(&task_handle,
                                &output,
                                input_tensors.data(),
                                dnn_handle,
                                &infer_ctrl_param),
                     "hbDNNInfer failed");
    // wait task done
    HB_CHECK_SUCCESS(hbDNNWaitTaskDone(task_handle, 0),
                     "hbDNNWaitTaskDone failed");
  }

  // Step5: do postprocess with output data
  std::vector<Classification> top_k_cls;
  {
    // make sure CPU read data from DDR before using output tensor data
    for (int i = 0; i < output_count; i++) {
      hbSysFlushMem(&output_tensors[i].sysMem[0], HB_SYS_MEM_CACHE_INVALIDATE);
    }

    get_topk_result(output, top_k_cls, FLAGS_top_k);
    for (int i = 0; i < FLAGS_top_k; i++) {
      VLOG(EXAMPLE_REPORT) << "TOP " << i << " result id: " << top_k_cls[i].id;
    }
    if(top_k_cls[0].id == 282) //如果ID等于282.图片中是猫
    {
    std::cout << "this picture is:cat" << std::endl;

    }
    if(top_k_cls[0].id == 340)  //如果推理结果最大概率值的ID是340,图片中是斑马
   {
    std::cout << "this picture is:zebra" << std::endl;

  }

  }

  // Step6: release resources
  {
    // release task handle
    HB_CHECK_SUCCESS(hbDNNReleaseTask(task_handle), "hbDNNReleaseTask failed");
    // free input mem
    for (int i = 0; i < input_count; i++) {
      HB_CHECK_SUCCESS(hbSysFreeMem(&(input_tensors[i].sysMem[0])),
                       "hbSysFreeMem failed");
    }
    // free output mem
    for (int i = 0; i < output_count; i++) {
      HB_CHECK_SUCCESS(hbSysFreeMem(&(output_tensors[i].sysMem[0])),
                       "hbSysFreeMem failed");
    }
    // release model
    HB_CHECK_SUCCESS(hbDNNRelease(packed_dnn_handle), "hbDNNRelease failed");
  }

  return 0;
}
}

/**
 * @brief 准备张量
 *
 * 根据给定的 DNN 句柄,准备输入和输出张量。
 *
 * @param input_tensor 输入张量指针
 * @param output_tensor 输出张量指针
 * @param dnn_handle DNN 句柄
 *
 * @return 返回准备结果,成功返回 0,失败返回错误码
 */
int prepare_tensor(hbDNNTensor *input_tensor,
                   hbDNNTensor *output_tensor,
                   hbDNNHandle_t dnn_handle) {
  int input_count = 0;
  int output_count = 0;
  hbDNNGetInputCount(&input_count, dnn_handle);
  hbDNNGetOutputCount(&output_count, dnn_handle);

  /** Tips:
   * For input memory size:
   * *   input_memSize = input[i].properties.alignedByteSize
   * For output memory size:
   * *   output_memSize = output[i].properties.alignedByteSize
   */
  hbDNNTensor *input = input_tensor;
  for (int i = 0; i < input_count; i++) {
    HB_CHECK_SUCCESS(
        hbDNNGetInputTensorProperties(&input[i].properties, dnn_handle, i),
        "hbDNNGetInputTensorProperties failed");
    int input_memSize = input[i].properties.alignedByteSize;
    HB_CHECK_SUCCESS(hbSysAllocCachedMem(&input[i].sysMem[0], input_memSize),
                     "hbSysAllocCachedMem failed");
    /** Tips:
     * For input tensor, aligned shape should always be equal to the real
     * shape of the user's data. If you are going to set your input data with
     * padding, this step is not necessary.
     * */
    input[i].properties.alignedShape = input[i].properties.validShape;

    // Show how to get input name
    const char *input_name;
    HB_CHECK_SUCCESS(hbDNNGetInputName(&input_name, dnn_handle, i),
                     "hbDNNGetInputName failed");
    VLOG(EXAMPLE_DEBUG) << "input[" << i << "] name is " << input_name;
  }

  hbDNNTensor *output = output_tensor;
  for (int i = 0; i < output_count; i++) {
    HB_CHECK_SUCCESS(
        hbDNNGetOutputTensorProperties(&output[i].properties, dnn_handle, i),
        "hbDNNGetOutputTensorProperties failed");
    int output_memSize = output[i].properties.alignedByteSize;
    HB_CHECK_SUCCESS(hbSysAllocCachedMem(&output[i].sysMem[0], output_memSize),
                     "hbSysAllocCachedMem failed");

    // Show how to get output name
    const char *output_name;
    HB_CHECK_SUCCESS(hbDNNGetOutputName(&output_name, dnn_handle, i),
                     "hbDNNGetOutputName failed");
    VLOG(EXAMPLE_DEBUG) << "output[" << i << "] name is " << output_name;
  }
  return 0;
}

/** You can define read_image_2_tensor_as_other_type to prepare your data **/
/**
 * @brief 将图像转换为 Tensor
 *
 * 将输入的图像文件转换为指定形状的 Tensor,并将其赋值给给定的 Tensor 指针。
 * 图像的格式必须是 NV12,即 YUV420 格式。
 *
 * @param image_file 图像文件路径
 * @param input_tensor 输出的 Tensor 指针
 *
 * @return 成功返回 0,否则返回 -1
 */
int32_t read_image_2_tensor_as_nv12(std::string &image_file,
                                    hbDNNTensor *input_tensor) {
  hbDNNTensor *input = input_tensor;
  hbDNNTensorProperties Properties = input->properties;
  int tensor_id = 0;
  // NCHW , the struct of mobilenetv1_224x224 shape is NCHW
  int input_h = Properties.validShape.dimensionSize[2];
  int input_w = Properties.validShape.dimensionSize[3];

  cv::Mat bgr_mat = cv::imread(image_file, cv::IMREAD_COLOR);
  if (bgr_mat.empty()) {
    VLOG(EXAMPLE_SYSTEM) << "image file not exist!";
    return -1;
  }
  // resize
  cv::Mat mat;
  mat.create(input_h, input_w, bgr_mat.type());
  cv::resize(bgr_mat, mat, mat.size(), 0, 0);
  // convert to YUV420
  if (input_h % 2 || input_w % 2) {
    VLOG(EXAMPLE_SYSTEM) << "input img height and width must aligned by 2!";
    return -1;
  }
  cv::Mat yuv_mat;
  cv::cvtColor(mat, yuv_mat, cv::COLOR_BGR2YUV_I420);
  uint8_t *nv12_data = yuv_mat.ptr<uint8_t>();

  // copy y data
  auto data = input->sysMem[0].virAddr;
  int32_t y_size = input_h * input_w;
  memcpy(reinterpret_cast<uint8_t *>(data), nv12_data, y_size);

  // copy uv data
  int32_t uv_height = input_h / 2;
  int32_t uv_width = input_w / 2;
  uint8_t *nv12 = reinterpret_cast<uint8_t *>(data) + y_size;
  uint8_t *u_data = nv12_data + y_size;
  uint8_t *v_data = u_data + uv_height * uv_width;

  for (int32_t i = 0; i < uv_width * uv_height; i++) {
    if (u_data && v_data) {
      *nv12++ = *u_data++;
      *nv12++ = *v_data++;
    }
  }
  return 0;
}

/**
 * @brief 获取 top k 个分类结果
 *
 * 将给定的张量 tensor 中的 top k 个分类结果提取出来,并存储在 top_k_cls 向量中。
 *
 * @param tensor hbDNNTensor 指针,指向输入的张量
 * @param top_k_cls 存储 top k 个分类结果的向量
 * @param top_k 提取的 top k 值
 */
void get_topk_result(hbDNNTensor *tensor,
                     std::vector<Classification> &top_k_cls,
                     int top_k) {
  // 刷新系统内存
  hbSysFlushMem(&(tensor->sysMem[0]), HB_SYS_MEM_CACHE_INVALIDATE);

  // 创建一个优先队列用于存储分类结果
  std::priority_queue<Classification,
                      std::vector<Classification>,
                      std::greater<Classification>>
      queue;

  // 获取张量的维度大小
  int *shape = tensor->properties.validShape.dimensionSize;

  // 根据输出类型确定reinterpret_cast的类型
  // 对于HB_DNN_TENSOR_TYPE_F32类型,需要将其转换为float类型
  // The type reinterpret_cast should be determined according to the output type
  // For example: HB_DNN_TENSOR_TYPE_F32 is float
  auto data = reinterpret_cast<float *>(tensor->sysMem[0].virAddr);

  // 获取张量的shift和scale数据
  auto shift = tensor->properties.shift.shiftData;
  auto scale = tensor->properties.scale.scaleData;

  // 计算张量的长度
  int tensor_len = shape[0] * shape[1] * shape[2] * shape[3];

  // 遍历张量中的每个元素,计算得分并存入优先队列中
  for (auto i = 0; i < tensor_len; i++) {
    float score = 0.0;
    if (tensor->properties.quantiType == SHIFT) {
      score = data[i] / (1 << shift[i]);
    } else if (tensor->properties.quantiType == SCALE) {
      score = data[i] * scale[i];
    } else {
      score = data[i];
    }
    queue.push(Classification(i, score, ""));
    if (queue.size() > top_k) {
      queue.pop();
    }
  }

  // 将优先队列中的元素依次取出并存入top_k_cls向量中,并按照得分降序排列
  while (!queue.empty()) {
    top_k_cls.emplace_back(queue.top());
    queue.pop();
  }
  std::reverse(top_k_cls.begin(), top_k_cls.end());
}
我是单独把这个例子copy出来,把其他的都去掉,变成单独的一个工程如下:

编译的时候直接到code目录下执行编译脚本:
 build_j5.sh  #执行这个脚本编译后在J5上运行
 build_x86.sh #执行这个脚本编译后在PC上docker环境中运行
编译完成后生成的结果在和code同一级目录的J5文件夹内,运行的时候需要把整个文件夹copy到userdata目录下或者userdata/app目录下都OK的,copy到板子上后需要给个权限,然后进入到j5目录下运行脚本查看效果:
chmod -R 777 j5  #给权限
cd /userdata/j5/script/quick_start  #进入到脚本目录
./run_mobilenetV1.sh  #执行该脚本
看看效果如何:
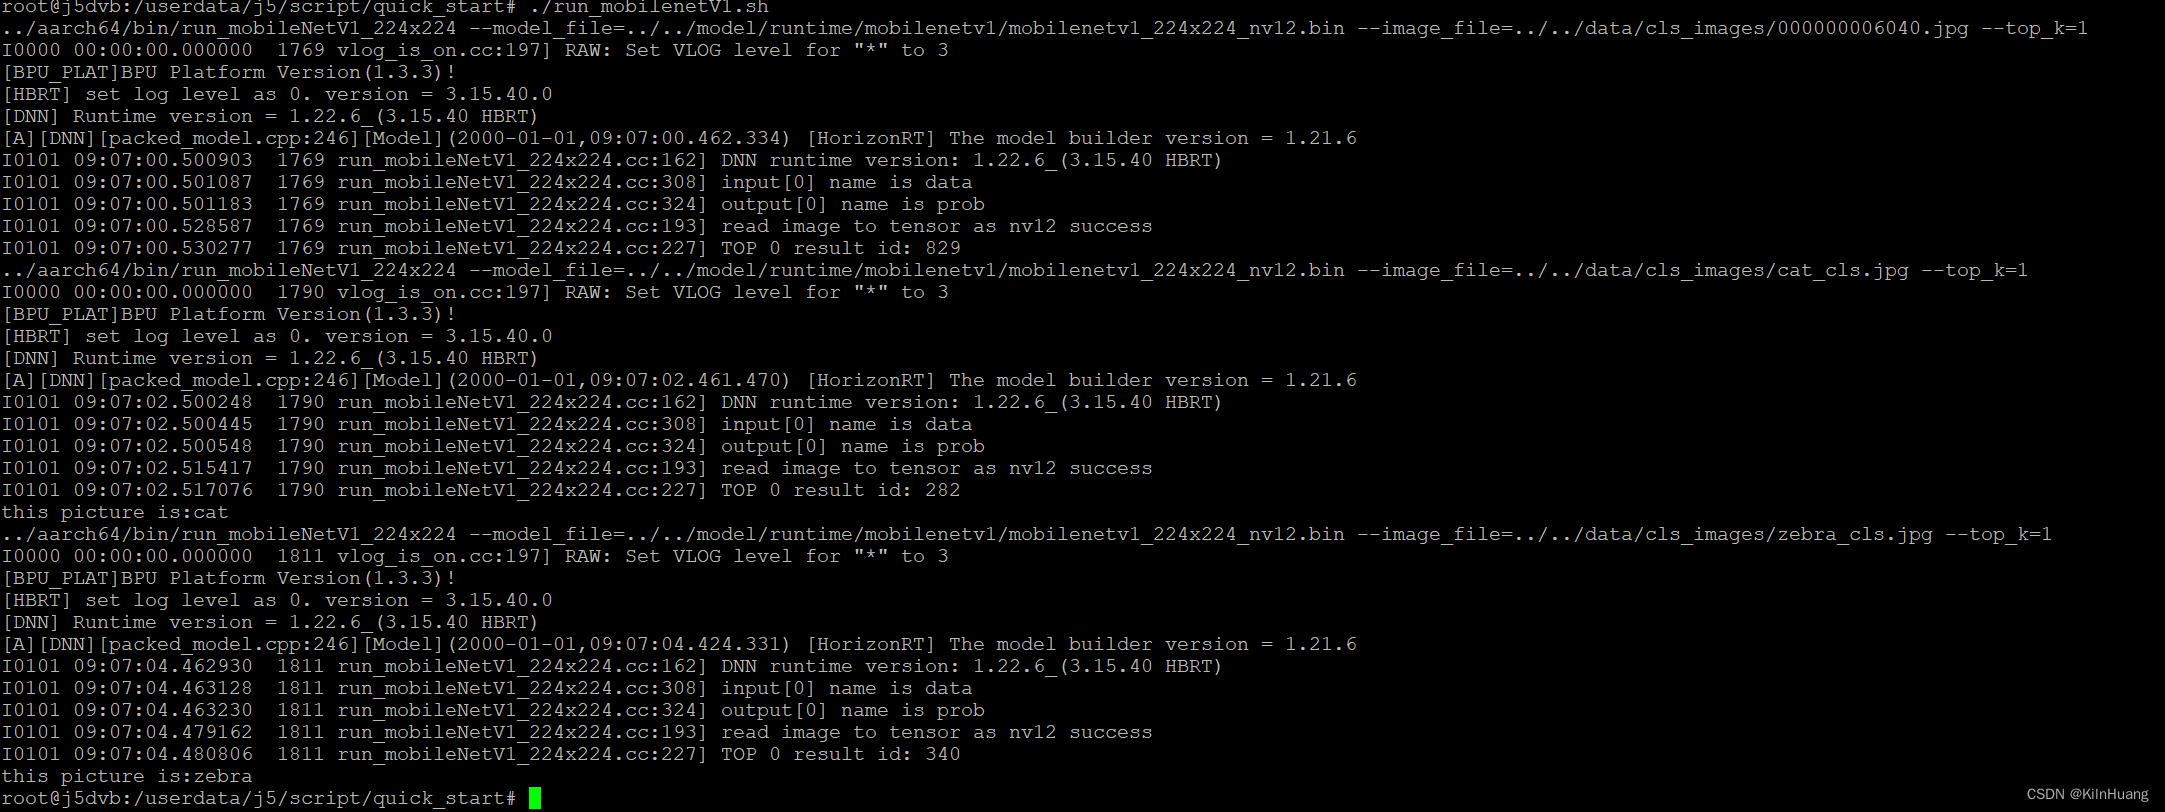
我的运行脚本和推理源代码都被我细微修改过,看看run_mobilenetV1.sh脚本内容如下:
#!/bin/bash
# 定义模型文件和库文件的路径
bin=../aarch64/bin/run_mobileNetV1_224x224
lib=../aarch64/lib

export LD_LIBRARY_PATH=${lib}:${LD_LIBRARY_PATH}
export BMEM_CACHEABLE=true

image_folder=../../data/cls_images/

for image_file in ${image_folder}*.jpg; do
    # 执行模型推理并输出结果
    ${bin} --model_file=../../model/runtime/mobilenetv1/mobilenetv1_224x224_nv12.bin --image_file=${image_file} --top_k=1
done
我把脚本改成了读取data目录下的所有图片每张图片进行一次推理,这样就可以验证多张不同的图片单次推理的效果了。修改后的代码暂时放到如下链接中:
https://download.csdn.net/download/weixin_41896321/89182792
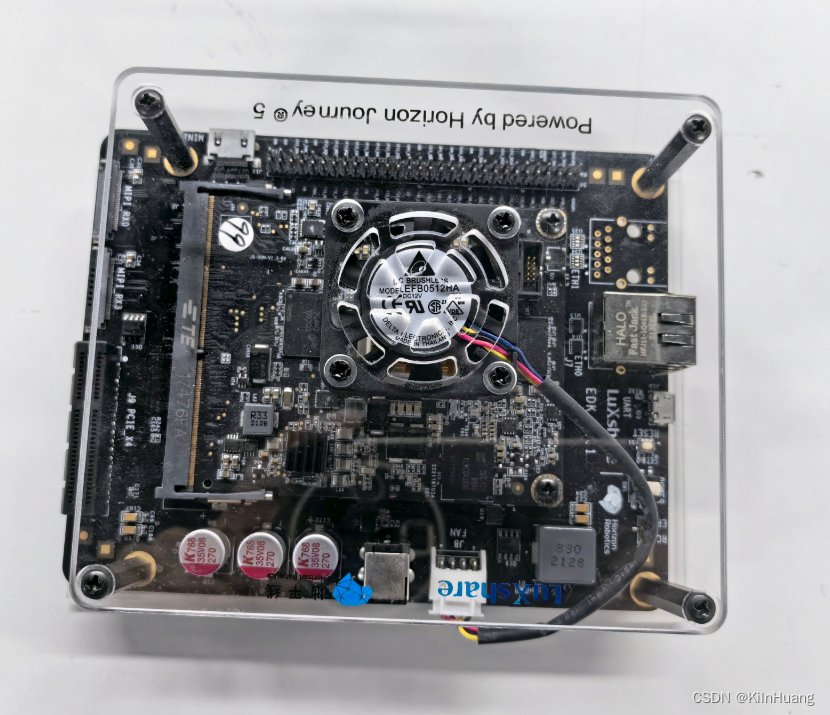
最后给陪我在漫长的岁月中摸索前行的开发板爆个照 ——,长这样
/********************************************************************************************************
公元2024年4月
/********************************************************************************************************


 519
519


 被折叠的 条评论
为什么被折叠?
被折叠的 条评论
为什么被折叠?
 到【灌水乐园】发言


