1、MySQL的安装
本教程安装MySQL版本为5.7
(1)远程登录到阿里云服务器,执行如下命令
sudo apt-get update

(2)执行如下命令,安装MySQL。
sudo apt-get install mysql-server-5.7


(3)检查状态,执行安装如下命令
sudo apt-get install net-tools
sudo netstat -tap | grep mysql

(4)检查MySQL版本号,执行如下命令
mysql -V

(5) 查看MySQL5.7默认账号和密码
sudo cat /etc/mysql/debian.cnf

2、配置MySQL
(1)执行如下命令,进行数据库的初始化配置
sudo mysql_secure_installation
配置信息及选项如下所示:
Securing the MySQL server deployment.
Connecting to MySQL using a blank password.
VALIDATE PASSWORD PLUGIN can be used to test passwords
and improve security. It checks the strength of password
and allows the users to set only those passwords which are
secure enough. Would you like to setup VALIDATE PASSWORD plugin?
#1
Press y|Y for Yes, any other key for No: N
Please set the password for root here.
#2
New password:设置自己的数据库密码
Re-enter new password:再次输入数据库密码
By default, a MySQL installation has an anonymous user,
allowing anyone to log into MySQL without having to have
a user account created for them. This is intended only for
testing, and to make the installation go a bit smoother.
You should remove them before moving into a production
environment.
#3
Remove anonymous users? (Press y|Y for Yes, any other key for No) : N
… skipping.
Normally, root should only be allowed to connect from
‘localhost’. This ensures that someone cannot guess at
the root password from the network.
#4
Disallow root login remotely? (Press y|Y for Yes, any other key for No) : N
… skipping.
By default, MySQL comes with a database named ‘test’ that
anyone can access. This is also intended only for testing,
and should be removed before moving into a production
environment.
#5
Remove test database and access to it? (Press y|Y for Yes, any other key for No) : N
… skipping.
Reloading the privilege tables will ensure that all changes
made so far will take effect immediately.
#6
Reload privilege tables now? (Press y|Y for Yes, any other key for No) : Y
Success.
All done!
(2)查看数据库状态,执行如下命令。数据库正在运行中,正常。
systemctl status mysql.service

(3)修改root账户密码认证方式。执行如下命令连接进入到MySQL
sudo mysql -uroot -p

查看用户
select user, plugin from mysql.user;

重置root密码,修改认证方式
update mysql.user set authentication_string=PASSWORD(‘123456’), plugin=‘mysql_native_password’ where user=‘root’;
flush privileges;
exit

(4)配置远程访问MySQL
修改配置文件,注释掉bind-address=127.0.0.1
sudo vim /etc/mysql/mysql.conf.d/mysqld.cnf

修改完保存退出,然后重新进入MySQL,执行授权命令
grant all ON . to root@‘%’ identified by ‘123456’ with grant option;
flush privileges;
exit;
其中root@%,localhost就是本地访问,配置成%就是所有主机都可连接;第二个’123456’为你给新增权限用户设置的密码。

(5)重启MySQL
sudo /etc/init.d/mysql restart

3、远程登录MySQL
(1)在阿里云服务器安全组配置MySQL服务的端口3036,如下图所示,编辑完点击保存即生效。

(2)使用第三方数据库管理客户端软件远程登录数据库,本教程使用navicat软件进行演示。
navicat下载地址:http://www.navicat.com.cn/download/navicat-premium
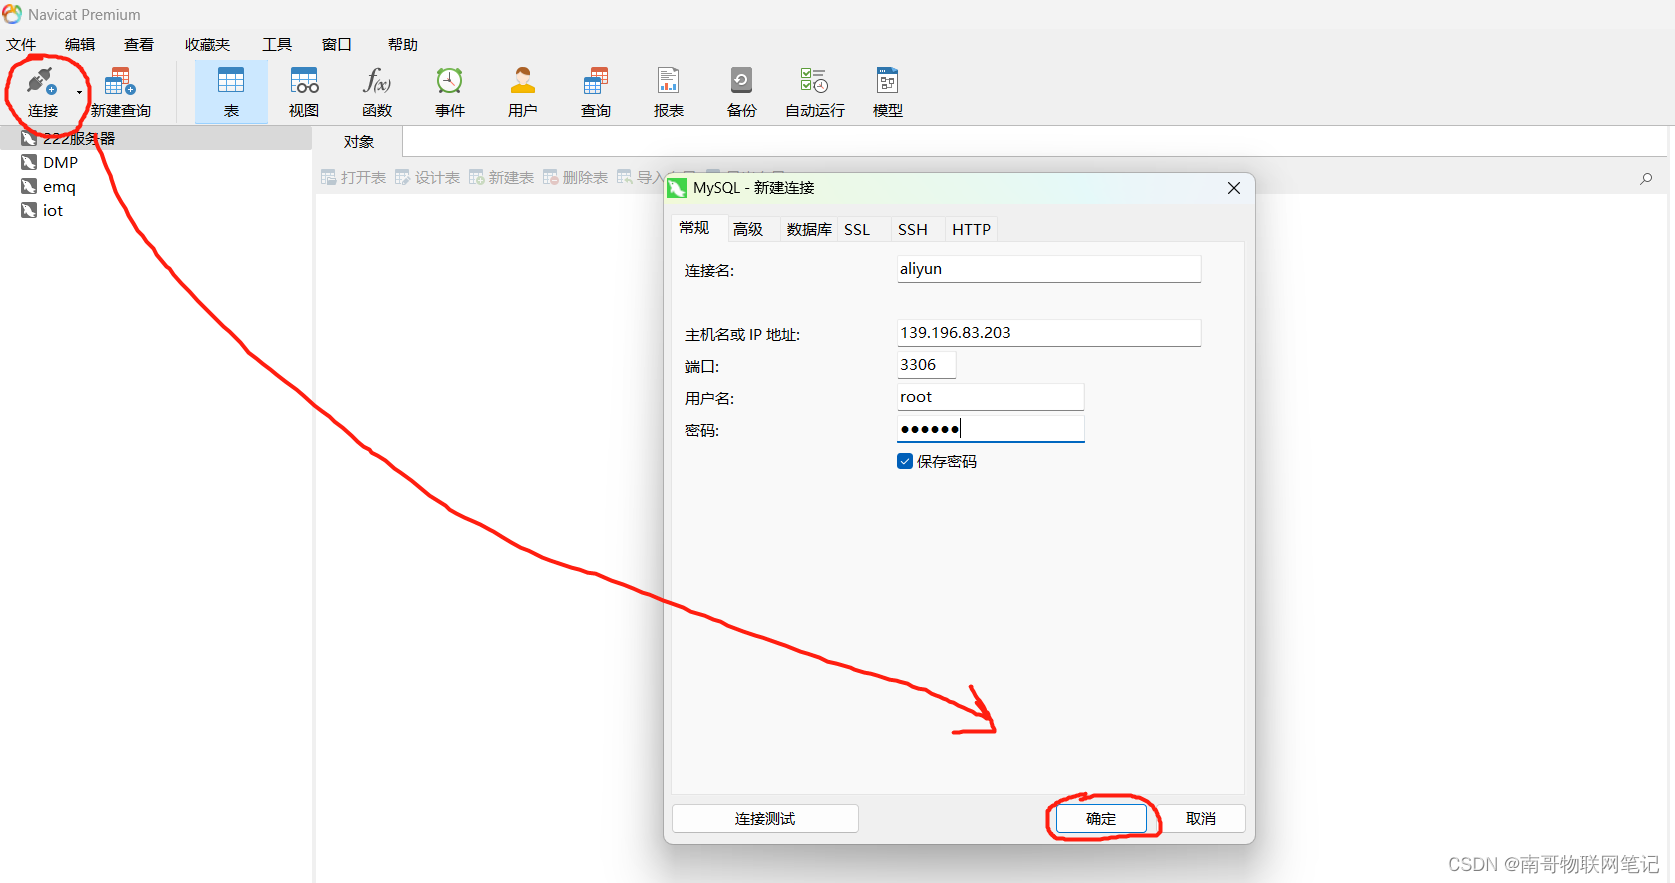
点击连接,选择MySQL数据库
- 连接名:自定义
- 主机名或IP地址:阿里云服务器的公网IP
- 端口:3306
- 用户名:访问数据库的用户名,root
- 密码:root的登录密码

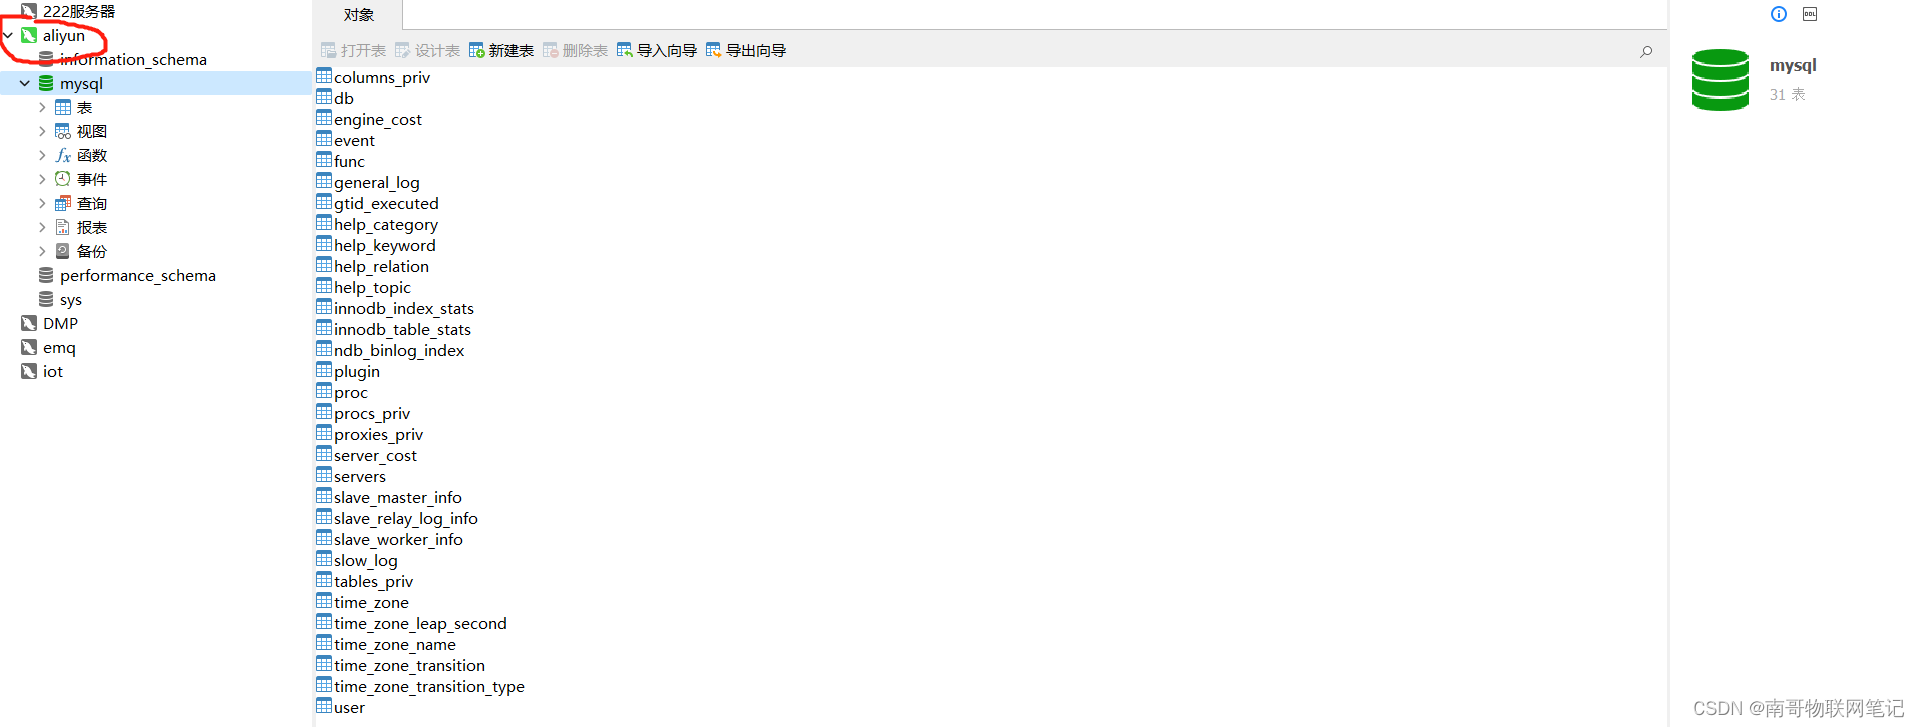
点击确定,连接成功如下图所示。到此在阿里云服务器中安装和配置MySQL完成。

PS:如果想卸载MySQL进行重新安装,操作步骤如下:
(1)删除MySQL
依次执行如下命令
sudo apt autoremove --purge mysql-server-*
sudo apt remove mysql-server
sudo apt autoremove mysql-server
sudo apt remove mysql-common
(2)清理残留数据
dpkg -l |grep ^rc|awk ‘{print $2}’ |sudo xargs dpkg -P


 71万+
71万+


 被折叠的 条评论
为什么被折叠?


