


配置准备
1. 新建工程项目
使用webapp模版生成maven项目
配置相关文件功能
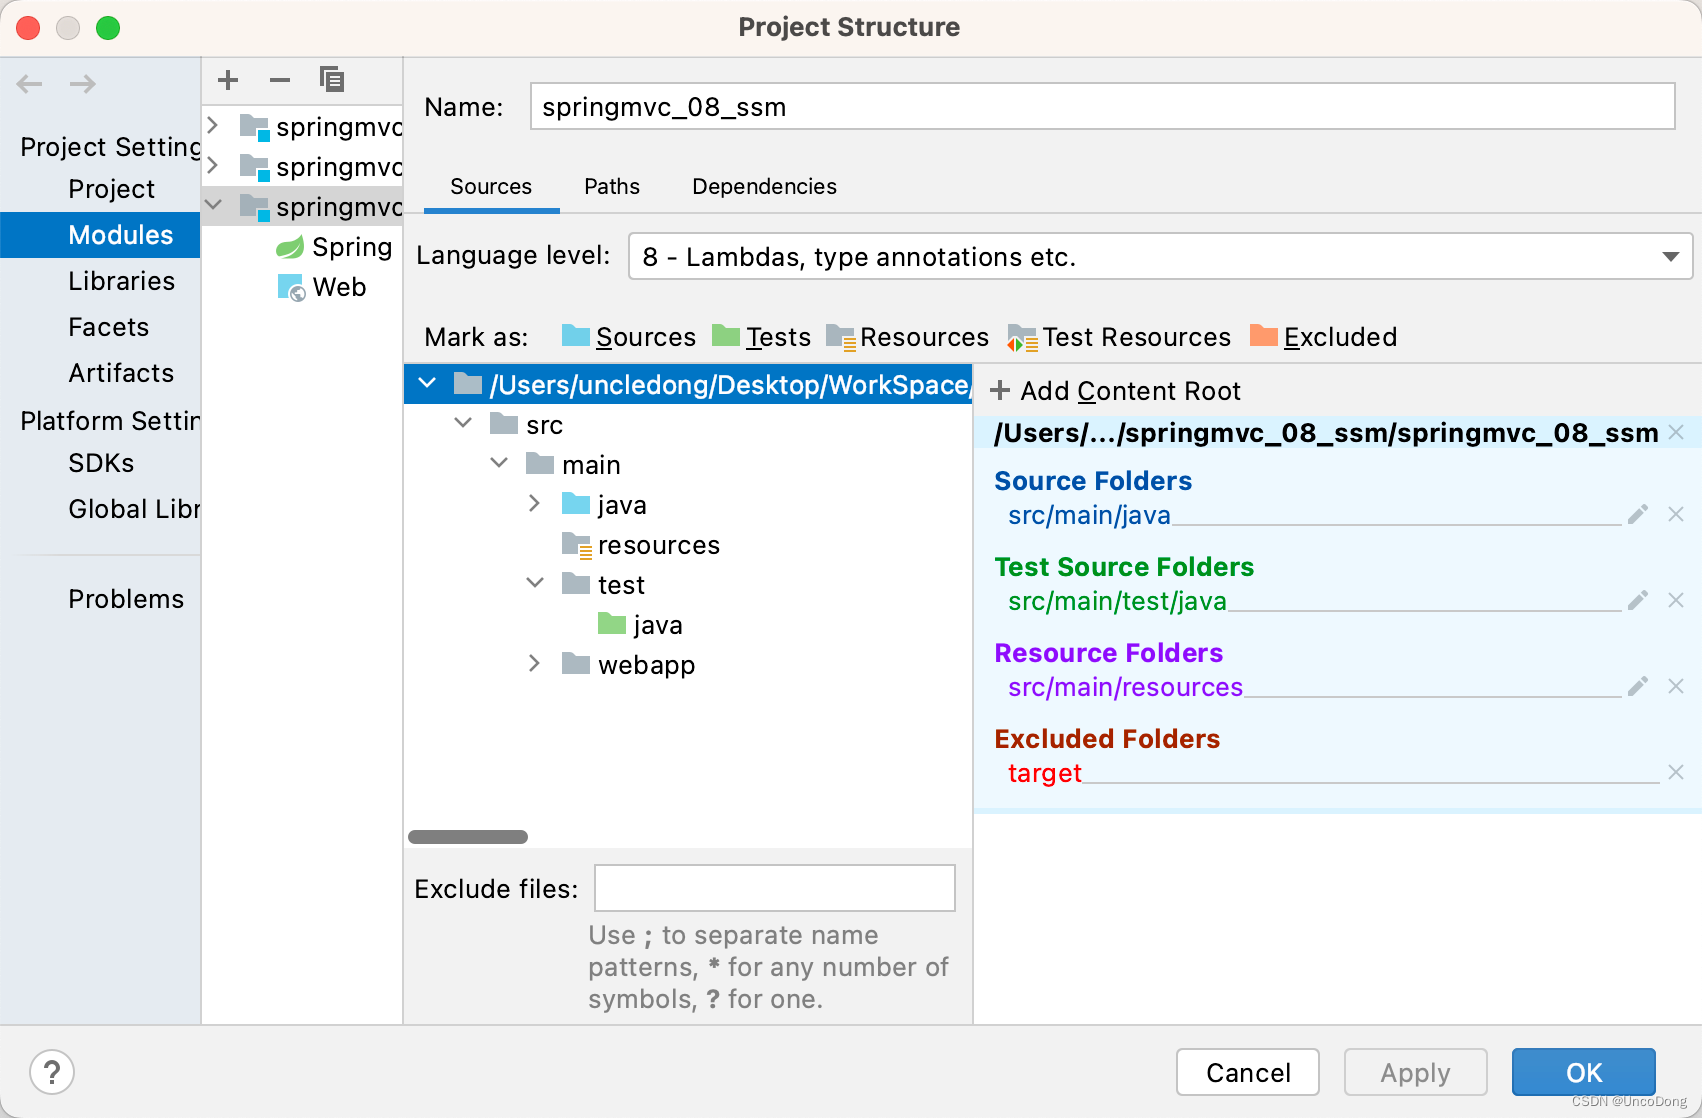
2. 引入配置文件+配置config
pom.xml
<?xml version="1.0" encoding="UTF-8"?>

<project xmlns="http://maven.apache.org/POM/4.0.0" xmlns:xsi="http://www.w3.org/2001/XMLSchema-instance"
         xsi:schemaLocation="http://maven.apache.org/POM/4.0.0 http://maven.apache.org/xsd/maven-4.0.0.xsd">
  <modelVersion>4.0.0</modelVersion>

  <groupId>com.itheima</groupId>
  <artifactId>springmvc_08_ssm</artifactId>
  <version>1.0-SNAPSHOT</version>
  <packaging>war</packaging>

  <dependencies>
    <dependency>
      <groupId>org.springframework</groupId>
      <artifactId>spring-webmvc</artifactId>
      <version>5.2.10.RELEASE</version>
    </dependency>

    <dependency>
      <groupId>org.springframework</groupId>
      <artifactId>spring-jdbc</artifactId>
      <version>5.2.10.RELEASE</version>
    </dependency>

    <dependency>
      <groupId>org.springframework</groupId>
      <artifactId>spring-test</artifactId>
      <version>5.2.10.RELEASE</version>
    </dependency>

    <dependency>
      <groupId>org.mybatis</groupId>
      <artifactId>mybatis</artifactId>
      <version>3.5.6</version>
    </dependency>

    <dependency>
      <groupId>org.mybatis</groupId>
      <artifactId>mybatis-spring</artifactId>
      <version>1.3.0</version>
    </dependency>

    <dependency>
      <groupId>mysql</groupId>
      <artifactId>mysql-connector-java</artifactId>
      <version>5.1.47</version>
    </dependency>

    <dependency>
      <groupId>com.alibaba</groupId>
      <artifactId>druid</artifactId>
      <version>1.1.16</version>
    </dependency>

    <dependency>
      <groupId>junit</groupId>
      <artifactId>junit</artifactId>
      <version>4.12</version>
      <scope>test</scope>
    </dependency>

    <dependency>
      <groupId>javax.servlet</groupId>
      <artifactId>javax.servlet-api</artifactId>
      <version>3.1.0</version>
      <scope>provided</scope>
    </dependency>

    <dependency>
      <groupId>com.fasterxml.jackson.core</groupId>
      <artifactId>jackson-databind</artifactId>
      <version>2.9.0</version>
    </dependency>
  </dependencies>

  <build>
    <plugins>
      <plugin>
        <groupId>org.apache.tomcat.maven</groupId>
        <artifactId>tomcat7-maven-plugin</artifactId>
        <version>2.1</version>
        <configuration>
          <port>80</port>
          <path>/</path>
        </configuration>
      </plugin>
    </plugins>
  </build>
</project>
新建相关文件
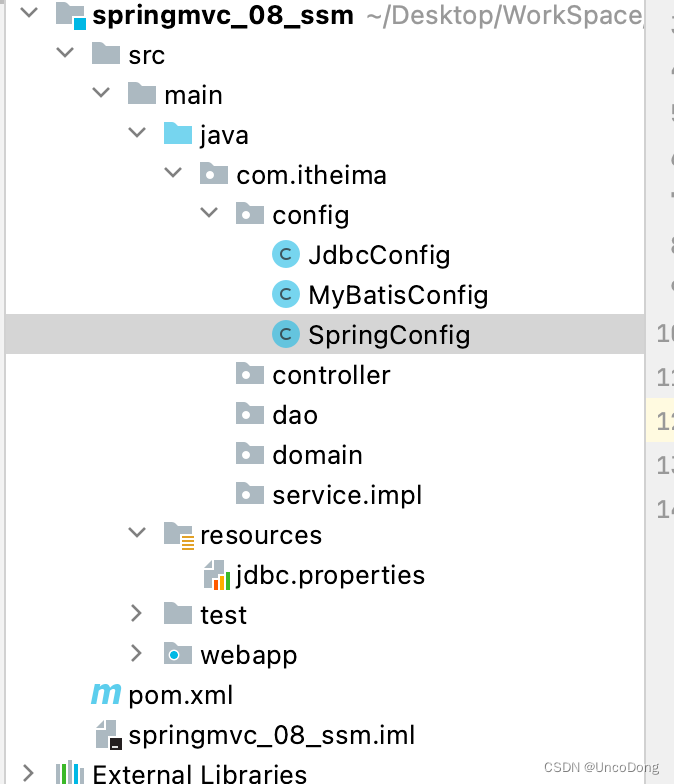
主要配置文件SpringConfig
@Configuration //说明是配置文件
@ComponentScan({"com.itheima.service", "com.itheima.service"}) // 配置导入bean
@PropertySource("jdbc.properties") // 引入jdbc的配置文件
@Import({JdbcConfig.class, MyBatisConfig.class}) // 引入jdbc和mybatis的config
public class SpringConfig {
}
数据库配置文件JdbcConfig
public class JdbcConfig {
    @Value("${jdbc.driver}")
    private String driver;
    @Value("${jdbc.url}")
    private String url;
    @Value("${jdbc.username}")
    private String username;
    @Value("${jdbc.password}")
    private String password;

    @Bean
    public DataSource dataSource() {
        DruidDataSource dataSource = new DruidDataSource();
        dataSource.setDriverClassName(driver);
        dataSource.setUrl(url);
        dataSource.setUsername(username);
        dataSource.setPassword(password);
        return dataSource;
    }
}
数据库配置信息jdbc.properties
这里的配置需要useSSL=false才能连接成功,原因见
【已解决】com.mysql.jdbc.exceptions.jdbc4.CommunicationsExcepti:Communications link failure ----mysql连接报错
关于数据库连接中useSSL是否为true 或者 false的选择
jdbc.driver=com.mysql.jdbc.Driver
jdbc.url=jdbc:mysql://localhost:3306/ssm_db?useSSL=false&useUnicode=true&characterEncoding=UTF-8
jdbc.username=root
jdbc.password=root
配置MyBatisConfig
public class MyBatisConfig {
    @Bean
    // spring容器中根据类型自动装配dataSource
    public SqlSessionFactoryBean sqlSessionFactory(DataSource dataSource){
        SqlSessionFactoryBean factoryBean = new SqlSessionFactoryBean();
        factoryBean.setDataSource(dataSource);
        factoryBean.setTypeAliasesPackage("com.itheima.domain");
        return factoryBean;
    }

    @Bean
    // 映射扫描
    public MapperScannerConfigurer mapperScannerConfigurer(){
        MapperScannerConfigurer msc = new MapperScannerConfigurer();
        msc.setBasePackage("com.itheima.dao");
        return msc;
    }
}
再次新建两个文件
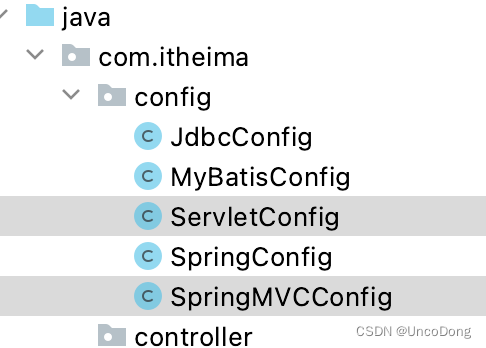
配置ServletConfig
package com.itheima.config;

import org.springframework.web.servlet.support.AbstractAnnotationConfigDispatcherServletInitializer;

public class ServletConfig extends AbstractAnnotationConfigDispatcherServletInitializer {
    @Override
    protected Class<?>[] getRootConfigClasses() {
//        return new Class[0];
        return new Class[]{SpringConfig.class};
    }

    @Override
    protected Class<?>[] getServletConfigClasses() {
//        return new Class[0];
        return new Class[]{SpringMVCConfig.class};
    }

    @Override
    protected String[] getServletMappings() {
//        return new String[0];
        return new String[]{"/"};
    }
}
配置SpringMVCConfig
package com.itheima.config;

import org.springframework.context.annotation.ComponentScan;
import org.springframework.context.annotation.Configuration;
import org.springframework.web.servlet.config.annotation.EnableWebMvc;

@Configuration
@ComponentScan("com.itheima.controller")
@EnableWebMvc
public class SpringMVCConfig {
}
功能模块开发
数据库与POJO配置
新建表格,构建表结构
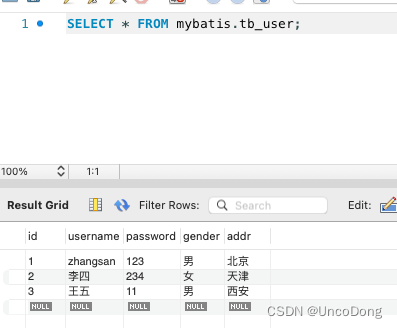
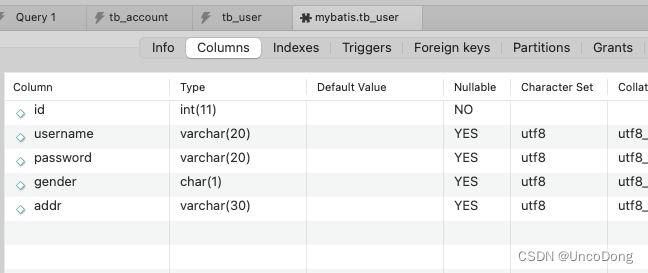
根据表结构实现POJO
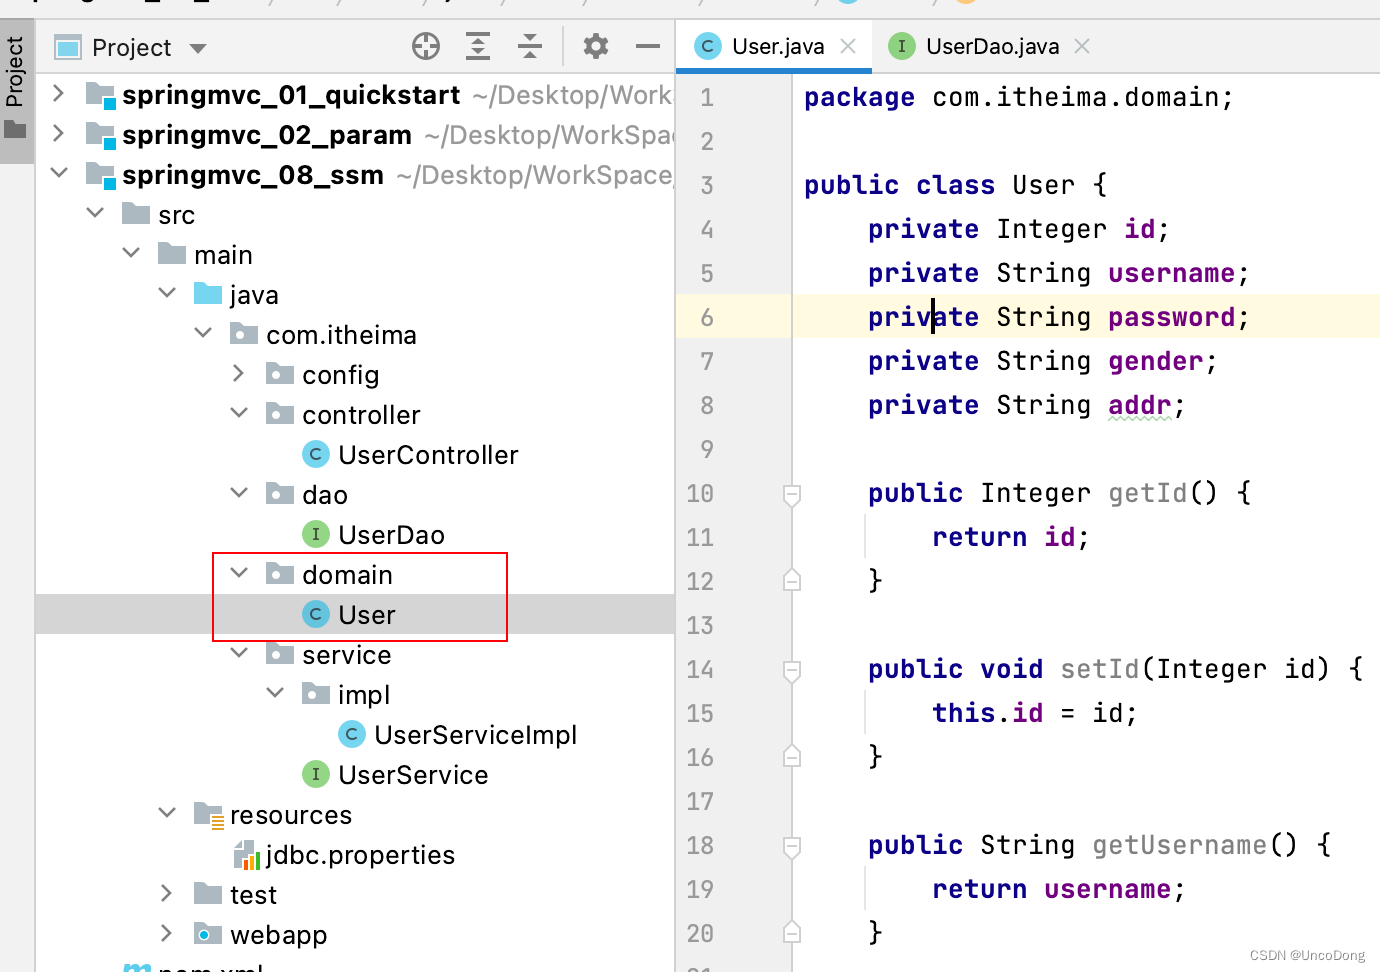
package com.itheima.domain;

public class User {
    private Integer id;
    private String username;
    private String password;
    private String gender;
    private String addr;

    public Integer getId() {
        return id;
    }

    public void setId(Integer id) {
        this.id = id;
    }

    public String getUsername() {
        return username;
    }

    public void setUsername(String username) {
        this.username = username;
    }

    public String getPassword() {
        return password;
    }

    public void setPassword(String password) {
        this.password = password;
    }

    public String getGender() {
        return gender;
    }

    public void setGender(String gender) {
        this.gender = gender;
    }

    public String getAddr() {
        return addr;
    }

    public void setAddr(String addr) {
        this.addr = addr;
    }

    @Override
    public String toString() {
        return "User{" +
                "id=" + id +
                ", username='" + username + '\'' +
                ", password='" + password + '\'' +
                ", gender='" + gender + '\'' +
                ", addr='" + addr + '\'' +
                '}';
    }
}
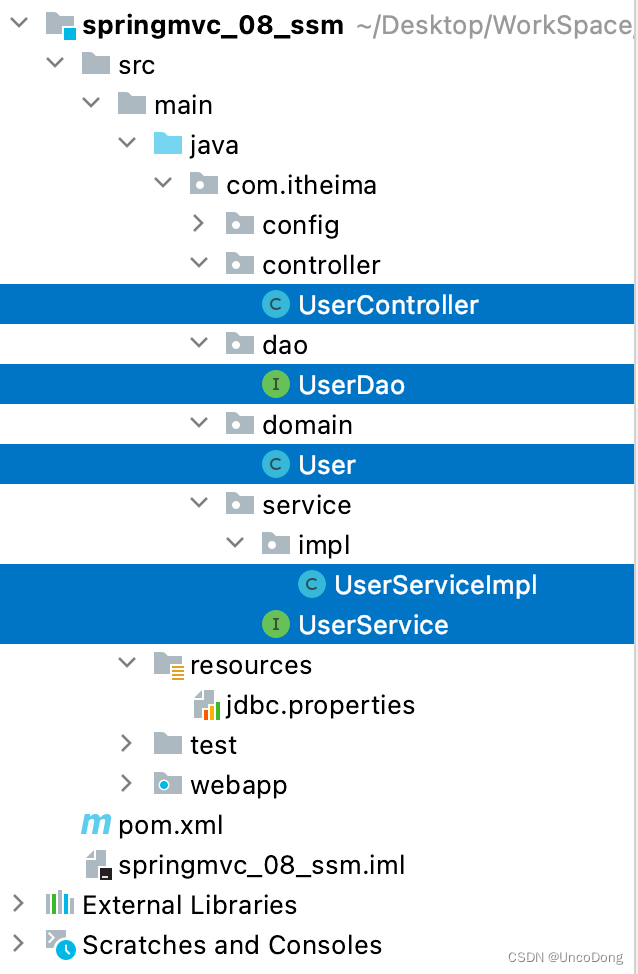
Dao和Service和Controller的配置
先新建对应的类
使用Mybatis自动代理写Dao的接口和实现
package com.itheima.dao;

import com.itheima.domain.User;
import org.apache.ibatis.annotations.Delete;
import org.apache.ibatis.annotations.Insert;
import org.apache.ibatis.annotations.Select;
import org.apache.ibatis.annotations.Update;

import java.util.List;

public interface UserDao {
    // 写入每个方法对应的sql语句
    // 这里的username是表中属性 ✅是这个?还是POJO中字段名?
    //    @Insert("insert into tb_user values(null,#{username},#{password},#{gender},#{addr}}}))")
    @Insert("insert into tb_user (username,password,gender,addr) values(#{username},#{password},#{gender},#{addr})")
    public void save(User user) ;

    @Update("update tb_user set username=#{username}, password=#{password}, gender=#{gender}, addr=#{addr} where id = #{id}}")
    public void update(User user);

    @Delete("delete from tb_user where id = #{id}")
    public void delete(Integer id);

    @Select("select * from tb_user where id = #{id}")
    public User getById(Integer id);

    @Select("select * from tb_user")
    public List<User> getAll();


}
实现Service的接口
Service本质就是调用Dao的执行方法,这是分离的思想
package com.itheima.service;

import com.itheima.domain.User;

import java.util.List;

public interface UserService {
    // 使用boolean表示是否成功

    /**
     * 正规开发使用文档注释
     * @param user
     * @return
     */
    public boolean save(User user) ;

    /**
     * 修改
     * @param user
     * @return
     */
    public boolean update(User user);


    /**
     * 按id删除
     * @param id
     * @return
     */
    public boolean delete(Integer id);

    /**
     * 按id查询
     * @param id
     * @return
     */
    public User getById(Integer id);

    public List<User> getAll();
}
实现Controller
package com.itheima.controller;

import com.itheima.domain.User;
import com.itheima.service.UserService;
import org.springframework.beans.factory.annotation.Autowired;
import org.springframework.web.bind.annotation.*;

import java.util.List;

@RestController
@RequestMapping("/books")
public class UserController {
    @Autowired
    private UserService userService;

    // 提供所有方法
    @PostMapping
    public boolean save(@RequestBody User user) {
        // user数据由json数据中来
        return userService.save(user);
    }

    @PutMapping
    public boolean update(@RequestBody User user) {
        return userService.update(user);
    }

    @DeleteMapping("/{id}")
    public boolean delete(@PathVariable Integer id) {
        return userService.delete(id);
    }

    @GetMapping("/{id}")
    public User getById(@PathVariable Integer id) {
        return userService.getById(id);
    }

    @GetMapping
    public List<User> getAll() {
        return userService.getAll();
    }

}
测试接口功能
实际开发中需要测试的环节
- 业务层接口开发完,Junit做测试
- 表现层接口开发完,Postman做测试
Junit业务层测试
新建测试类
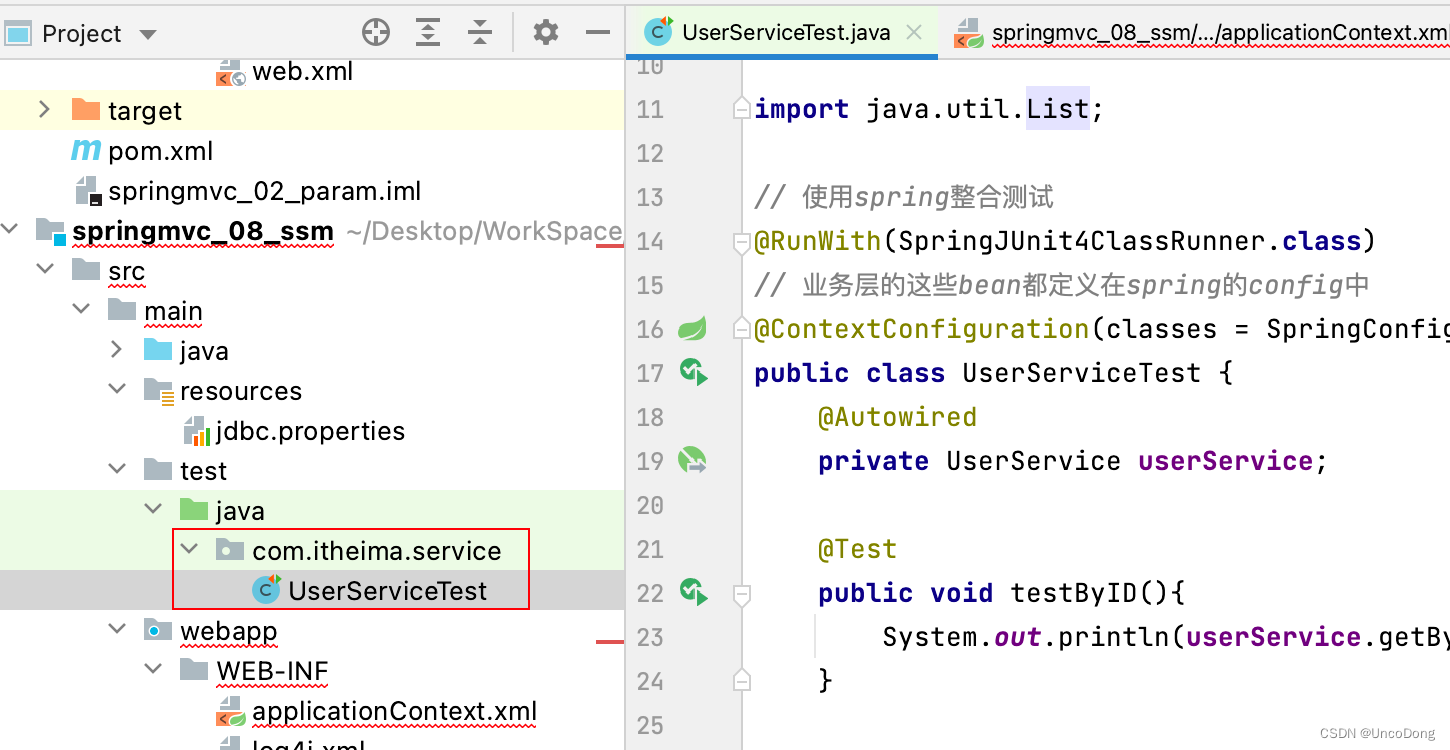
package com.itheima.service;

import com.itheima.config.SpringConfig;
import com.itheima.domain.User;
import org.junit.Test;
import org.junit.runner.RunWith;
import org.springframework.beans.factory.annotation.Autowired;
import org.springframework.test.context.ContextConfiguration;
import org.springframework.test.context.junit4.SpringJUnit4ClassRunner;

import java.util.List;

// 使用spring整合测试
@RunWith(SpringJUnit4ClassRunner.class)
// 业务层的这些bean都定义在spring的config中
@ContextConfiguration(classes = SpringConfig.class)
public class UserServiceTest {
    @Autowired
    private UserService userService;

    @Test
    public void testByID(){
        System.out.println(userService.getById(1));
    }

    @Test
    public void testGetAll(){
        List<User> all = userService.getAll();
        System.out.println(all);

    }

}
接口测试
maven接口启动tomcat,如果遇到问题,可以参考
记一个很坑的问题:Context initialization failed
解决 No qualifying bean of type 问题
Tomcat启动报错: Context initialization failed
【bug排查】启动tomcat服务器报错Context initialization failed
maven启动tomcat插件神坑, Failed to start component StandardEngineTomcat.StandardHostlocalhost.Standar
Maven项目启动报错:Failed to start component StandardEngineTomcat.StandardHostlocalhost.StandardContex
Unable to locate Spring NamespaceHandler for XML schema产生的原因及解决方法
scope为provided【讲的是maven的继承关系等等,感觉挺好的】
如何使用idea配置tomcat并启动,可以参考我之前的笔记【黑马笔记】IDEA配置Tomcat


 148
148


 被折叠的 条评论
为什么被折叠?
被折叠的 条评论
为什么被折叠?
 到【灌水乐园】发言


