


 本文详细介绍了在Colab上使用GPU进行OpenPose、HumanParse、DensePose、ClothMask和ParseAgnostic等人体解析模型的预处理步骤。包括安装依赖、模型下载、数据准备和运行代码,以及在不同环境(如本地服务器)下的配置。这些步骤对于获取HR-VITON模型所需的输入至关重要。
Link of original Github repo
Link of personal made study case of HR-VITON
Content
Pre
According to explanation from authors: Preprocessing.md. At least a few steps are needed for getting all required inputs of model.
- OpenPose
- Human Parse
- DensePose
- Cloth Mask
- Parse Agnostic
- Human Agnostic
Most of those are reproduced on Colab, except Human Parse, which needs Tensorflow 1.15 and GPU is highly prefered.
1、OpenPose(On colab, need GPU)
(1) Install OpenPose, taking about 15 minutes
import os
from os.path import exists, join, basename, splitext

git_repo_url = 'https://github.com/CMU-Perceptual-Computing-Lab/openpose.git'
project_name = splitext(basename(git_repo_url))[0]
if not exists(project_name):
  # see: https://github.com/CMU-Perceptual-Computing-Lab/openpose/issues/949
  # install new CMake becaue of CUDA10
  !wget -q https://cmake.org/files/v3.13/cmake-3.13.0-Linux-x86_64.tar.gz
  !tar xfz cmake-3.13.0-Linux-x86_64.tar.gz --strip-components=1 -C /usr/local
  # clone openpose
  !git clone -q --depth 1 $git_repo_url
  !sed -i 's/execute_process(COMMAND git checkout master WORKING_DIRECTORY ${CMAKE_SOURCE_DIR}\/3rdparty\/caffe)/execute_process(COMMAND git checkout f019d0dfe86f49d1140961f8c7dec22130c83154 WORKING_DIRECTORY ${CMAKE_SOURCE_DIR}\/3rdparty\/caffe)/g' openpose/CMakeLists.txt
  # install system dependencies
  !apt-get -qq install -y libatlas-base-dev libprotobuf-dev libleveldb-dev libsnappy-dev libhdf5-serial-dev protobuf-compiler libgflags-dev libgoogle-glog-dev liblmdb-dev opencl-headers ocl-icd-opencl-dev libviennacl-dev
  # install python dependencies
  !pip install -q youtube-dl
  # build openpose
  !cd openpose && rm -rf build || true && mkdir build && cd build && cmake .. && make -j`nproc`
Now, OpenPose will be installed under your current path.
(2) Get all needed models
!. ./openpose/models/getModels.sh
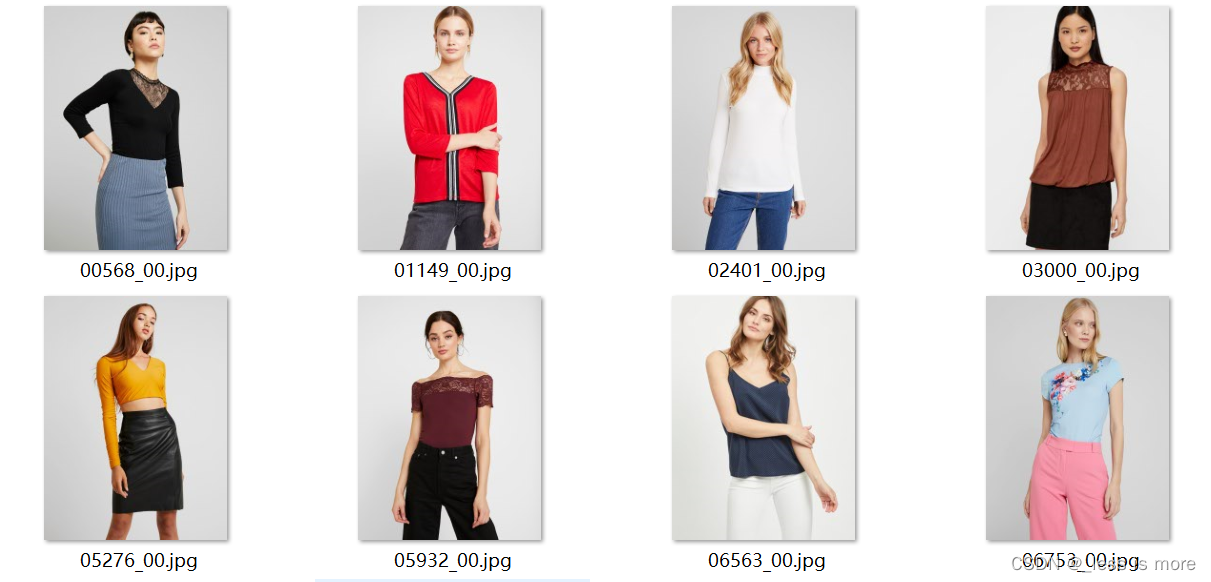
(3) Prepare your test data
# for storing input image
!mkdir ./image_path
# copy official provided data to image_path, you may need to download and unzip it in advance
!cp ./test/image/000* ./image_path/
# create directories for generated results of OpenPose
!mkdir ./json_path
!mkdir ./img_path
(4)Run
# go to openpose directory
%cd openpose
# run openpose.bin
!./build/examples/openpose/openpose.bin --image_dir ../image_path --hand --disable_blending --display 0 --write_json ../json_path --write_images ../img_path --num_gpu 1 --num_gpu_start 0
Then json files will be saved under …/json_path and images will be saved under …/img_path.
The image result looks like
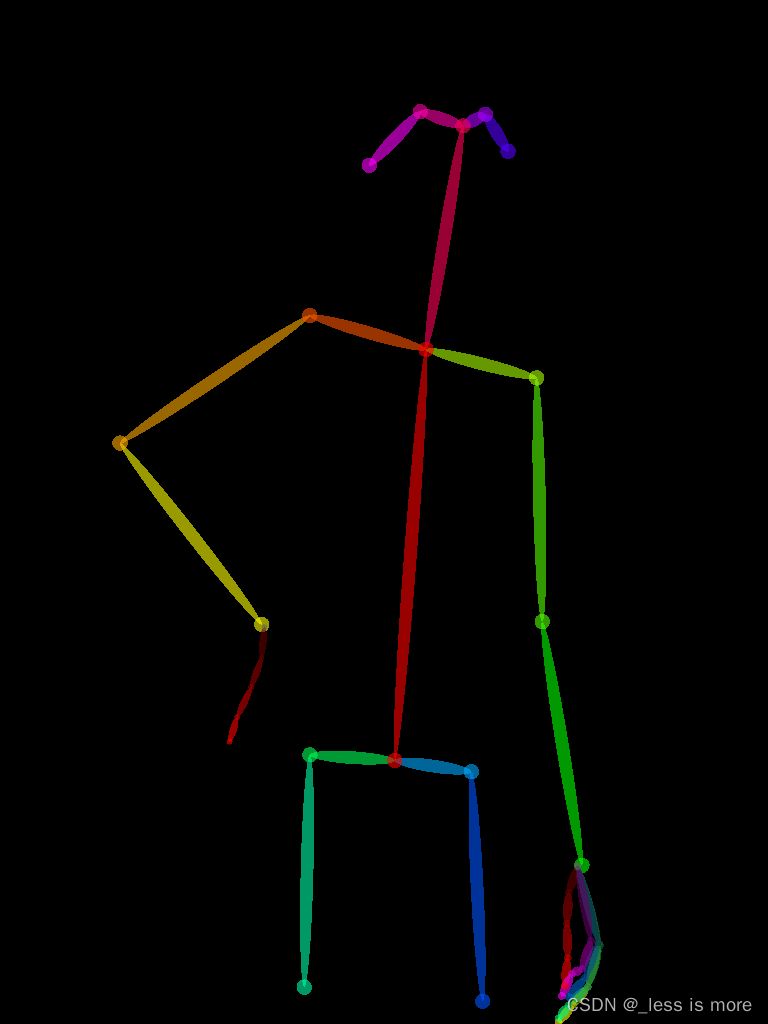
More details about results can be found at openpose
2、Human Parse
In this section, you can either do it on Colab, Cloud, or local. Unfortunately, I didn’t successfully make use of GPU on Colab, and I can only use CPU, which is super slow when image size at 768 × 1024 (about 13 minutes per image).
Method 1: Colab
If you can accept, then install Tensorflow 1.15, before which you have to change Python version to 3.7 or 3.6.
(1) Get pretrained model
%%bash
FILE_NAME='./CIHP_pgn.zip'
FILE_ID='1Mqpse5Gen4V4403wFEpv3w3JAsWw2uhk'

curl -sc /tmp/cookie "https://drive.google.com/uc?export=download&id=$FILE_ID" > /dev/null
CODE="$(awk '/_warning_/ {print $NF}' /tmp/cookie)"
curl -Lb /tmp/cookie "https://drive.google.com/uc?export=download&confirm=${CODE}&id=$FILE_ID" -o $FILE_NAME
unzip
!unzip CIHP_pgn.zip
(2) Get repo
!cp -r /content/drive/MyDrive/CIHP_PGN ./
%cd CIHP_PGN
Note: I just saved the repo and cleaned it for my own purpose, but you can use official provided code as well.
(3) Prepare data and model
!mkdir -p ./checkpoint
!mkdir -p ./datasets/images
# You also need to download dataset provided or use your own images
!mv ../CIHP_pgn ./checkpoint/CIHP_pgn
!cp ../test/image/0000* ./datasets/images
(4) Configuration
Change to Python 3.6
!sudo update-alternatives --config python3
Install dependencies (Tensorflow 1.15)
!sudo apt-get install python3-pip
!python -m pip install --upgrade pip
!pip install matplotlib opencv-python==4.2.0.32 Pillow scipy tensorflow==1.15
!pip install ipykernel
(5) Run
now you can run your code
!python ./inference_pgn.py
Note: In official repo, the file is named inf_pgn.py, which leads to the same result as mine.
Finally, you can get result looks like
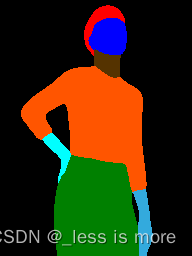
More details can be found at CIHP_PGN
Method 2: Local or Server
In this section, I will give more explanation about what we really need.
You need conda in this part, which is what I used at least.
(1) Create a new env for oldschool Tensorflow
conda create -n tf python=3.7
(2) Configuration
conda activate tf
install GPU dependencies: cudatoolkit=10.0 cudnn=7.6.5
conda install -c conda-forge cudatoolkit=10.0 cudnn=7.6.5
install Tensorflow 1.15 GPU
pip install tensorflow-gpu==1.15
You may need to install below in a new env
pip install scipy==1.7.3 opencv-python==4.5.5.62 protobuf==3.19.1 Pillow==9.0.1 matplotlib==3.5.1
More info about compatibility between Tensorflow and CUDA can be found here
(3) Prepare data, repo and model as mentioned before
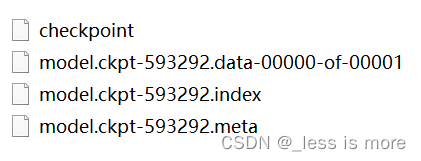
A final dir looks like
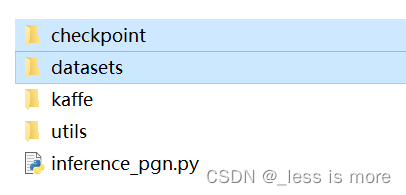
So you basically just put model under checkpoint/CIHP_pgn
And put data under datasets/images
It can be just a few images of people. A repo of my cleaned version can be found at Google Drive. Feel free to download it. If you use official provided inf_pgn.py, same results will be generated.
(4) Run
python inference_pgn.py
Then you should see the output. Unfortunately, I didn’t make it inference with GPU, no matter on server or local.
At local, my GPU is MX250 with 2G memory, which is not enough for inference.
At server, the GPU is RTX A5000, but for some unknown reason, probably something incompatible, the GPU is not invoked for inference. But model is successfully loaded into GPU though.
Fortunately, the server I used has 24 Cores and supports 2 threads per Core, which make it running still fast (20 to 30 seconds per 768×1024 image) even with CPU.
Final result looks like
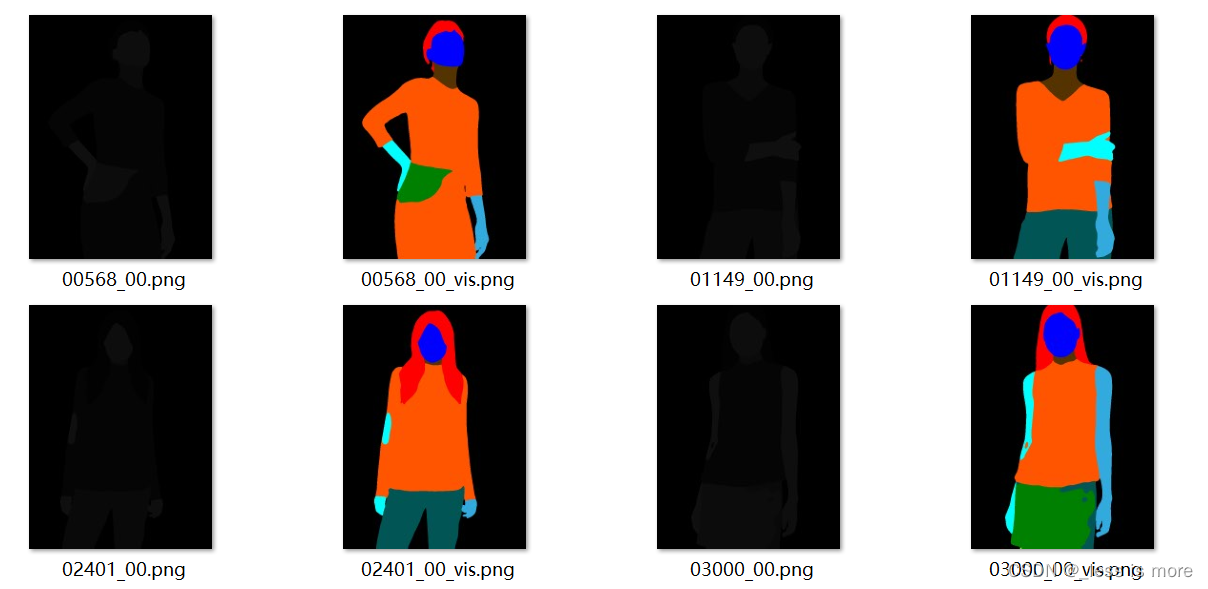
However, the result inferenced with input of 768×1024 is not the same as input of 192×256. The former looks worse as shown above.
Note: The black images are what we really need, because the values of colored one are for example 0, 51, 85, 128, 170, 221, 255, which are not from 0 - 20 and inconsistant with HR-VITON. The values of black one are for example 0, 2, 5, 10, 12, 13, 14, 15, which are needed as labels for getting agnostic images.
One thing to mention, the images provided by official dataset keep both visualization (colored) and label (0 - 20). I don’t know how they did that. I also tried P mode in PIL, but found nothing.
The color and corresponding label: (See Github Issue)
Back 最低0.47元/天 解锁文章


 4597
4597

 被折叠的 条评论
为什么被折叠?
被折叠的 条评论
为什么被折叠?
 到【灌水乐园】发言


