


本文主要实现了两个类型的流光效果,一个是Unilt shader实现的法阵流光,另一个是SurfaceShader实现的武器流光,其实也可以用Unilt shader实现,只是SurfaceShader的金属效果实现起来更加的简单。
先来看效果,开始是法阵流光

这个shader主要参考了本篇博客从圆心向外流光的魔法阵shader.
下一个是武器流光

由于UV的原因导致流光方向不一致,要是有个遮罩图就好了
以下是法阵流光的代码
Shader "Learn/FlowInsideOut"
{
	Properties
	{
		_MainTex ("Texture", 2D) = "white" {}
		_FlowColor ("Flow Color", Color) = (1, 1, 1, 1)//流光颜色
        _Period ("Period (Seconds)", float) = 1//周期
        _FlowWidth ("Flow Width", Range(0, 1)) = 0.1//宽度
        _FlowTex ("Flow Texture (RGB)", 2D) = "black" {}//光带从内环到外环的alpha分布贴图
    }
	SubShader
	{
        CGINCLUDE
        #include "UnityCG.cginc"

        sampler2D _MainTex;
        fixed4 _FlowColor;
        float _Period;
        fixed _FlowWidth;
        sampler2D _FlowTex;

        struct appdata_t {
            float4 vertex : POSITION;
            half2 texcoord : TEXCOORD0;
        };

        struct v2f {
            float4 pos : POSITION;
            half2 mainTex : TEXCOORD0;
        };

        v2f vert (appdata_t v)
        {
            v2f o;
            o.pos = UnityObjectToClipPos(v.vertex);
            o.mainTex = v.texcoord;
            return o;
        }

        fixed4 frag (v2f i) : COLOR
        {
            fixed4 baseColor = tex2D(_MainTex, i.mainTex);
            float2 center=float2(0.5,0.5);
            //float2 test=float2(i.mainTex.x*0.8+0.1,i.mainTex.y*0.6+0.2);
            float r=distance(i.mainTex,center);
            float radiusMax=0.5;
            float flowRadiusMax=fmod(_Time.y,_Period)/_Period*(radiusMax+_FlowWidth);
            float flowRadiusMin=flowRadiusMax-_FlowWidth;
            float isInFlow=step(flowRadiusMin,r)-step(flowRadiusMax,r);
            float2 flowTexUV = float2((r - flowRadiusMin) / (flowRadiusMax - flowRadiusMin), 0);
            fixed4 finalColor=baseColor+isInFlow*_FlowColor*baseColor*tex2D(_FlowTex,flowTexUV);
            return finalColor;
        }
        ENDCG
		Pass
		{
			Tags {"Queue"="Transparent" "IgnoreProjector"="True" "RenderType"="Transparent"}
        	Cull Off
        	Lighting Off
        	ZWrite Off
        	Fog { Mode Off }
        	Blend One One

			CGPROGRAM
            #pragma vertex vert
            #pragma fragment frag
            ENDCG
		}
	}
	FallBack "Diffuse"
}
float2 center=float2(0.5,0.5);
本行代码是设置UV的中心,因为流光由中心向外扩散,但这有个缺点,那就是只能用正方形的贴图,否则流光会是个椭圆。
以下是解决方案
//float2 test=float2(i.mainTex.x*0.8+0.1,i.mainTex.y*0.6+0.2);
//float r=distance(test);
注释掉的代码就是用了一张8:6的图并进行了位置修正
float flowRadiusMax=fmod(_Time.y,_Period)/_Period*(radiusMax+_FlowWidth);
float flowRadiusMin=flowRadiusMax-_FlowWidth;
计算流光的范围,fmod(返回a / b的浮点余数)。
float isInFlow=step(flowRadiusMin,r)-step(flowRadiusMax,r);
step 返回(x >= a)? 1 : 0。计算是否位于流光范围
float2 flowTexUV = float2((r - flowRadiusMin) / (flowRadiusMax - flowRadiusMin), 0);
计算流光纹理坐标
fixed4 finalColor=baseColor+isInFlow*_FlowColor*baseColor*tex2D(_FlowTex,flowTexUV);
alpha分布贴图

以下是武器流光的代码
Shader "MySurfShader/MyFirstSurfaceShader" {
	Properties {
		_Color ("Color", Color) = (1,1,1,1)
		_MainTex ("Albedo (RGB)", 2D) = "white" {}
		_LiuGuangTex ("流光 (RGB)", 2D) = "white" {}//流光图
		_Glossiness ("Smoothness", Range(0,1)) = 0.5
		_Metallic ("Metallic", Range(0,1)) = 0.0
		_LiuGuangCol("流光颜色",Color)=(1,1,1,1)
		_LightWidth("宽度",Range(0.0,1.0))=1.0
		_SpeedX("X轴速度",Range(0.0,1.0))=0.5
		_SpeedY("Y轴速度",Range(0.0,1.0))=0.3
	}
	SubShader {
		Tags { "RenderType"="Opaque" }
		LOD 200

		CGPROGRAM
		// Physically based Standard lighting model, and enable shadows on all light types
		#pragma surface surf Standard fullforwardshadows

		// Use shader model 3.0 target, to get nicer looking lighting
		#pragma target 3.0

		sampler2D _MainTex;
		sampler2D _LiuGuangTex;

		struct Input {
			float2 uv_MainTex;
		};

		half _Glossiness;
		half _Metallic;
		fixed4 _Color;
		fixed4 _LiuGuangCol;
		fixed _LightWidth;
		fixed _SpeedX;
		fixed _SpeedY;

		UNITY_INSTANCING_BUFFER_START(Props)
			// put more per-instance properties here
		UNITY_INSTANCING_BUFFER_END(Props)

		void surf (Input IN, inout SurfaceOutputStandard o) {
			// Albedo comes from a texture tinted by color
			float2 uv=IN.uv_MainTex/_LightWidth;
			uv.x+=_Time.y*_SpeedX;
			uv.y+=_Time.y*_SpeedY;
			fixed light=tex2D(_LiuGuangTex,uv).b;
			fixed4 c = tex2D (_MainTex, IN.uv_MainTex) * _Color+light*_LiuGuangCol;
			o.Albedo = c.rgb;
			// Metallic and smoothness come from slider variables
			o.Metallic = _Metallic;
			o.Smoothness = _Glossiness;
			o.Alpha = c.a;
		}
		ENDCG
	}
	FallBack "Diffuse"
}
	// 主要代码
	float2 uv=IN.uv_MainTex/_LightWidth;//用以调整流光宽度
	uv.x+=_Time.y*_SpeedX;//X轴偏移
	uv.y+=_Time.y*_SpeedY;//Y轴偏移
	fixed light=tex2D(_LiuGuangTex,uv).b;//对流光图采样(rgb任选一个都可以)
	fixed4 c = tex2D (_MainTex, IN.uv_MainTex) * _Color+light*_LiuGuangCol;//计算最终颜色
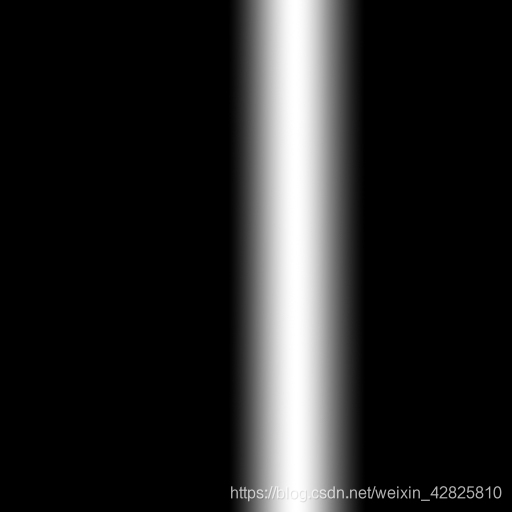
流光图:


 3263
3263


 被折叠的 条评论
为什么被折叠?
被折叠的 条评论
为什么被折叠?
 到【灌水乐园】发言


