


Arduino ESP32PWM 通过示波器对实际产生的波形测量
测试代码
  // the number of the LED pin
  const int ledPin = 16;  // 16 corresponds to GPIO16
  const int ledPin2 = 17; // 17 corresponds to GPIO17
  const int ledPin3 = 5;  // 5 corresponds to GPIO5

  // setting PWM properties
  const int freq = 10000;
  const int ledChannel = 0;
  const int resolution = 8;

  void setup(){
    // configure LED PWM functionalitites
    ledcSetup(ledChannel, freq, resolution);

    // attach the channel to the GPIO to be controlled
    ledcAttachPin(ledPin, ledChannel);
    ledcAttachPin(ledPin2, ledChannel);
    ledcAttachPin(ledPin3, ledChannel);
  }

  void loop(){
    // increase the LED brightness
    for(int dutyCycle = 0; dutyCycle <= 255; dutyCycle++){
      // changing the LED brightness with PWM
      ledcWrite(ledChannel, dutyCycle);
      delay(5);
    }

    // decrease the LED brightness
    for(int dutyCycle = 255; dutyCycle >= 0; dutyCycle--){
      // changing the LED brightness with PWM
      ledcWrite(ledChannel, dutyCycle);
      delay(5);
    }
  }
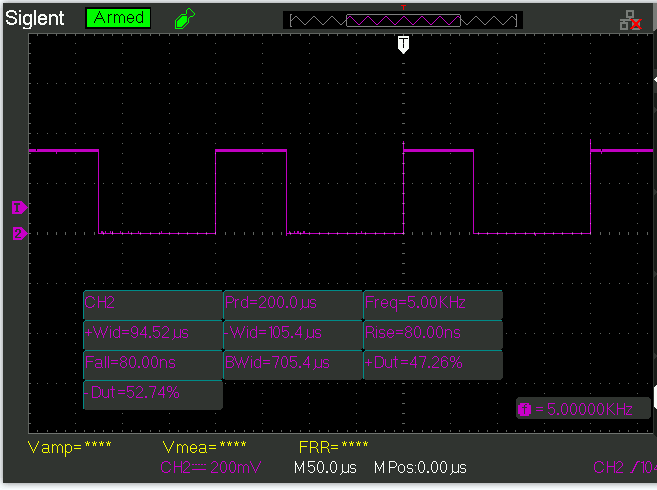
- 5KHz
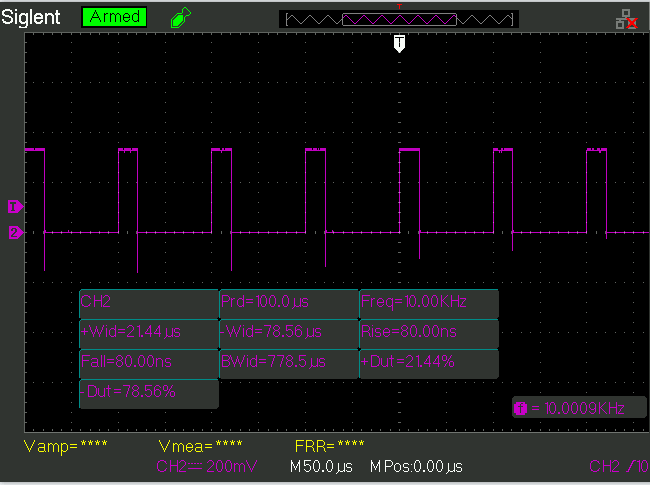
- 10KHz
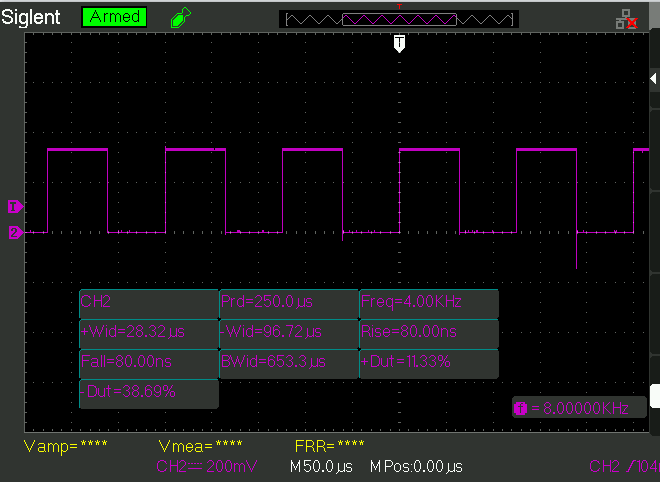
- 8KHz


 920
920


 被折叠的 条评论
为什么被折叠?
被折叠的 条评论
为什么被折叠?
 到【灌水乐园】发言


