


1. 为什么说立方缓冲几何体才是有三维操作意义的模型?
立方缓冲几何体是由大量的三角形组合而成,通过BufferGeometry就能够对组成三维模型的三角形的顶点进行操作,在立方体的基础上操作三角形顶点创作出不同的效果
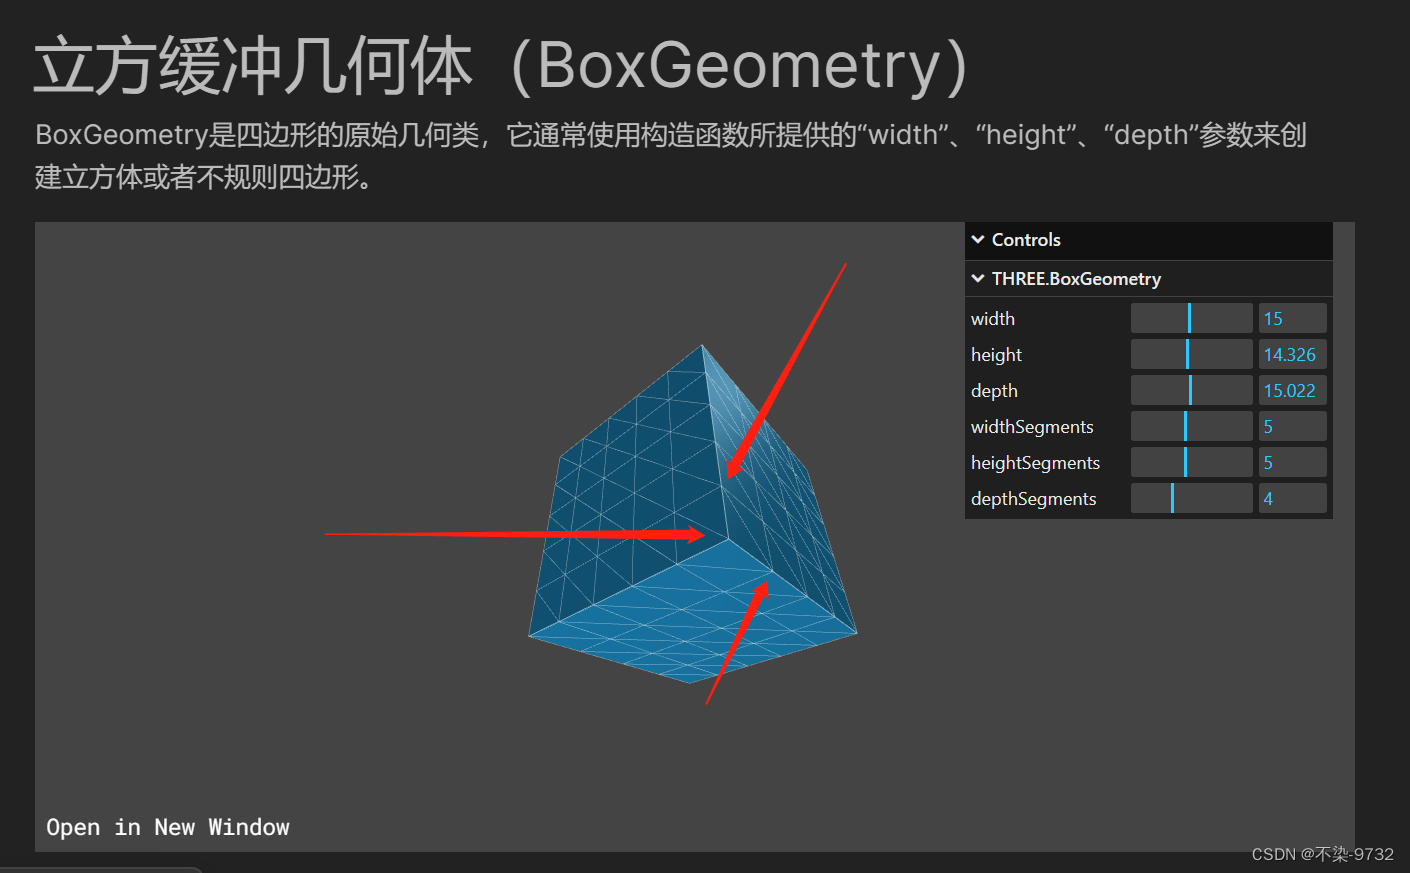
上图效果大家可以在这里进行体验:https://www.three3d.cn/docs/index.html?q=geometry#api/zh/geometries/BoxGeometry
2. 使用BufferGeometry创建顶点使用三角形围成一个面
// 创建一个几何体对象
const geometry = new THREE.BufferGeometry()
const vertices =new  Float32Array([
    -1.0,-1.0,1.0,
    1.0,-1.0,1.0,
    1.0,1.0,1.0,
    1.0,1.0,1.0,
    -1.0,1.0,1.0,
    -1.0,-1.0,1.0,
])

geometry.setAttribute('position',new THREE.BufferAttribute(vertices,3)) //缓冲区属性对象BufferAttribute(vertices,每几个值作为一个坐标)
const material = new THREE.MeshBasicMaterial({
    color: 0xffff00
})
// 根据几何体和材质创建一个物体
const mesh = new THREE.Mesh(geometry, material)
console.log(mesh);
// 将几何体添加到场景中
scene.add(mesh)
3.创建的六个顶点组成的面的效果如下
](https://img-blog.csdnimg.cn/6cca9640a36946bbb103973134dd448c.gif)
4. 页面完整代码
import * as THREE from 'three'
// 导入轨道控制器
import {
    OrbitControls
} from 'three/examples/jsm/controls/OrbitControls'
// console.log(THREE);

// 2023.05.02  导入gsap动画库
import gsap from 'gsap'
// 2023.05.04  导入datgui
import * as dat from 'dat.gui'

// 基础内容

// 1.创建场景
const scene = new THREE.Scene()
// 2.创建相机
const camera = new THREE.PerspectiveCamera(
    75,
    window.innerWidth / window.innerHeight,
    0.1,
    1000
) //透视相机(角度,宽高比,近端,远端)

camera.position.set(0, 0, 10) //修改相机位置

scene.add(camera) //将相机添加到场景中

// 添加物体
// 创建一个几何体对象
const cubeGeometry = new THREE.BoxGeometry(1, 1, 1)
const cubeMaterial = new THREE.MeshBasicMaterial({
    color: 0xffff00
})
// 根据几何体和材质创建一个物体
const cube = new THREE.Mesh(cubeGeometry, cubeMaterial)

const geometry = new THREE.BufferGeometry()
const vertices =new  Float32Array([
    -1.0,-1.0,1.0,
    1.0,-1.0,1.0,
    1.0,1.0,1.0,
    1.0,1.0,1.0,
    -1.0,1.0,1.0,
    -1.0,-1.0,1.0,
])

geometry.setAttribute('position',new THREE.BufferAttribute(vertices,3)) //缓冲区属性对象BufferAttribute(vertices,每几个值作为一个坐标)
const material = new THREE.MeshBasicMaterial({
    color: 0xffff00
})
const mesh = new THREE.Mesh(geometry, material)
// 将几何体添加到场景中
scene.add(mesh)


//初始化渲染器
const renderer = new THREE.WebGLRenderer()

//设置渲染的尺寸大小
renderer.setSize(window.innerWidth, window.innerHeight)
console.log(renderer);

// 将webgl渲染的canves内容添加到body上
document.body.appendChild(renderer.domElement)

// 使用渲染器,通过相机,将场景渲染进来
// renderer.render(scene, camera)


// 2023.04.26 使用控制器查看3d物体
// 创建轨道控制器
const controls = new OrbitControls(camera, renderer.domElement) //第一个参数是相机对象,第二个参数是渲染器
// 设置控制器的阻尼感  有真实感  必须在循环调用update()
controls.enableDamping = true
// 添加坐标轴辅助器
const axesHelper = new THREE.AxesHelper(5) //参数5代表长度
scene.add(axesHelper) //添加完成后出现坐标轴辅助器

// 2023.05.02  使用补间动画实现动画的操作
// 设置动画 2023.05.04
// let animate1 = gsap.to(cube.position, {
//     x: 5,
//     duration: 5,
//     ease: "bounce.out",
//     repeat: 3, //重复次数
//     // repeat:-1,//-1表示无限循环
//     yoyo: true, //开启往返运动
//     // delay:2,//延迟两秒移动
//     onComplete: () => {
//         console.log('动画完成了:');
//     },
//     onStart: () => {
//         console.log('动画开始了:');
//     }
// }) //参数解释:让(要操作的对象,{哪一条轴:运动到什么位置,duration:花费多少秒})
// 设置旋转 2023.05.04
// gsap.to(cube.rotation, {
//     x: 2 * Math.PI,
//     duration: 5,
//     ease: "power4.in"
// })
// 双击暂停/开始动画  2023.05.03
// window.addEventListener('dblclick', () => {
//     console.log(animate1);
//     if (animate1.isActive()) {
//         animate1.pause() //暂停
//     } else {
//         animate1.resume() //恢复
//     }
// })
// 双击控制开启关闭全屏  2023.05.04
window.addEventListener('dblclick', () => {
    const fullscreenElement = document.fullscreenElement
    console.log('执行了双击', fullscreenElement);
    if (fullscreenElement) {
        document.exitFullscreen()
    } else {
        renderer.domElement.requestFullscreen()
    }
})

// 设置一个渲染函数,浏览器每次刷新重新加载渲染器
// function render(time) {
function render() {
    controls.update()
    renderer.render(scene, camera) //渲染器
    requestAnimationFrame(render) //requestAnimationFrame==》请求动画帧 接收一个渲染函数  渲染下一帧的时候就会执行render函数
}

// 2023.05.04  监听画面变化,更新渲染画面
window.addEventListener('resize', () => {
    console.log('画面变化了,宽高适配执行');
    //更新摄像头
    camera.aspect = window.innerWidth / window.innerHeight
    // 更新摄像机的投影矩阵
    camera.updateProjectionMatrix()
    // 更新渲染器
    renderer.setSize(window.innerWidth, window.innerHeight)
    renderer.setPixelRatio(window.devicePixelRatio)
})

// 创建gui工作台
const gui = new dat.GUI()
gui.add(cube.position, 'x').min(0).max(5).step(0.01).name('x轴').onChange((value) => {
    console.log('x轴结果被实时修改为:', value);
}).onFinishChange((value) => {
    console.log('x轴最终的结果为:', value);
}) //参数解释   (控制的目标,'参数名称').min(最小值).max(最大值).step(每一步的步长)

// 修改颜色
const params = {
    color:"#ffff00",
    fn:()=>{
        //让cube动起来
        gsap.to(cube.position,{x:5,duration:3,yoyo:true,repeat:-1,ease: "bounce.out",})
    }
}
gui.addColor(params,'color').name('颜色修改').onChange((value)=>{
    console.log('颜色为:',value);
    cube.material.color.set(value)
})
// 控制是否显示
gui.add(cube,'visible').name('是否显示')

//设置按钮触发事件(动画事件)
// gui.add(params,'fn').name('开启x轴运动')

// 为工具栏添加一个文件夹
var folder=gui.addFolder('设置立方体')
folder.add(cube.material,'wireframe').name('设置线框')
folder.add(params,'fn').name('x轴运动')

render() //一开始的时候渲染一下


 965
965


 被折叠的 条评论
为什么被折叠?
被折叠的 条评论
为什么被折叠?
 到【灌水乐园】发言


