


围栅使用方法
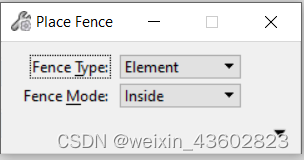
使用元素创建围栅
该方法类似于使用MicroStation软件中的选择元素建立围栅的方法,确定构造围栅的元素后,他会根据选取的元素构造出一个垂直于该元素的三维围栅体,获得该区域的所有元素
public static void FilterByScanCriteria(string unparsed)//Case:ScanCriteriaCase
{
    DgnModel dgnModel = Session.Instance.GetActiveDgnModel();//获得当前激活的模型控件
    double uorPerMas = Session.Instance.GetActiveDgnModel().GetModelInfo().UorPerMaster;//分辨率单位转换为主单位

    ScanCriteria sc = new ScanCriteria();//声明扫描标准
    sc.SetModelRef(dgnModel);//设置扫描目标模型
    sc.SetModelSections(DgnModelSections.GraphicElements);//设置扫描部分(本案例中仅扫描图形元素)

    BitMask elemTypeMask = new BitMask(false);//声明可变位数组
    elemTypeMask.Capacity = 128;//设置数组容量
    elemTypeMask.ClearAll();
    // Element Type Number - 1 = BitMask Index
    elemTypeMask.SetBit(18, true); // Element Type = Solid (Not SmartSolid), or (int)MSElementType.Solid - 1 设置筛选元素类型
    sc.SetElementTypeTest(elemTypeMask);//将可变位数组应用于扫描标准
    ScanRange range = new ScanRange((long)(99439.621 * uorPerMas), (long)(79738.341 * uorPerMas), 0, (long)(99701.215 * uorPerMas), (long)(79946.173 * uorPerMas), 0);//设置扫描范围
    sc.SetRangeTest(range);//将扫描范围应用于扫描标准 注:若无范围要求不进行该项设置即可

    string result = "The result of scan is:\n";//声明字符串
    ScanDelegate scanDelegate = (Element elem, DgnModelRef modelRef) =>//声明扫描委托
    {
        //若扫描到符合条件的目标后执行的操作
        result = result + "ElmentId = " + elem.ElementId + ", element type = " + elem.TypeName + '\n';
        return StatusInt.Success;//返回成功
    };
    sc.Scan(scanDelegate);//执行扫描
    MessageBox.Show(result);//将字符串结果输出到对话框
}
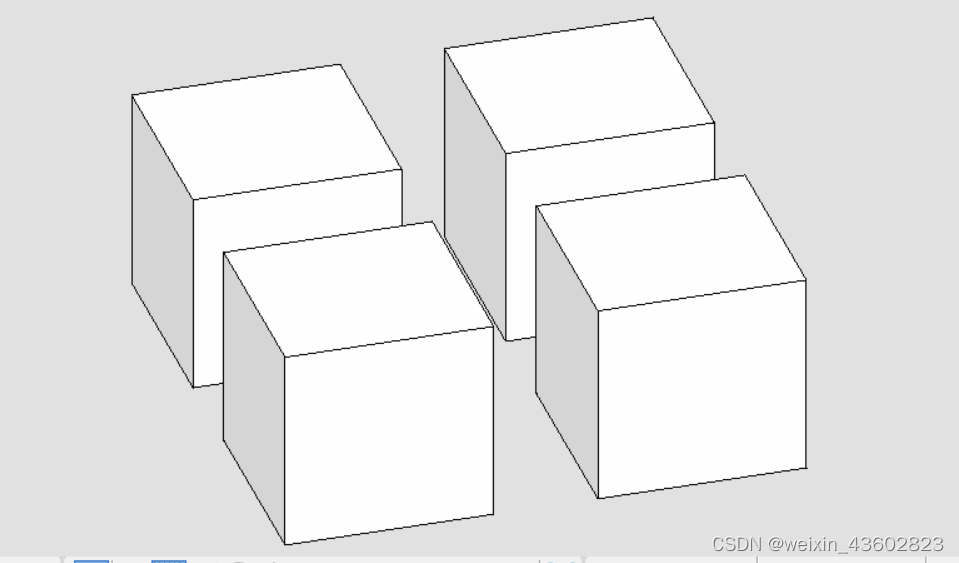
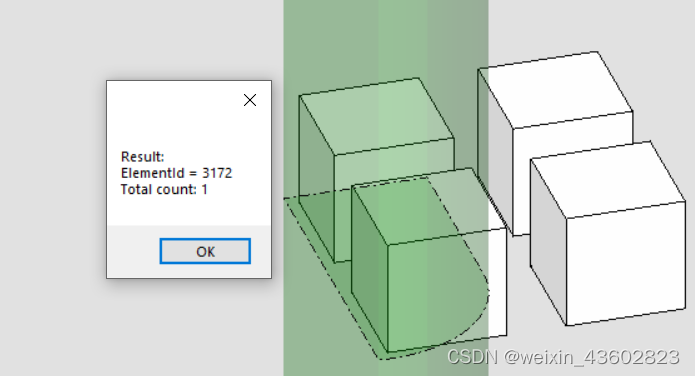
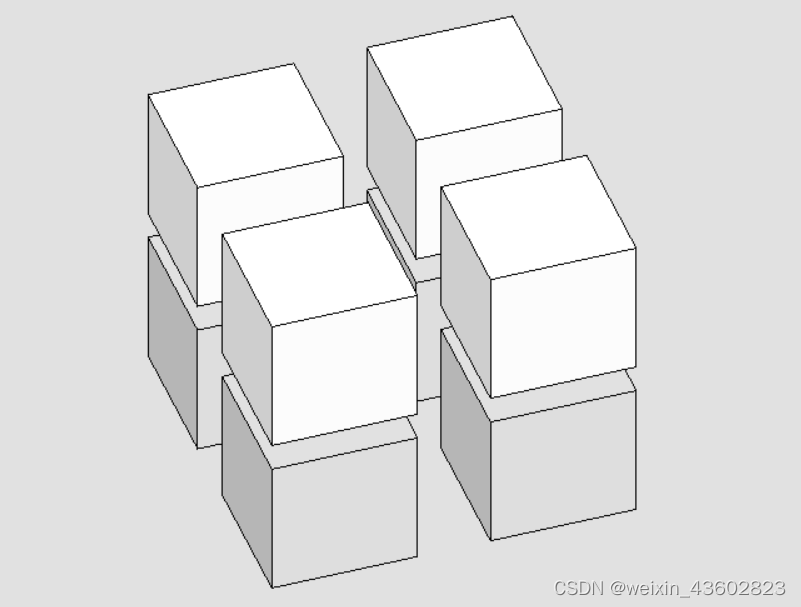
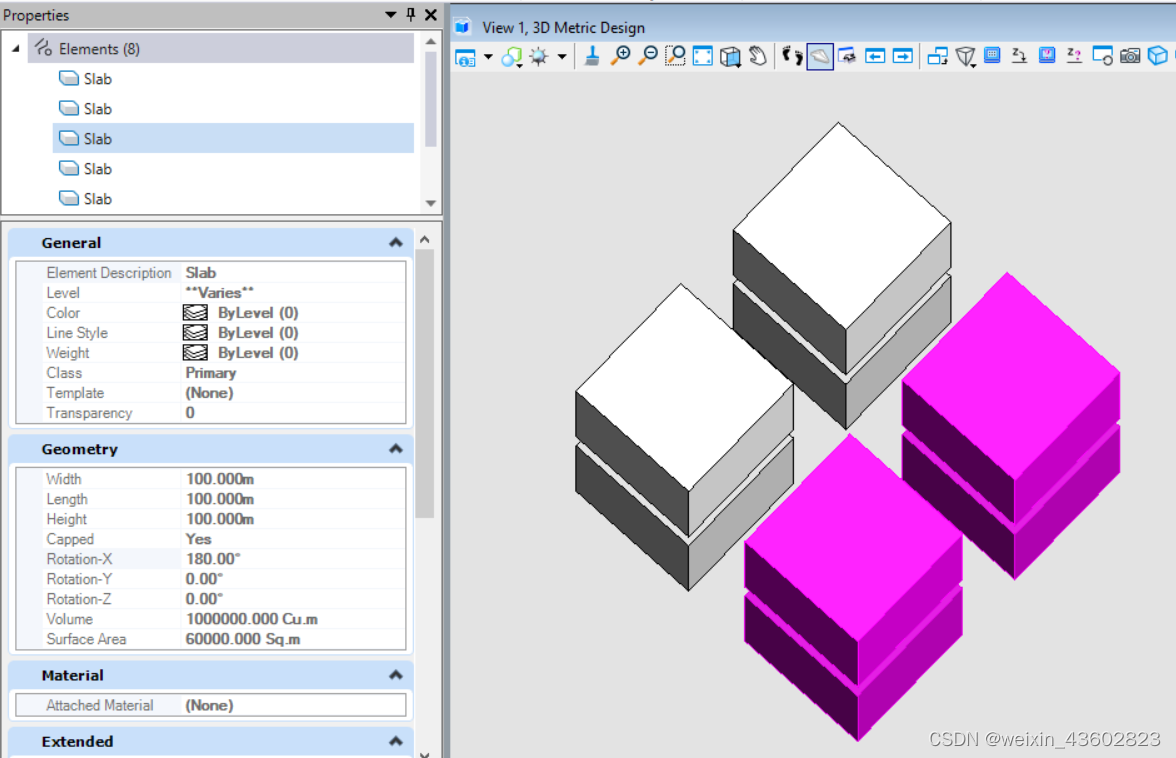
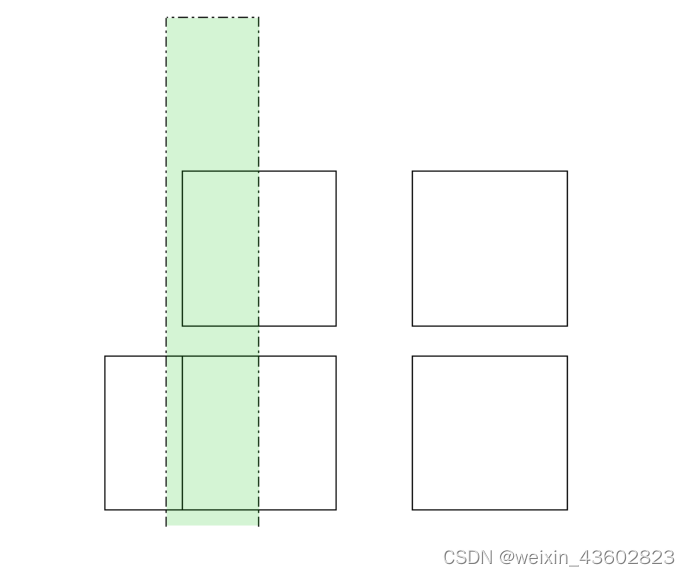
在文件名为FenceClipByElement的案例中,预先建立了四个实体元素,然后我们首先使用形元素创建围栅的轮廓并定义围栅,规定只有围栅完全包含元素才能获取元素(InitFromActiveFence()中第二个参数控制),最终获得完全包含在围栅的元素。
使用点集创建围栅
该方法类似于MicroStation中围栅功能中通过绘制创建围栅的方法。与前者不同的是,前者视角对于围栅的建立没有影响,他只根据创建元素的垂直法线建立围栅;而该方法高度依赖视角的变化,若视角不同,则获取到围栅内元素的结果也会不同。
public static void CreateFenceByElement(string unparsed)//Case:FenceClipByElement
{
    DgnModelRef dgnModelRef = Session.Instance.GetActiveDgnModelRef();//获得当前的模型空间/参照空间 注:DgnModelRef是一个基类,DgnModel和DgnAttachment都派生于这个基类
    DgnModel dgnModel = Session.Instance.GetActiveDgnModel();//获得当前激活的模型控件
    Viewport view = Session.GetActiveViewport();//获得当前视图信息
    double uorPerMas = Session.Instance.GetActiveDgnModel().GetModelInfo().UorPerMaster;//分辨率单位转换为主单位

    #region Create complex shape element
    DPoint3d p1 = new DPoint3d(-10*uorPerMas,0,0);//声明线串元素端点
    DPoint3d p2 = new DPoint3d(-10 * uorPerMas, 260*uorPerMas,0);
    DPoint3d p3 = new DPoint3d(110*uorPerMas,260*uorPerMas,0);
    DPoint3d p4 = new DPoint3d(110*uorPerMas,110*uorPerMas,0);
    DPoint3d[] pos = { p1,p2,p3,p4 };//声明端点集
    LineStringElement lineString = new LineStringElement(dgnModel,null,pos);//声明线串元素

    DPoint3d centerPo = new DPoint3d(0,100*uorPerMas,0);//声明弧元素的圆心
    ArcElement arc = new ArcElement(dgnModel,null, centerPo,110*uorPerMas,110*uorPerMas,DMatrix3d.Identity, 0, -Angle.PI.Radians / 2);//声明弧元素

    ComplexShapeElement complexShape = new ComplexShapeElement(dgnModel,null);//声明复杂形元素
    complexShape.AddComponentElement(lineString);//将子构件添加到复杂元素中
    complexShape.AddComponentElement(arc);
    complexShape.AddComponentComplete();//子构件添加完成
    #endregion

    if (StatusInt.Success == FenceManager.DefineByElement(complexShape, view))//使用元素围成的区域声明围栅
    {
        FenceParameters fenceParams = new FenceParameters(dgnModelRef, DTransform3d.Identity);//声明围栅信息
        FenceManager.InitFromActiveFence(fenceParams, false, false, FenceClipMode.None);
        /*
         * 使用围栅信息初始化围栅
         * fenceParameters:围栅信息
         * overlap:若需囊括部分包含的元素则输入true
         * doClip:若需修剪操作则输入true
         * allowClipFlag:若需要在原始元素上剪切则输入FenceClipMode.Original,若需要在新声明的元素上剪切则输入FenceClipMode.Copy
         */
        ElementAgenda eAgenda = new ElementAgenda();//声明元素容器
        DgnModelRef[] modelRefList = new DgnModelRef[1];//设置需要声明围栅的模型空间
        modelRefList[0] = dgnModelRef;//设置模型空间
        FenceManager.BuildAgenda(fenceParams, eAgenda, modelRefList, false, false, false);
        /*
         * 使用围栅信息获得符合要求的元素集
         * fenceParameters:围栅信息
         * elementAgenda:符合要求的元素集
         * modelRefList:声明围栅的模型空间
         * modifyOrig:是否修改原始元素
         * allowLocked:是否允许锁定元素
         * callAsynch:是否需要调用异步
         */
        string result = "Result:\n";//声明字符串
        for (uint i = 0; i < eAgenda.GetCount(); i++)//遍历元素容器中的元素
        {
            Element element = eAgenda.GetEntry(i);//获得元素容器中的元素
            result = result + "ElementId = " + element.ElementId + '\n';//将元素ID写入模型
        }
        result = result + "Total count: " + eAgenda.GetCount();//输出元素个数
        MessageBox.Show(result);//将字符串输出到对话框中
    }
}
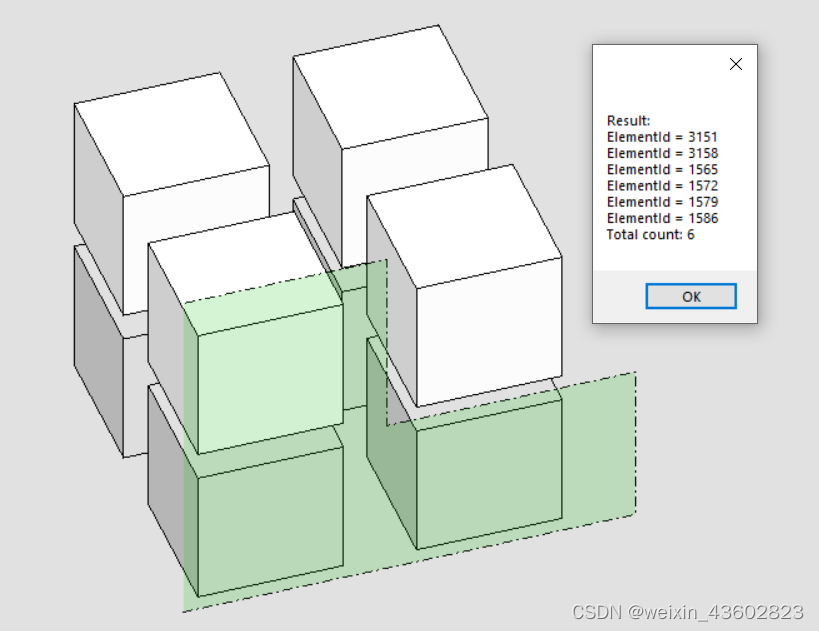
在文件名为FenceClipByPoints的案例中,上方四个实体元素时参照其他模型的元素,下发四个实体元素为该模型的中的元素,首先使用点集构建出围栅轮廓,然后围栅会以视图方向为围栅法线方向构建围栅并获得囊括在围栅内的元素集合。在定义围栅时InitFromActiveFence()中第二个参数设为真,可以看到就算是部分囊括的元素同样会被添加到元素集合中。
检索并复制围栅内元素
当我们需要对围栅内的元素进行复制,便需要首先创建围栅,而后执行元素的复制操作。需要注意的是,在本案例中使用到的围栅内元素复制方法,不仅适用于模型内元素,同样适用于参考模型元素
public static void CopyFenceByPoints(string unparsed)//Case:FenceClipByPoints
{
    DgnModelRef dgnModelRef = Session.Instance.GetActiveDgnModelRef();//获得当前的模型空间/参照空间 注:DgnModelRef是一个基类,DgnModel和DgnAttachment都派生于这个基类
    Viewport view = Session.GetActiveViewport();//获得当前视图信息
    double uorPerMas = Session.Instance.GetActiveDgnModel().GetModelInfo().UorPerMaster;//分辨率单位转换为主单位

    DPoint3d p1 = new DPoint3d(-10 * uorPerMas, 0, -130 * uorPerMas);//声明围栅坐标点
    DPoint3d p2 = new DPoint3d(300 * uorPerMas, 0, -130 * uorPerMas);
    DPoint3d p3 = new DPoint3d(300 * uorPerMas, 0, -10 * uorPerMas);
    DPoint3d p4 = new DPoint3d(130 * uorPerMas, 0, -10 * uorPerMas);
    DPoint3d p5 = new DPoint3d(130 * uorPerMas, 0, 130 * uorPerMas);
    DPoint3d p6 = new DPoint3d(-10 * uorPerMas, 0, 130 * uorPerMas);
    DPoint3d[] pos = { p1, p2, p3, p4, p5, p6 };//使用端点声明端点集
    if (StatusInt.Success == FenceManager.DefineByPoints(pos, view))//使用端点声明
    {
        FenceParameters fenceParams = new FenceParameters(dgnModelRef, DTransform3d.Identity);//声明围栅信息
        FenceManager.InitFromActiveFence(fenceParams, true, false, FenceClipMode.Copy);//使用围栅信息初始化围栅
        ElementAgenda eAgenda = new ElementAgenda();//声明元素容器
        DgnModelRef[] modelRefList = new DgnModelRef[1];//设置需要声明围栅的模型空间
        modelRefList[0] = dgnModelRef;//设置模型空间
        FenceManager.BuildAgenda(fenceParams, eAgenda, modelRefList, false, false, false);//使用围栅信息获得符合要求的元素集
        for (uint i = 0; i < eAgenda.GetCount(); i++)//遍历元素容器中的元素
        {
            using (ElementCopyContext copyContext = new ElementCopyContext(dgnModelRef))//复制元素
            {
                Element element = eAgenda.GetEntry(i);//获得元素容器中的元素
                copyContext.DoCopy(element);//将元素复制到指定模型中
            }
        }
    }
}
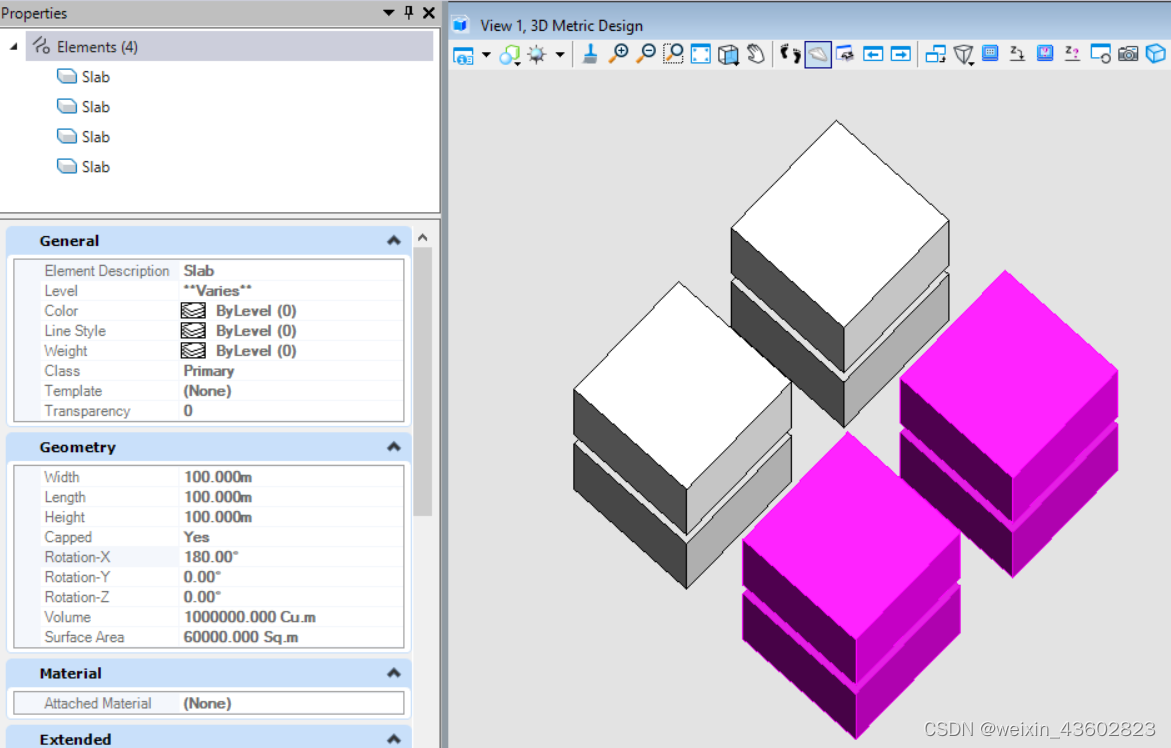
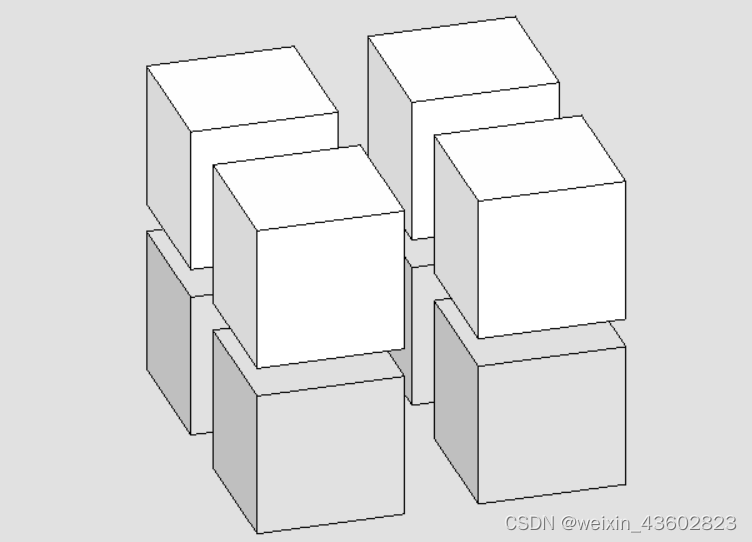
在文件名为FenceClipByPoints的案例中,上方四个实体元素是引用参照其他模型中的元素,下方四个实体元素为该模型中的元素,使用点集创建围栅的方式,对围栅内的元素进行复制操作,代码执行后可以发现无论是模型中还是参照中的元素都被顺利复制到当前模型中。注意:复制元素的目标模型由ElementCopyContext copyContext=new ElementCopyContext(dngModelRef)中的入参模型确定,若您需要复制到其他模型中,修改该入参即可实现
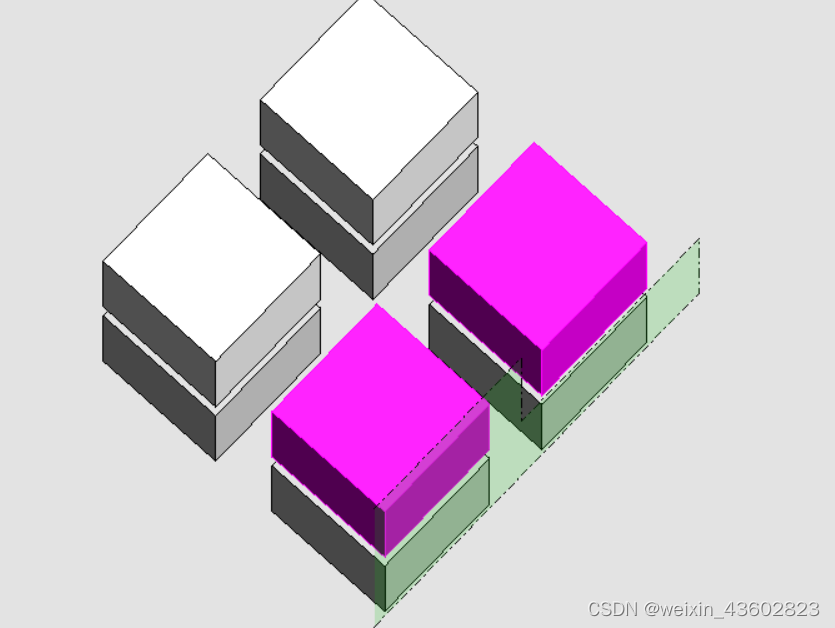
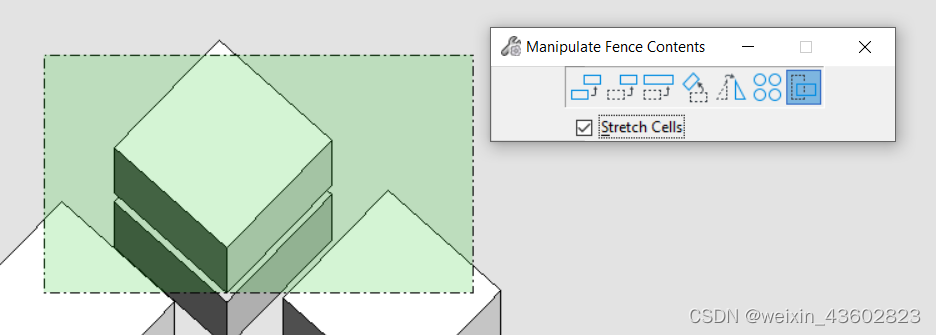
使用围栅拉伸元素
该方法类似于MicroStation中国修改围栅中的拉伸功能,该功能可以对元素以拉伸端点的方式对元素进行拉伸操作。需要注意的是,该方法无法对参照模型中的元素执行拉伸操作
public static void StretchElementByFence(string unparsed)//Case:FenceClipByPoints
{
    DgnModelRef dgnModelRef = Session.Instance.GetActiveDgnModelRef();//获得当前的模型空间/参照空间 注:DgnModelRef是一个基类,DgnModel和DgnAttachment都派生于这个基类
    Viewport view = Session.GetActiveViewport();//获得当前视图信息
    double uorPerMas = Session.Instance.GetActiveDgnModel().GetModelInfo().UorPerMaster;//分辨率单位转换为主单位

    DPoint3d p1 = new DPoint3d(-10 * uorPerMas, 0, -130 * uorPerMas);//声明围栅坐标点
    DPoint3d p2 = new DPoint3d(-10 * uorPerMas, 0, 200 * uorPerMas);
    DPoint3d p3 = new DPoint3d(50 * uorPerMas, 0, 200 * uorPerMas);
    DPoint3d p4 = new DPoint3d(50 * uorPerMas, 0, -130 * uorPerMas);
    DPoint3d[] pos = { p1, p2, p3, p4 };//使用端点声明端点集
    if (StatusInt.Success == FenceManager.DefineByPoints(pos, view))//使用端点声明
    {
        FenceParameters fenceParams = new FenceParameters(dgnModelRef, DTransform3d.Identity);//声明围栅信息
        FenceManager.InitFromActiveFence(fenceParams, true, false, FenceClipMode.None);//使用围栅信息初始化围栅
        ElementAgenda eAgenda = new ElementAgenda();//声明元素容器
        DgnModelRef[] modelRefList = new DgnModelRef[1];//设置需要声明围栅的模型空间
        modelRefList[0] = dgnModelRef;//设置模型空间
        FenceManager.BuildAgenda(fenceParams, eAgenda, modelRefList, false, false, false);//使用围栅信息获得符合要求的元素集  .
        for (uint i = 0; i < eAgenda.GetCount(); i++)//遍历元素容器中的元素
        {
            Element element = eAgenda.GetEntry(i);//获得元素容器中的元素
            DPoint3d po = new DPoint3d(-50*uorPerMas,0,0);//声明坐标点,在本文中用于表明移动的值,具体可参考元素变换课程相关内容
            StatusInt status= FenceManager.StretchElement(fenceParams, element,DTransform3d.FromTranslation(po),FenceStretchFlags.None);
            /*
             * 使用围栅对元素拉伸 注:视图对拉伸结果也有影响
             * fenceParameters:围栅信息
             * element:围栅内拉伸的元素
             * transform:变换信息
             * stretchFlags:围栅拉伸风格。若为Cells,则可拉伸用户声明的单元组件
             */
            if (status==StatusInt.Success)//判断是否拉伸成功
            {
                element.AddToModel();//将拉伸结果写入模型
            }
        }
    }
}
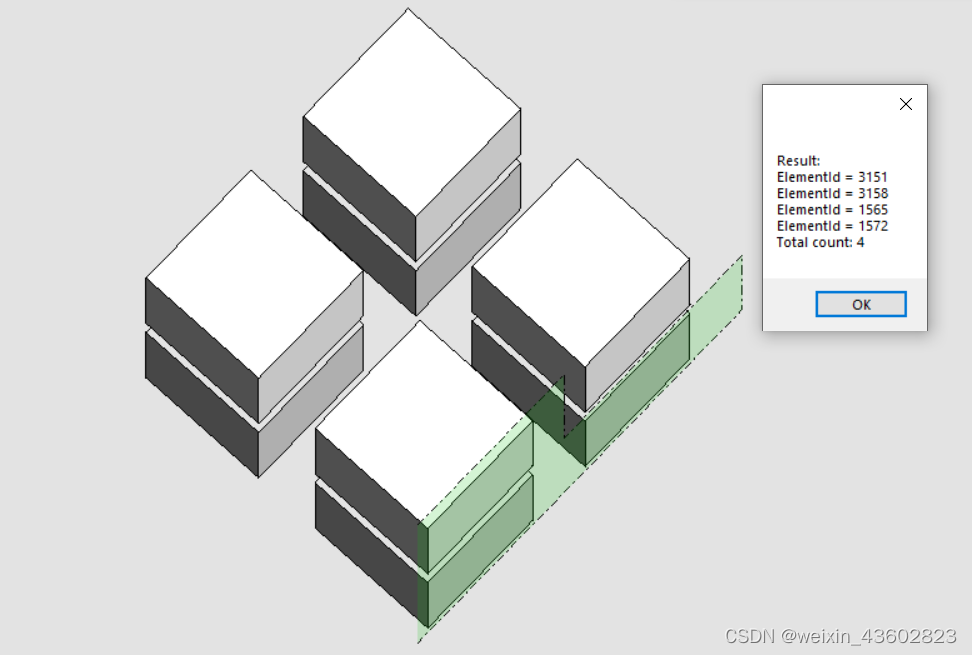
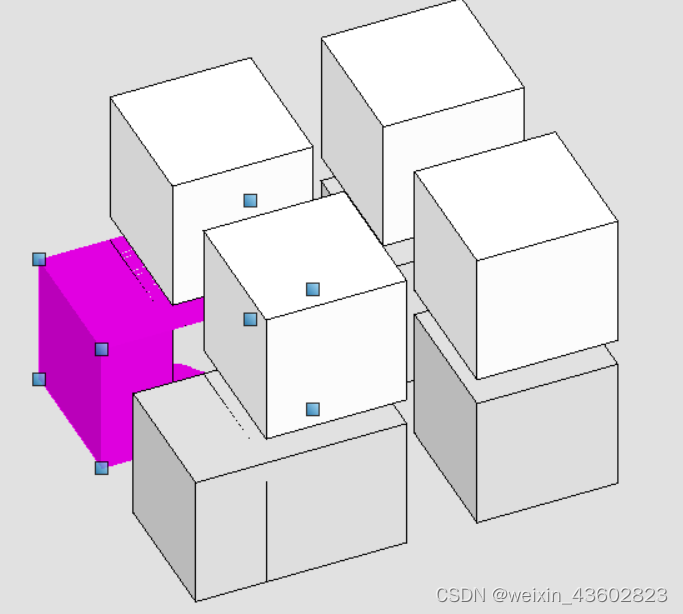
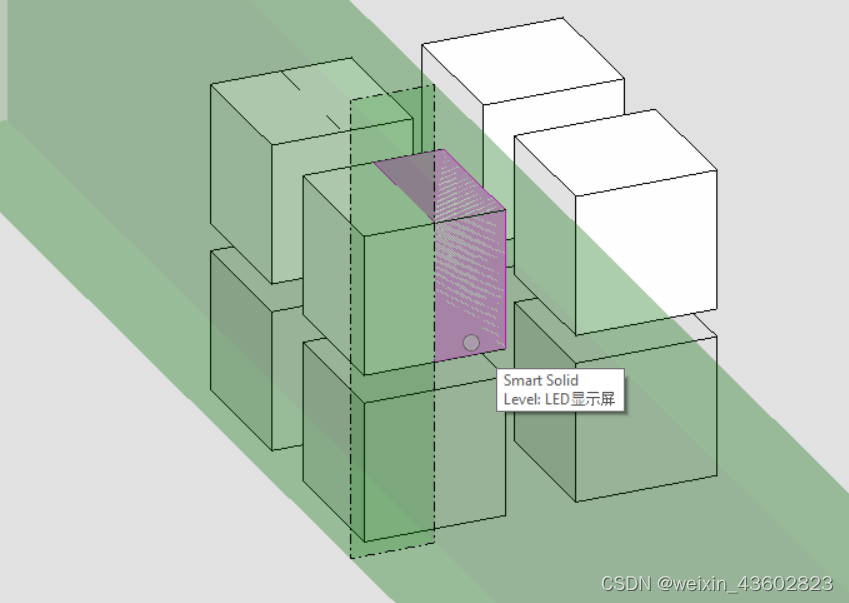
在命名为"FenceClipByPoints"的示例中,上方的四个实体元素是引用其他模型中的元素,下方的四个实体元素是本模型中的元素。首先,我们使用一组点来创建一个围栅。接下来,根据拉伸的方向和大小使用FenceManager.StretchElement()来拉伸元素。在本示例中,我们对元素的端点沿着X轴负方向进行了50单位的拉伸操作。最终的结果如图所示。从结果来看,我们无法对引用到模型中的元素执行拉伸操作,而本模型内的元素则没有此限制。
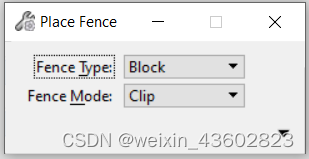
使用围栅剪切元素
该方法与MicroStation中使用的围栅剪切元素功能完全相同,可用于执行元素剪切操作。它最大的优势在于可以顺利剪切任何类型的元素。目前,在使用围栅剪切后可能会丢失一些数据,例如挂接的工程属性,同时也可能破坏原始元素内部的数据。
public static void ClipElementByFence(string unparsed)//Case:FenceClipByPoints
{
    DgnModelRef dgnModelRef = Session.Instance.GetActiveDgnModelRef();//获得当前的模型空间/参照空间 注:DgnModelRef是一个基类,DgnModel和DgnAttachment都派生于这个基类
    DgnModel dgnModel = Session.Instance.GetActiveDgnModel();//获得当前激活的模型控件
    Viewport view = Session.GetActiveViewport();//获得当前视图信息
    double uorPerMas = Session.Instance.GetActiveDgnModel().GetModelInfo().UorPerMaster;//分辨率单位转换为主单位

    DPoint3d p1 = new DPoint3d(-10 * uorPerMas, 0, -130 * uorPerMas);//声明围栅坐标点
    DPoint3d p2 = new DPoint3d(-10 * uorPerMas, 0, 200 * uorPerMas);
    DPoint3d p3 = new DPoint3d(50 * uorPerMas, 0, 200 * uorPerMas);
    DPoint3d p4 = new DPoint3d(50 * uorPerMas, 0, -130 * uorPerMas);
    DPoint3d[] pos = { p1, p2, p3, p4 };//使用端点声明端点集
    ShapeElement shape = new ShapeElement(dgnModel, null,pos);//声明形元素

    if (StatusInt.Success == FenceManager.DefineByElement(shape, view))//使用图形建立围栅
    {
        FenceParameters fenceParams = new FenceParameters(dgnModelRef, DTransform3d.Identity);//声明围栅信息
        FenceManager.InitFromActiveFence(fenceParams, true, true, FenceClipMode.Copy);//使用围栅信息初始化围栅
        ElementAgenda eAgenda = new ElementAgenda();//声明元素容器
        DgnModelRef[] modelRefList = new DgnModelRef[1];//设置需要声明围栅的模型空间
        modelRefList[0] = dgnModelRef;//设置模型空间
        FenceManager.BuildAgenda(fenceParams, eAgenda, modelRefList, false, false, false);//使用围栅信息获得符合要求的元素集
        for (uint i = 0; i < eAgenda.GetCount(); i++)//遍历元素容器中的元素
        {
            ElementAgenda insideElems = new ElementAgenda();//声明元素容器
            ElementAgenda outsideElems = new ElementAgenda();//声明元素容器
            Element element = eAgenda.GetEntry(i);//获得元素容器中的元素

            FenceManager.ClipElement(fenceParams, insideElems, outsideElems, element, FenceClipFlags.Optimized);//对围栅内的元素进行剪切
            for (uint j = 0; j < outsideElems.GetCount(); j++)//遍历围栅切割后生成的外围元素
            {
                using (ElementCopyContext copyContext = new ElementCopyContext(dgnModelRef))//复制元素
                {
                    Element elemToCopy = outsideElems.GetEntry(j);//获得切割后生成的外围元素
                    copyContext.DoCopy(elemToCopy);//将元素复制到指定模型中
                }
            }
        }
    }
}
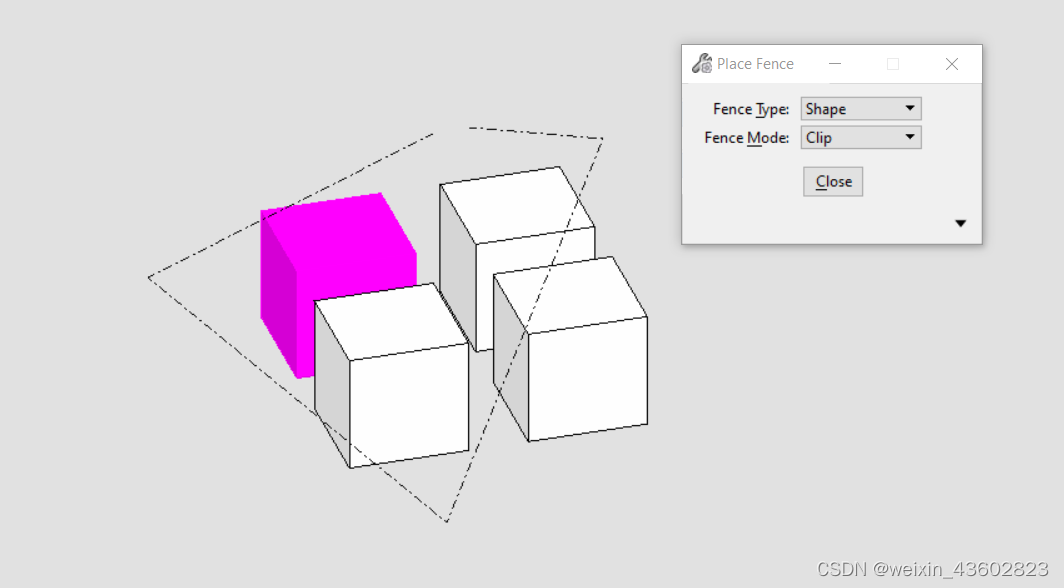
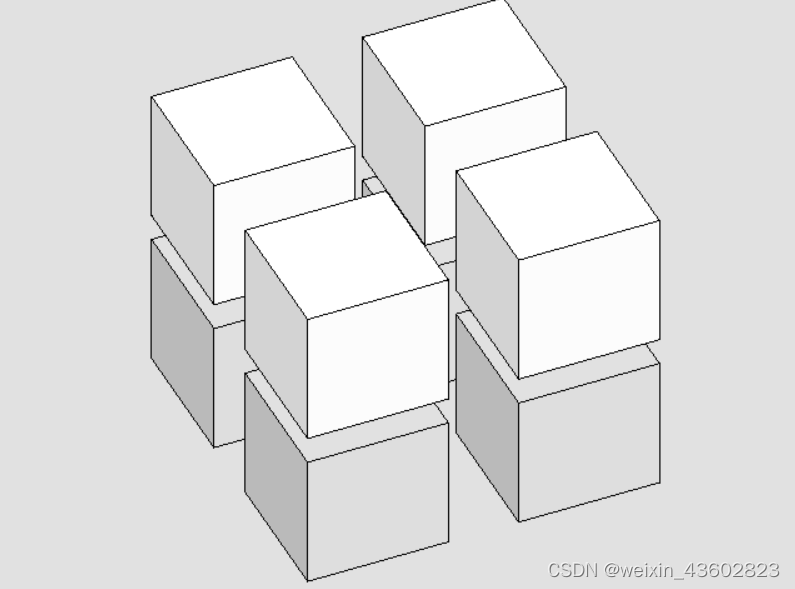
在文件名为FenceClipByPoints的案例中,上方四个实体元素是引用参照其他模型中的元素,下方四个实体元素为该模型中的元素。首先使用点集创建了一个围栅,与上面方法不同的是,在初始化围栅时,FenceManager.InitFromActiveFence( )中第三个参数用于控制围栅是否执行剪切惭怍,需要输入真,然后使用FenceManager.ClipElement( )对围栅检索到的元素使用围栅执行切割操作,最后将切割结果写入模型。需要注意的是,对参照模型中的元素使用围栅剪切也可以获得结果。


 220
220


 被折叠的 条评论
为什么被折叠?
被折叠的 条评论
为什么被折叠?
 到【灌水乐园】发言


