


 本文详细介绍了在Windows系统上从创建虚拟环境、安装CUDA、选择并安装对应的PyTorch版本,到下载和配置Detectron2及其依赖包,以及遇到错误时的解决方案。
目录
本文主要介绍windows系统下安装detectron2的全流程,包括环境搭建、torch安装、detectron2安装以及本人安装过程中遇到的bug及相应解决办法。
第1章 创建detectron2环境
1.1 创建虚拟环境
在终端下输入
conda create --name detectron2 python=3.9- --name:【detectron2】为新创建的虚拟环境的名称,创建完的环境可以在Anaconda/envs目录下找到
- python=3.9:指创建的python版本号。
1.2 激活虚拟环境
终端下输入
conda activate detectron2detectron2为激活的环境名称。
第2章 torch安装
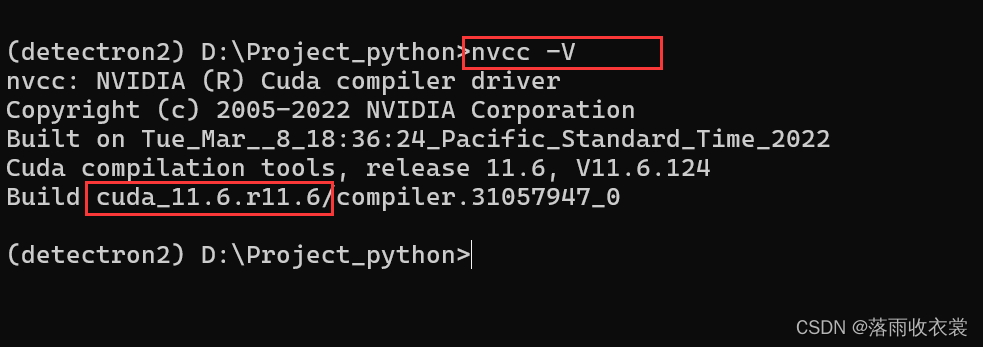
2.1 查看cuda版本
终端输入
nvcc -V
得到输出结果,cuda版本为11.6
2.2 安装相应torch版本
推荐下载本地安装,torch、torchvision和python的对应版本查询链接如下:
 最低0.47元/天 解锁文章


 4628
4628

 被折叠的 条评论
为什么被折叠?
被折叠的 条评论
为什么被折叠?
 到【灌水乐园】发言


