


YOLOv5的Tricks | 【Trick15】使用COCO API评估模型在自己数据集的结果
1. yolo的txt标注文件转coco的json标注文件
1.1 标注格式
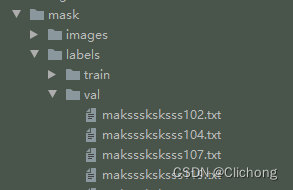
一般来说,现有的标注格式就是xml格式,yolo的txt格式还有coco的json标注特殊,我们使用yolov5项目来说标注文件就是一堆txt文件,文件名是对应的图像名,如下所示:
然后每个txt文件中,就存储着当前图像的标注信息,分别对于的是:类别,归一化后中心点的x坐标,归一化后中心点的y坐标,归一化后的目标框宽度w,归一化后的目标框高度h(此处归一化指的是除以图片宽和高)
0 0.17 0.36678200692041524 0.07 0.09688581314878893
0 0.35625 0.20415224913494812 0.0525 0.08304498269896193
0 0.6375000000000001 0.3788927335640139 0.065 0.10726643598615918
0 0.65 0.19896193771626297 0.03 0.04498269896193772
0 0.6725 0.29584775086505194 0.03 0.04498269896193772
1 0.79 0.32525951557093424 0.07 0.08996539792387544
1 0.91125 0.19377162629757785 0.0625 0.07612456747404844
但是,对于coco的标注格式来说,顺序是:左上角的x坐标,左上角的y坐标,目标框的宽度w,目标框的高度h
所以,对于yolo格式的标注文件,不仅仅要依次的读取每个图像的标注txt信息,还需要对其中的信息进行转换。
下面,需要对coco的json标注格式进行一个简要的说明
1.2 coco字段说明
对于这部分内容,基本是来源于网上资料的,详细可以查看参考资料1,2
不同于voc还有yolo,一张照片对应着一个xml文件或者是一个txt文件,coco是直接将所有图片以及对应的box信息写在了一个json文件里。通常整个coco目录长这样:
coco
|______annotations # 存放标注信息
|        |__train.json
|        |__val.json
|        |__test.json
|______trainset # 存放训练集图像
|______valset   # 存放验证集图像
|______testset  # 存放测试集图像
一个标准的json文件包含如下信息:
{
"info": info,
"images": [image],
"annotations": [annotation],
"licenses": [license],
"categories": [categories]
}
info{
"description": "COCO 2017 Dataset", # 数据集描述
"url": "http://cocodataset.org", # 下载地址
"version": "1.0", # 版本
"year": 2017, # 年份
"contributor": "COCO Consortium", # 提供者
"date_created": "2017/09/01" # 数据创建日期
}
image{
"file_name": "000000397133.jpg", # 图片名
"id": 397133 # 图片的ID编号(每张图片ID是唯一的)
"height": 427, # 高
"width": 640, # 宽
"license": 4,
"coco_url": "http://images.cocodataset.org/val2017/000000397133.jpg",# 网路地址路径
"date_captured": "2013-11-14 17:02:52", # 数据获取日期
"flickr_url": "http://farm7.staticflickr.com/6116/6255196340_da26cf2c9e_z.jpg",# flickr网路地址
}
license{
"url": "http://creativecommons.org/licenses/by-nc-sa/2.0/",
"id": 1,
"name": "Attribution-NonCommercial-ShareAlike License"
}
categories{
"supercategory": "person", # 主类别
"id": 1, # 类对应的id (0 默认为背景)
"name": "person" # 子类别
}
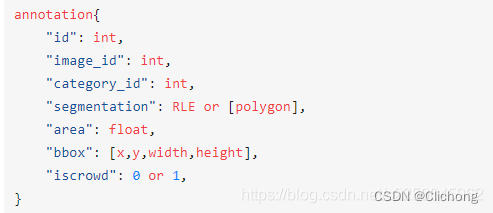
annotations{
"id": # 指的是这个annotation的一个id
"image_id": # 等同于前面image字段里面的id。
"category_id": # 类别id
"segmentation": # 左上-右上-右下-坐下 依次四个点坐标
"area": # 标注区域面积
"bbox": # 标注框,x,y为标注框的左上角坐标。
"iscrowd": # 决定是RLE格式还是polygon格式
}
1.3 yolo转coco脚本
接下来就直接进行转换,代码是我基于参考资料4的基础上修改而来的。
参考代码:
import os
import json
import random
import time
from PIL import Image
import csv

coco_format_save_path = './coco'  # 要生成的标准coco格式标签所在文件夹
yolo_format_classes_path = 'annotations.csv'  # 类别文件,用csv文件表示,一行一个类
yolo_format_annotation_path = '../dataset/mask/labels/val'  # yolo格式标签所在文件夹
img_pathDir = '../dataset/mask/images/val'  # 图片所在文件夹

# 类别设置
categories = []
class_names = ['with_mask', 'without_mask', 'mask_weared_incorrect']
for label in class_names:
    categories.append({'id': class_names.index(label), 'name': label, 'supercategory': ""})

write_json_context = dict()  # 写入.json文件的大字典
write_json_context['licenses'] = [{'name': "", 'id': 0, 'url': ""}]
write_json_context['info'] = {'contributor': "", 'date_created': "", 'description': "", 'url': "", 'version': "", 'year': ""}
write_json_context['categories'] = categories
write_json_context['images'] = []
write_json_context['annotations'] = []

# 接下来的代码主要添加'images'和'annotations'的key值
imageFileList = os.listdir(img_pathDir)
# 遍历该文件夹下的所有文件,并将所有文件名添加到列表中
img_id = 0  # 图片编号
anno_id = 0     # 标注标号
for i, imageFile in enumerate(imageFileList):
    if '_' not in imageFile:
        img_id += 1
        imagePath = os.path.join(img_pathDir, imageFile)  # 获取图片的绝对路径
        image = Image.open(imagePath)  # 读取图片
        W, H = image.size  # 获取图片的高度宽度
        img_context = {}  # 使用一个字典存储该图片信息
        # img_name=os.path.basename(imagePath)
        img_context['id'] = img_id  # 每张图像的唯一ID索引
        img_context['width'] = W
        img_context['height'] = H
        img_context['file_name'] = imageFile
        img_context['license'] = 0
        img_context['flickr_url'] = ""
        img_context['color_url'] = ""
        img_context['date_captured'] = ""

        write_json_context['images'].append(img_context)  # 将该图片信息添加到'image'列表中

        txtFile = imageFile.split('.')[0] + '.txt'  # 获取该图片获取的txt文件
        with open(os.path.join(yolo_format_annotation_path, txtFile), 'r') as fr:
            lines = fr.readlines()  # 读取txt文件的每一行数据,lines2是一个列表,包含了一个图片的所有标注信息

        for j, line in enumerate(lines):
            anno_id += 1  # 标注的id从1开始
            bbox_dict = {}  # 将每一个bounding box信息存储在该字典中

            class_id, x, y, w, h = line.strip().split(' ')  # 获取每一个标注框的详细信息
            class_id, x, y, w, h = int(class_id), float(x), float(y), float(w), float(h)  # 将字符串类型转为可计算的int和float类型

            # 坐标转换
            xmin = (x - w / 2) * W
            ymin = (y - h / 2) * H
            xmax = (x + w / 2) * W
            ymax = (y + h / 2) * H
            w = w * W
            h = h * H
            height, width = abs(ymax - ymin), abs(xmax - xmin)

            # bounding box的坐标信息
            bbox_dict['id'] = anno_id               # 每个标注信息的索引
            bbox_dict['image_id'] = img_id          # 当前图像的ID索引
            bbox_dict['category_id'] = class_id     # 类别信息
            bbox_dict['segmentation'] = [[xmin, ymin, xmax, ymin, xmax, ymax, xmin, ymax]]
            bbox_dict['area'] = height * width
            bbox_dict['bbox'] = [xmin, ymin, w, h]  # 注意目标类别要加一
            bbox_dict['iscrowd'] = 0
            bbox_dict['attributes'] = ""

            write_json_context['annotations'].append(bbox_dict)  # 将每一个由字典存储的bounding box信息添加到'annotations'列表中

name = os.path.join(coco_format_save_path, "annotations" + '.json')
with open(name, 'w') as fw:  # 将字典信息写入.json文件中
    json.dump(write_json_context, fw, indent=4, ensure_ascii=False)
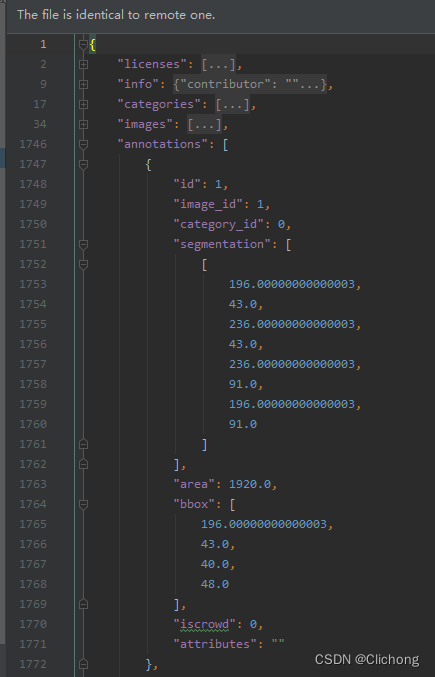
运行结果:
{
"images": [
        {
            "id": 1,
            "width": 400,
            "height": 267,
            "file_name": "maksssksksss98.png",
            "license": 0,
            "flickr_url": "",
            "color_url": "",
            "date_captured": ""
        },
        ......
"annotations": [
        {
            "id": 1,
            "image_id": 1,
            "category_id": 0,
            "segmentation": [
                [
                    196.00000000000003,
                    43.0,
                    236.00000000000003,
                    43.0,
                    236.00000000000003,
                    91.0,
                    196.00000000000003,
                    91.0
                ]
            ],
            "area": 1920.0,
            "bbox": [
                196.00000000000003,
                43.0,
                40.0,
                48.0
            ],
            "iscrowd": 0,
            "attributes": ""
        },
        {
            "id": 2,
            "image_id": 1,
            "category_id": 0,
            "segmentation": [
                [
                    41.0,
                    73.0,
                    65.0,
                    73.0,
                    65.0,
                    95.0,
                    41.0,
                    95.0
                ]
            ],
            "area": 528.0,
            "bbox": [
                41.0,
                73.0,
                24.0,
                22.000000000000004
            ],
            "iscrowd": 0,
            "attributes": ""
        },
        ......
}
这样,就可以将全部的标注txt文件,转化成一个json文件的标注信息
2. 按coco格式获取预测结果的json文件
基于以上的操作,现在已经得到了coco格式的json标注文件。根据API的调用,现在还需要将预测信息整合在一个json文件中,对于每副图像需要获取其所有预测框的类别,边界框的4个坐标,置信度。将所有结果保留为一个列表,输入如下所示:
[
    {
        "image_id": "maksssksksss363",
        "category_id": 0,
        "bbox": [
            342.638,
            86.238,
            36.37,
            39.355
        ],
        "score": 0.91578
    },
    {
        "image_id": "maksssksksss363",
        "category_id": 0,
        "bbox": [
            327.98,
            21.8,
            38.32,
            41.232
        ],
        "score": 0.9059
    },
    ......
]
这个预测文件在原本的val.py脚本中,设置--save-json参数基于可以输出
def parse_opt():
parser = argparse.ArgumentParser()
parser.add_argument('--save-json', default=True, action='store_true', help='save a COCO-JSON results file')
......
def run(...):
# Save JSON
if save_jsonand len(jdict):
w = Path(weights[0] if isinstance(weights, list) else weights).stem if weights is not None else '' # weights
anno_json = str(Path(data.get('path', '../coco')) / 'annotations/instances_val2017.json') # annotations json
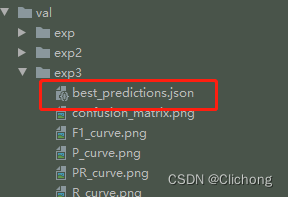
pred_json = str(save_dir / f"{w}_predictions.json") # predictions json
print(f'\nEvaluating pycocotools mAP... saving {pred_json}...')
# 保存val的所有预测结果在jdict字典中,然后保存名称为:best_predictions.json
with open(pred_json, 'w') as f:
json.dump(jdict, f, indent=4, ensure_ascii=False)
输入路径如下所示:
对于jdict字典中的每一个内容,是通过save_one_json函数来保存设置的:
# 将预测信息保存到coco格式的json字典
def save_one_json(predn, jdict, path, class_map):
    # Save one JSON result {"image_id": 42, "category_id": 18, "bbox": [258.15, 41.29, 348.26, 243.78], "score": 0.236}
    # 获取图片id
    image_id = int(path.stem) if path.stem.isnumeric() else path.stem

    # 获取预测框 并将xyxy转为xywh格式
    box = xyxy2xywh(predn[:, :4])  # xywh

    # 之前的的xyxy格式是左上角右下角坐标  xywh是中心的坐标和宽高
    # 而coco的json格式的框坐标是xywh(左上角坐标 + 宽高)
    # 所以这行代码是将中心点坐标 -> 左上角坐标
    box[:, :2] -= box[:, 2:] / 2  # xy center to top-left corner

    # image_id: 图片id 即属于哪张图片
    # category_id: 类别 coco91class()从索引0~79映射到索引0~90
    # bbox: 预测框坐标
    # score: 预测得分
    for p, b in zip(predn.tolist(), box.tolist()):
        jdict.append({'image_id': image_id,
                      'category_id': class_map[int(p[5])],
                      'bbox': [round(x, 3) for x in b],
                      'score': round(p[4], 5)})
那么,现在有了对val数据集的标注信息json文件,也有了val数据集的预测信息json文件,就可以使用pycocotools.cocoeval工具包来进行map的判断,这样就不需要像yolov5那样写了一大堆复杂的评价函数。
3. 使用coco API评估结果
使用coco api评估当前数据集的map结果非常简单,只需要将coco格式的标注json文件和coco格式的预测json文件同时传入COCOeval函数中即可,代码如下:
from pycocotools.coco import COCO
from pycocotools.cocoeval import COCOeval

if __name__ == '__main__':

    anno_json = r'./test/anno_json.json'
    pred_json = r'./test/pred_json.json'

    anno = COCO(anno_json)  		# init annotations api
    pred = anno.loadRes(pred_json)  # init predictions api
    eval = COCOeval(anno, pred, 'bbox')

    eval.evaluate()
    eval.accumulate()
    eval.summarize()
    map, map50 = eval.stats[:2]  # update results (mAP@0.5:0.95, mAP@0.5)
    print(eval.stats)
这时候如果直接传入刚刚的两个json文件,是会报错的,错误信息是:AssertionError: Results do not correspond to current coco set。参考资料6.
出现这个问题的原因有两个:
- 图像id和标注的id数量不对应。也就是说出现了一些没有标注的图像信息,在image列表中出现,但是却没有在annotations中出现,也就是有点图像没有目标没有标注。
image_id类型出现错误,image_id必须为 int类型,不能是字符串
随后,我检查了一下txt标注文件,发现所有的图像都有目标,都有标注,也就排除了第一个问题。(假如是因为第一个问题,需要把标注信息为空的图像进行删除,这个操作其实挺不合理的)。那么,就是第二个问题了。
然后,我们的预测json文件中,image_id 是图像的文件名。image_id 必须为 int类型,不能是字符串。为什么会出现这个错误?原因是在save_one_json()函数主要注意image_id = int(path.stem) if path.stem.isnumeric() else path.stem这一句出现的了问题,因为我们传入的 path.stem 本身就是一个字符串。
path.stem是指验证集图片名,如host0000001.jpg
那么path.stem为host0000001,则取数字部分:path.stem[5:] #为0000001
由于本身就是字符串,所以判断后的image_id 传入还是字符串,导致了这个错误。同样的,在标注信息的json文件中,也出现了这个错误。
- annotations.json的错误:
"annotations": [
        {
            "id": 1,
            "image_id": "maksssksksss98",   # 错误,需要是int类型,和image信息相匹配
            "category_id": 0,
            "segmentation": [
                [
                    196.00000000000003,
                    43.0,
                    236.00000000000003,
                    43.0,
                    236.00000000000003,
                    91.0,
                    196.00000000000003,
                    91.0
                ]
            ],
            "area": 1920.0,
            "bbox": [
                196.00000000000003,
                43.0,
                40.0,
                48.0
            ],
            "iscrowd": 0,
            "attributes": ""
        },
- best_preditions.json的错误:
{
        "image_id": "maksssksksss363",  # 错误,需要是int类型,和image信息相匹配
        "category_id": 0,
        "bbox": [
            342.638,
            86.238,
            36.37,
            39.355
        ],
        "score": 0.91578
    },
那么,现在知道了错误的原因,就需要将问题改正。对于这些字符串,我们需要和annotations.json字典中的images信息来进行匹配,在对应的地方转为id,而不是图像名。比如:
 "images": [
        {
            "id": 1,
            "width": 400,
            "height": 267,
            "file_name": "maksssksksss98.png",
            "license": 0,
            "flickr_url": "",
            "color_url": "",
            "date_captured": ""
        },
也就是说,将原本image_id为maksssksksss98的内容,改为1,因为匹配的是id是1。基于这一点,下面就写了一个修正脚本:
'''
修正脚本:对预测的json文件还有标注的json文件的id信息根据标注文件的image来命名
'''
import json
import os
from collections import OrderedDict
# 获取标注文件图像id与图像名字的字典
def get_name2id_map(image_dict):
name2id_dict = OrderedDict()
for image in image_dict:
file_name = image['file_name'].split('.')[0] # maksssksksss98.png -> maksssksksss98
id = image['id']
name2id_dict[file_name] = id
return name2id_dict
if __name__ == '__main__':
anno_json = r'./coco/annotations.json'
pred_json = r'../runs/val/mask/best_predictions.json'
with open(pred_json, 'r') as fr:
pred_dict = json.load(fr)
with open(anno_json, 'r') as fr:
anno_dict = json.load(fr)
name2id_dict = get_name2id_map(anno_dict['images'])
# 对标注文件annotations的image_id进行更改
for annotations in anno_dict['annotations']:
image_id = annotations['image_id']
annotations['image_id'] = int(name2id_dict[image_id])
# 对预测文件的image_id同样进行更改
for predictions in pred_dict:
image_id = predictions['image_id']
predictions['image_id'] = int(name2id_dict[image_id])
# 分别保存更改后的标注文件和预测文件
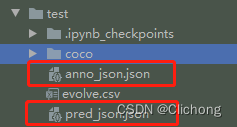
with open('anno_json.json', 'w') as fw:
json.dump(anno_dict, fw, indent=4, ensure_ascii=False)
with open('pred_json.json', 'w') as fw:
json.dump(pred_dict, fw, indent=4, ensure_ascii=False)
输出两个修正后的json文件:
现在重新查看修正后的标注信息:
# pred_json.json
{
        "image_id": 112,	# 这里需要修改为图像的的ID索引
        "category_id": 0,
        "bbox": [
            342.638,
            86.238,
            36.37,
            39.355
        ],
        "score": 0.91578
    },
	...

# anno_json.json
"annotations": [
        {
            "id": 1,
            "image_id": 1,  # 由于图像的读取顺序是固定的,所以这里的image_id其实也就是id
            "category_id": 0,
            "segmentation": [
                [
                    196.00000000000003,
                    43.0,
                    236.00000000000003,
                    43.0,
                    236.00000000000003,
                    91.0,
                    196.00000000000003,
                    91.0
                ]
            ],
            "area": 1920.0,
            "bbox": [
                196.00000000000003,
                43.0,
                40.0,
                48.0
            ],
            "iscrowd": 0,
            "attributes": ""
        },
经过如此修正之后,就可以正常的调用coco的api了。
- COCO API评估代码:
from pycocotools.coco import COCO
from pycocotools.cocoeval import COCOeval

if __name__ == '__main__':

    anno_json = r'./test/anno_json.json'
    pred_json = r'./test/pred_json.json'

    anno = COCO(anno_json)  # init annotations api
    pred = anno.loadRes(pred_json)  # init predictions api
    eval = COCOeval(anno, pred, 'bbox')

    eval.evaluate()
    eval.accumulate()
    eval.summarize()
    map, map50 = eval.stats[:2]  # update results (mAP@0.5:0.95, mAP@0.5)
    print(eval.stats)
输出信息:
loading annotations into memory...
Done (t=0.00s)
creating index...
index created!
Loading and preparing results...
DONE (t=0.01s)
creating index...
index created!
Running per image evaluation...
Evaluate annotation type *bbox*
DONE (t=0.45s).
Accumulating evaluation results...
DONE (t=0.05s).
 Average Precision  (AP) @[ IoU=0.50:0.95 | area=   all | maxDets=100 ] = 0.494
 Average Precision  (AP) @[ IoU=0.50      | area=   all | maxDets=100 ] = 0.764
 Average Precision  (AP) @[ IoU=0.75      | area=   all | maxDets=100 ] = 0.545
 Average Precision  (AP) @[ IoU=0.50:0.95 | area= small | maxDets=100 ] = 0.392
 Average Precision  (AP) @[ IoU=0.50:0.95 | area=medium | maxDets=100 ] = 0.680
 Average Precision  (AP) @[ IoU=0.50:0.95 | area= large | maxDets=100 ] = 0.853
 Average Recall     (AR) @[ IoU=0.50:0.95 | area=   all | maxDets=  1 ] = 0.269
 Average Recall     (AR) @[ IoU=0.50:0.95 | area=   all | maxDets= 10 ] = 0.565
 Average Recall     (AR) @[ IoU=0.50:0.95 | area=   all | maxDets=100 ] = 0.591
 Average Recall     (AR) @[ IoU=0.50:0.95 | area= small | maxDets=100 ] = 0.503
 Average Recall     (AR) @[ IoU=0.50:0.95 | area=medium | maxDets=100 ] = 0.755
 Average Recall     (AR) @[ IoU=0.50:0.95 | area= large | maxDets=100 ] = 0.868

Process finished with exit code 0
普通执行val.py函数的预测信息:
(yolov5) [fs@localhost yolov5-6.0]$ python val.py
val: data=./dataset/mask/mask.yaml, weights=./runs/train/mask/weights/best.pt, batch_size=32, imgsz=640, conf_thres=0.001, iou_thres=0.6, task=val, device=cpu, single_cls=False, augment=False, verbose=False, save_txt=False, save_hybrid=False, save_conf=False, save_json=True, project=runs/val, name=exp, exist_ok=False, half=False
YOLOv5 🚀 2022-6-10 torch 1.9.1 CPU

Fusing layers...
Model Summary: 213 layers, 7018216 parameters, 0 gradients, 15.8 GFLOPs
val: Scanning 'dataset/mask/labels/val.cache' images and labels... 171 found, 0 missing, 0 empty, 0 corrupted: 100%|█| 171/171 [00:00<
               Class     Images     Labels          P          R     mAP@.5 mAP@.5:.95: 100%|███████████| 6/6 [00:06<00:00,  1.11s/it]
                 all        171        754      0.808      0.708      0.767      0.501
           with_mask        171        630       0.96      0.881      0.943      0.656
        without_mask        171        104      0.799      0.841      0.872      0.552
mask_weared_incorrect        171         20      0.666        0.4      0.486      0.296
Speed: 0.3ms pre-process, 26.4ms inference, 0.5ms NMS per image at shape (32, 3, 640, 640)

Evaluating pycocotools mAP... saving runs/val/exp3/best_predictions.json...
loading annotations into memory...
pycocotools unable to run: [Errno 2] No such file or directory: 'dataset/mask/annotations/instances_val2017.json'
Results saved to runs/val/exp3
4. val脚本简化
到了这里,就可以直接将cal脚本给简化了。现在,我再总结一下,需要两个步骤。
第一步:首选需要将yolo的txt目录转换成coco的json文件,参考代码:
- yolo2coco.py:
import os
import json
import random
import time
from PIL import Image
import csv

coco_format_save_path = './coco'  # 要生成的标准coco格式标签所在文件夹
yolo_format_classes_path = 'annotations.csv'  # 类别文件,用csv文件表示,一行一个类
yolo_format_annotation_path = '../dataset/mask/labels/val'  # yolo格式标签所在文件夹
img_pathDir = '../dataset/mask/images/val'  # 图片所在文件夹

# with open(yolo_format_classes_path, 'r') as f:
#     reader = csv.reader(f)
#     for label in reader:
#         print(label)
# categories = []
# for i in label:
#     categories.append({'id': label.index(i) + 1, 'name': i, 'supercategory': ""})  # 存储类别

categories = []
class_names = ['with_mask', 'without_mask', 'mask_weared_incorrect']
for label in class_names:
    categories.append({'id': class_names.index(label), 'name': label, 'supercategory': ""})

write_json_context = dict()  # 写入.json文件的大字典
write_json_context['licenses'] = [{'name': "", 'id': 0, 'url': ""}]
write_json_context['info'] = {'contributor': "", 'date_created': "", 'description': "",
                              'url': "", 'version': "", 'year': ""}
write_json_context['categories'] = categories
write_json_context['images'] = []
write_json_context['annotations'] = []

# 接下来的代码主要添加'images'和'annotations'的key值
imageFileList = os.listdir(img_pathDir)
# 遍历该文件夹下的所有文件,并将所有文件名添加到列表中
img_id = 0  # 图片编号
anno_id = 0     # 标注标号
for i, imageFile in enumerate(imageFileList):
    if '_' not in imageFile:
        img_id += 1
        imagePath = os.path.join(img_pathDir, imageFile)  # 获取图片的绝对路径
        image = Image.open(imagePath)  # 读取图片
        W, H = image.size  # 获取图片的高度宽度
        img_context = {}  # 使用一个字典存储该图片信息
        # img_name=os.path.basename(imagePath)
        img_context['id'] = img_id  # 每张图像的唯一ID索引
        img_context['width'] = W
        img_context['height'] = H
        img_context['file_name'] = imageFile
        img_context['license'] = 0
        img_context['flickr_url'] = ""
        img_context['color_url'] = ""
        img_context['date_captured'] = ""

        write_json_context['images'].append(img_context)  # 将该图片信息添加到'image'列表中

        txtFile = imageFile.split('.')[0] + '.txt'  # 获取该图片获取的txt文件
        with open(os.path.join(yolo_format_annotation_path, txtFile), 'r') as fr:
            lines = fr.readlines()  # 读取txt文件的每一行数据,lines2是一个列表,包含了一个图片的所有标注信息

        for j, line in enumerate(lines):
            anno_id += 1  # 标注的id从1开始
            bbox_dict = {}  # 将每一个bounding box信息存储在该字典中

            class_id, x, y, w, h = line.strip().split(' ')  # 获取每一个标注框的详细信息
            class_id, x, y, w, h = int(class_id), float(x), float(y), float(w), float(h)  # 将字符串类型转为可计算的int和float类型

            # 坐标转换
            xmin = (x - w / 2) * W
            ymin = (y - h / 2) * H
            xmax = (x + w / 2) * W
            ymax = (y + h / 2) * H
            w = w * W
            h = h * H
            height, width = abs(ymax - ymin), abs(xmax - xmin)

            # bounding box的坐标信息
            bbox_dict['id'] = anno_id               # 每个标注信息的索引
            bbox_dict['image_id'] = img_id          # 当前图像的ID索引
            bbox_dict['category_id'] = class_id     # 类别信息
            bbox_dict['segmentation'] = [[xmin, ymin, xmax, ymin, xmax, ymax, xmin, ymax]]
            bbox_dict['area'] = height * width
            bbox_dict['bbox'] = [xmin, ymin, w, h]  # 注意目标类别要加一
            bbox_dict['iscrowd'] = 0
            bbox_dict['attributes'] = ""

            write_json_context['annotations'].append(bbox_dict)  # 将每一个由字典存储的bounding box信息添加到'annotations'列表中

name = os.path.join(coco_format_save_path, "annotations" + '.json')
with open(name, 'w') as fw:  # 将字典信息写入.json文件中
    json.dump(write_json_context, fw, indent=4, ensure_ascii=False)
将val数据集的所以txt信息,就可以转换成一个json文件了,获得annotations.json文件
第二步:遍历带检测目录下的全部头像,依次检测每张图像,将每一个预测结果全部依次添加在一个列表中,同样构建一个预测的json文件,获得preditions.json文件。
那么,根据标注信息的annotations.json文件和预测结果的preditions.json文件就可以调用coco的api完成一个简单的处理。
- val_simplify.py:
import torch
import cv2
import numpy as np
import os
import json
from tqdm import tqdm

from models.experimental import attempt_load
from utils.augmentations import letterbox
from utils.general import check_img_size, non_max_suppression, scale_coords, xyxy2xywh

from pycocotools.coco import COCO
from pycocotools.cocoeval import COCOeval


# 获取标注文件图像id与图像名字的字典
def get_name2id_map():

    # 获取标注文件的images标注信息
    anno_json = r'./test/coco/annotations.json'
    with open(anno_json, 'r') as fr:
        anno_dict = json.load(fr)
    image_dict = anno_dict['images']

    # 构建图像名称与索引的字典对
    name2id_dict = {}
    for image in image_dict:
        # file_name = image['file_name'].split('.')[0]    # maksssksksss98.png -> maksssksksss98
        file_name = image['file_name']
        id = image['id']
        name2id_dict[file_name] = id

    return name2id_dict


# 功能:单图像推理
def val(image_dir, img_size=640, stride=32, augment=False, visualize=False):

    device = 'cpu'
    weights = r'./runs/train/mask/weights/best.pt'  # 权重路径
    anno_json = r'./test/coco/annotations.json'     # 已处理的标注信息json文件
    pred_json = 'preditions.json'                   # 带保存的预测信息json文件

    # 导入模型
    model = attempt_load(weights, map_location=device)
    img_size = check_img_size(img_size, s=stride)
    # names = model.names

    jdict = []
    name2id_dict = get_name2id_map()
    image_list = os.listdir(image_dir)

    # 依次预测每张图像,将预测信息全部保存在json文件中
    for image_name in tqdm(image_list, desc='val image'):

        # Padded resize
        image_path = image_dir + os.sep + image_name
        img0 = cv2.imread(image_path)
        img = letterbox(img0, img_size, stride=stride, auto=True)[0]

        # Convert
        img = img.transpose((2, 0, 1))[::-1]  # HWC to CHW, BGR to RGB
        img = np.ascontiguousarray(img)

        img = torch.from_numpy(img).to(device)
        img = img.float() / 255.0   # 0 - 255 to 0.0 - 1.0
        img = img[None]     # [h w c] -> [1 h w c]

        # inference
        pred = model(img, augment=augment, visualize=visualize)[0]
        pred = non_max_suppression(pred, conf_thres=0.25, iou_thres=0.45, max_det=1000)

        # plot label
        det = pred[0]
        # annotator = Annotator(img0.copy(), line_width=3, example=str(names))

        if len(det):
            # (xyxy, conf, cls)
            det[:, :4] = scale_coords(img.shape[2:], det[:, :4], img0.shape).round()

            # bbox格式需要转换: xyxy -> (x_min, y_min, width, height)
            bbox = xyxy2xywh(det[:, :4])
            bbox[:, :2] -= bbox[:, 2:] / 2  # xy center to top-left corner
            score = det[:, 4]
            category_id = det[:, -1]

            for box, src, cls in zip(bbox, score, category_id):
                jdict.append(
                    {'image_id': name2id_dict[image_name],
                     'category_id': int(cls),
                     'bbox': box.tolist(),
                     'score': float(src)}
                )

    # 保存预测好的json文件
    with open(pred_json, 'w') as fw:
        json.dump(jdict, fw, indent=4, ensure_ascii=False)

    # 使用coco api评价指标
    anno = COCO(anno_json)  # init annotations api
    pred = anno.loadRes(pred_json)  # init predictions api
    eval = COCOeval(anno, pred, 'bbox')

    eval.evaluate()
    eval.accumulate()
    eval.summarize()


if __name__ == '__main__':

    image_dir = r'./dataset/mask/images/val'
    val(image_dir=image_dir)
输出结果:
val image: 100%|██████████████████████████████| 171/171 [00:06<00:00, 24.88it/s]
loading annotations into memory...
Done (t=0.00s)
creating index...
index created!
Loading and preparing results...
DONE (t=0.00s)
creating index...
index created!
Running per image evaluation...
Evaluate annotation type *bbox*
DONE (t=0.15s).
Accumulating evaluation results...
DONE (t=0.02s).
 Average Precision  (AP) @[ IoU=0.50:0.95 | area=   all | maxDets=100 ] = 0.465
 Average Precision  (AP) @[ IoU=0.50      | area=   all | maxDets=100 ] = 0.701
 Average Precision  (AP) @[ IoU=0.75      | area=   all | maxDets=100 ] = 0.525
 Average Precision  (AP) @[ IoU=0.50:0.95 | area= small | maxDets=100 ] = 0.360
 Average Precision  (AP) @[ IoU=0.50:0.95 | area=medium | maxDets=100 ] = 0.648
 Average Precision  (AP) @[ IoU=0.50:0.95 | area= large | maxDets=100 ] = 0.848
 Average Recall     (AR) @[ IoU=0.50:0.95 | area=   all | maxDets=  1 ] = 0.247
 Average Recall     (AR) @[ IoU=0.50:0.95 | area=   all | maxDets= 10 ] = 0.493
 Average Recall     (AR) @[ IoU=0.50:0.95 | area=   all | maxDets=100 ] = 0.514
 Average Recall     (AR) @[ IoU=0.50:0.95 | area= small | maxDets=100 ] = 0.409
 Average Recall     (AR) @[ IoU=0.50:0.95 | area=medium | maxDets=100 ] = 0.713
 Average Recall     (AR) @[ IoU=0.50:0.95 | area= large | maxDets=100 ] = 0.867

Process finished with exit code 0
最后,简化成这样的直观的脚本就是我最后的目标,比一开始的代码容易看多了。最后的输出结果也比较清晰明了。但是,缺点是相比与yolov5原始的验证指标,这里没有为每一个类单独的输出map结果,只是对全部的所有类进行的测试,这是不足之处。


 1788
1788


 被折叠的 条评论
为什么被折叠?
被折叠的 条评论
为什么被折叠?
 到【灌水乐园】发言


