


文章目录
课程地址:tensorflow-data-and-deployment
B站:Tensorflow2.0数据和部署(二)
代码链接:TensorFlow Deployment
一、概述
TensorFlow Lite的两个主要部分:转换器和解释器。
转换器的主要作用是将TF模型转换为轻量化的可被解释器读取的模型结构,解释器主要是为了在不同的平台上进行部署。下图为TensorFlow Lite的结构:

由于移动设备的计算能力限制,我们需要对模型进行优化,优化方法如下:
- 量化(主要):降低模型权重和偏差中数字的精度,float32->int8
- 剪枝:减少参数总数
- 模型结构转换:Tensor分解、蒸馏
1.模型存储
针对不同的模型存储格式可大概分为以下三种:
- SavedModel(推荐):
tf.lite.TFLiteConverter.from_saved_model - Keras的HDF5模型文件:
tf.lite.TFLiteConverter.from_keras_model - Concrete functions:
tf.lite.TFLiteConverter.from_concrete_model
使用SavedModel
import pathlib

# 保存模型
pretrained_model = tf.keras.applications.Mobilenet()
tf.saved_model.save(pretrained-model, path)
# 转换模型
converter = tf.lite.TFLiteConverter.from_saved_model(path)
tflite_model = converter.convert()
# 保存TFLite模型
tflite_model_file = pathlib.Path("./tmp/foo.tflite")
tflite_model_file.write_bytes(tflite_model )
使用keras保存模型
import pathlib

# 保存模型
pretrained_model = tf.keras.applications.Mobilenet()
model.save('model.h5')
# 转换模型
converter = tf.lite.TFLiteConverter.from_keras_model(path)
tflite_model = converter.convert()
# 保存TFLite模型
tflite_model_file = pathlib.Path("./tmp/foo.tflite")
tflite_model_file.write_bytes(tflite_model )
命令行方式转换
!tflite_convert --output_file=model.tflite --saved_model_dir=dir
!tflite_convert --output_file=model.tflite --keras_model_file=model.h5
2.量化方法
转换器的默认方式是从大小和延迟方向来进行优化,优化的整体结构如下;

针对大小进行优化:
converter = tf.lite.TFLiteConverter.from_saved_model(path)
converter.optimizations = [tf.lite.Optimize.OPTIMIZE_FOR_SIZE]
tflite_model = converter.convert()
整数后训练量化+校准数据
def generator():
	data = tfds.load(...)
	for _ in range(num_calibration_steps):
		img, = data.take(1)
		yield [image]

converter = tf.lite.TFLiteConverter.from_saved_model(path)
converter.optimizations = [tf.lite.Optimize.DEFAULT]
converter.representative_dataset = tf.lite.RepresentativeFataset(generator)
# 限制支持目标操作为INT8
converter.target_spec.supported_ops = [tf.lite.OpsSet.TFLITE_BUILTINS_INT8]
使用TF-Select来处理无法支持的操作
converter = tf.lite.TFLiteConverter.from_saved_model(path)
converter.target_ops= [tf.lite.OpsSet.TFLITE_BUILTINS
					   tf.lite.OpsSet.SELECT_TF_OPS]
tflite_model = converter.convert()
3.模型验证
我们可以在python环境中对tflite模型进行验证
# Load TFLite model and allocate tensors.
interpreter = tf.lite.Interpreter(model_path=tflite_model_file)
interpreter.allocate_tensors()

# Get input and output tensors.
input_index = interpreter.get_input_details()[0]["index"]
output_index = interpreter.get_output_details()[0]["index"]

# Point the tensor to be used for testing and run the interpreter
interpreter.set_tensor(input_details[0]['index'], input_data)
interpreter.invoke()
tflite_results = interpreter.get_tensor(output_details[0]['index'])
二、基于安卓的TF模型
使用安卓设备部署TF模型的步骤如下图所示,

1.初始化解释器
设置解释器选项是最早的步骤之一,这些选项是可选的(已经有默认值),参数如下:
- setNumThreads:线程数
- setUseNNAPI:使用NNAPI进行硬件加速
- setAllowFp16precisionForFp32:混合精度计算
- addDelegate;添加GPU
val tfliteOptions = Interpreter.Options()
tfliteOptions.setNumThreads(5)
tfliteOptions.setUseNNAPI(true)
加载模型和标签
// 文件需要放在assets文件夹下
assetManager.openFd("converted_model.tflite")
// 打开文件流
val inputStream = FileInputStream(fileDescriptor.fileDescriptor)
// 读文件通道、偏置和长度
val fileChannel = inputStream.channel
val startOffset = fileDescriptor.startDffset
val declaredlength = fileDescriptor.declaredLength
// 加载TFLite模型
tflitemodel = filechannel.map(FileChannel.MapMode.READ_ONLY, startOffset, declaredlength )
// 设置标签
labelList = Array.aslist("cat", "dog")
2.准备输入
首先将图片resize,然后获取红绿蓝三个通道的值,最后进行归一化
// resize
val scaledBitmap = Bitmap.createScaledBitmap(bitmap, INPUT_SIZE, INPUT_SIZE, false)

// convert bitmap to bytebuffer
val byteBuffer = ByteBuffer.allocateDirect(4 * INPUT_SIZE * INPUT_SIZE * PIXEL_SIZE)
byteBuffer.order(ByteOrder.nativeOrder())

// get RGB channels
for (i in 0 until INPUT_SIZE) {
	for (j in 0 until INPUT_SIZE) {
		val input = intValues[pixel++]

		byteBuffer.putFloat((((input.shr(16)  and 0xFF) - IMAGE_MEAN) / IMAGE_STD))
        byteBuffer.putFloat((((input.shr(8) and 0xFF) - IMAGE_MEAN) / IMAGE_STD))
        byteBuffer.putFloat((((input and 0xFF) - IMAGE_MEAN) / IMAGE_STD))
	}
}
3.调用解释器
val result = Array(1){FloarArray(2)}
interpreter.run(bytebuffer, result)
4.输出结果
val pq = PriorityQueue(
	MAX_RESULTS,
    Comparator<Classifier.Recognition> {
    	(_, _, confidence1), (_, _, confidence2)
      -> java.lang.Float.compare(confidence1, confidence2) * -1
    })

for (i in lableList.indices) {
	val confidence = labelProbArray[0][i]
    if (confidence >= THRESHOLD) {
    	pq.add(Classifier.Recognition("" + i,
        	if (lableList.size > i) lableList[i] else "Unknown", confidence)
        )
    }
}
三、基于IOS的TF模型
TensorFlowLiteSwift是一个swift库,它可以在IOS设备上运行TensorFlowLite模型。
为了将TensorFlowLite添加到iOS设备中,我们需要使用Pod文件(cocoapods),安装方式如下:
!sudo gem install cocoapods
之后在项目目录中,放置一个没有扩展名的叫做podfile文件,然后添加文本pod 'TensorFlowLiteSwift',之后转回到目录并使用如下命令添加依赖项并创新一个.xcworkspace文件夹
!pod install
应用程序的整体架构如下:

- 视图控制器:显示图像和结果
- ModelDataHandler.swift:用于存放模型数据处理类,用于执行与TFLite模型相关的核心功能,包括预处理输入为模型所需的格式、通过TFLite进行推理
视图控制器首先将图像的像素缓冲区送入ModelDataHandler,ModelDataHandler通过初始化必要的TFLite对象来推断结果,最后将结果送回视图控制器。
解释器是驱动推理过程的主要引擎。我们需要将输入送入输入tensor,调用模型进行推理,并将获得的结果送到输出tensor,具体的步骤和安卓开发相同。
1.初始化
// 创建对模型文件的引用
let modelPath = Bundle.main.path(
      forResource: modelFilename, ofType: modelFileInfo.extension)
// 定义解释器选项
var options = InterpreterOptions()
options.threadCount = threadCount
// 实例化解释器
interpreter = try Interpreter(modelPath: modelPath, options: options)
// 分配输入张量为其保留内存
do {
	try interpreter.allocateTensors()
}
catch let error(
)
2.准备输入
- 模型期望输入的pixel buffer大小为2242243
- iOS使用CVPixelBuffer在内存中表示图片
- CVPixelBuffer有Alpha(透明度)和RGB
- 需要从CVPixelBuffer抽取R、G、B并归一化
- 最终的输出需要是‘data’类型
let inputChannels = 3
let inputWidth = 224
let inputHeight = 224
let scaledSize = CGSize(width: inputWidth, height: inputHeight)
let thumbnailPixelBuffer = pixelBuffer.centerThumbnail(ofSize: scaledSize)
let rgbData = rgbDataFromBuffer(
        thumbnailPixelBuffer,
        byteCount: batchSize * inputWidth * inputHeight * inputChannels
        )
private func rgbDataFromBuffer(
	_ buffer: CVPixelBuffer,
    byteCount: Int
    ) -> Data? {
    CVPixelBufferLockBaseAddress(buffer, .readOnly)
    defer { CVPixelBufferUnlockBaseAddress(buffer, .readOnly) }
    guard let mutableRawPointer = CVPixelBufferGetBaseAddress(buffer) else {
      return nil
    }
    let count = CVPixelBufferGetDataSize(buffer)
    let bufferData = Data(bytesNoCopy: mutableRawPointer, count: count, deallocator: .none)
    var rgbBytes = [Float](repeating: 0, count: byteCount)
    var index = 0
    for component in bufferData.enumerated() {
    	let offset = component.offset
        let isAlphaComponent = (offset % alphaComponent.baseOffset) == alphaComponent.moduloRemainder
        guard !isAlphaComponent else { continue }
        rgbBytes[index] = Float(component.element) / 255.0
        index += 1
    }

    return rgbBytes.withUnsafeBufferPointer(Data.init)
3.使用解释器进行预测
// Copy the RGB data to the input `Tensor`.
try interpreter.copy(rgbData, toInputAt: 0)

// Run inference by invoking the `Interpreter`.
try interpreter.invoke()

// Get the output `Tensor` to process the inference results.
outputTensor = try interpreter.output(at: 0)
4.获得并映射结果
let results = [Float32](unsafeData: outputTensor.data) ?? []
// Process the results.
let topNInferences = getTopN(results: results)
private func getTopN(results: [Float]) -> [Inference] {
    // Create a zipped array of tuples [(labelIndex: Int, confidence: Float)].
    let zippedResults = zip(labels.indices, results)

    // Sort the zipped results by confidence value in descending order.
    let sortedResults = zippedResults.sorted { $0.1 > $1.1 }.prefix(resultCount)

    // Return the `Inference` results.
    return sortedResults.map { result in Inference(confidence: result.1, label: labels[result.0]) }
  }
5.使用量化
let results: [Float]
switch outputTensor.dataType {

    case .uInt8:
      guard let quantization = outputTensor.quantizationParameters else {
        print("No results returned because the quantization values for the output tensor are nil.")
        return nil
      }
      let quantizedResults = [UInt8](outputTensor.data)
      results = quantizedResults.map {
        quantization.scale * Float(Int($0) - quantization.zeroPoint)
      }
    case .float32:
      results = [Float32](unsafeData: outputTensor.data) ?? []
    default:
      print("Output tensor data type \(outputTensor.dataType) is unsupported for this example app.")
      return nil
    }
四、基于嵌入式设备的TF模型
1.嵌入式设备介绍
嵌入式设备可以包含以下几种,本小节主要针对树莓派:
-
Coral

Coral系列产品是USB加速器,可以在那些没有能力运行模型的设备上进行部署和建模和运行。Coral有内置TPU处理器,可以加速允许TF模型。上图右侧产品独立USB供电设备,左侧是含有边缘TPU处理器的单板计算机。Coral软件
- Mendel OS:是Debian分支,使用Mendel可以搭建具有加速推理功能的机器学习模型。
- 边缘TPU编译器:可以匹配TFLite模型和TPU,最终可以进行运行模型
- Mendel Development Tool(mdt):Mendel开发工具,可以直接与开发板或USB加速器进行交互。
-
树莓派(Raspberry Pi)

树莓派是一种低成本信用卡大小的计算机,可以插入计算机显示器或者电视,并且可以使用键盘和鼠标。它几乎能完成计算机能实现的所有功能。类似Coral的Mendel系统,树莓派也有自己的基于Debian的Raspbian系统,树莓派在运行大型模型时效果较差,但可以与CoralUSB加速器进行配对来加快推理速度。 -
微控制器
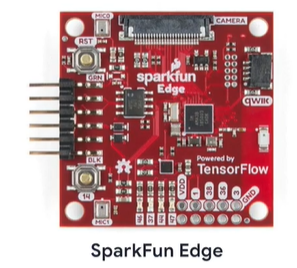
微控制器是小型功耗设备,通常用在嵌入式硬件中。微控制器的优点是低能耗、外形小,但是在存储和处理能力上较差。另外,微控制器通常是离线工作的,这对模型的大小和存储有了更高的要求。一些微控制器针对机器学习进行了优化,例如SparkFun Edge微控制器。
2.环境搭建
搭建环境,有以下三种方法:
-
基于源码搭建
这种方法依赖docker,安装docke以及确认docker是否正常运行的代码如下
curl -sSl http://get.docker.com|sh
sudo docker run hello-world
之后需要从Github上获取TensorFlow的源码,进入tensorflow目录
git clone https://github.com/tensorflow/tensorflow.git
cd tensorflow
之后进行build
sudo CI_DOCKER_EXTRA_PARAMS = \
	"-e CI_BUILD_PYTHON=python3 \
	-e CROSSTOOL_PYTHON_INCLUDE_PATH=/usr/include/python3.4" \
	tensorflow/tools/ci_build/ci_build.sh PI-PYTHON3 \
	tensorflow/tools/ci_build/pi/build_raspberry_pi.sh
之后会得到一个.whl文件,通过pip在树莓派上安装
-
使用pre-build的包
很重要的一个依赖包是libatlas-base-dev
sudo apt update sudo apt install python3-dev python3-pip sudo apt install libatlas-base-dev pip install --upgrade tensorflow -
仅使用解释器,可能会进行一些低层次的输出输出工作。
pip3 install xxx.whl
3.训练代码
(1)初始化解释器
# Load TFLite model and allocate tensors
interpreter = Interpreter(model_path=model_path)
interpreter.allocate_tensors()

# Get input and output tensors.
input_details = interpreter.get_input_details()
output_details = interpreter.get_output_details()
(2)预处理
# Get input size
input_shape = input_details[0]['shape']
size = input_shape[:2] if len(input_shape) == 3 else input_shape[1:3]

# Preprocess image
img = img.resize(size)
img = np.array(img)

# Add a batch dimension
input_data = np.expand_dims(img, axis=0)
(3)进行推理
# Point the data to be used for testing and run the interpreter
interpreter.set_tensor(input_details[0]['index'], input_data)
interpreter.invoke()
(4)获取结果
# Obtain results and map them to the classes
predictions = interpreter.get_tensor(output_details[0]['index'])[0]

# Get indices of the top k results
top_k_indices = np.argsort(predictions)[::-1][:top_k_results]

for i in range(top_k_results):
    print(labels[top_k_indices[i]], predictions[top_k_indices[i]] / 255.0)


 710
710


 被折叠的 条评论
为什么被折叠?
被折叠的 条评论
为什么被折叠?
 到【灌水乐园】发言


