


1.设计思路
突发奇想设计一个游戏,游戏名是《小老鼠历险记》,设计思路是一只可怜的小老鼠,他的敌人是猫和狗,它的活动区间只能是他的窝窝附近,不时还有猫猫和狗狗想吃它,所以小老鼠要走位躲过他们的偷袭,然而因为狗狗还是比较喜欢是骨头,所以和老鼠达成一个协议,可以用一个骨头换帮我对付一只猫,如果我没有骨头,狗狗就把我吃了,所以我一边要躲他们,一边收集骨头和狗一起攻击猫,玩家操纵小老鼠,让小老鼠生存下去。
2.结果展示


3. 实现逻辑
3.1 操控小老鼠
小老鼠的操控方式为键盘操控,分别为
w->向上 s->向下 a->向左 d->向右
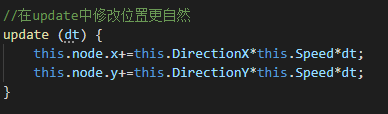
设计的方式为设置一个速度变量,分别为横轴和纵轴的速度,向右 向上为正,向下 向左为负。在update()中更新小老鼠的位置。

为小老鼠添加监听器,分别为w,a,s,d键的按下和松开。
    //键盘按下事件
    onKeyDown(event){
        switch(event.keyCode) {
            //按下a,则老鼠向前
            case cc.macro.KEY.w:
                console.log('老鼠前进');
                this.DirectionY = 1;
                break;
            case cc.macro.KEY.s:
                console.log('老鼠后退');
                this.DirectionY = -1;
                break;
            case cc.macro.KEY.a:
                console.log('老鼠向左');
                this.DirectionX = -1;
                break;
            case cc.macro.KEY.d:
                console.log('老鼠向右');
                this.DirectionX = 1;
                break;
        }
    }
    //按键松下事件
    onKeyUp(event){
        if(event.keyCode==cc.macro.KEY.w&&this.DirectionY==1){
            this.DirectionY=0;
        }
        if(event.keyCode==cc.macro.KEY.s&&this.DirectionY==-1){
            this.DirectionY=0;
        }
        if(event.keyCode==cc.macro.KEY.a&&this.DirectionX==-1){
            this.DirectionX=0;
        }
        if(event.keyCode==cc.macro.KEY.d&&this.DirectionX==1){
            this.DirectionX=0;
        }
    }
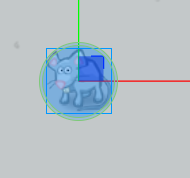
3.2 为小老鼠设置活动区间

小老鼠的活动区间为下方边界和木棍组成的区间,若没有区间限制,小老鼠就会在键盘的控制下,跃出游戏界面。
这里采用了刚体的方法,设置方法如下:
小老鼠的刚体:

设置为圆形的刚体,这里类型设置为Dynamic,
box2d 原本的刚体类型是三种:Static、Dynamic、Kinematic。Cocos Creator 多添加了一个类型:Animated。分别为静态、动态、运动学。取消睡眠,设置重力加速度为0.
为边界和木棍设置刚体,设置方式和小老鼠类似:

这里注意:一开始我在操纵老鼠的时候,老鼠可以越界,询问了一下,问题是刚体要全部设置为不休眠,这样才不会出现越界问题。
现在运行程序,就可以实现键盘控制小老鼠在制定区间活动了。
onLoad () {
        //给老鼠添加监听器
        cc.systemEvent.on(cc.SystemEvent.EventType.KEY_DOWN, this.onKeyDown, this);
        cc.systemEvent.on(cc.SystemEvent.EventType.KEY_UP, this.onKeyUp, this);
        //开启物理特性
        cc.director.getPhysicsManager().enabled = true;
        //开启碰撞检测
        cc.director.getCollisionManager().enabled = true;
    }
记得要开启物理特性,不然还是没有刚体的效果。
3.3 骨头,猫,狗掉落效果
他们的实现方法类似,都是先把图片拖到场景里面,然后加载脚本,再拖到资源管理器,成为预设体。
以骨头为例,脚本为:
const {ccclass, property} = cc._decorator;

@ccclass
export default class BoneControl extends cc.Component {

    // LIFE-CYCLE CALLBACKS:
    @property
    Speed: number = 100;//骨头移动速度

    // onLoad () {}

    start () {

    }

    update (dt) {
        this.node.y -= this.Speed*dt;
        if(this.node.y<-755){
            this.die();
        }
    }

    die(){
        this.node.destroy();
    }
}
注意越界后要去销毁。挂载好脚本后,设置为预设体

3.4 设置批量产生猫,狗,骨头
这里我设置了一个空节点,猫,狗,骨头都生成在该节点下面

为该空节点挂载脚本
要想实现批量产生猫,狗和骨头,就要引用他们的脚本和控件。

设置一个计时器,每隔一段时间就随机产生一个精灵。
这里利用schedule()方法,每隔0.8s就从猫,狗和骨头选一个生成,初始位置为空节点的高度,水平位置为游戏屏幕宽度之间的随机位置。
onLoad () {
        this.schedule(function() {
            //随机产生一个随机数确定是产生猫还是狗还是骨头
            let randn = Math.random()*100;
            if(randn>=0&&randn<=30){
                //生成骨头
                this.chooseBorn = 1;
            }
            else if(randn>30&&randn<=70){
                //生成猫
                this.chooseBorn = 2;
            }
            else{
                //生成狗
                this.chooseBorn = 3;
            }

            let thing = null;
            switch(this.chooseBorn){
                case 1:
                    thing = cc.instantiate(this.BonePre);
                    break;
                case 2:
                    thing = cc.instantiate(this.CatPre);
                    break;
                case 3:
                    thing = cc.instantiate(this.DogPre);
                    break;
            }
            //获得当前的场景
            let scene = cc.director.getScene();
            //设置骨头的父节点
            thing.parent = scene;
            //设置位置
            thing.y = this.node.y;//y和节点位置相同
            thing.x = Math.random()*400;
        }, 0.8);
    }
生成后设置父节点,这样就产生随机生成猫,狗和骨头的效果了。
3.5 设置碰撞事件
为每个事物添加碰撞,以老鼠为例

这里设置为圆形碰撞,为每个事物设置不同的Tag,这里我设置为Tag=1为骨头,Tag=0是老鼠,Tag=2是猫,Tag=3是狗,可以在预设体中设置,也可以一开始就设置碰撞再设置为预设体,预设体中设置记得保存。
接下来,在老鼠的脚本中实现碰撞检测:
在onCollisionStay(other)函数中,根据other的tag值判断碰撞的是什么事物。
//检测碰撞
    onCollisionStay(other){
        if(other.tag==1){
            //如果接到的是骨头
            console.log("与骨头发生碰撞")
            this.BoneNumber++;
            this.num_Bones.string = this.BoneNumber+"";
            let bone = other.getComponent(BoneControl);
            bone.die();
        }
        if(other.tag==2){
            //如果接到的是猫
            console.log("与猫发生碰撞")
            let cat = other.getComponent(CatControl);
            //检测有没有和狗的协议
            if(this.DealNumber>0){
                //协议数减一
                this.DealNumber--;
                this.num_agreenments.string = this.DealNumber+"";
                //猫死亡
                cat.die();
                this.KillCatNumber++;
                this.num_kills.string = ""+this.KillCatNumber;
            }
            else{
                //猫胜利
                cat.vectory();
                //自己死亡
                this.die();
            }
        }
        if(other.tag==3){
            console.log("与狗发生碰撞")
            //如果接到的是狗
            let dog = other.getComponent(DogControl);
            //检测骨头数是否大于0,用于和狗狗交易
            if(this.BoneNumber>0){
                //骨头数减一
                this.BoneNumber--;
                this.num_Bones.string = this.BoneNumber+"";
                //狗狗离开
                dog.die();
                //协议数加一
                this.DealNumber++;
                this.num_agreenments.string = this.DealNumber+"";
            }
            else{
                //狗狗胜利
                dog.vectory();
                //狗狗吃了老鼠
                this.die();
            }
        }
    }
碰撞处理的方法大致为获得碰撞体的脚本,然后处理各种情况,更新结果。
情况分为:
1.碰到的是骨头
接收骨头,骨头数+1,然后销毁骨头
2.碰到的是猫
判断是否有协议,如果协议大于等于1,则协议数-1,销毁猫,杀死猫的个数+1。
否则,销毁老鼠和猫,游戏结束,猫胜利。
3.碰到的是狗
判断收集的骨头数,若大于等于1则和狗达成协议,协议数+1,骨头数-1,销毁狗,
否则,销毁老鼠和狗,游戏结束,狗胜利。
3.6 记录游戏中的参数
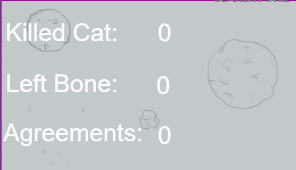
Killed Cat为杀死猫的个数
Left Bone为剩下的骨头数
Agreements为协议数
添加控制,每当参数改变的时候,更新Label的值

玩家在游戏过程中注意自己的骨头数是否大于0,才能和狗进行交易,并且只有当手中有协议的时候,才能和猫抗衡。
4.程序代码及框架
4.1 层级管理器

4.2 脚本代码
4.2.1 BoneControl.ts
const {ccclass, property} = cc._decorator;

@ccclass
export default class BoneControl extends cc.Component {

    // LIFE-CYCLE CALLBACKS:
    @property
    Speed: number = 100;//骨头移动速度


    // onLoad () {}

    start () {

    }

    update (dt) {
        this.node.y -= this.Speed*dt;
        if(this.node.y<-755){
            this.die();
        }
    }

    die(){
        this.node.destroy();
    }
}
4.2.2 CatControl.ts
const {ccclass, property} = cc._decorator;

@ccclass
export default class CatControl extends cc.Component {
    //计分控件
    @property(cc.Label)
    num_kills: cc.Label = null;

    //计分控件
    @property(cc.Label)
    num_Bones: cc.Label = null;

    @property
    Speed: number = 200;//猫移动的速度

    // onLoad () {}

    start () {

    }

    update (dt) {
        this.node.y -= this.Speed*dt;
        if(this.node.y<-755){
            this.die();
        }
    }

    die(){
        this.node.destroy();
    }

    vectory(){
        console.log("猫猫胜利");
    }
}
4.2.3 DogControl.ts
const {ccclass, property} = cc._decorator;

@ccclass
export default class DogControl extends cc.Component {

    @property
    Speed: number = 200;//猫移动的速度


    // onLoad () {}

    start () {

    }

    update (dt) {
        this.node.y -= this.Speed*dt;
        if(this.node.y<-755){
            this.die();
        }
    }

    die(){
        this.node.destroy();
    }

    vectory(){
        console.log("狗狗胜利")
    }
}
4.2.4 CreatorControl.ts
const {ccclass, property} = cc._decorator;

@ccclass
export default class CreatorControl extends cc.Component {

    // 骨头预设体
    @property(cc.Prefab)
    BonePre : cc.Prefab = null;

    //猫预设体
    @property(cc.Prefab)
    CatPre : cc.Prefab = null;

    //狗预设体
    @property(cc.Prefab)
    DogPre : cc.Prefab = null;


    chooseBorn: number = 0;

    onLoad () {
        this.schedule(function() {
            //随机产生一个随机数确定是产生猫还是狗还是骨头
            let randn = Math.random()*100;
            if(randn>=0&&randn<=30){
                //生成骨头
                this.chooseBorn = 1;
            }
            else if(randn>30&&randn<=70){
                //生成猫
                this.chooseBorn = 2;
            }
            else{
                //生成狗
                this.chooseBorn = 3;
            }

            let thing = null;
            switch(this.chooseBorn){
                case 1:
                    thing = cc.instantiate(this.BonePre);
                    break;
                case 2:
                    thing = cc.instantiate(this.CatPre);
                    break;
                case 3:
                    thing = cc.instantiate(this.DogPre);
                    break;
            }
            //获得当前的场景
            let scene = cc.director.getScene();
            //设置骨头的父节点
            thing.parent = scene;
            //设置位置
            thing.y = this.node.y;//y和节点位置相同
            thing.x = Math.random()*400;
        }, 0.8);
    }

    start () {

    }

    // update (dt) {}
}
4.2.5 MouseControl.ts
import BoneControl from "./BoneControl";
import CatControl from "./CatControl";
import DogControl from "./DogControl";
const {ccclass, property} = cc._decorator;
@ccclass
export default class MouseControl extends cc.Component {
@property
Speed: number = 200;//老鼠移动速度
//计分控件
@property(cc.Label)
num_kills: cc.Label = null;
//计分控件
@property(cc.Label)
num_Bones: cc.Label = null;
//计分控件
@property(cc.Label)
num_agreenments: cc.Label = null;
DirectionX: number = 0;//0->不动,1->前,-1->后
DirectionY: number = 0;//0->不动,1->右,-1->左
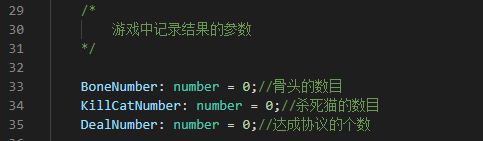
/*
游戏中记录结果的参数
*/
BoneNumber: number = 0;//骨头的数目
KillCatNumber: number = 0;//杀死猫的数目
DealNumber: number = 0;//达成协议的个数
onLoad () {
//给老鼠添加监听器
cc.systemEvent.on(cc.SystemEvent.EventType.KEY_DOWN, this.onKeyDown, this);
cc.systemEvent.on(cc.SystemEvent.EventType.KEY_UP, this.onKeyUp, this);
//开启物理特性
cc.director.getPhysicsManager().enabled = true;
//开启碰撞检测
cc.director.getCollisionManager().enabled = true;
}
//键盘按下事件
onKeyDown(event){
switch(event.keyCode) {
//按下a,则老鼠向前
case cc.macro.KEY.w:
console.log('老鼠前进');
this.DirectionY = 1;
break;
case cc.macro.KEY.s:
console.log('老鼠后退');
this.DirectionY = -1;
break;
case cc.macro.KEY.a:
console.log('老鼠向左');
this.DirectionX = -1;
break;
case cc.macro.KEY.d:
console.log('老鼠向右');
this.DirectionX = 1;
break;
}
}
//按键松下事件
onKeyUp(event){
if(event.keyCode==cc.macro.KEY.w&&this.DirectionY==1){
this.DirectionY=0;
}
if(event.keyCode==cc.macro.KEY.s&&this.DirectionY==-1){
this.DirectionY=0;
}
if(event.keyCode==cc.macro.KEY.a&&this.DirectionX==-1){
this.DirectionX=0;
}
if(event.keyCode==cc.macro.KEY.d&&this.DirectionX==1){
this.DirectionX=0;
}
}
start () {
}
//在update中修改位置更自然
update (dt) {
this.node.x+=this.DirectionX*this.Speed*dt;
this.node.y+=this.DirectionY*this.Speed*dt;
}
//检测碰撞
onCollisionStay(other){
if(other.tag==1){
//如果接到的是骨头
console.log("与骨头发生碰撞")
this.BoneNumber++;
this.num_Bones.string = this.BoneNumber+"";
let bone = other.getComponent(BoneControl);
bone.die();
}
if(other.tag==2){
//如果接到的是猫
console.log("与猫发生碰撞")
let cat = other.getComponent(CatControl);
//检测有没有和狗的协议
if(this.DealNumber>0){
//协议数减一
this.DealNumber--;
this.num_agreenments.string = this.DealNumber+"";
//猫死亡
cat.die();
this.KillCatNumber++;
this.num_kills.string = ""+this.KillCatNumber;
}
else{
//猫胜利
cat.vectory();
//自己死亡
this.die();
}
}
if(other.tag==3){
console.log("与狗发生碰撞")
//如果接到的是狗
let dog = other.getComponent(DogControl);
//检测骨头数是否大于0,用于和狗狗交易
if(this.BoneNumber>0){
//骨头数减一
this.BoneNumber--;
this.num_Bones.string = this.BoneNumber+"";
//狗狗离开
dog.die();
//协议数加一
this.DealNumber++;
this.num_agreenments.string = this.DealNumber+"";
}
else{
//狗狗胜利
dog.vectory();
//狗狗吃了老鼠
this.die();
}
}
}
die(){
// 停止 Player 节点的跳跃动作
this.node.stopAllActions();
// 重新加载场景 game
cc.director.loadScene('Game');
//销毁自己
this.node.destroy();
}
}
4.3 运行结果

4.4 资源及代码
链接:https://pan.baidu.com/s/1YOlpKq6HIwxoXAg4sIzaKg
提取码:vbua
–来自百度网盘超级会员V3的分享
Cocos Creator版本是2.4.7哦,如有错误还请指导。


 1844
1844


 被折叠的 条评论
为什么被折叠?
被折叠的 条评论
为什么被折叠?
 到【灌水乐园】发言


