


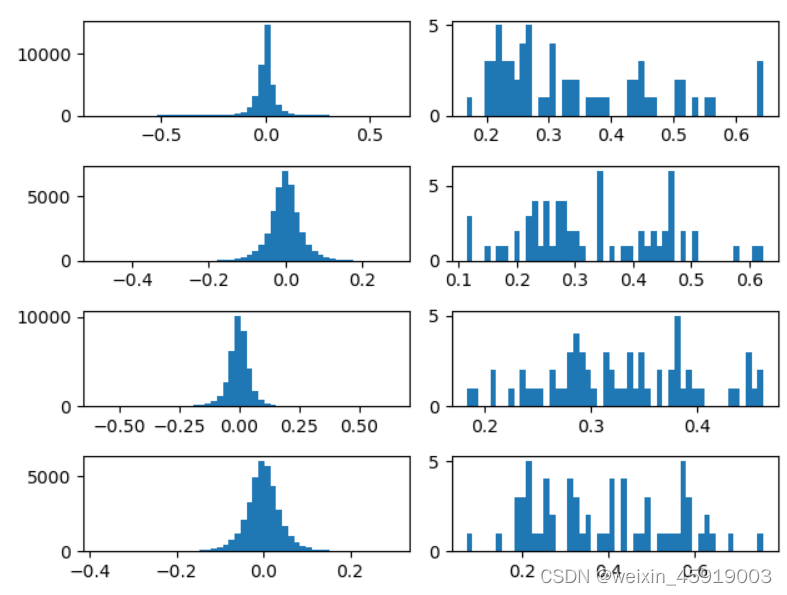
resnet18 的 layer1量化前
代码实现
代码参考:Efficient-Neural-Network-Bilibili / 3-Quantization / 3-2_Linear_Quantization.ipynb
from matplotlib import pyplot as plt

def plot_weights(model):
    modules = [module for module in model.modules()]
    num_sub_plot = 0
    for i, layer in enumerate(modules):
        if hasattr(layer, 'weight'):
            plt.subplot(421+num_sub_plot)
            w = layer.weight.data
            w_one_dim = w.cpu().numpy().flatten()
            plt.hist(w_one_dim, bins=50)
            num_sub_plot += 1
    plt.show()
其中
- plt.subplot()为绘制子图,4行2列,一共8个子图,子图序号从1开始
- plt.hist (x, bins=None):x为作直方图所要用的数据,必须是一维数组;bins为直方图的柱数,即要分的组数
# 量化前
plot_weights(r18_o.layer1)
结果:
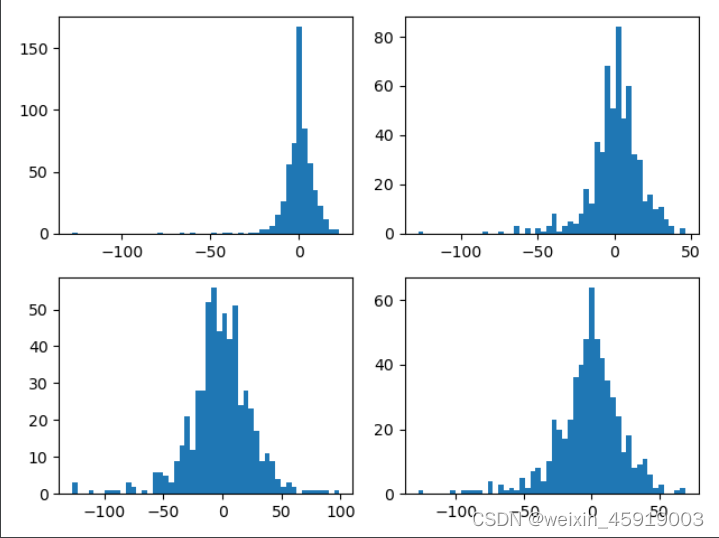
resnet18 的 layer1量化后的权重参数
获取量化后权重参数主要参考下面博客中的方法
天才da熊猫:pytorch的模型解析
代码实现
def plot_qweights(model):
modules = [module for module in model.modules()]
# print(modules)
num_sub_plot = 0
for i, layer in enumerate(modules):
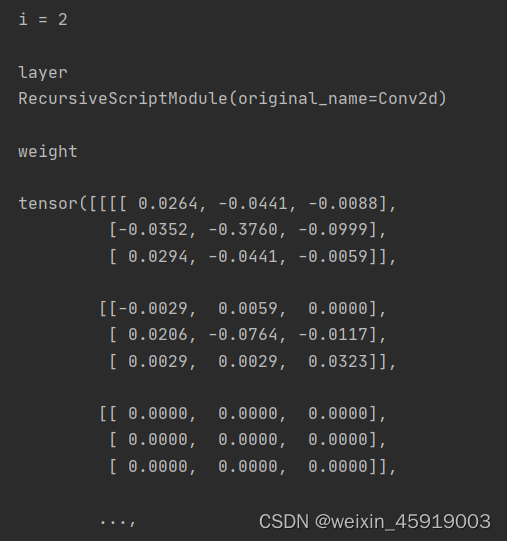
if i == 2 or i == 5 or i == 10 or i == 13:
print('\n i =', i)
print('\n layer \n', layer)
plt.subplot(221 + num_sub_plot)
# Get the weights
mod_c = layer._c
# print(mod_c.dump())
param = layer.__getattr__('_packed_params')
weight, bias = param.unpack()
# print('\n weight \n\n', weight)
w = weight.clone() # 创建副本
w1 = w[0] # 获取第一个元素张量
print(w1.int_repr())
w_one_dim =w1.int_repr().cpu().numpy().flatten()
plt.hist(w_one_dim, bins=50)
num_sub_plot += 1
plt.show()
- 使用weight, bias = param.unpack() 获取的量化后的权重张量的类型为torch.qint8,打印结果如下,可看到其中包含多个元素张量。因此,可以使用索引 [0] 来获取第一个元素张量。
需要注意:索引操作返回的是原始张量的视图而不是副本。如果修改了 ,则可能会影响原始张量中对应的元素张量。可以使用 .clone() 方法创建一个副本
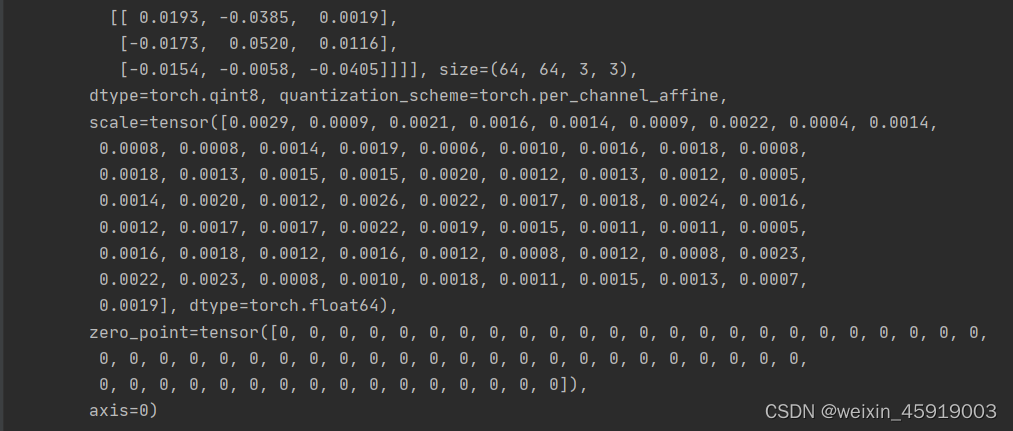
可以使用 int_repr() 获取量化张量的整数表示。下文中演示了tensor量化和反量化的具体过程。
pytorch中模型量化方案qconfig设置
量化后
plot_qweights(r18_q.layer1)
结果:


 392
392


 被折叠的 条评论
为什么被折叠?
被折叠的 条评论
为什么被折叠?
 到【灌水乐园】发言


