


封装
OVERVIEW
C++面向对象的三大特性为:封装、继承、多态。万物皆为对象,对象有其相应的属性和行为。
一、封装:
封装是C++面向对象三大特性之一,
1.封装的意义:
- 将属性和行为作为一个整体,表现生活中的事物。
- 将属性和行为加以权限控制。
#include<iostream>
using namespace std;
const double PI = 3.14;
//设计一个圆类,求圆的周长
class Circle {
public:
int r;
double calculate() {
return 2 * PI * r;
}
};
int main() {
//通过Circle类创建具体的对象(对象实例化)
Circle c1;
//通过对象给对象的属性赋值
c1.r = 10;
//通过对象的方法计算圆的周长
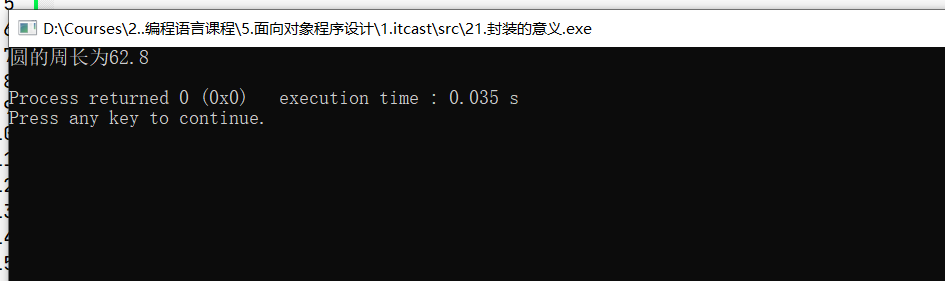
cout << "圆的周长为" << c1.calculate() << endl;
return 0;
}
注意:c中的struct结构体(默认为公有)与cpp中的class类(默认为私有)唯一的区别在于默认的访问权限不同。
2.封装访问权限:
访问权限包括三种:
| 权限 | 说明 |
|---|---|
| public公共权限 | 成员,类内可以访问、类外可以访问 |
| protected保护权限 | 成员,类内可以访问、类外不可以访问(儿子可以访问父亲中的保护内容) |
| private私有权限 | 成员,类内可以访问、类外不可以访问(儿子不可以访问父亲中的保护内容) |
注意protected权限与private权限之间的区别:继承的子类是否可以访问到父类protected权限中的内容。
3.成员属性私有化:
- 优点1:将所有成员属性设置为私有,可以自己控制读写权限。
- 优点2:对于写权限,可以检测数据的有效性。
#include<iostream>
using namespace std;

class Person {
private:
    string name;
    int age;
public:
    void setName(string n) {
        name = n;
    }
    string getName() {
        return name;
    }
    void setAge(int a) {
        //检测数据的有效性
        if (a < 0 || a > 150) {
            cout << "输入数据无效!" << endl;
            return ;
        }
        age = a;
    }
    int getAge() {
        return age;
    }
};

int main() {
    Person person;
    person.setName("luochenhao");
    person.setAge(-3);
    person.setAge(20);

    cout << "姓名为:" << person.getName() << endl;
    cout << "年龄为:" << person.getAge() << endl;
    system("pause");
    return 0;
}

4.封装案例—点与圆的关系判断:
#include <iostream>
using namespace std;
//1.设计点类
class Point{
public:
void setX(int m){
x = m;
}
int getX(){
return x;
}
void setY(int n){
y = n;
}
int getY(){
return y;
}
private:
int x;
int y;
};
//2.设计圆类
class Circle{
public:
//(1)设置&获取半径
void setR(int z) {
r = z;
}
int getR() {
return r;
}
//(2)设置&获取圆心
void setCenter(Point p) {
c = p;
}
Point getCenter(){
return c;
}
private:
int r;
Point c;
};
//3.设计判断点与圆的关系类
void isInCircle(Circle &c, Point &p){
//(1)计算两点之间距离的平方
int distance =
(c.getCenter().getX() - p.getX()) * (c.getCenter().getX() - p.getX()) +
(c.getCenter().getY() - p.getY()) * (c.getCenter().getY() - p.getY());
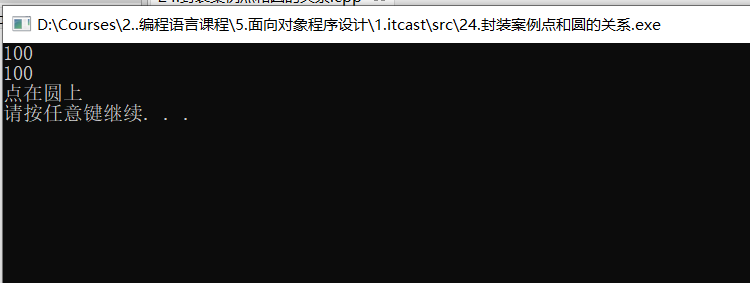
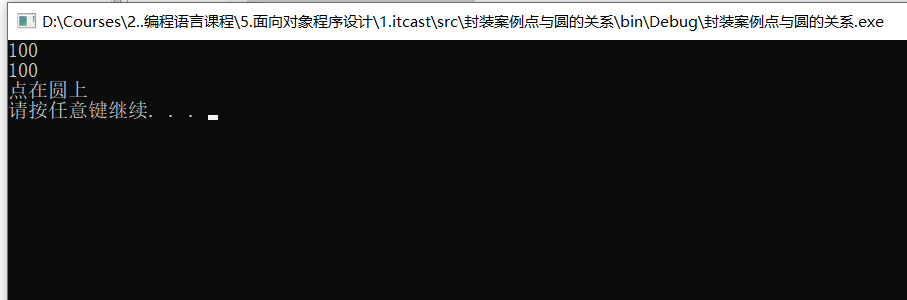
cout << distance << endl;
//(2)计算半径的平方
int rDistance = c.getR() * c.getR();
cout << rDistance << endl;
//(3)判断点在圆的位置关系
if(distance == rDistance) {
cout << "点在圆上" << endl;
} else if(distance > rDistance) {
cout << "点在圆外" << endl;
} else {
cout << "点在圆内" << endl;
}
}
int main() {
//模拟测试
//(1)创建圆
Point center;
center.setX(10);
center.setY(0);
Circle c;
c.setR(10);
c.setCenter(center);
//(2)创建点
Point p;
p.setX(10);
p.setY(10);
//(3)判断关系
isInCircle(c, p);
system("pause");
return 0;
}
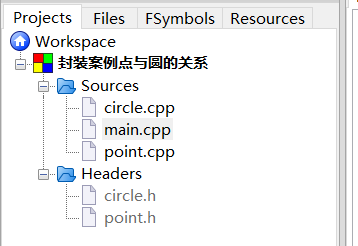
5.封装后类的分文件编写:
创建一个project文件,对封装案例进行分文件编写:
报错处理:redefinition of class xxx,了解关于
#ifndef,#define和#endif的实际作用。
文件结构:
#include <iostream>
#include "circle.h"
#include "point.h"
using namespace std;

void isInCircle(Circle &c, Point &p){
    //(1)计算两点之间距离的平方
    int distance =
    (c.getCenter().getX() - p.getX()) * (c.getCenter().getX() - p.getX()) +
    (c.getCenter().getY() - p.getY()) * (c.getCenter().getY() - p.getY());
    cout << distance << endl;
    //(2)计算半径的平方
    int rDistance = c.getR() * c.getR();
    cout << rDistance << endl;
    //(3)判断点在圆的位置关系
    if(distance == rDistance) {
        cout << "点在圆上" << endl;
    } else if(distance > rDistance) {
        cout << "点在圆外" << endl;
    } else {
        cout << "点在圆内" << endl;
    }
}

int main() {
    //模拟测试
    //(1)创建圆
    Point center;
    center.setX(10);
    center.setY(0);
    Circle c;
    c.setR(10);
    c.setCenter(center);
    //(2)创建点
    Point p;
    p.setX(10);
    p.setY(10);
    //(3)判断关系
    isInCircle(c, p);

    system("pause");
    return 0;
}
#ifndef POINT_H_INCLUDED
#define POINT_H_INCLUDED

#include <iostream>
using namespace std;

class Point{
public:
    void setX(int m);
    int getX();
    void setY(int n);
    int getY();
private:
    int x;
    int y;
};

#endif // POINT_H_INCLUDED
#ifndef CIRCLE_H_INCLUDED
#define CIRCLE_H_INCLUDED

#include <iostream>
using namespace std;
#include "point.h"

class Circle{
public:
    void setR(int z);
    int getR();
    void setCenter(Point p);
    Point getCenter();
private:
    int r;
    Point c;
};

#endif // CIRCLE_H_INCLUDED
#include "point.h"

//注意"Point::"用于声明该函数为Point作用域下的一个成员函数
void Point::setX(int m){
    x = m;
}
int Point::getX(){
    return x;
}
void Point::setY(int n){
    y = n;
}
int Point::getY(){
    return y;
}
#include "circle.h"

void Circle::setR(int z) {
    r = z;
}
int Circle::getR() {
    return r;
}
void Circle::setCenter(Point p) {
    c = p;
}
Point Circle::getCenter(){
    return c;
}
二、友元:
在程序中有些私有属性也想让类外特殊的一些函数 or 类进行访问,就需要使用到友元技术。
友元的目的就是让一个函数 or 类访问另一个类中的私有成员,友元的关键字为friend。
友元的三种实现包括:全局函数做友元、类做友元、成员函数做友元
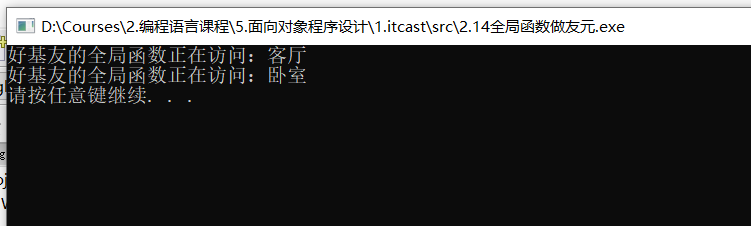
1.全局函数做友元:
全局函数做友元的关键实现:friend void 全局函数名();
#include<iostream>
using namespace std;

//1.建筑物类
class Building{
    friend void goodGay(Building *building);//关键语句:将全局函数设置为友元
public:
    Building(){
        sittingRoom = "客厅";
        bedRoom = "卧室";
    }
    string sittingRoom;
private:
    string bedRoom;
};

//2.全局函数
void goodGay(Building *building){
    cout << "好基友的全局函数正在访问:" << building->sittingRoom << endl;
    cout << "好基友的全局函数正在访问:" << building->bedRoom << endl;
}

void test01(){
    Building building;
    goodGay(&building);
}

int main(){
    test01();

    system("pause");
    return 0;
}
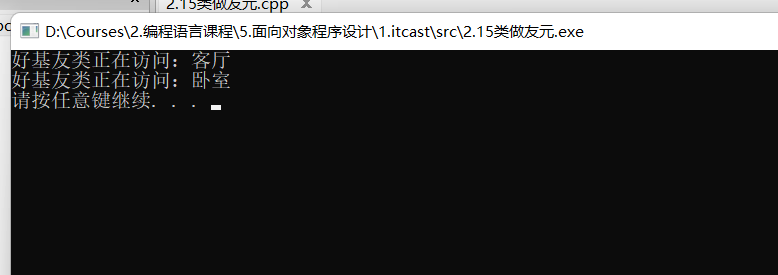
2.类做友元:
类做友元的关键实现:friend class 友元类名;
#include<iostream>
using namespace std;

class Building;
class GoodGay{
public:
    GoodGay();
    void visit();//参观函数访问Building中的属性
private:
    Building *building;
};

class Building{
    friend class GoodGay;//设置GoodGay类可以访问Buiding类中的私有成员
public:
    Building();
    string sittingRoom;
private:
    string beddingRoom;
};

//1.类外实现构造函数Building进行初始化操作,初始化string字符串操作
Building::Building(){
    sittingRoom = "客厅";
    beddingRoom = "卧室";
}

//2.类外实现构造函数GoodGay进行初始化操作,初始化指针指向堆区的一块内存
GoodGay::GoodGay(){
    building = new Building;
}

void GoodGay::visit(){
    cout << "好基友类正在访问:" << building->sittingRoom << endl;
    cout << "好基友类正在访问:" << building->beddingRoom << endl;
}

void test01(){
    GoodGay goodGay;
    goodGay.visit();
}

int main(){
    test01();
    system("pause");
    return 0;
}
3.成员函数做友元:
成员函数做友元的关键实现:friend 类名::成员函数名();
#include<iostream>
using namespace std;

class Building;
class GoodGay{
public:
    GoodGay();
    void visit1();//成员函数visit1可以访问到Building中的私有内容
    void visit2();//成员函数visit2不可以访问到Building中的私有内容
private:
    Building *building;
};

class Building{
    friend void GoodGay::visit1();//设置GoodGay类中的成员函数visit1可以访问Buiding类中的私有成员
public:
    Building();
    string sittingRoom;
private:
    string beddingRoom;
};

//1.类外实现构造函数Building进行初始化操作,初始化string字符串操作
Building::Building(){
    sittingRoom = "客厅";
    beddingRoom = "卧室";
}

//2.类外实现构造函数GoodGay进行初始化操作,初始化指针指向堆区的一块内存
GoodGay::GoodGay(){
    building = new Building;
}

void GoodGay::visit1(){
    cout << "visit1函数正在访问:" << building->sittingRoom << endl;
    cout << "visit1函数正在访问:" << building->beddingRoom << endl;
}

void GoodGay::visit2(){
    cout << "visit2函数正在访问:" << building->sittingRoom << endl;
    //cout << "visit2函数正在访问:" << building->beddingRoom << endl;
}

void test01(){
    GoodGay goodGay;
    goodGay.visit1();
    goodGay.visit2();
}

int main(){
    test01();
    system("pause");
    return 0;
}

注意:在程序中多个类之间存在相互联系,且需要类外实现构造函数需要特别注意书写顺序,否则容易报错。


 2114
2114


 被折叠的 条评论
为什么被折叠?
被折叠的 条评论
为什么被折叠?
 到【灌水乐园】发言


