


YOLOv8 训练 OSDaR23 数据集
文章目录
YOLOv8 & OSDaR23 介绍
参考这两个链接:
YOLOv8 深度详解
轨道交通数据集-OSDaR23: Open Sensor Data for Rail 2023
YOLOv8 源码
源码链接:https://github.com/ultralytics/ultralytics
相关部署和环境配置参考该链接:完整且详细的Yolov8复现+训练自己的数据集
OSDaR 数据集处理
1. 下载链接
因为这个数据集下载需要翻墙,然后下载那边的数据集,速度很慢,而且如果网络不好还会一直断联,因此此处俺将自己下载好的数据集链接放在百度网盘里面,需要的可以自行下载。不过这个数据集究极大,所以一定要用百度网盘的会员来下载。(看在作者这么无私的份上给个免费的赞吧)
链接: https://pan.baidu.com/s/1cWrnteEf-6vgsXawiqL4-w?pwd=yjnu 提取码: yjnu
2. 了解 YOLOv8 数据集格式
首先要了解 YOLOv8 所需要的数据集格式,可以看下面这个树状图
- datasets
- images
- train
- valid
- test
- labels
- train
- valid
- test
- images
这个就是 YOLOv8 数据集的分布,不过我在做这次的数据集的时候没有添加 test 部分的文件夹(对结果没啥影响)。
3. 处理 OSDaR23 数据集
下载好数据集后,打开文件夹可以发现里面有好多个文件夹,但是如果是用于图像检测的 YOLOv8 来说,使用这 6 个文件夹即可。同时,每个文件夹里面的标签文件都放在同一个 .json 文件下面。所以这个标签文件非常巨大,内容及其难读取。
下面是我根据标签文件里面的内容读取一个图片的标注框的代码,可以进行参考。
在这里插入代码片
正式开始处理数据集。
先将处理数据集的代码与所有文件夹放在同一个文件夹下面,如下图所示(dataset.py)。yolo_dataset 为最后生成的数据集文件(一共 107.3 GB,简直离谱!!!)。

生成数据集的代码如下:
大部分代码都有注释,想细看的可以自己逐步分析,里面还有一部分数据增强环节,不过因为增强部分太过耗时,因此被注释掉了,在本人实际使用时并未打开(想开的兄弟可以自行打开)。运行完毕即可生成名为 yolo_dataset 的数据集。
不过因为数据集里面有一些图像实际是没有标注内容的,因此理论上其对应的 txt 文件应该为空文件,但时当时写代码的时候没注意到,导致空文件没有生成,而图片数量比实际对应的标签文件数量多了一些。针对这个问题,删除多余的图片即可。
# import raillabel
import json
import cv2
import os
import shutil
import random
import numpy as np

dirt_yaml = {
            'person': 0,        'bicycle': 1,           'road_vehicle': 2,      'motorcycle': 3,
            'crowd': 4,         'group_of_bicycles': 5, 'train': 6,             'wagons': 7,
            'animal': 8,        'group_of_animals': 9,  'wheelchair': 10,       'drag_shoe': 11,
            'track': 12,        'transition': 13,       'switch': 14,           'catenary_pole': 15,
            'signal_pole': 16,  'signal': 17,           'signal_bridge': 18,    'buffer_stop': 19,
            'flame': 20,        'smoke': 21
}

# 定义要遍历的文件夹列表
rgb_folder_list = ["rgb_center", "rgb_left", "rgb_right",
               "rgb_highres_center", "rgb_highres_left", "rgb_highres_right"]

home_path = os.getcwd()                           # /home/be/Desktop/Train_Image_Dataset  主目录
print(home_path)
yolo_path = './yolo_dataset/'                       # yolo 数据集路径
yolo_image_path = yolo_path + 'image/'
yolo_image_train_path = yolo_image_path + 'train/'
yolo_image_valid_path = yolo_image_path + 'valid/'
yolo_label_path = yolo_path + 'label/'
yolo_label_train_path = yolo_label_path + 'train/'
yolo_label_valid_path = yolo_label_path + 'valid/'
train_ratio = 0.8                                   # 分配比例
valid_ratio = 0.2
# 遍历所有子文件夹里面的 6 个 rgb 图像文件夹,将每个文件夹里面的图像路径按照 8:2 随机分配到数据集的 train 和 valid
train_paths = []
valid_paths = []


def make_dirs():
    if os.path.exists(yolo_path):
        print("文件夹已存在!")
        shutil.rmtree(yolo_path)
    os.mkdir(yolo_path)
    os.makedirs(yolo_image_path)
    os.makedirs(yolo_image_train_path)
    os.makedirs(yolo_image_valid_path)
    os.makedirs(yolo_label_path)
    os.makedirs(yolo_label_train_path)
    os.makedirs(yolo_label_valid_path)


# 将文件夹里面的所有子文件的所有图片进行存储
def random_shuffle():
    for sub_folder in os.listdir(home_path):
        sub_folder_path = os.path.join(home_path, sub_folder)
        for folder in rgb_folder_list:
            sub_sub_folder_path = os.path.join(sub_folder_path, folder)
            if not os.path.exists(sub_sub_folder_path):
                continue
            current_folder_images = []
            for file_name in os.listdir(sub_sub_folder_path):
                file_path = os.path.join(sub_sub_folder_path, file_name)
                current_folder_images.append(file_path)
            random.shuffle(current_folder_images)
            split_index = int(4 * len(current_folder_images) / 5)
            train_paths.extend(current_folder_images[:split_index])
            valid_paths.extend(current_folder_images[split_index:])
    print(len(train_paths), train_paths)
    print(len(valid_paths), valid_paths)


def transfer():
    n = 0  # 统计现在向数据集移动了多少个图像
    # 将标签文件的内容转换成需要用到的 txt
    for folder_name in os.listdir(home_path):
        if not os.path.isdir(folder_name):          # 先跳过 dataset.py
            continue
        # 首先筛掉不是数据的文件夹
        sub_folder_path = os.path.join(home_path, folder_name)
        # 检查子文件夹中是否存在 JSON 文件
        json_found = False
        json_file = ''
        for item in os.listdir(sub_folder_path):
            if item.endswith('.json'):
                json_found = True
                json_file = item
                break
        if json_found:
            print("当前子文件夹中存在 JSON 文件。")
        else:
            continue

        sub_json_path = os.path.join(sub_folder_path, json_file)
        print("当前数据文件夹:             ", folder_name)
        print("当前文件夹路径:             ", sub_folder_path)
        print("当前文件夹标签文件路径:      ", sub_json_path)
        # 读取文件夹对应的 json 文件
        with open(sub_json_path, 'r') as data_file:
            scene = json.load(data_file)
            frames = scene['openlabel']['frames']
            # 遍历每一帧 frame
            for frame, frame_value in frames.items():
                print('current frame ================================================================================'+\
                      '======================================================================================: ', frame)
                for properties_or_objects, _value in frame_value.items():
                    print('properties_or_objects==============================================:', properties_or_objects)
                    # 获取图片和对应的时间戳
                    if properties_or_objects == 'frame_properties':
                        streams_value = _value['streams']
                        for key_folder, image_path in streams_value.items():
                            original_image_path = sub_folder_path + image_path['uri']
                            # 排除不是 rgb 的图像
                            if 'ir' in image_path['uri'] or 'lidar' in image_path['uri'] or 'radar' in image_path['uri']:
                                continue
                            # 确定图像是否存在
                            if not os.path.exists(original_image_path):
                                print('error')
                                break
                            # 判断图像属于 train 还是 valid
                            # 在传输图像的时候顺便进行变亮的增强处理,扩充一倍的数据集
                            if judge_train_valid(original_image_path) == 'train':
                                # 读取当前路径下面的图片然后复制到数据集的路径下面
                                shutil.copy(original_image_path, yolo_image_train_path)
                                old_image_name = yolo_image_train_path + image_path['uri'].split("/")[-1]
                                new_image_name = yolo_image_train_path + folder_name + '_' + key_folder + '_' + image_path['uri'].split("/")[-1].split("_")[0] + '.png'
                                os.rename(old_image_name, new_image_name)
                                # # 图像增强并另存为 _2 版本
                                # pre_image = cv2.imread(new_image_name)
                                # done_image = brighter(pre_image)
                                # cv2.imwrite(yolo_image_train_path + folder_name + '_' + key_folder + '_' + image_path['uri'].split("/")[-1].split("_")[0] + '_2' + '.png', done_image)
                            elif judge_train_valid(original_image_path) == 'valid':
                                shutil.copy(original_image_path, yolo_image_valid_path)
                                old_image_name = yolo_image_valid_path + image_path['uri'].split("/")[-1]
                                new_image_name = yolo_image_valid_path + folder_name + '_' + key_folder + '_' + image_path['uri'].split("/")[-1].split("_")[0] + '.png'
                                os.rename(old_image_name, new_image_name)
                                # # 图像增强并另存为 _2 版本
                                # pre_image = cv2.imread(new_image_name)
                                # done_image = brighter(pre_image)
                                # cv2.imwrite(yolo_image_valid_path + folder_name + '_' + key_folder + '_' + image_path['uri'].split("/")[-1].split("_")[0] + '_1' + '.png', done_image)
                            n += 1
                            print(n)

                    # 获取标签文件 txt 的信息
                    if properties_or_objects == 'objects':
                        for key_object_data, value_object_data in _value.items():
                            for key, value in value_object_data.items():
                                for key_bbox, value_bbox in value.items():
                                    # 不属于 bbox 的数据,例如 poly2d 直接跳过
                                    if key_bbox == 'bbox':
                                        for value_bbox_i in value_bbox:
                                            # 开始判断单个 bbox 的数据对应的种类以及所属的图片的文件夹
                                            # 获取图片的尺寸并计算框的距离比例
                                            if value_bbox_i['coordinate_system'] in rgb_folder_list:
                                                # 获取 bbox 对应目标物体的种类
                                                class_name = value_bbox_i['name'].split('__')[-1]
                                                class_index = dirt_yaml[class_name]
                                                print(value_bbox_i['name'], '       ', class_name, ':   ', class_index)
                                                image_h = 0
                                                image_w = 0
                                                frame_current_path = ''
                                                # 标签文件命名(文件夹_摄像机文件夹_第几帧)
                                                formatted_frame = '{:0>3}'.format(frame)
                                                new_txt_name = folder_name + '_' + value_bbox_i[
                                                        'coordinate_system'] + '_' + formatted_frame + '.txt'
                                                find_image_ = formatted_frame + '_'
                                                # 此处循环只为找到获得 bbox 对应图片并获得 高宽 尺寸数据,然后计算出 bbox 的数据
                                                bbox_folder = os.path.join(sub_folder_path, value_bbox_i['coordinate_system'])
                                                for image_name in os.listdir(bbox_folder):
                                                    if find_image_ in image_name:
                                                        frame_current_path = os.path.join(bbox_folder, image_name)
                                                        frame_current_file = cv2.imread(frame_current_path)
                                                        image_h, image_w, c = frame_current_file.shape          # 这个没有问题
                                                txt_bbox = to_yolo(value_bbox_i['val'], image_h, image_w)
                                                txt_str = str(class_index) + ' ' + str(
                                                                ' '.join(str(element) for element in txt_bbox)) + '\n'
                                                print(frame_current_path)
                                                # 判断标签文件是 train 还是 valid
                                                if judge_train_valid(frame_current_path) == 'train':
                                                    txt_path = os.path.join(yolo_label_train_path,
                                                                            new_txt_name)
                                                    with open(txt_path, 'a') as txt_file:
                                                        txt_file.write(txt_str)
                                                        txt_file.close()
                                                elif judge_train_valid(frame_current_path) == 'valid':
                                                    txt_path = os.path.join(yolo_label_valid_path,
                                                                            new_txt_name)
                                                    with open(txt_path, 'a') as txt_file:
                                                        txt_file.write(txt_str)
                                                        txt_file.close()

                                                print(value_bbox_i['name'], ' ', 'h: ', image_h, 'w: ', image_w)
                                                print(txt_str)
                                                print(n)
                                                print()
                                            else:
                                                continue


def to_yolo(bbox, image_h, image_w):
    # 四个数据分别为: 中心点_x、中心点_y、检测框_宽、检测框_高
    return [bbox[0] / image_w, bbox[1] / image_h, bbox[2] / image_w, bbox[3] / image_h]


def judge_train_valid(path):
    if path in train_paths:
        return 'train'
    if path in valid_paths:
        return 'valid'


# 亮度
# def brighter(image, percetage=1.3):
#     image_copy = image.copy()
#     w = image.shape[1]
#     h = image.shape[0]
#     # get brighter
#     for xi in range(0, w):
#         for xj in range(0, h):
#             image_copy[xj, xi, 0] = np.clip(int(image[xj, xi, 0] * percetage), a_max=255, a_min=0)
#             image_copy[xj, xi, 1] = np.clip(int(image[xj, xi, 1] * percetage), a_max=255, a_min=0)
#             image_copy[xj, xi, 2] = np.clip(int(image[xj, xi, 2] * percetage), a_max=255, a_min=0)
#     return image_copy


if __name__ == '__main__':
    make_dirs()
    random_shuffle()
    transfer()
其实就是读取文件夹里面的图片名字,然后提换成对应的 txt 文件名,然后在 labels 文件夹里面找,是否存在对应的 txt 文件,如果没有就创建一个空的 txt 文件或者把这个图片删除。
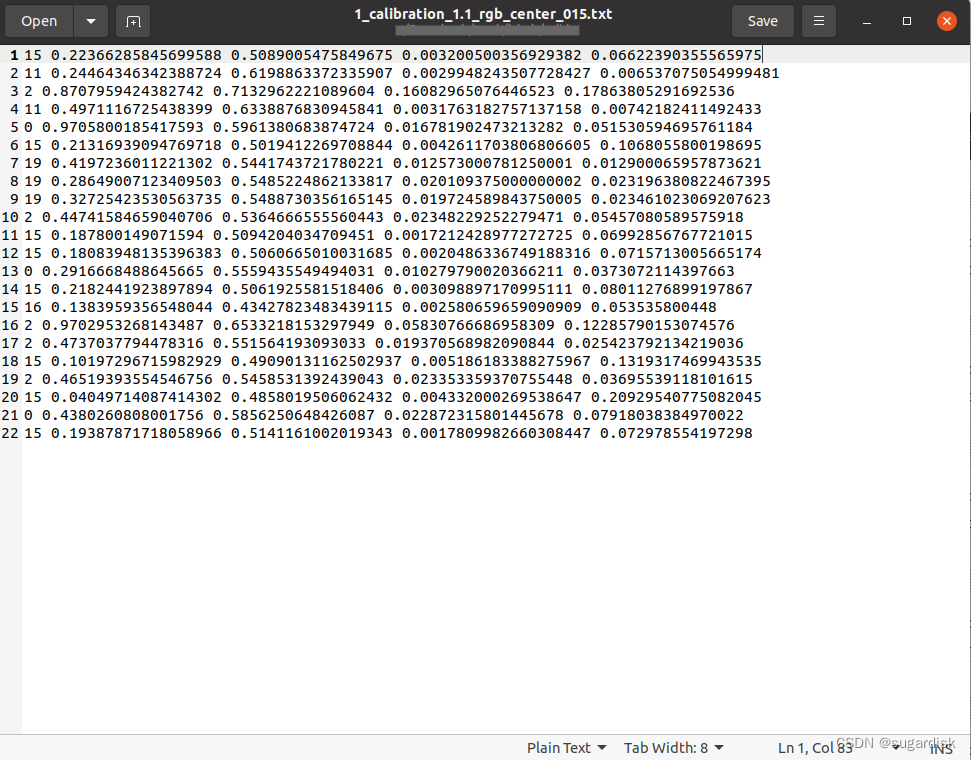
最后的结果如下所示,其中一个 txt 文件:
YOLOv8 训练
编写 yolo_dataset.yaml 训练文件,内容如下
# Train/val/test sets as 1) dir: path/to/imgs, 2) file: path/to/imgs.txt, or 3) list: [path/to/imgs1, path/to/imgs2, ..]
path: /home/be/Desktop/T_I_Dataset/yolo_dataset  # dataset root dir
train: images/train  # train images (relative to 'path') 4 images
val: images/valid  # val images (relative to 'path') 4 images
test:  # test images (optional)
# Classes
names:
  0: person
  1: bicycle
  2: road_vehicle
  3: motorcycle
  4: crowd
  5: group_of_bicycles
  6: train
  7: wagons
  8: animal
  9: group_of_animals
  10: wheelchair
  11: drag_shoe
  12: track
  13: transition
  14: switch
  15: catenary_pole
  16: signal_pole
  17: signal
  18: signal_bridge
  19: buffer_stop
  20: flame
  21: smoke
最后在 YOLOv8 终端部分输入命令:yolo detect train data=yolo_dataset.yaml model=yolov8n.yaml epochs=300 imgsz=640
温情提示:这个数据集很大,训练时间很久,如果可以,尽量使用 GPU 训练,对应命令为 yolo detect train data=yolo_dataset.yaml model=yolov8n.yaml epochs=300 imgsz=640 device=0,但是即便如此依旧时间很久。最好有超算的话,用超算可以节省很多时间。
这么說,我在并行超算平台训练这个数据集, 300轮,使用了 8 张卡,依旧接近 10 个小时。emmmmmmmm,所以,你懂的。
使用权重文件进行预测以及生成结果视频
使用权重文件进行预测,可以使用命令
“ 记得修改文件的路径 ”
yolo detect predict model=/{pwd}/best.pt source=/{pwd}/yolo_dataset/images/valid
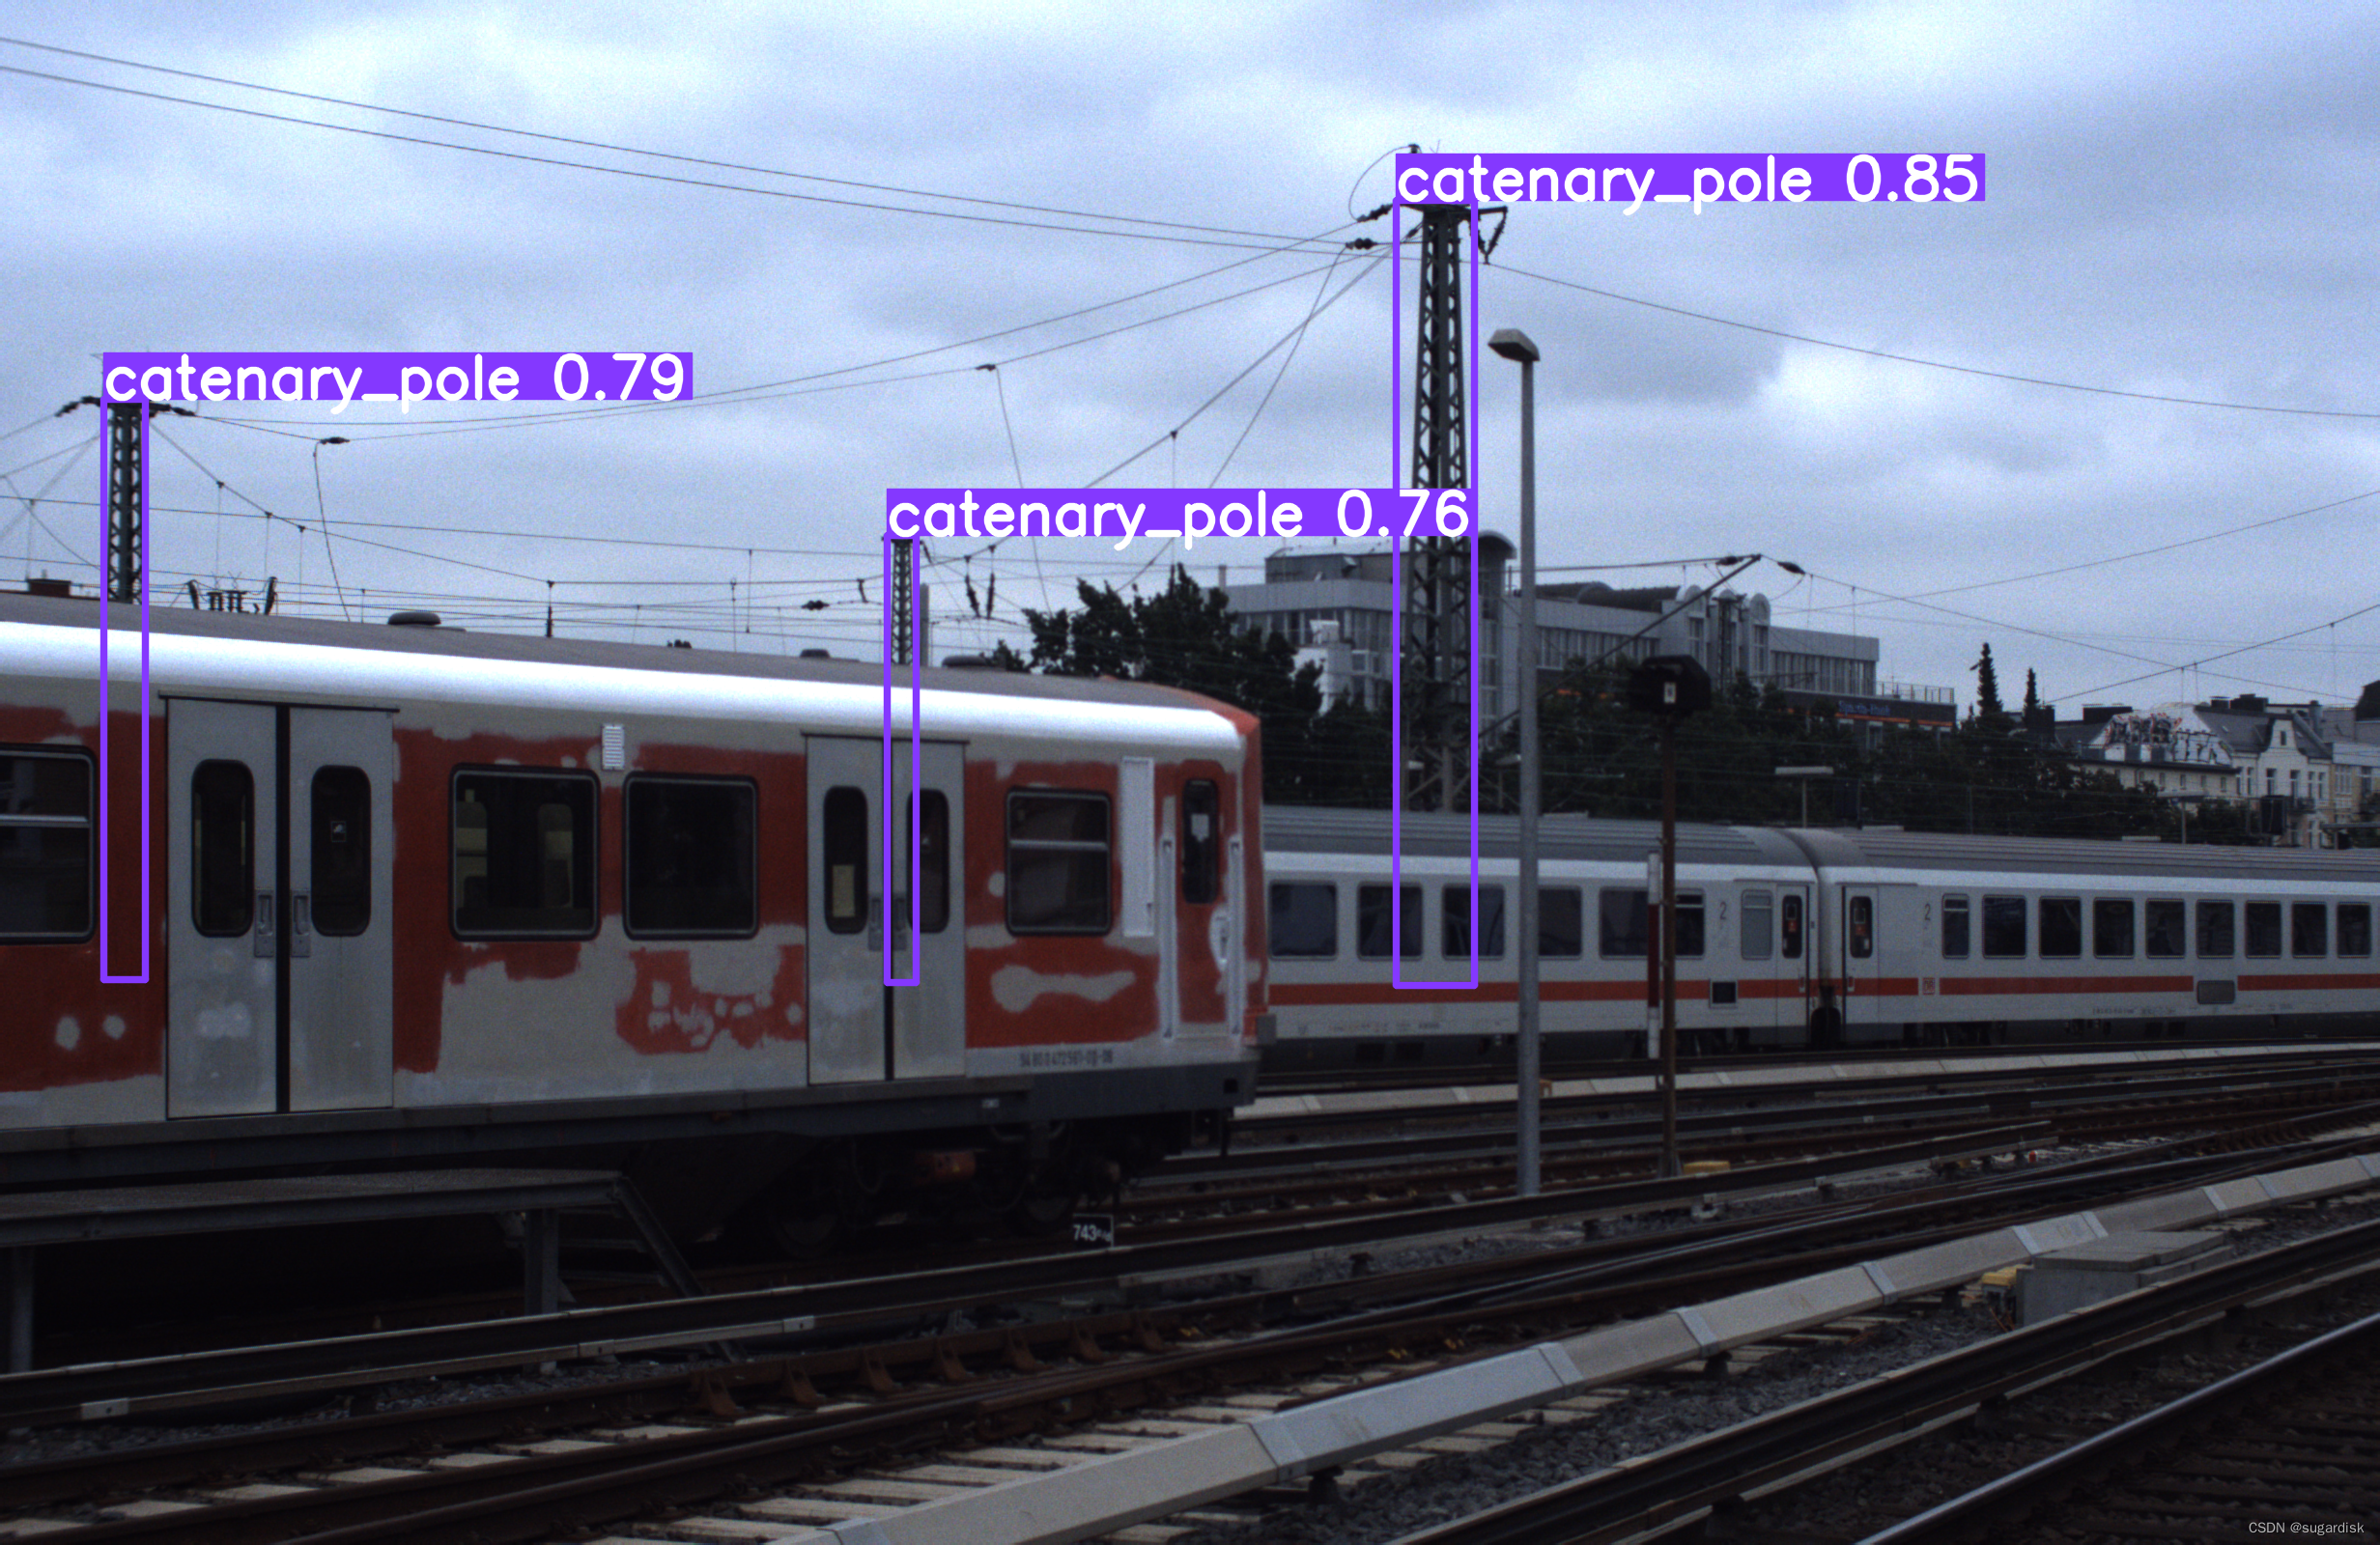
可以得到一系列结果图,例如下图:
使用生成的结果进行视频制作
代码如下:
from PIL import Image
import cv2
import os
import numpy as np

class_dict = {
    '0': 'person',
    '1': 'bicycle',
    '2': 'road_vehicle',
    '3': 'motorcycle',
    '4': 'crowd',
    '5': 'group_of_bicycles',
    '6': 'train',
    '7': 'wagons',
    '8': 'animal',
    '9': 'group_of_animals',
    '10': 'wheelchair',
    '11': 'drag_shoe',
    '12': 'track',
    '13': 'transition',
    '14': 'switch',
    '15': 'catenary_pole',
    '16': 'signal_pole',
    '17': 'signal',
    '18': 'signal_bridge',
    '19': 'buffer_stop',
    '20': 'flame',
    '21': 'smoke'
}

# 定义目标宽度
target_width = 1000
# 帧率
frame_rate = 1
video_name = '/{pwd}/test.mp4'
# 创建视频写入对象
fourcc = cv2.VideoWriter_fourcc(*'mp4v')  # 使用 MPEG-4 编解码器(对应字符串为 'mp4v')
video = cv2.VideoWriter(video_name, fourcc, frame_rate, (2000, 1298))

source_images_path = '/{pwd}/images/valid'  # 存放原测试部分的图像
source_labels_path = '/{pwd}/labels/valid'  # 存放原测试部分的标签文件
predict_images_path = '/{pwd}/runs/detect/train_predict'    # 存放已经进行 predict 的图片

for pre_image in os.listdir(predict_images_path):
    # 分别获得图片对应的路徑
    s_image_path = os.path.join(source_images_path, pre_image)
    s_label_path = os.path.join(source_labels_path, pre_image.replace('.png', '.txt'))
    p_image_path = os.path.join(predict_images_path, pre_image)

    # 检查这个文件路径是否正确
    if not os.path.exists(s_label_path) or not os.path.exists(s_image_path) or not os.path.exists(p_image_path):
        print("文件路径不匹配")
        break
    # 读取图像
    s_image = cv2.imread(s_image_path)
    p_image = cv2.imread(p_image_path)
    image_h, image_w, c = p_image.shape
    # 创建一个用于标注的图像
    clone_s_image = np.copy(s_image)
    # 创建一个空白的画板
    blank_image = np.ones((image_h, image_w, 3), np.uint8) * 0
    # 对原图像进行标签标注
    with open(s_label_path, 'r') as file:
        for line in file:
            class_bbox = line.split(' ')
            label_class = class_dict[class_bbox[0]]
            bbox = [int(float(class_bbox[1]) * image_w), int(float(class_bbox[2]) * image_h),      # 中心点位置,检测框宽高
                    int(float(class_bbox[3]) * image_w), int(float(class_bbox[4].split('\n')[0]) * image_h),]
            # 计算矩形的左上角和右下角坐标
            top_left = (int(bbox[0] - bbox[2] / 2), int(bbox[1] - bbox[3] / 2))
            bottom_right = (int(bbox[0] + bbox[2] / 2), int(bbox[1] + bbox[3] / 2))
            # 画检测框
            clone_s_image = cv2.rectangle(clone_s_image, top_left, bottom_right, color=(0, 255, 0), thickness=2)
            blank_image = cv2.rectangle(blank_image, top_left, bottom_right, color=(0, 255, 0), thickness=2)

    # 计算缩放比例
    scale_percent = target_width / image_w
    width = target_width
    height = int(image_h * scale_percent)
    dim = (width, height)
    print(dim)
    org = cv2.FONT_HERSHEY_SIMPLEX
    # 缩放图像,并打上标签并拼接
    resized_s_image = cv2.resize(s_image, dim, interpolation=cv2.INTER_LINEAR)
    resized_s_image = cv2.putText(resized_s_image, 'source image', (10, 50), cv2.FONT_HERSHEY_SIMPLEX, 1, (0, 0, 255),
                                  1)
    resized_blank_image = cv2.resize(blank_image, dim, interpolation=cv2.INTER_LINEAR)
    resized_blank_image = cv2.putText(resized_blank_image, 'label image', (10, 50), cv2.FONT_HERSHEY_SIMPLEX, 1,
                                      (0, 0, 255), 1)
    resized_clone_image = cv2.resize(clone_s_image, dim, interpolation=cv2.INTER_LINEAR)
    resized_clone_image = cv2.putText(resized_clone_image, 'test image', (10, 50), cv2.FONT_HERSHEY_SIMPLEX, 1,
                                      (0, 0, 255), 1)
    resized_p_image = cv2.resize(p_image, dim, interpolation=cv2.INTER_LINEAR)
    resized_p_image = cv2.putText(resized_p_image, 'predict image', (10, 50), cv2.FONT_HERSHEY_SIMPLEX, 1, (0, 0, 255),
                                  1)

    # 水平拼接两张图片
    combined_1_image = np.hstack((resized_s_image, resized_blank_image))
    combined_2_image = np.hstack((resized_clone_image, resized_p_image))
    # 垂直拼接两张图片
    concatenated_image = np.vstack((combined_1_image, combined_2_image))
    h, w, c = concatenated_image.shape
    print(h, w)
    # 向视频中插入图片帧
    video.write(concatenated_image)
# 释放资源
cv2.destroyAllWindows()
video.release()
测试的图片效果如下所示:

生成的视频结果如下:
OSDaR23预测视频


 1万+
1万+

 被折叠的 条评论
为什么被折叠?
被折叠的 条评论
为什么被折叠?
 到【灌水乐园】发言


