


1.实验任务
(一)掌握在XML文件中和Java代码中编写布局
(二)掌握搭建常见布局:相对布局,线性布局,帧布局和表格布局
2.实验内容
1.在XML文件中和Java代码中编写布局
2.搭建常见布局
(1)相对布局
(2)线性布局
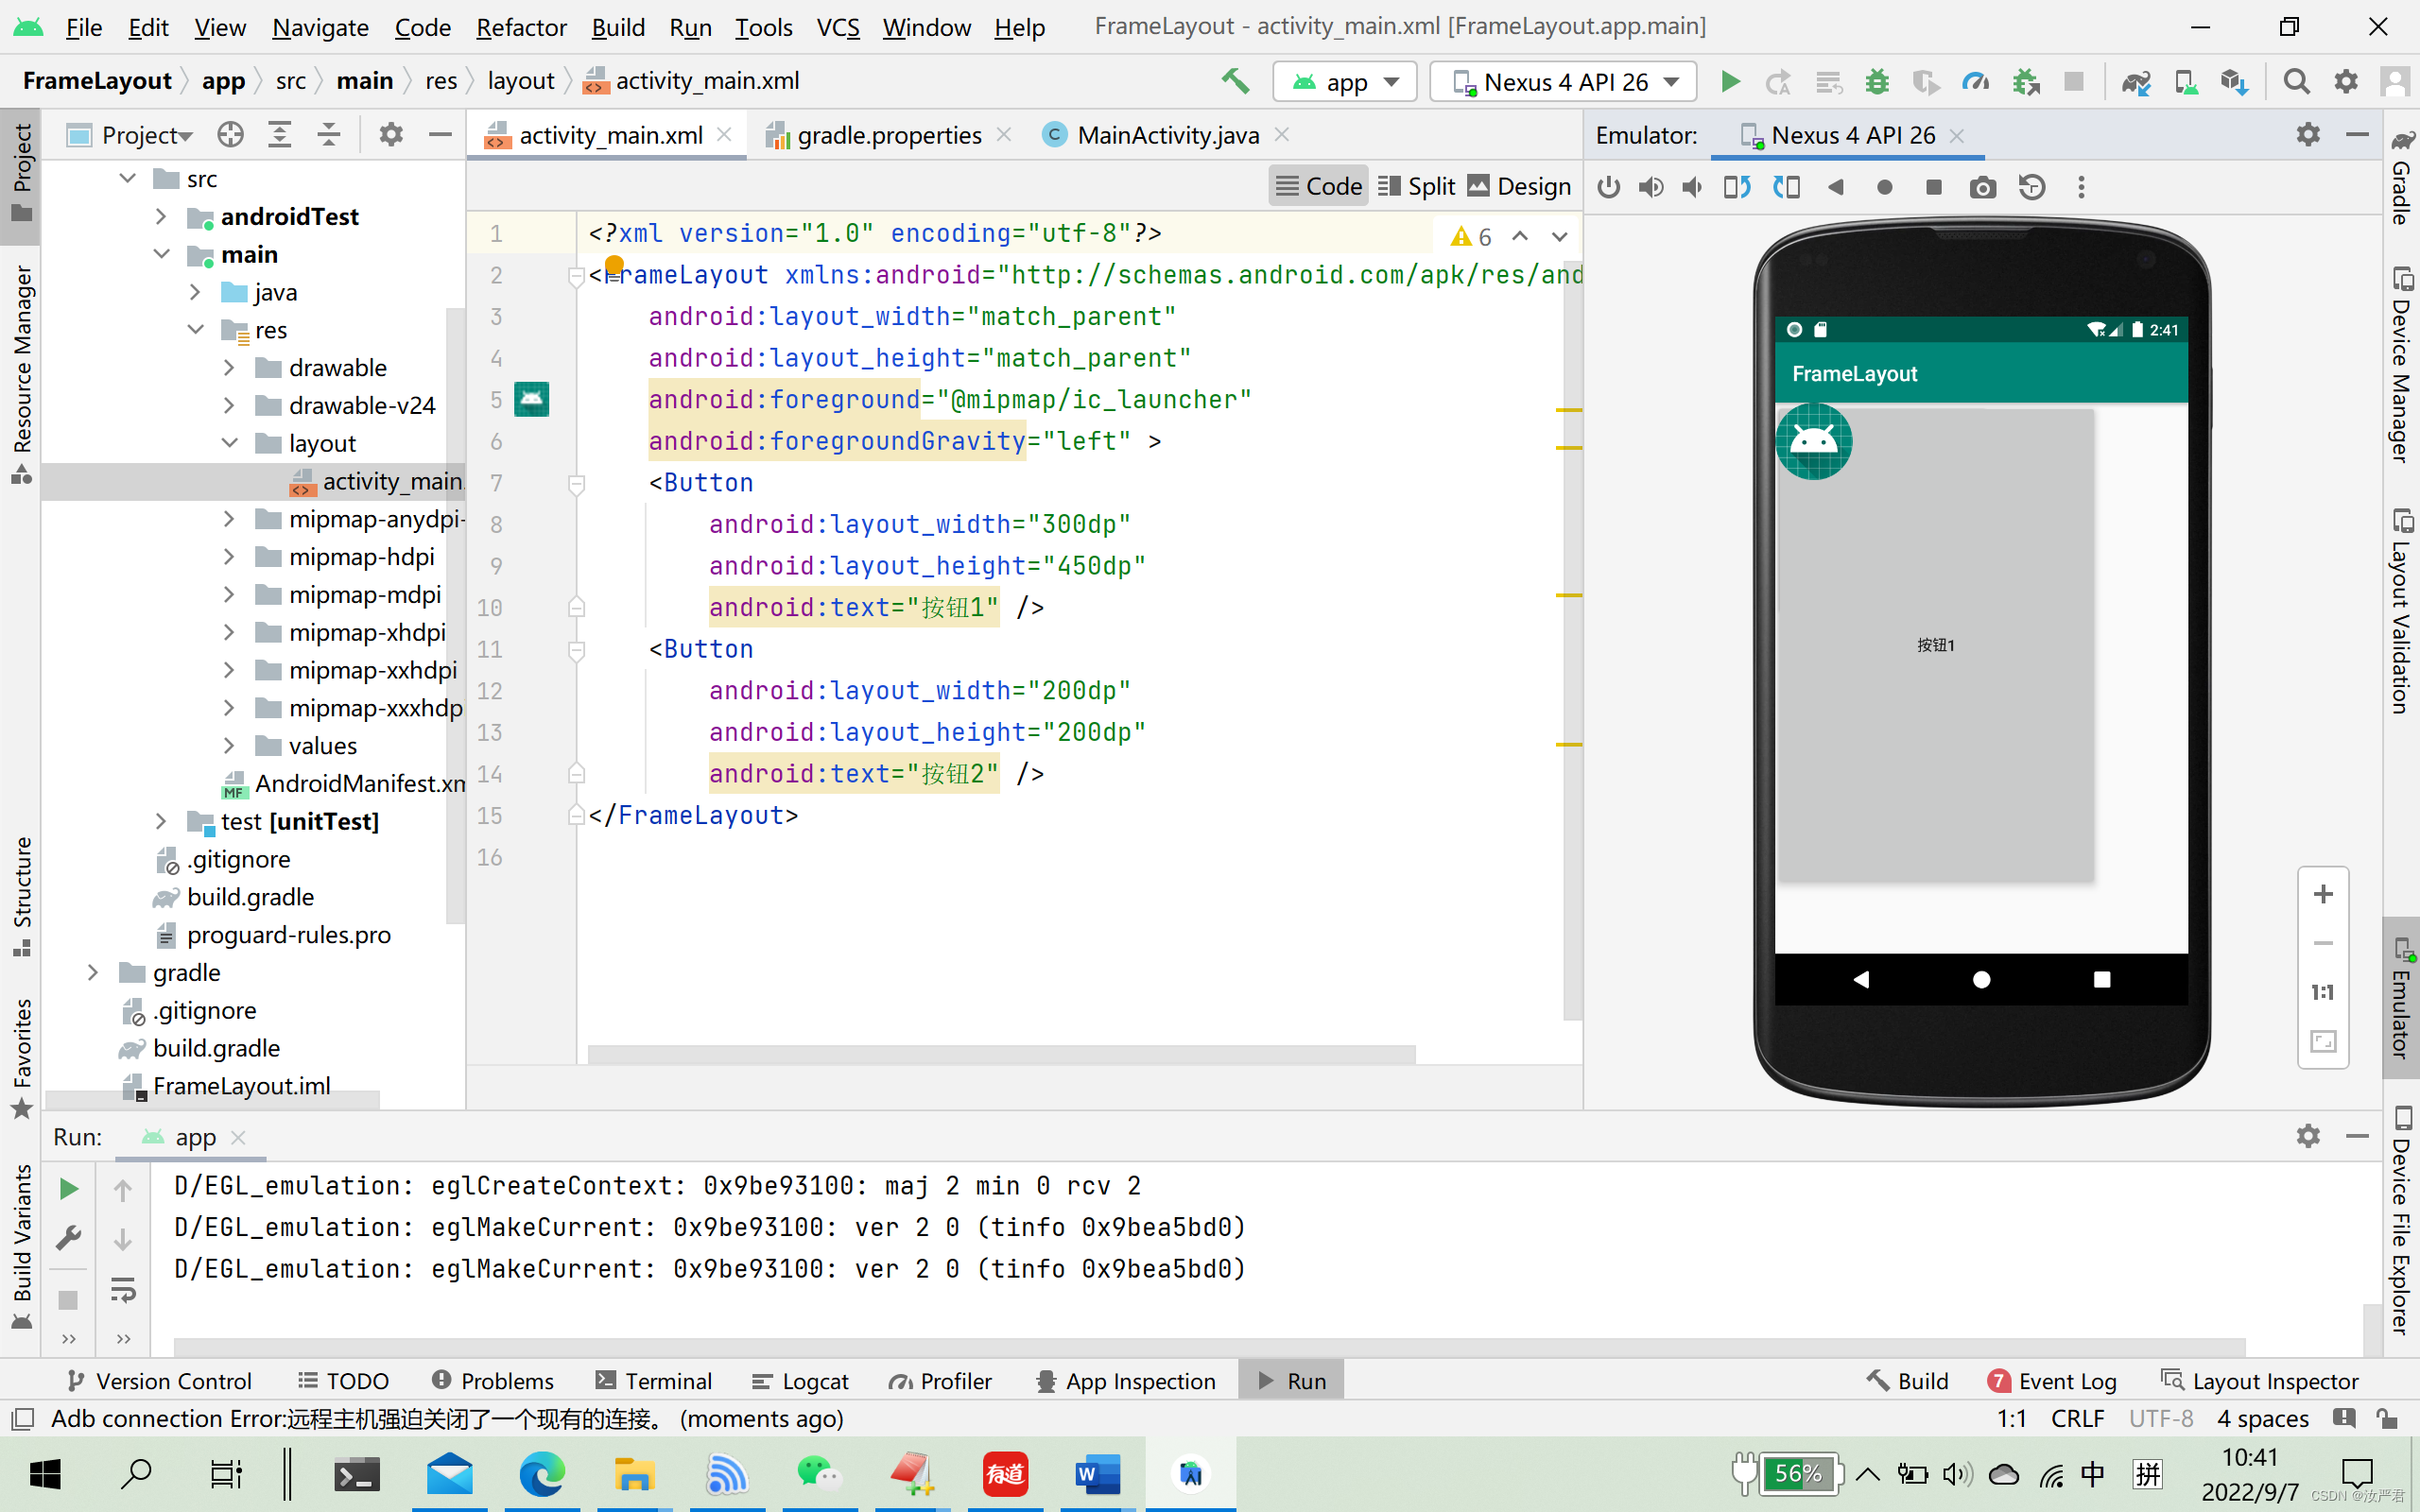
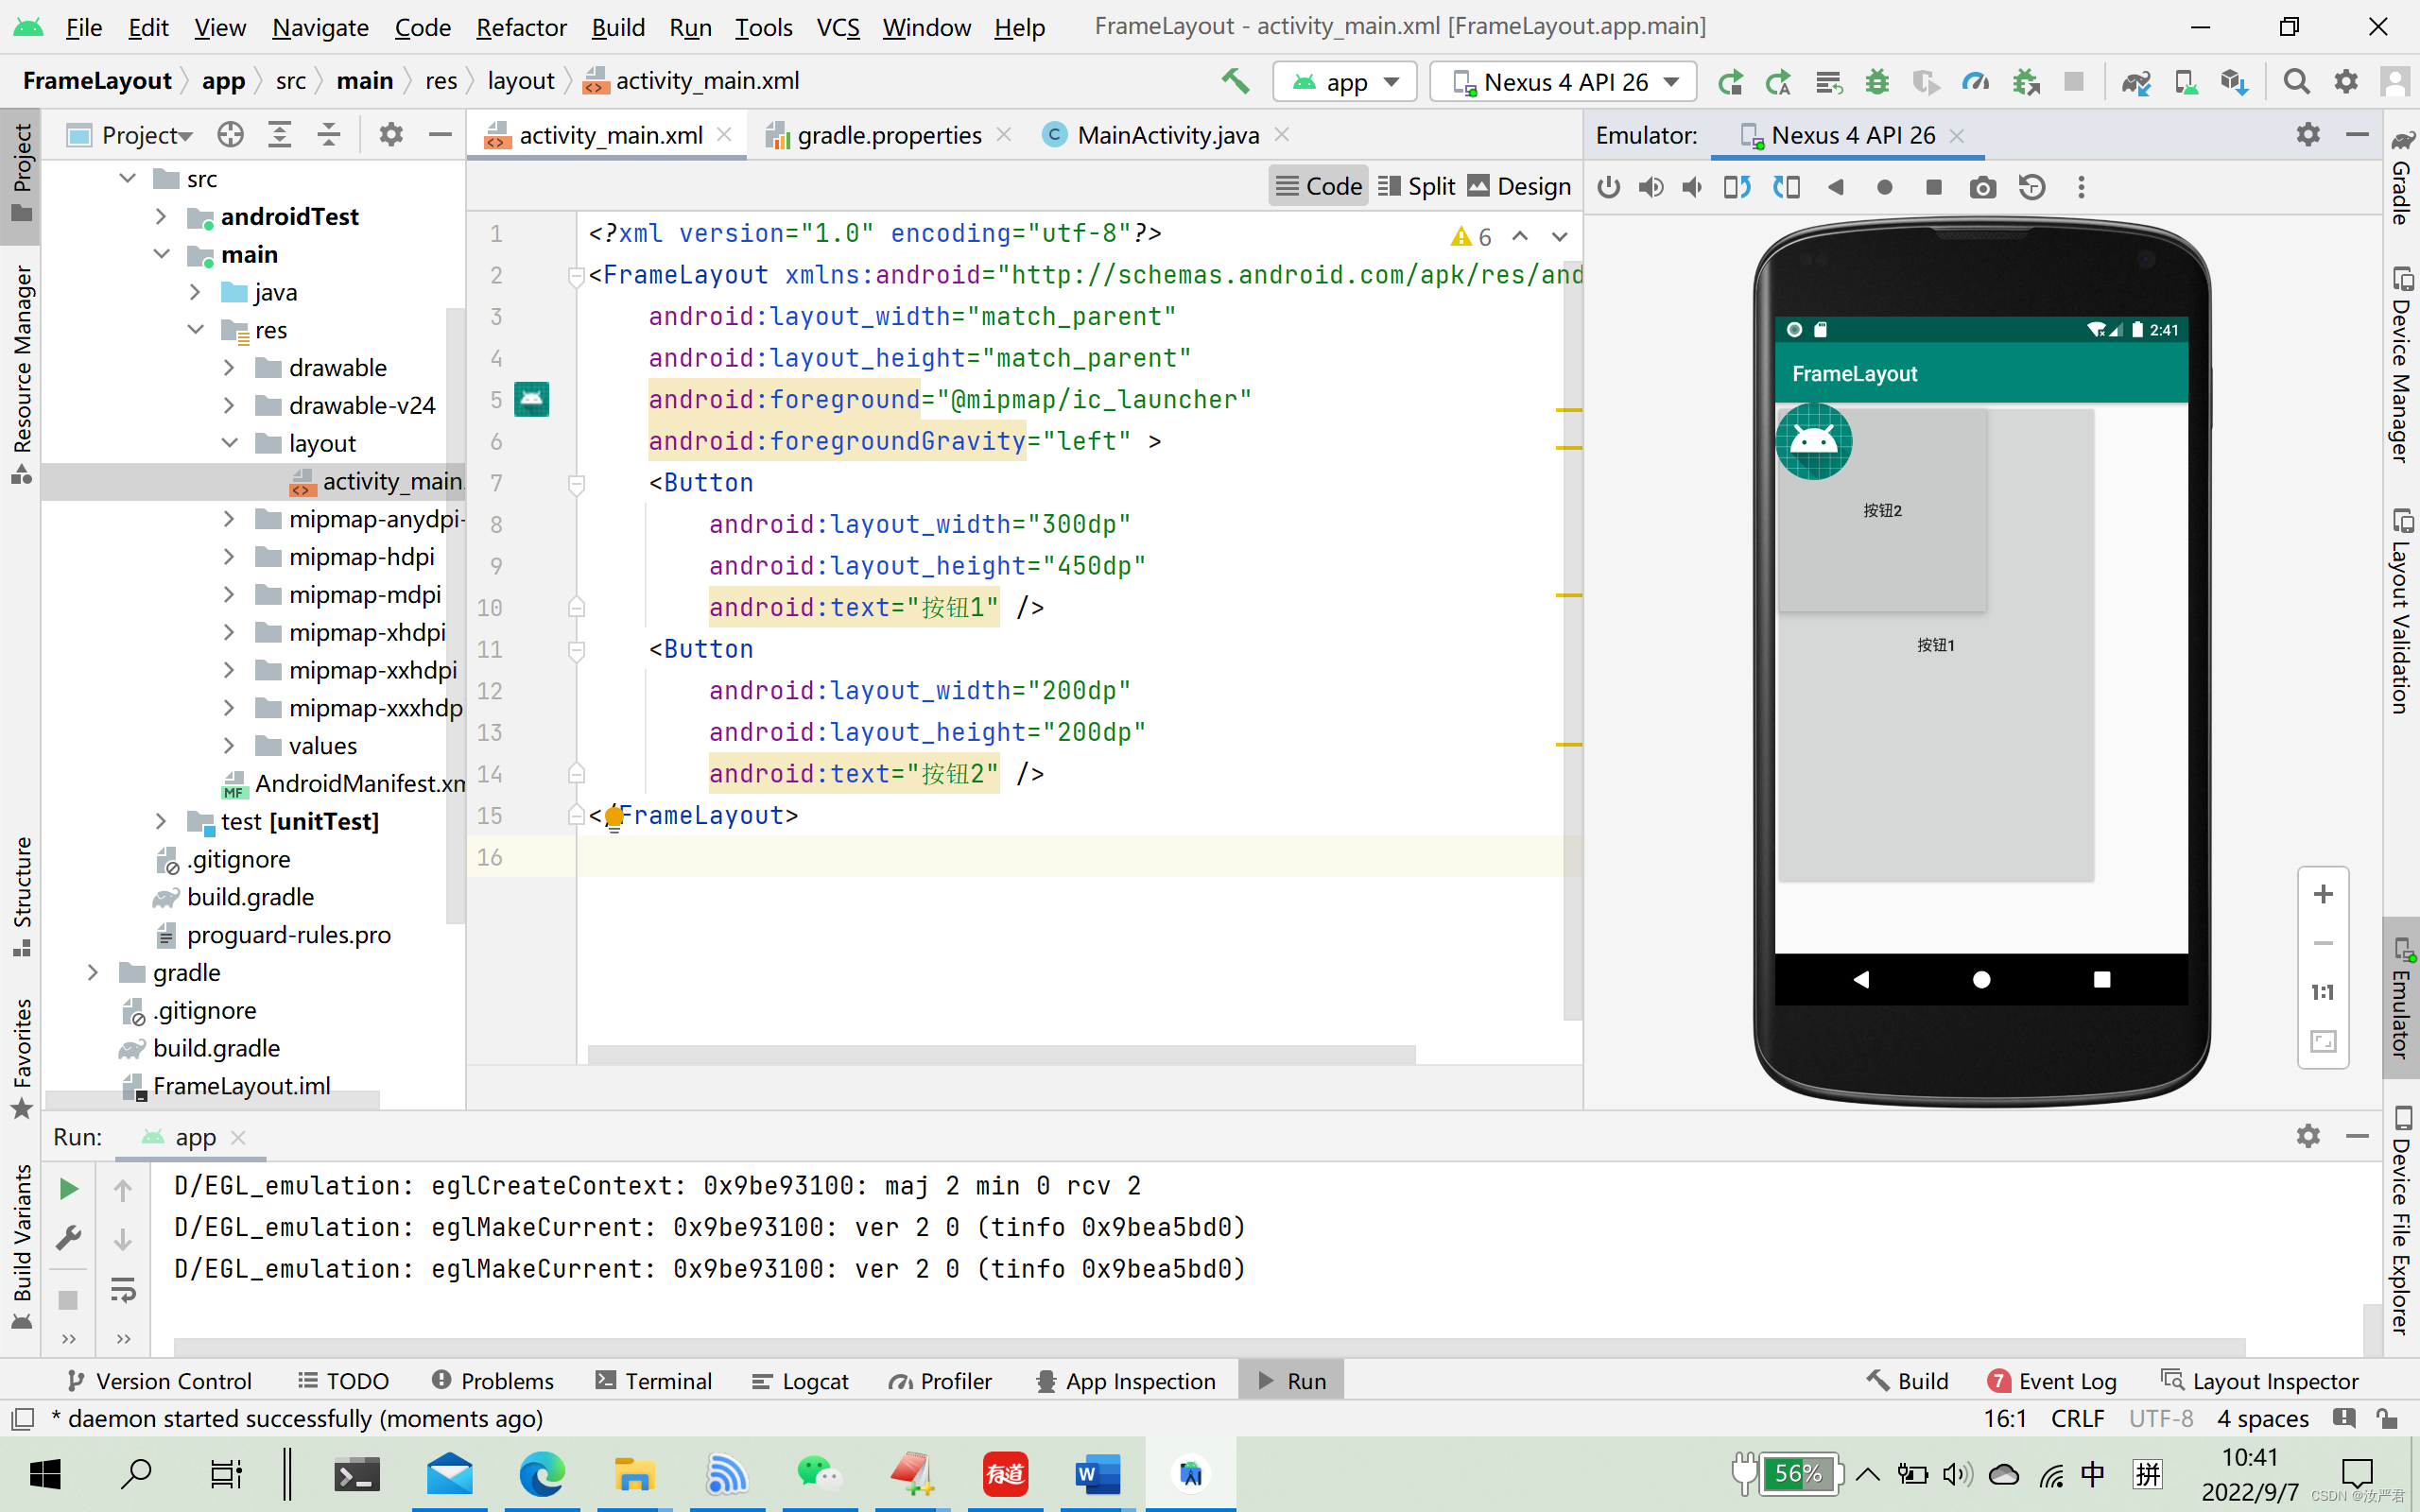
(3)帧布局
(4)表格布局
3.实验步骤
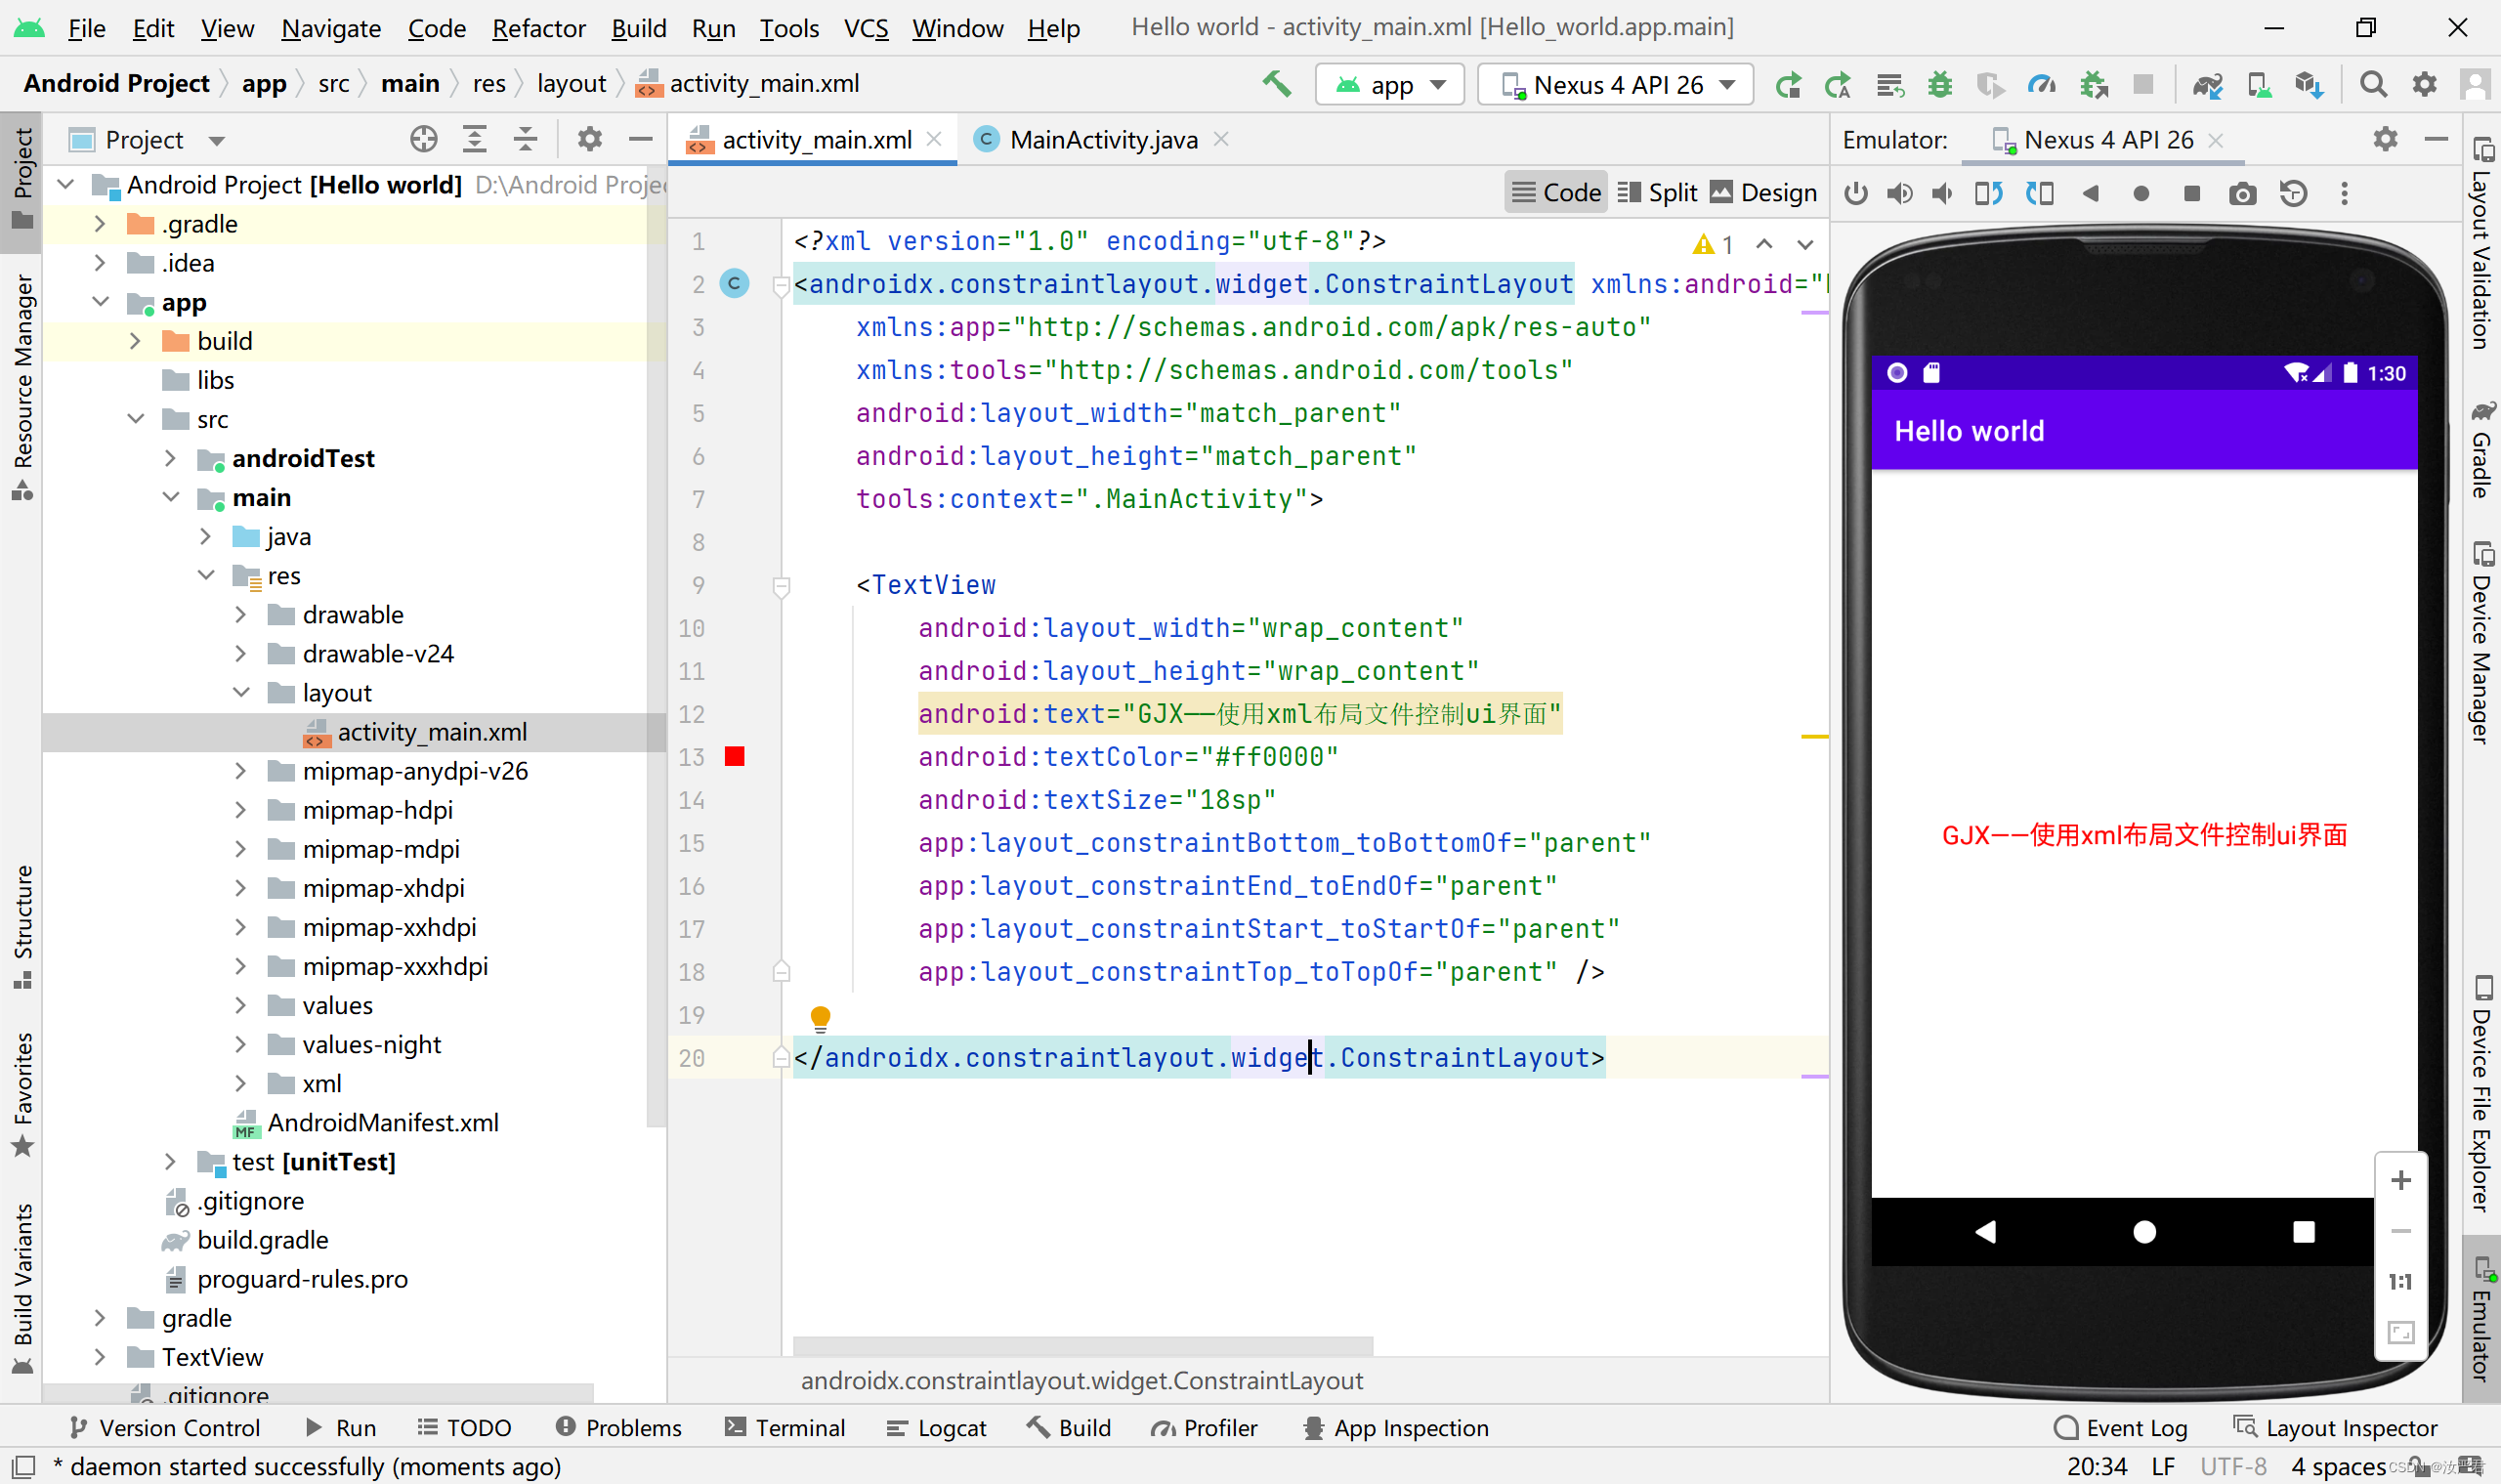
一、在XML中编写布局
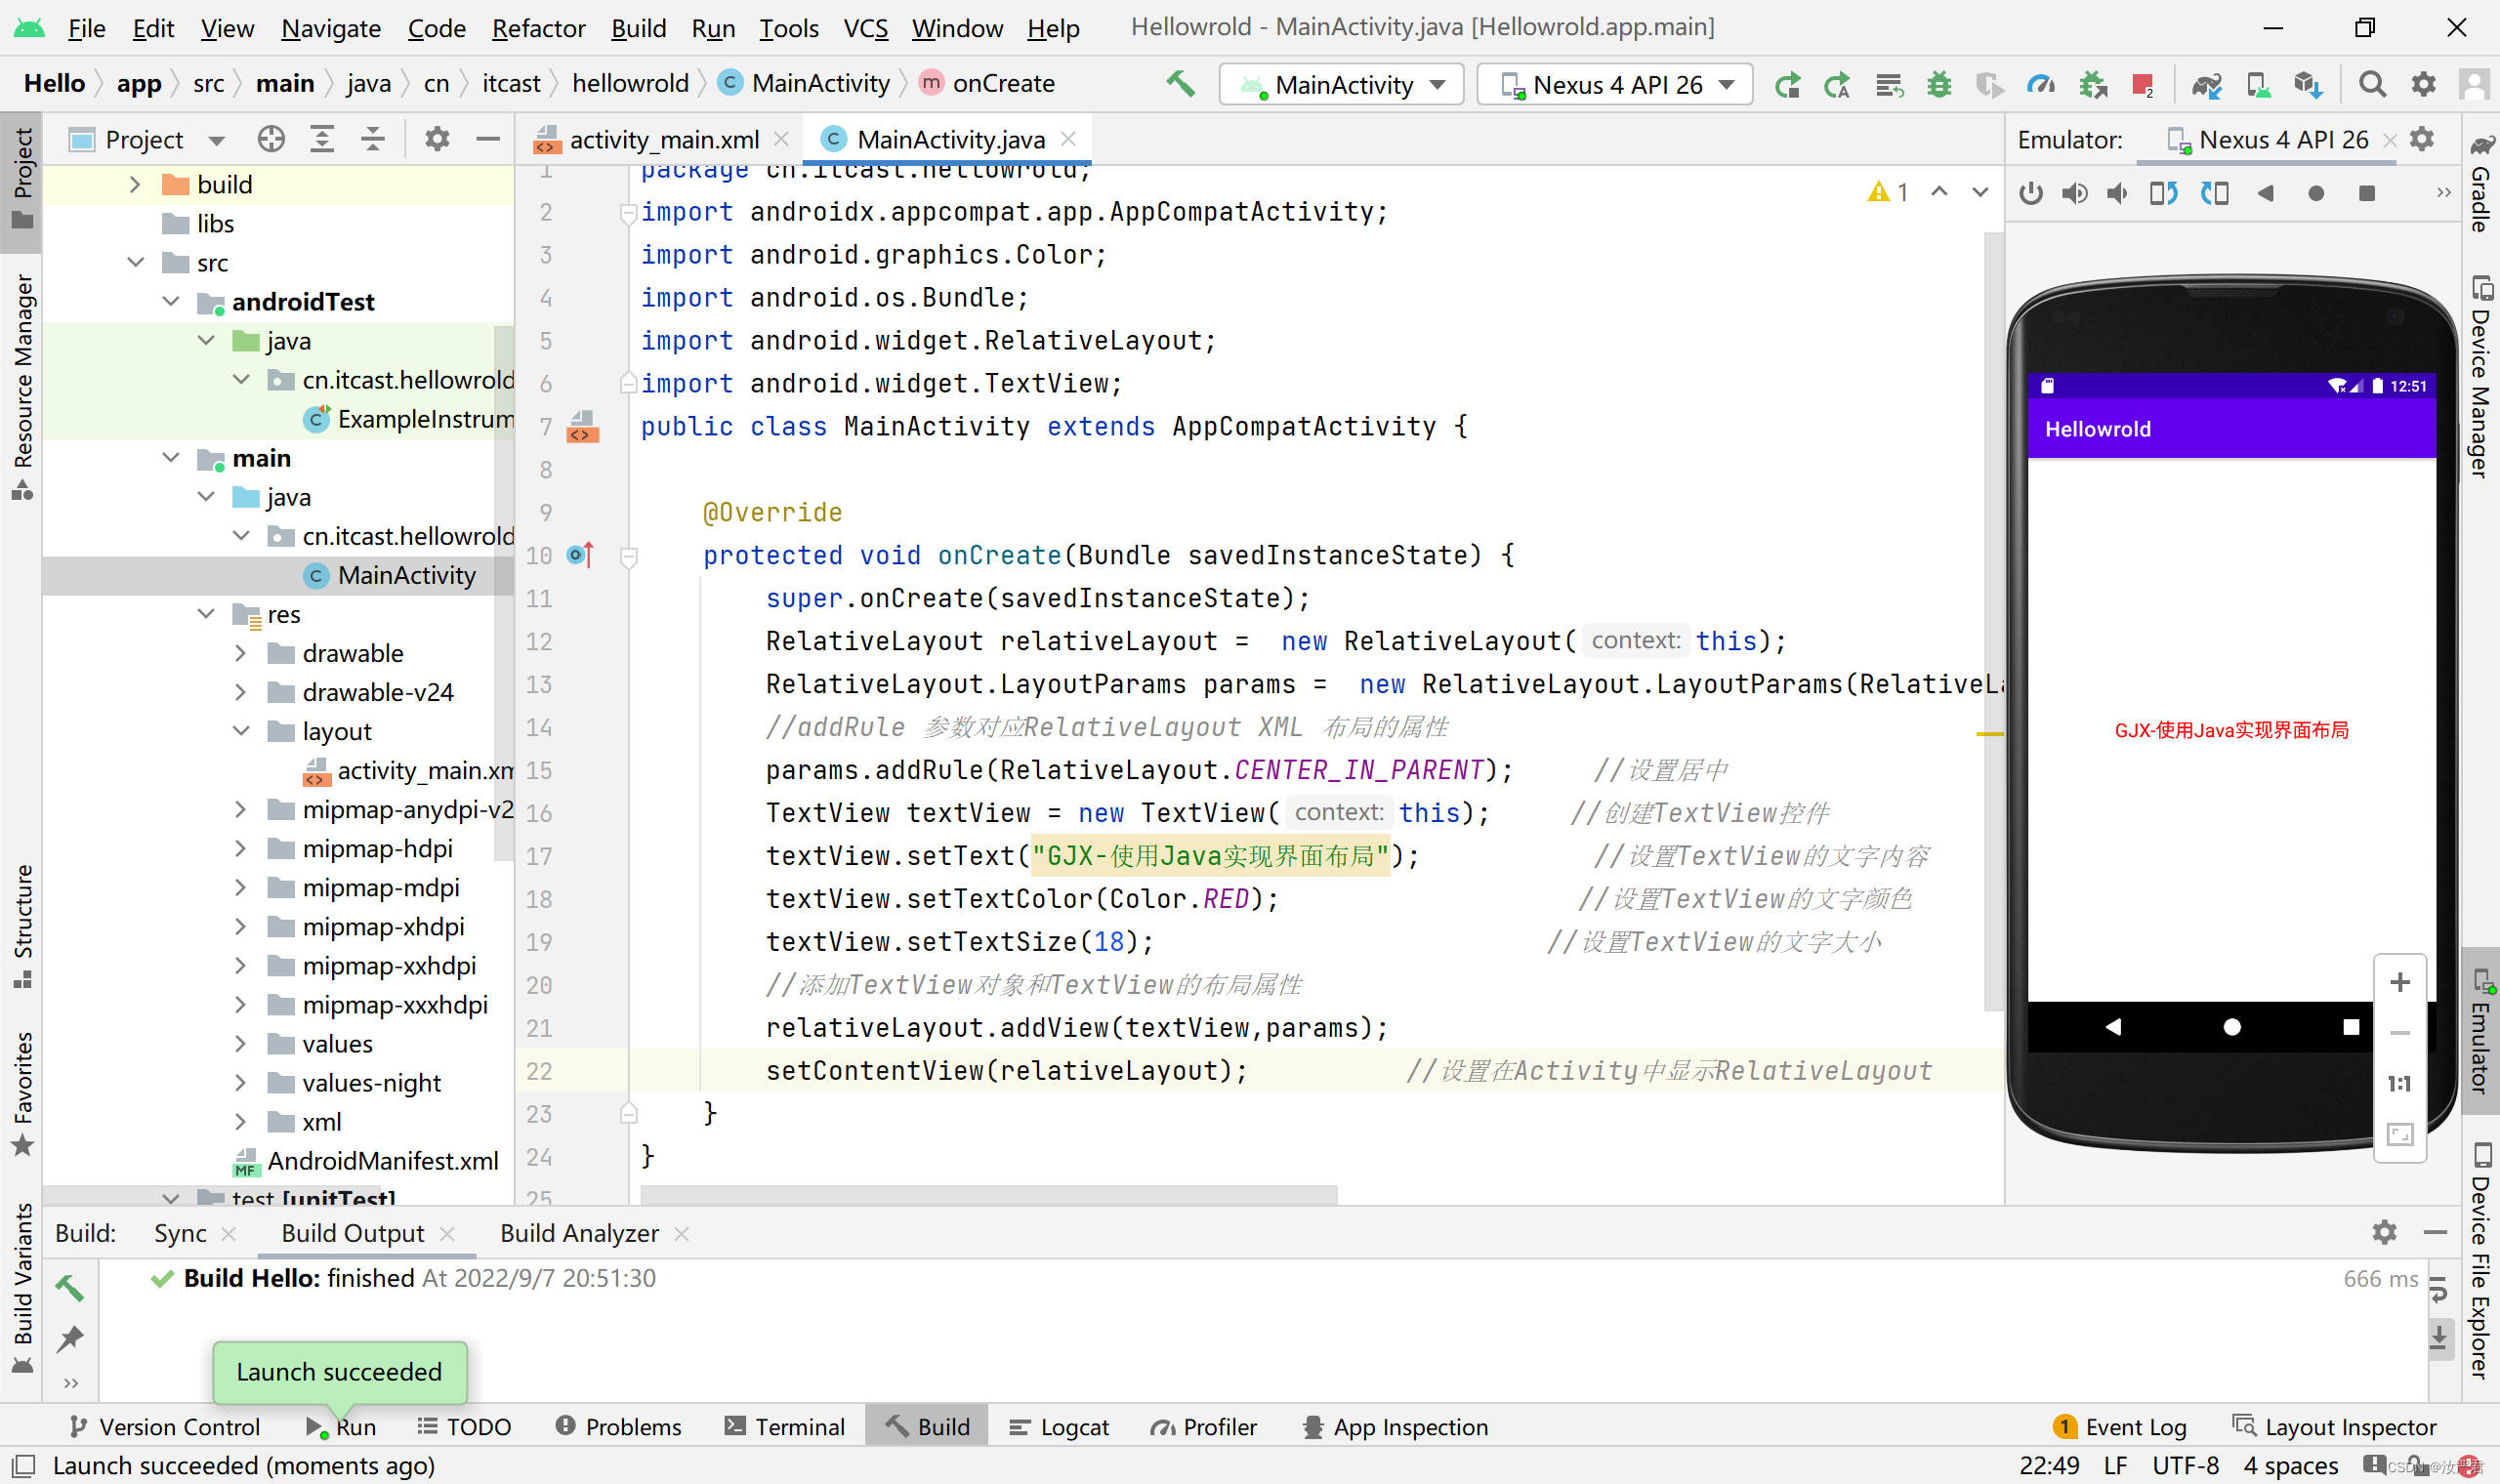
2.在Java代码中编写布局
二、搭建常见布局
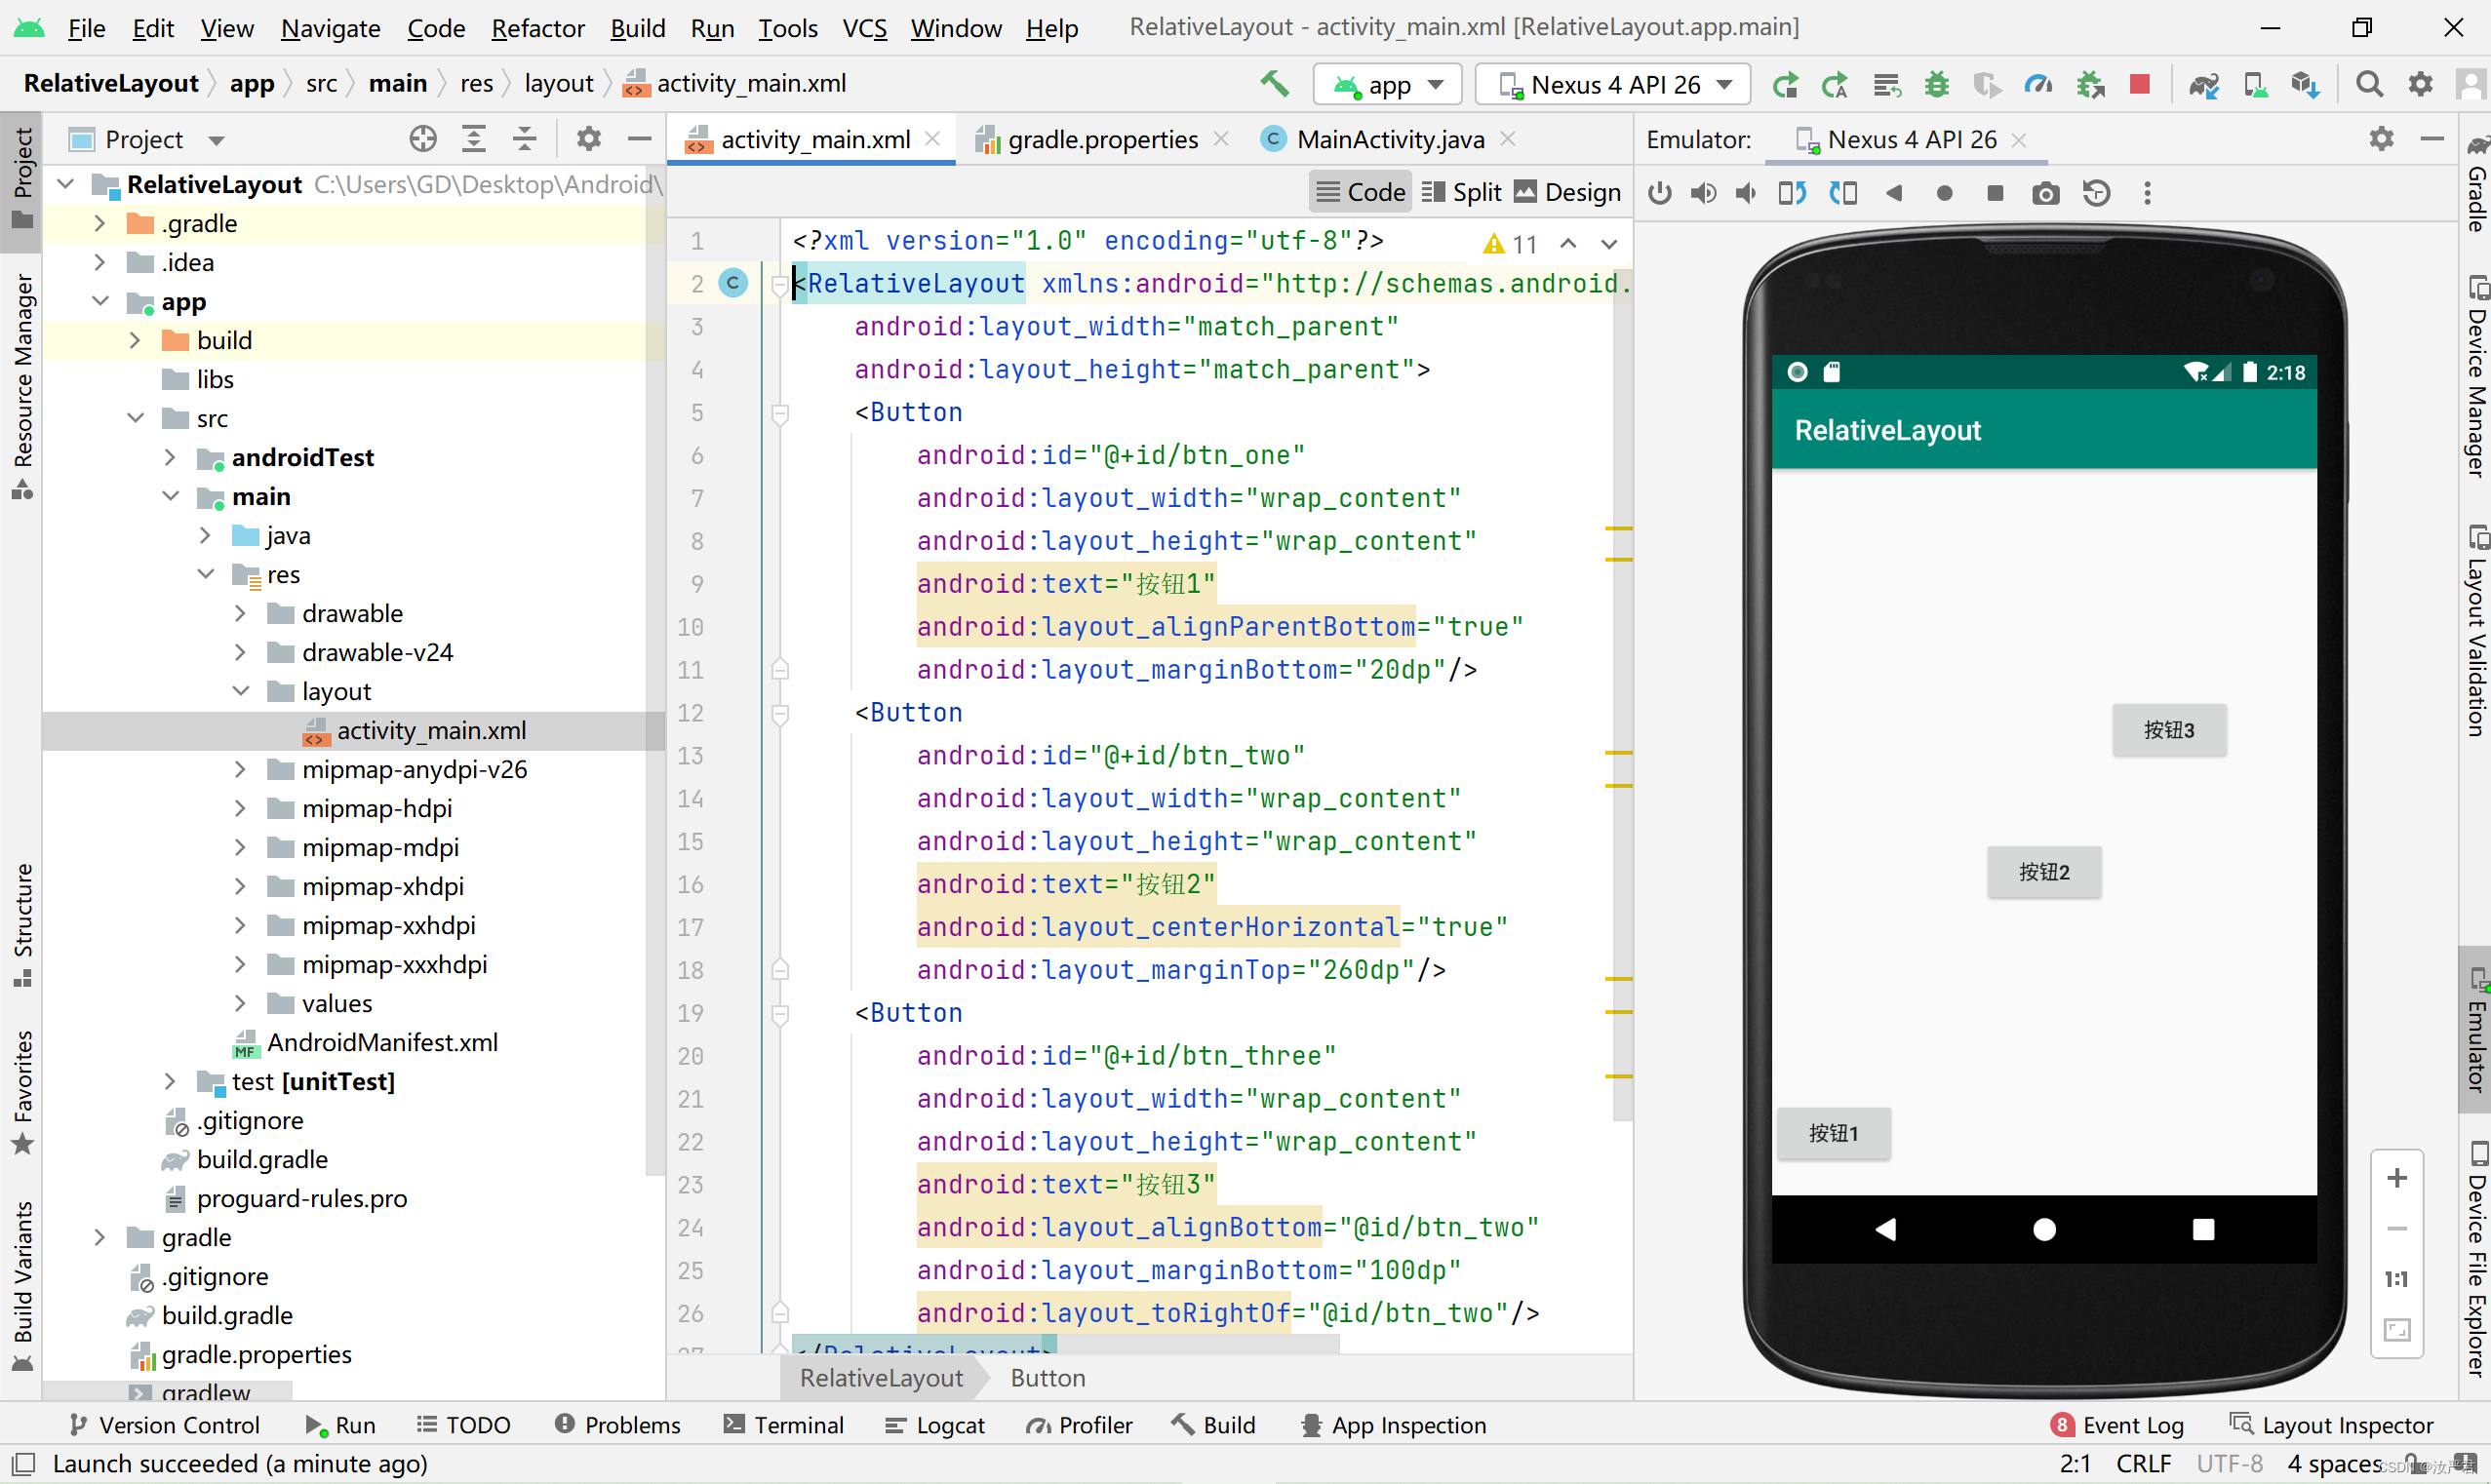
1.相对布局
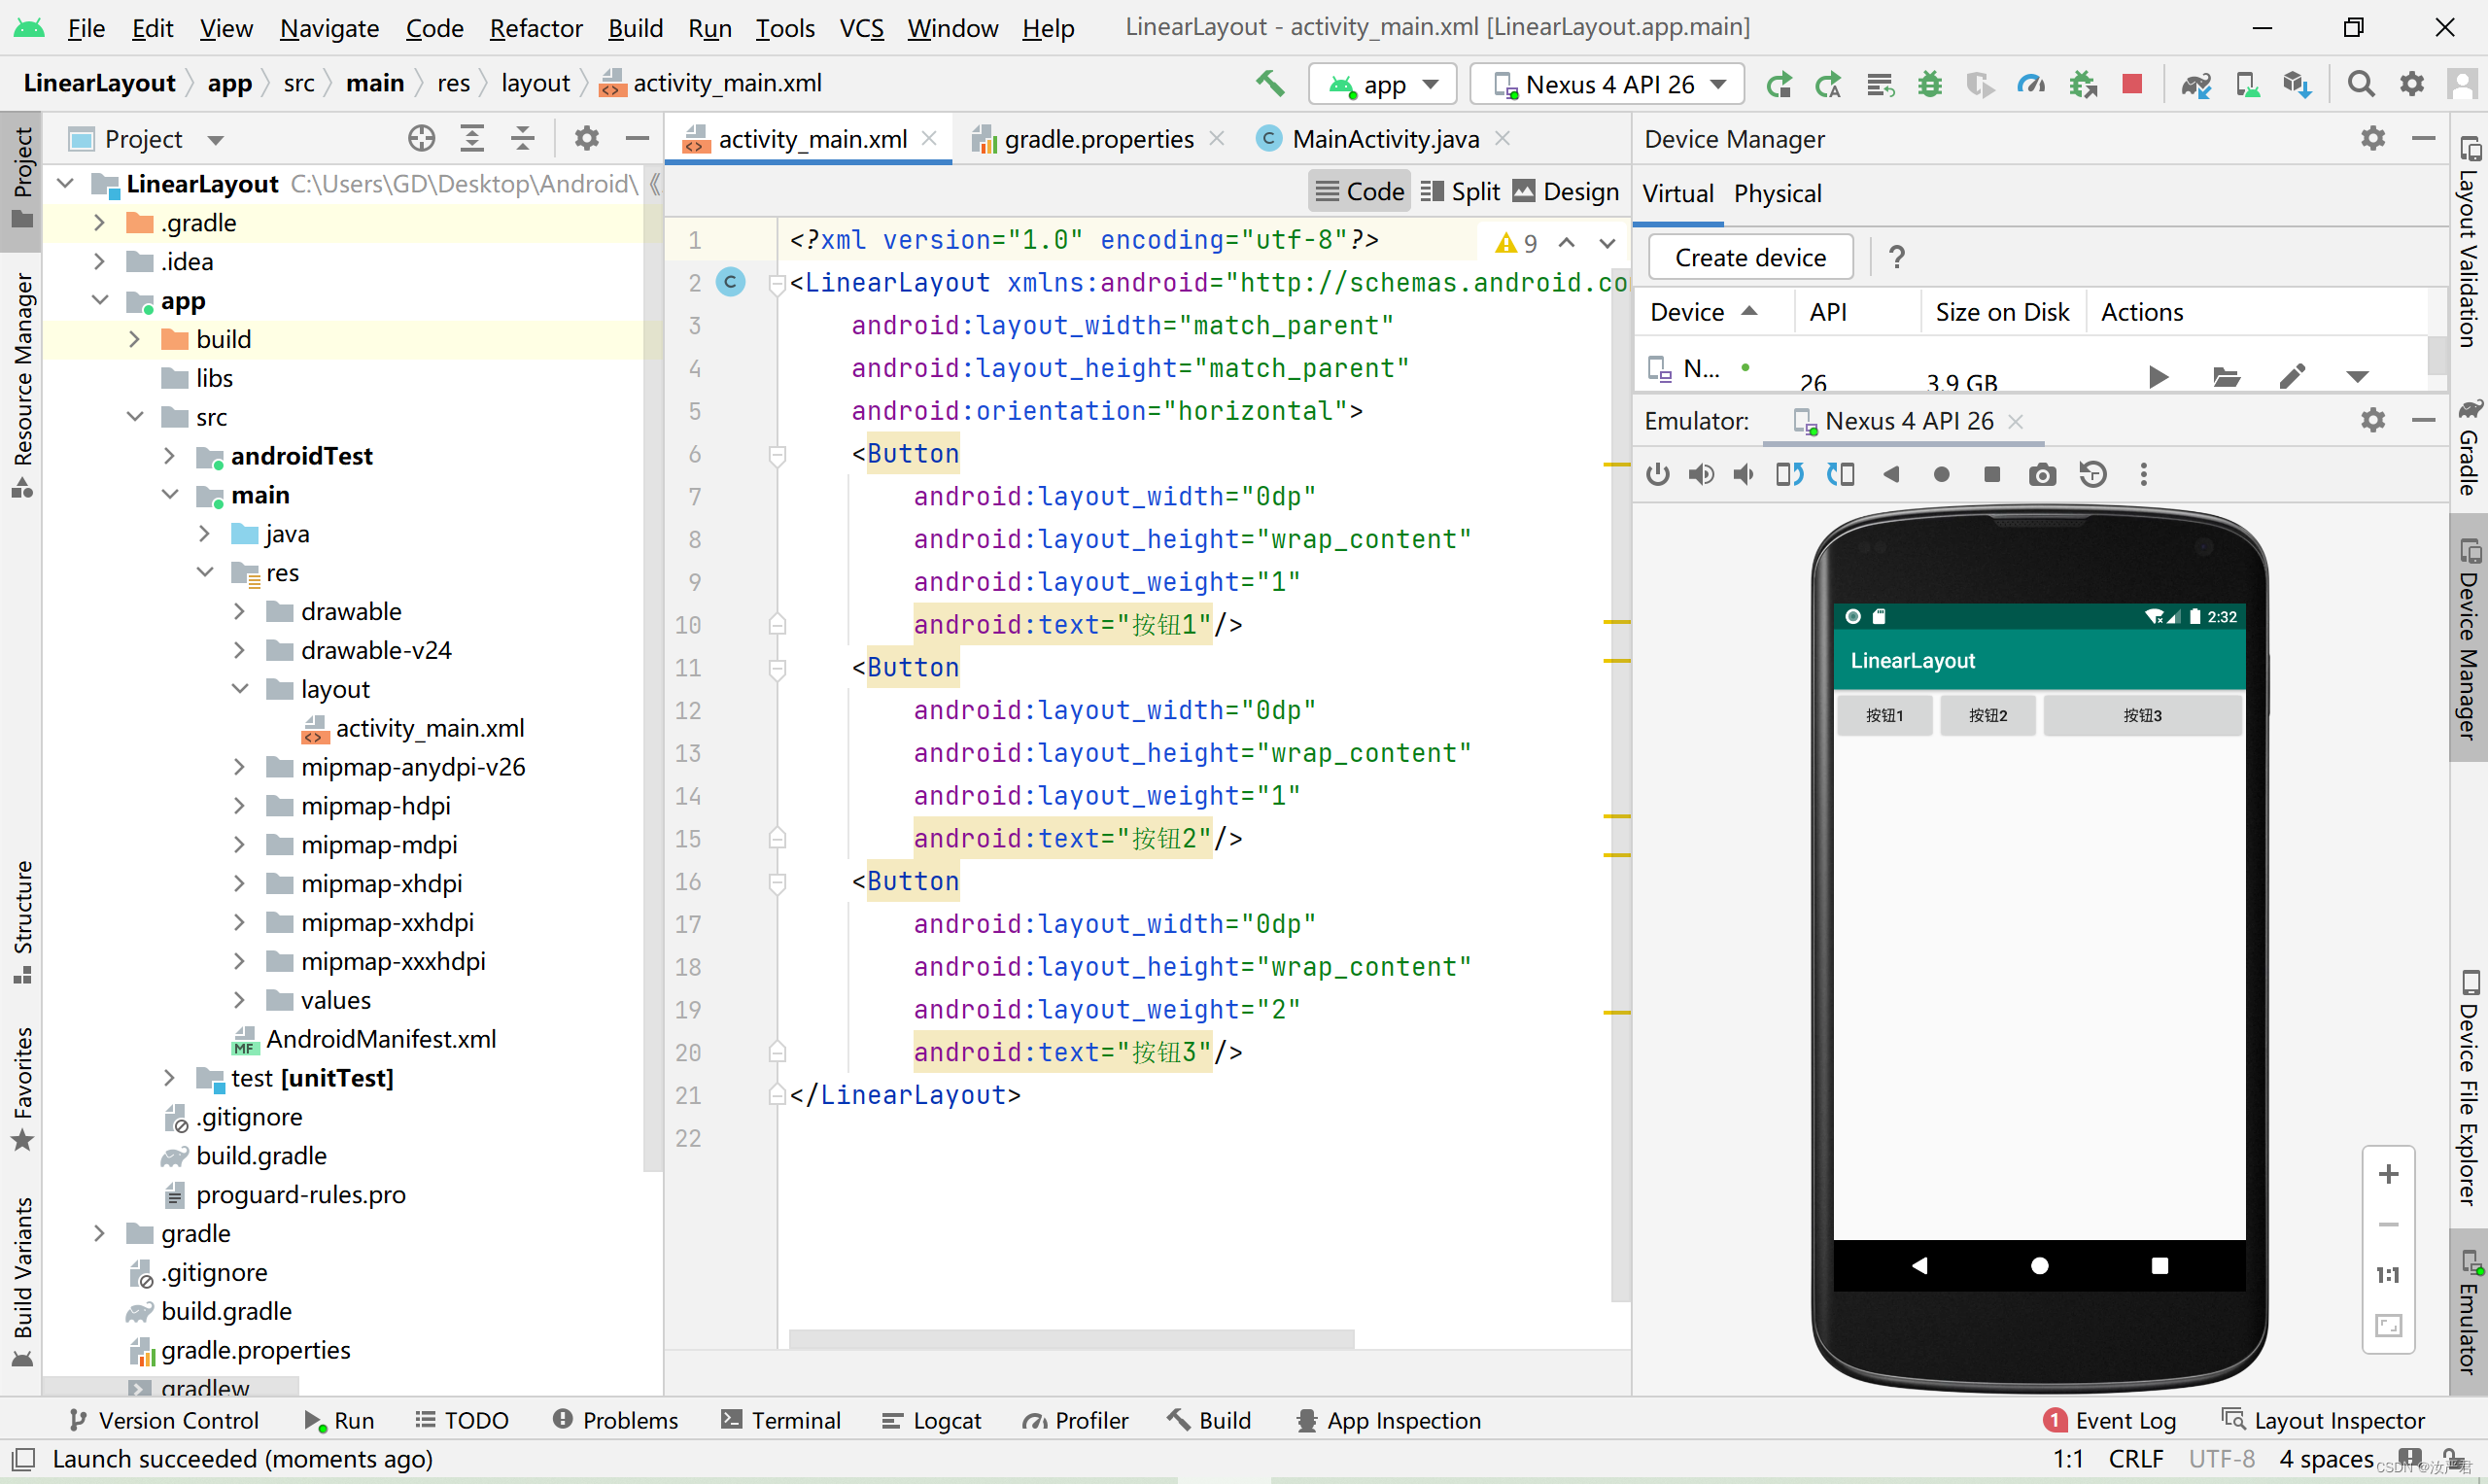
2.线性布局
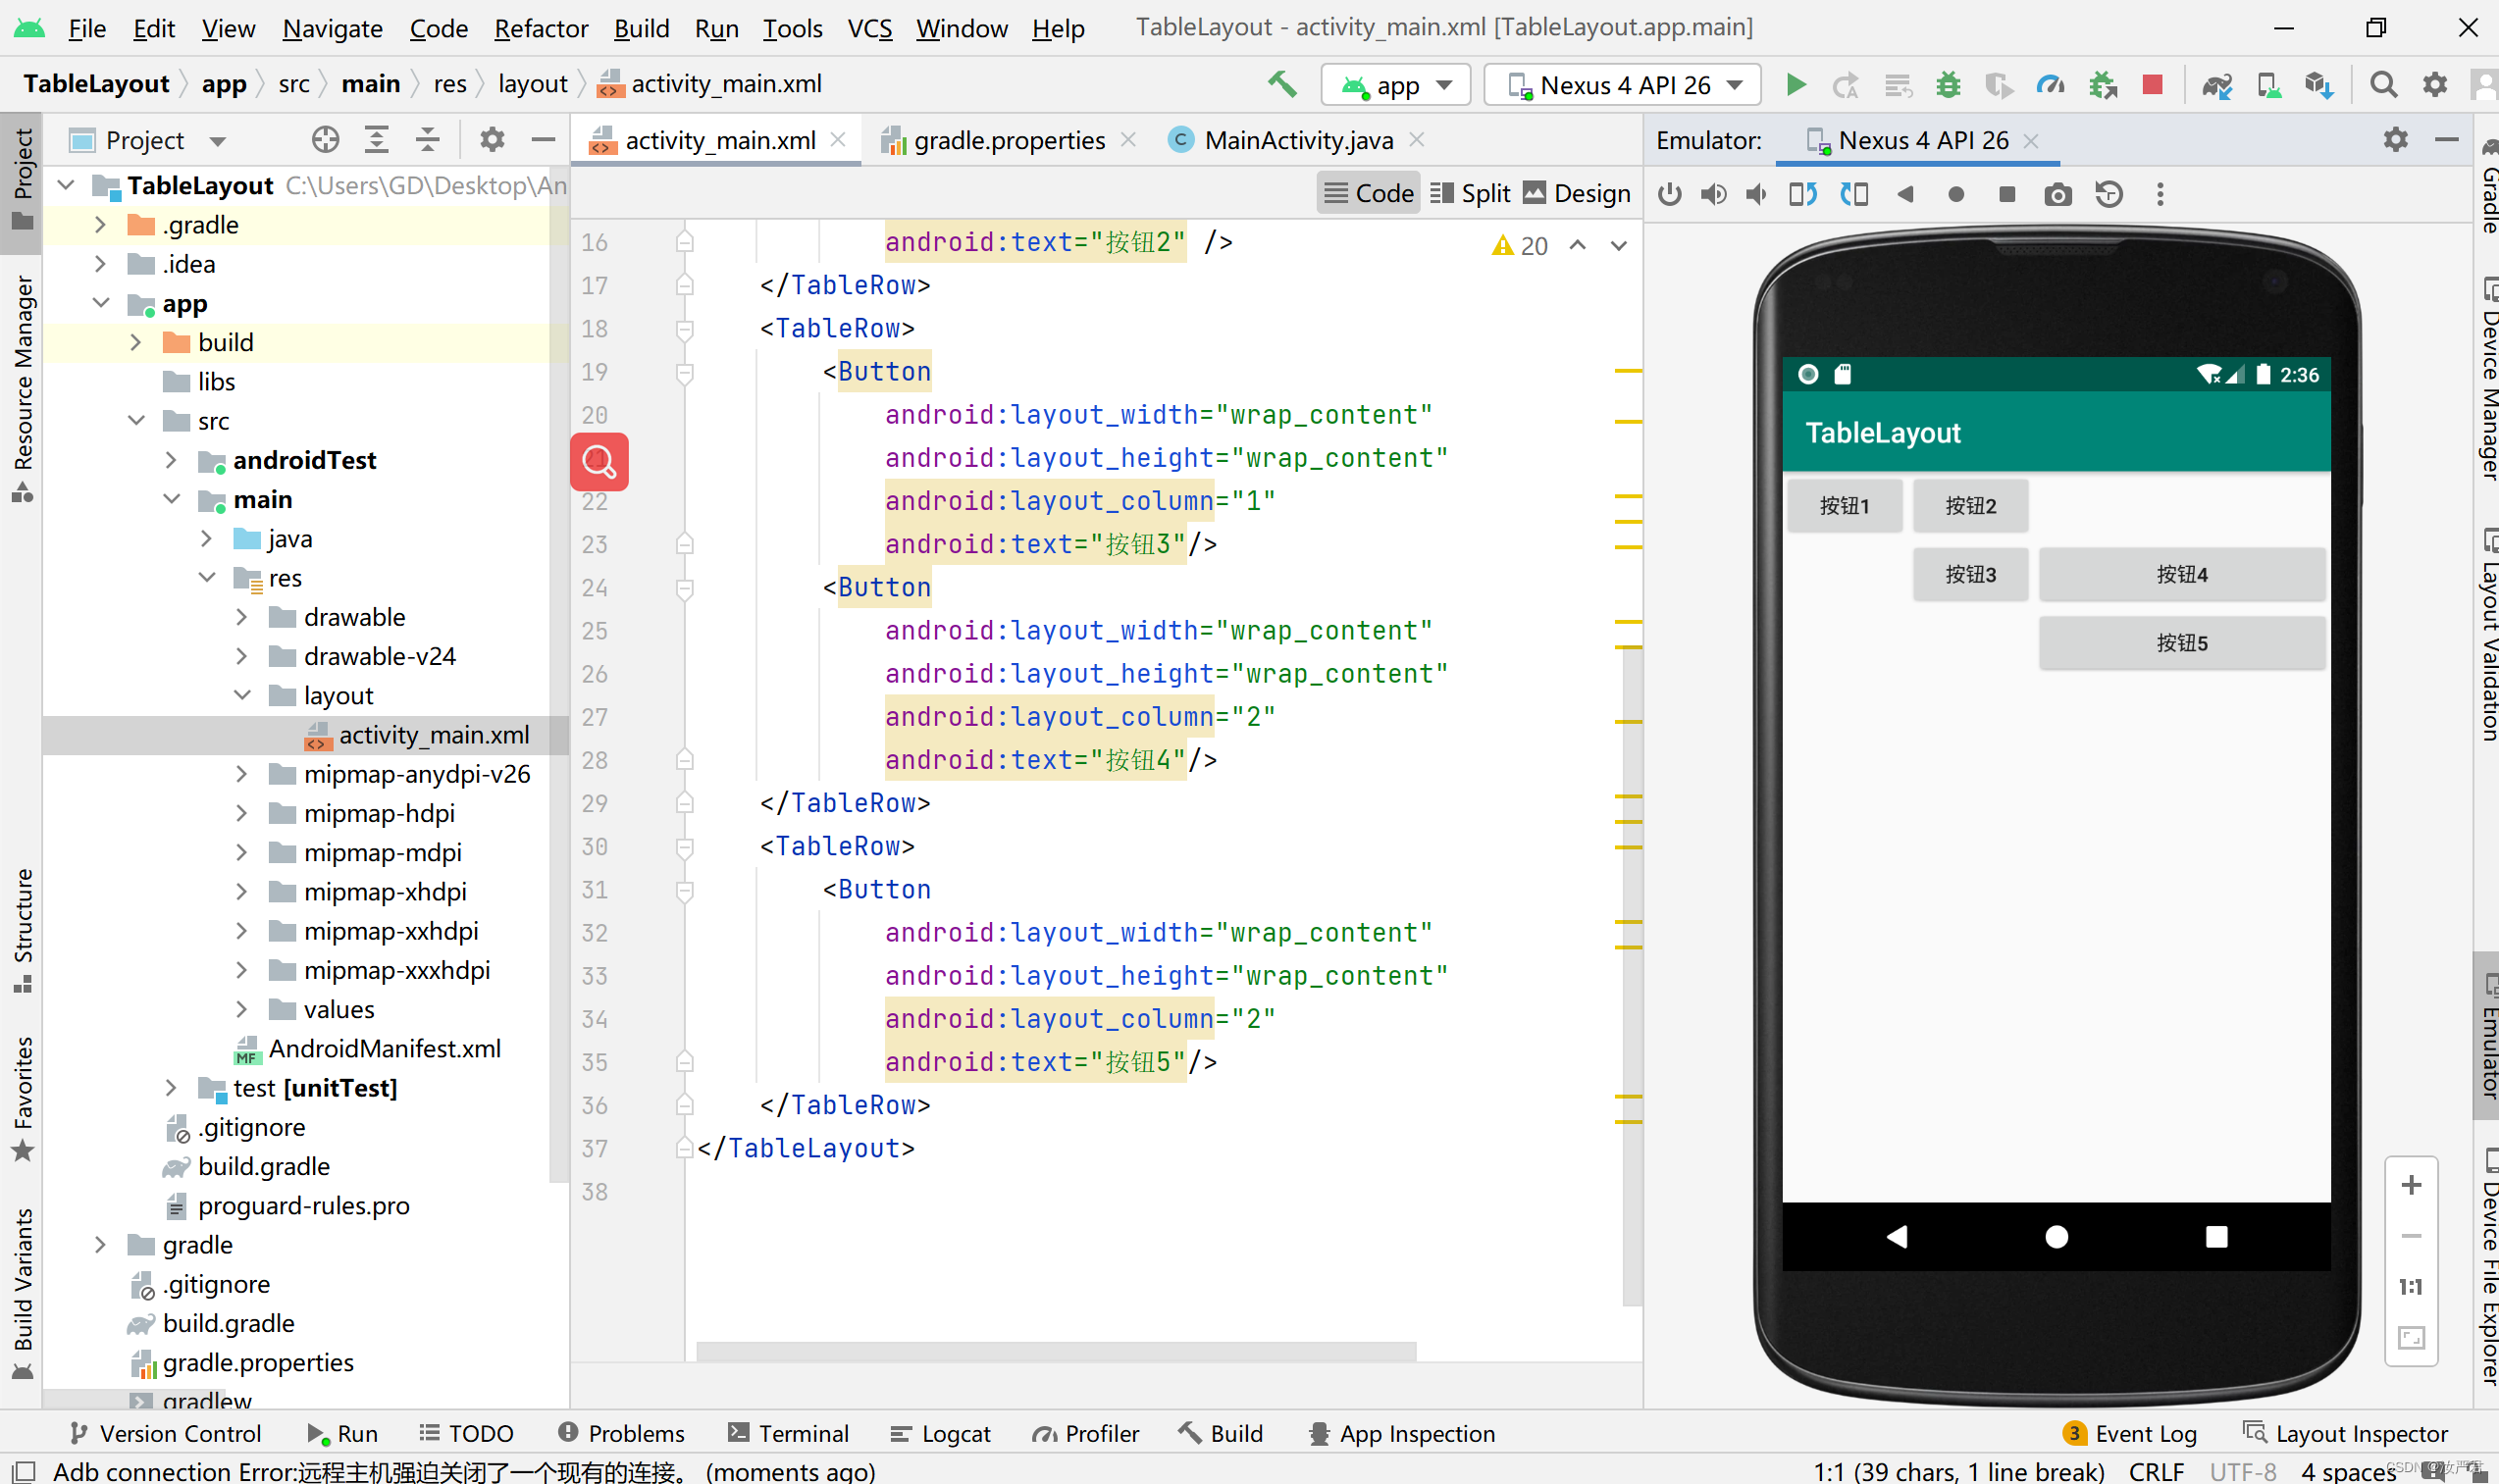
3.表格布局
4.帧布局
5.使用TableLayout布局实现一个简单的计算器界面
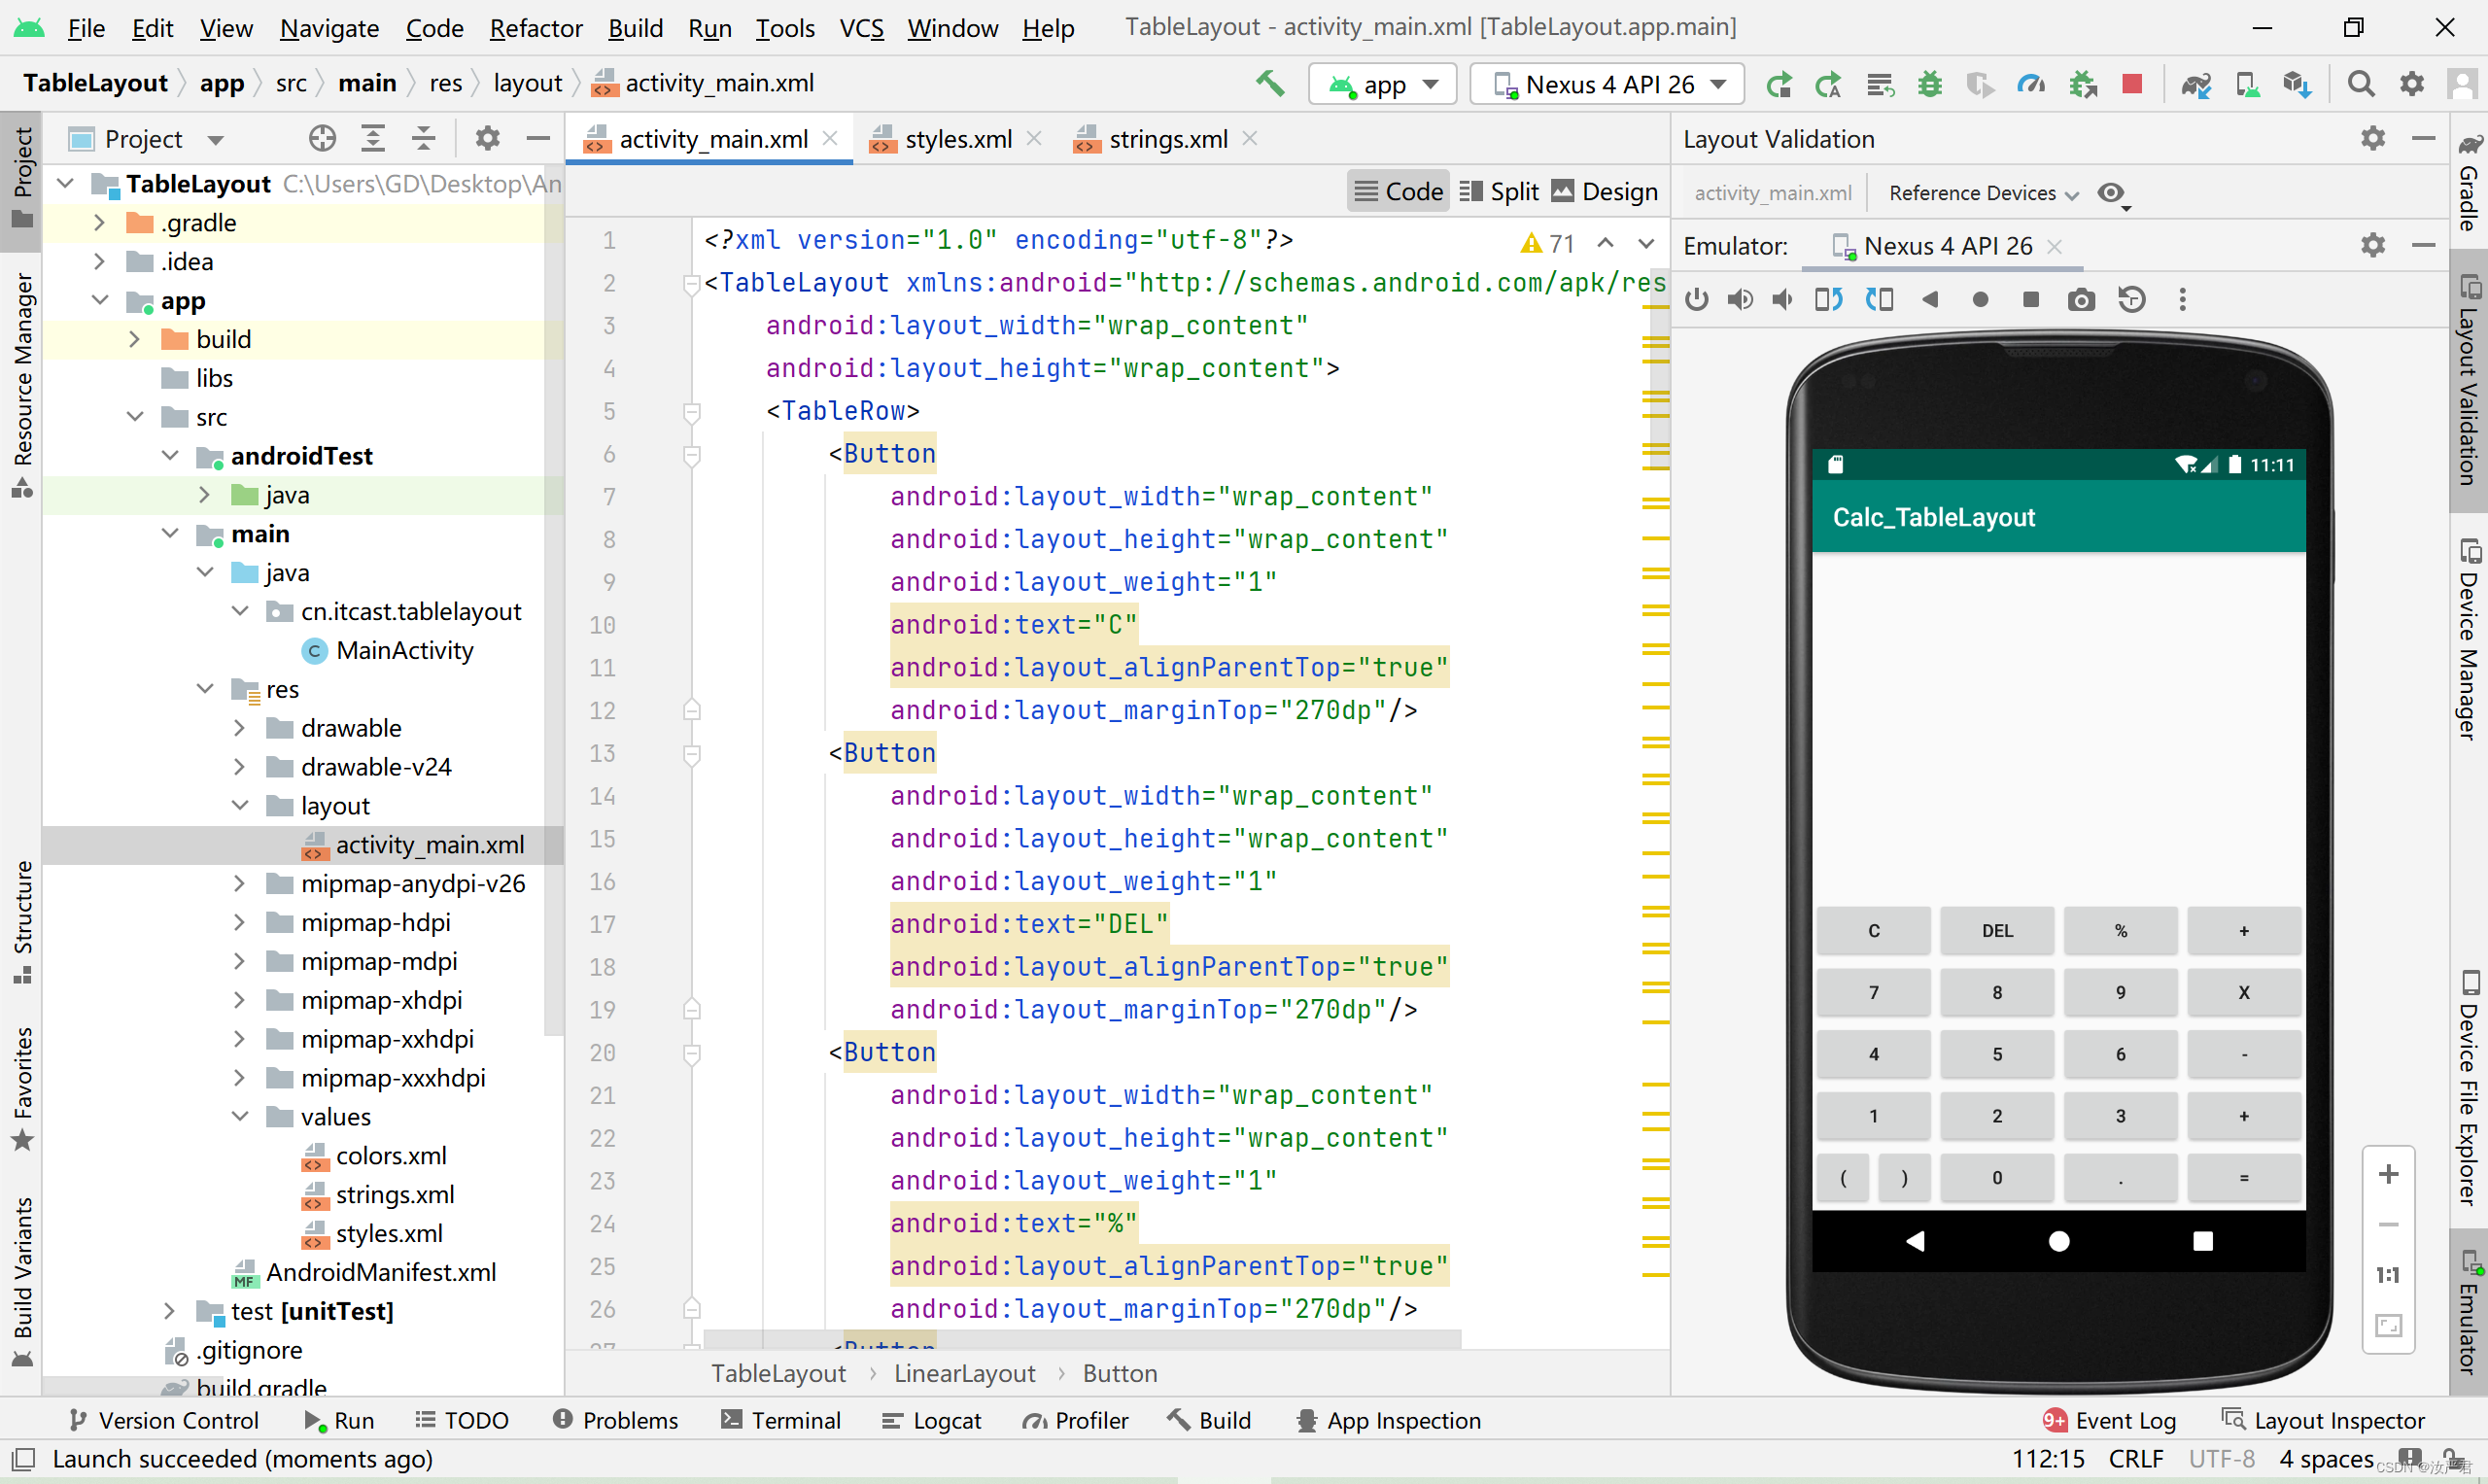
最后一行左边两个按钮试了很多方法都没弄好(比如TableLayout内嵌);最后只能用LinearLayout线性布局才设置好
activity_main.xml
<?xml version="1.0" encoding="utf-8"?>
<TableLayout xmlns:android="http://schemas.android.com/apk/res/android"
    android:layout_width="wrap_content"
    android:layout_height="wrap_content">
    <TableRow>
        <Button
            android:layout_width="wrap_content"
            android:layout_height="wrap_content"
            android:layout_weight="1"
            android:text="C"
            android:layout_alignParentTop="true"
            android:layout_marginTop="270dp"/>
        <Button
            android:layout_width="wrap_content"
            android:layout_height="wrap_content"
            android:layout_weight="1"
            android:text="DEL"
            android:layout_alignParentTop="true"
            android:layout_marginTop="270dp"/>
        <Button
            android:layout_width="wrap_content"
            android:layout_height="wrap_content"
            android:layout_weight="1"
            android:text="%"
            android:layout_alignParentTop="true"
            android:layout_marginTop="270dp"/>
        <Button
            android:layout_width="wrap_content"
            android:layout_height="wrap_content"
            android:layout_weight="1"
            android:text="+"
            android:layout_alignParentTop="true"
            android:layout_marginTop="270dp"/>
    </TableRow>
    <TableRow>
        <Button
            android:layout_width="wrap_content"
            android:layout_height="wrap_content"
            android:layout_weight="1"
            android:text="7" />
        <Button
            android:layout_width="wrap_content"
            android:layout_height="wrap_content"
            android:layout_weight="1"
            android:text="8" />
        <Button
            android:layout_width="wrap_content"
            android:layout_height="wrap_content"
            android:layout_weight="1"
            android:text="9" />
        <Button
            android:layout_width="wrap_content"
            android:layout_height="wrap_content"
            android:layout_weight="1"
            android:text="x" />
    </TableRow>
    <TableRow>
        <Button
            android:layout_width="wrap_content"
            android:layout_height="wrap_content"
            android:layout_weight="1"
            android:text="4" />
        <Button
            android:layout_width="wrap_content"
            android:layout_height="wrap_content"
            android:layout_weight="1"
            android:text="5" />
        <Button
            android:layout_width="wrap_content"
            android:layout_height="wrap_content"
            android:layout_weight="1"
            android:text="6" />
        <Button
            android:layout_width="wrap_content"
            android:layout_height="wrap_content"
            android:layout_weight="1"
            android:text="-" />
    </TableRow>
    <TableRow>
        <Button
            android:layout_width="wrap_content"
            android:layout_height="wrap_content"
            android:layout_weight="1"
            android:text="1" />
        <Button
            android:layout_width="wrap_content"
            android:layout_height="wrap_content"
            android:layout_weight="1"
            android:text="2" />
        <Button
            android:layout_width="wrap_content"
            android:layout_height="wrap_content"
            android:layout_weight="1"
            android:text="3" />
        <Button
            android:layout_width="wrap_content"
            android:layout_height="wrap_content"
            android:layout_weight="1"
            android:text="+" />
    </TableRow>


    <LinearLayout
        android:layout_width="match_parent"
        android:layout_height="match_parent"
        android:orientation="horizontal">
        <Button
            android:layout_width="0dp"
            android:layout_height="wrap_content"
            android:layout_weight="1"
            android:text="("
            />
        <Button
            android:layout_width="0dp"
            android:layout_height="wrap_content"
            android:layout_weight="1"
            android:text=")" />
        <Button
            android:layout_width="0dp"
            android:layout_height="wrap_content"
            android:layout_weight="2"
            android:text="0" />
        <Button
            android:layout_width="0dp"
            android:layout_height="wrap_content"
            android:layout_weight="2"
            android:text="." />
        <Button
            android:layout_width="0dp"
            android:layout_height="wrap_content"
            android:layout_weight="2"
            android:text="=" />
    </LinearLayout>
</TableLayout>
4.实验过程遇到的问题
1、在向Android studio导入项目时遇到了几个问题
(1)Android studio 加载项目时报错(Your project path contains non-ASCII characters. This will most likely cause)
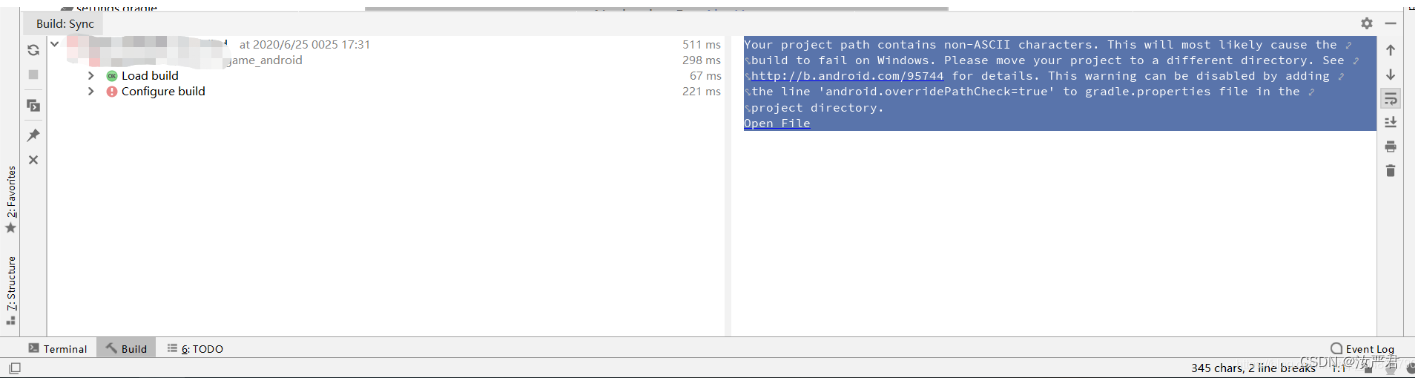
原因:项目路径包含非ASCII字符。这很可能会导致生成在Windows上失败。请将项目移动到其他目录。
解决:
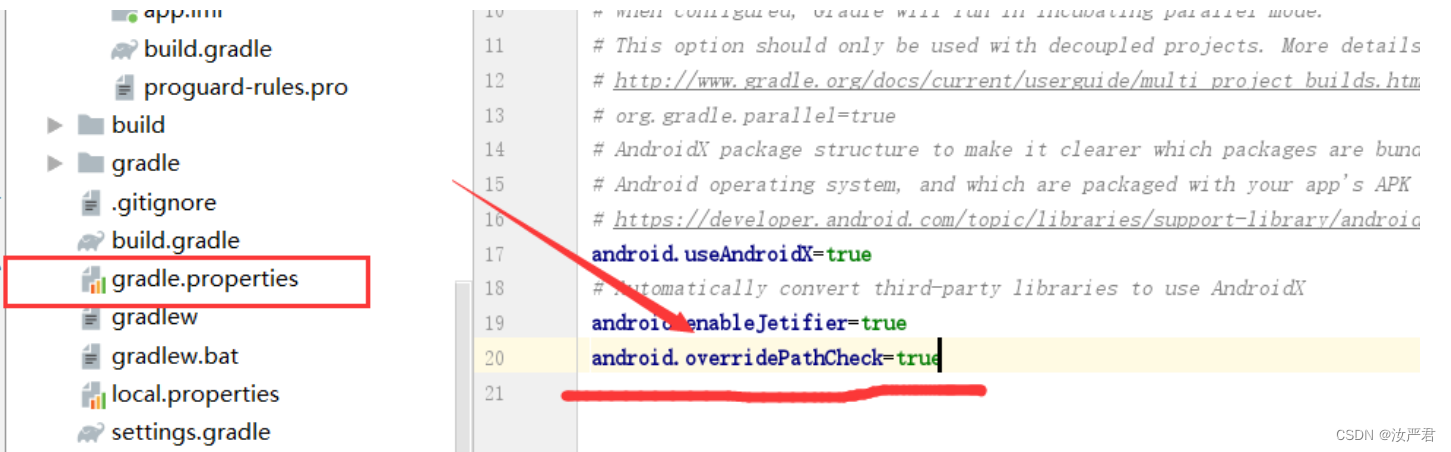
即在项目的gradle.properties中添加:
android.overridePathCheck=true
通过将行“android.overridePathCheck=true”添加到项目目录中的gradle.properties文件中,可以禁用此警告。
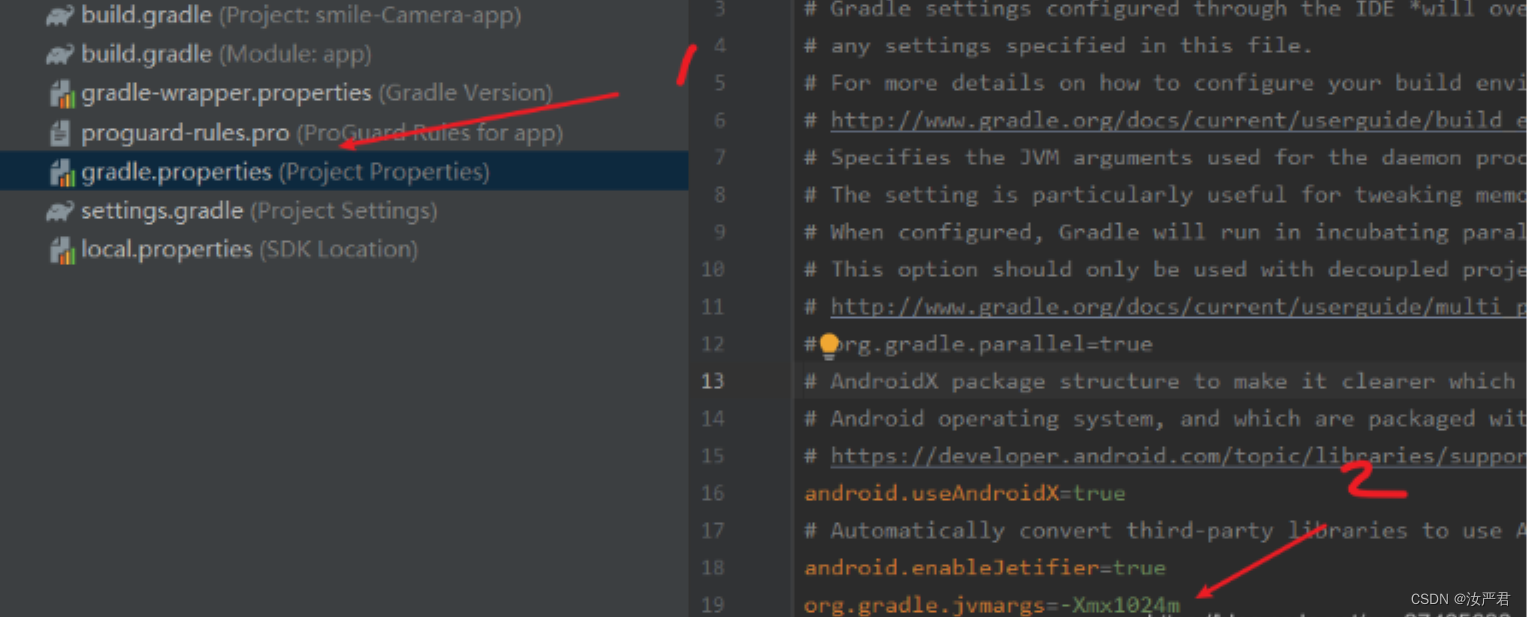
(2)运行项目报错“Unable to start the daemon process ”

这是对gradle的低内存导致的结果,我们需要重新设定
如图,找到gradle.properties,添加org.gradle.jvmargs=-Xmx1024m并保存,如果文件里面已经有了,先删掉即可,如果还不行,将1024改为512
构建成功

(3)android studio编译出错:Android resource linking failed
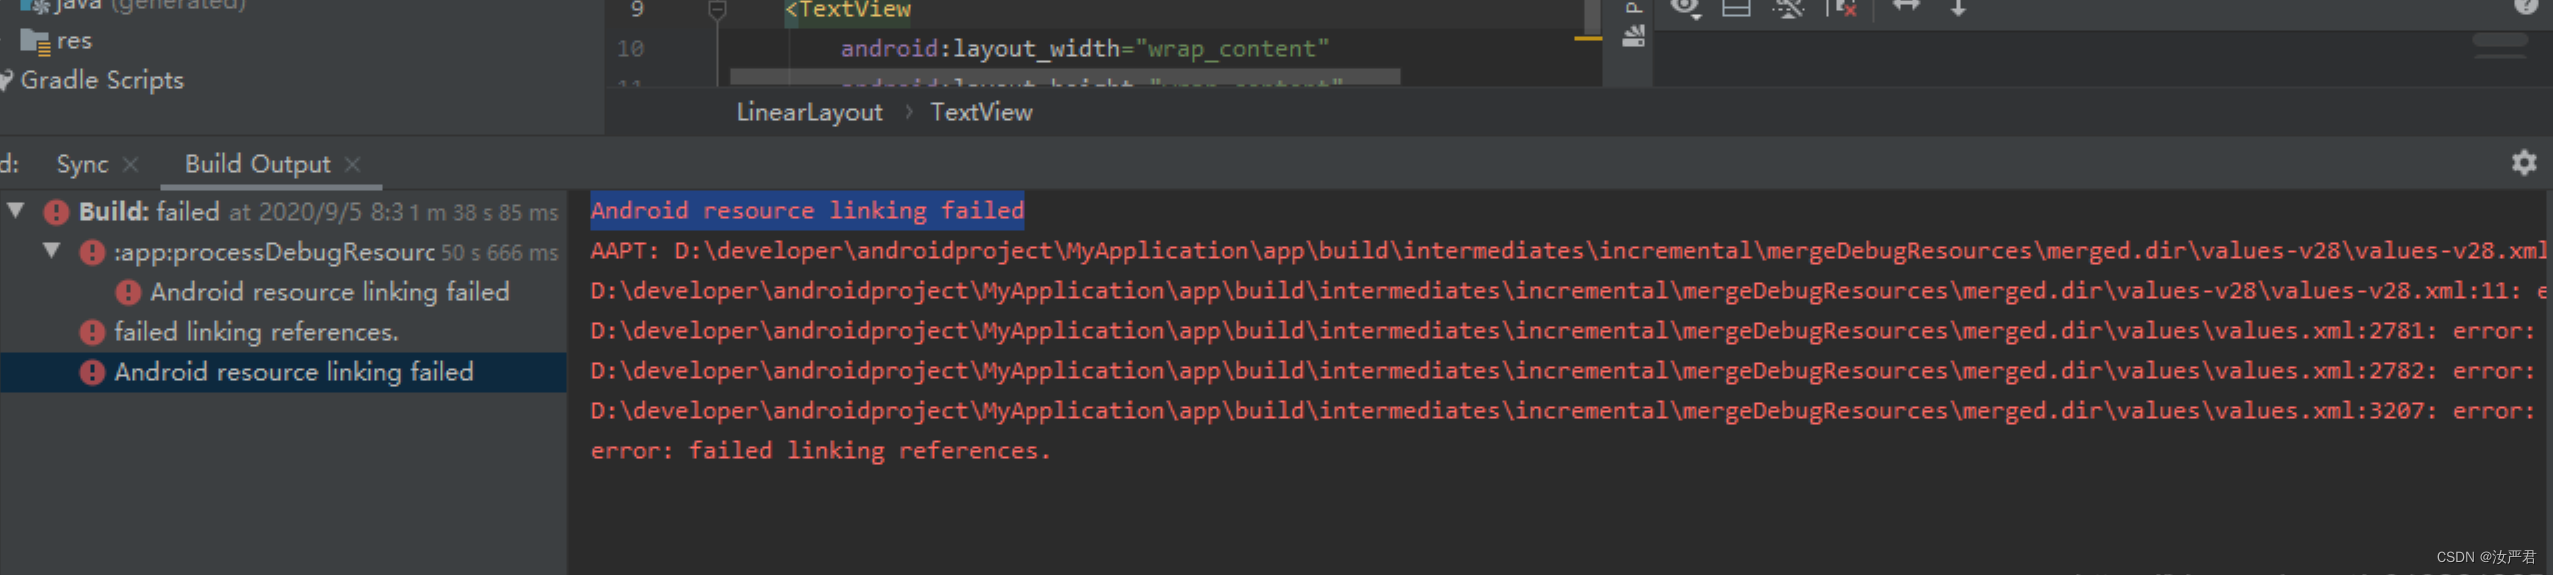
这种情况一般是项目配置导致的,打开 File–> Project Structure,看到modules选项内容如下:
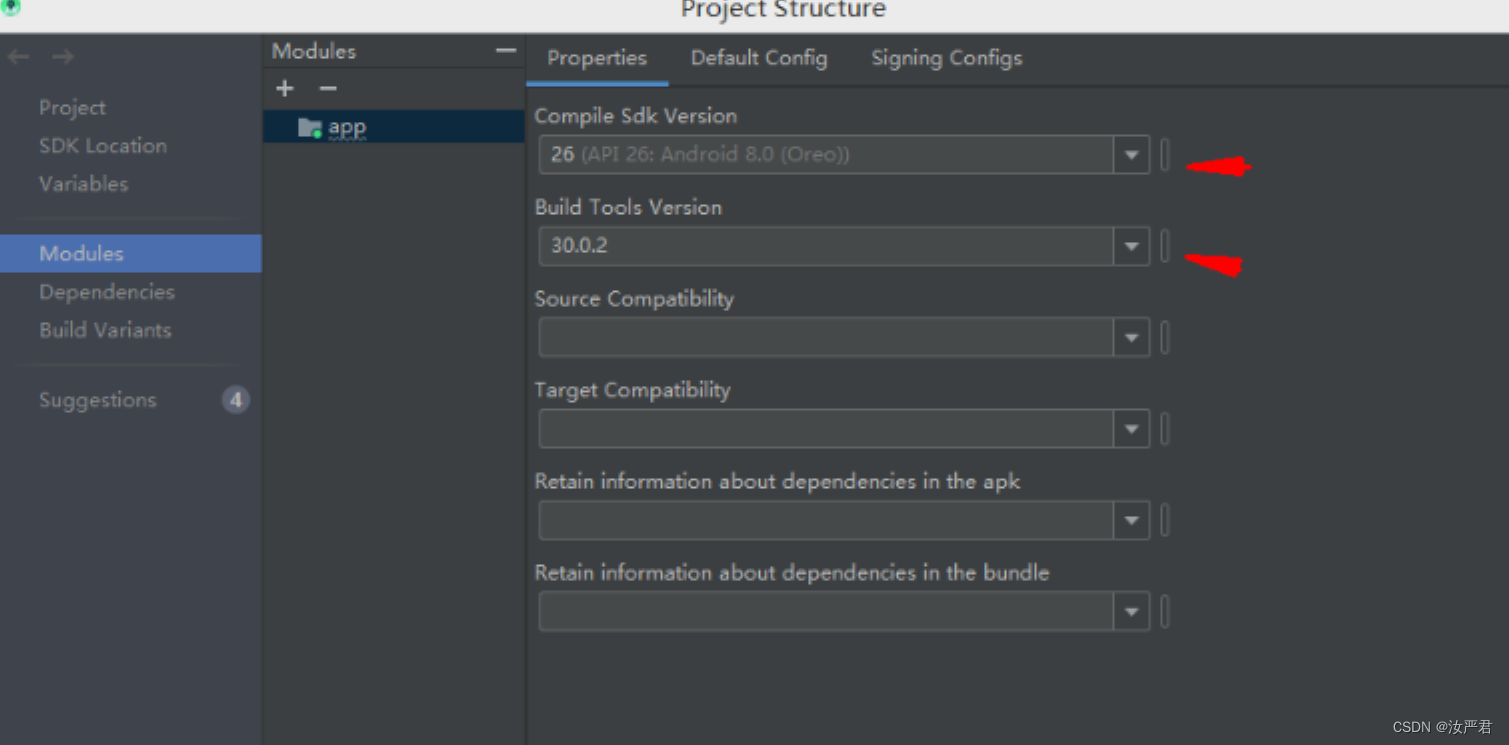
在上图中会发现compile sdk version 和build tools version版本不一致,将build tools version版本也改为26.
如下图所示:
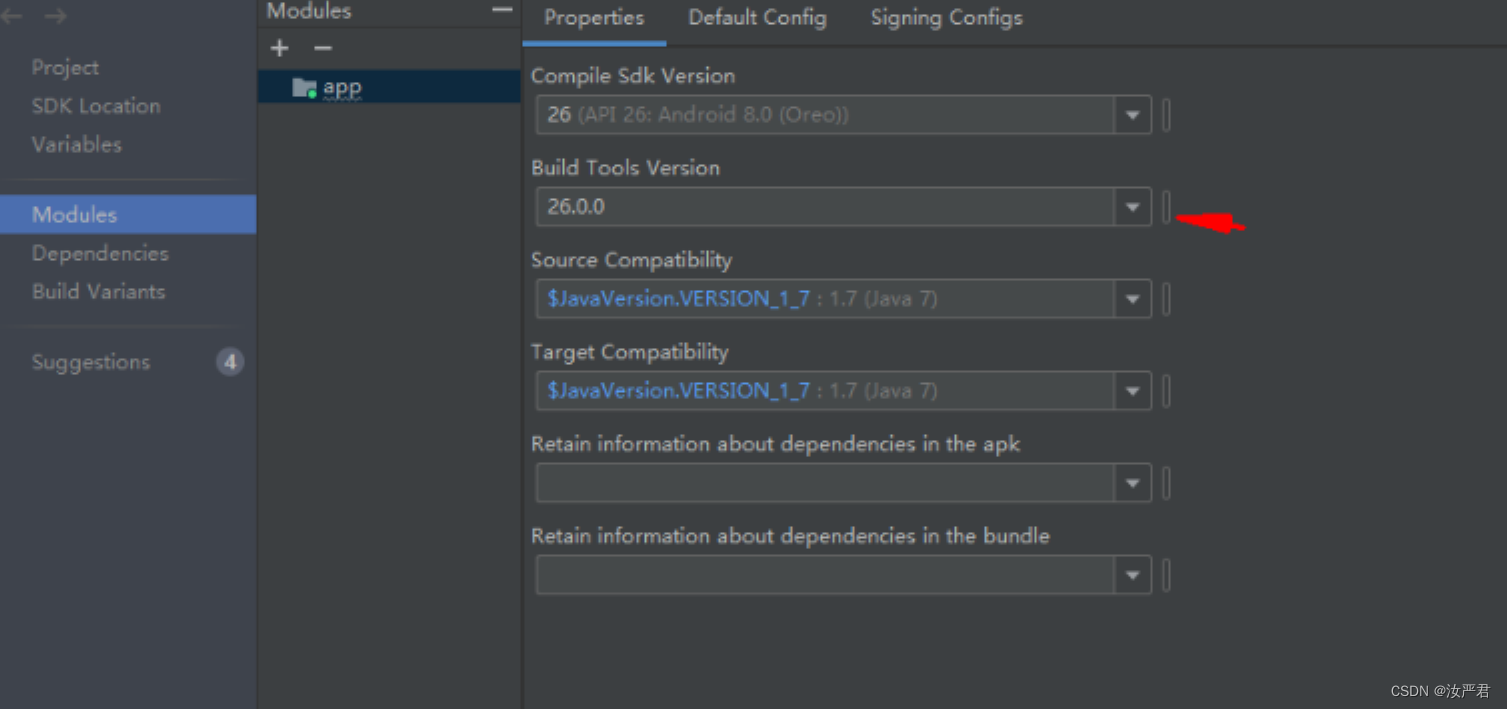
再次运行成功。
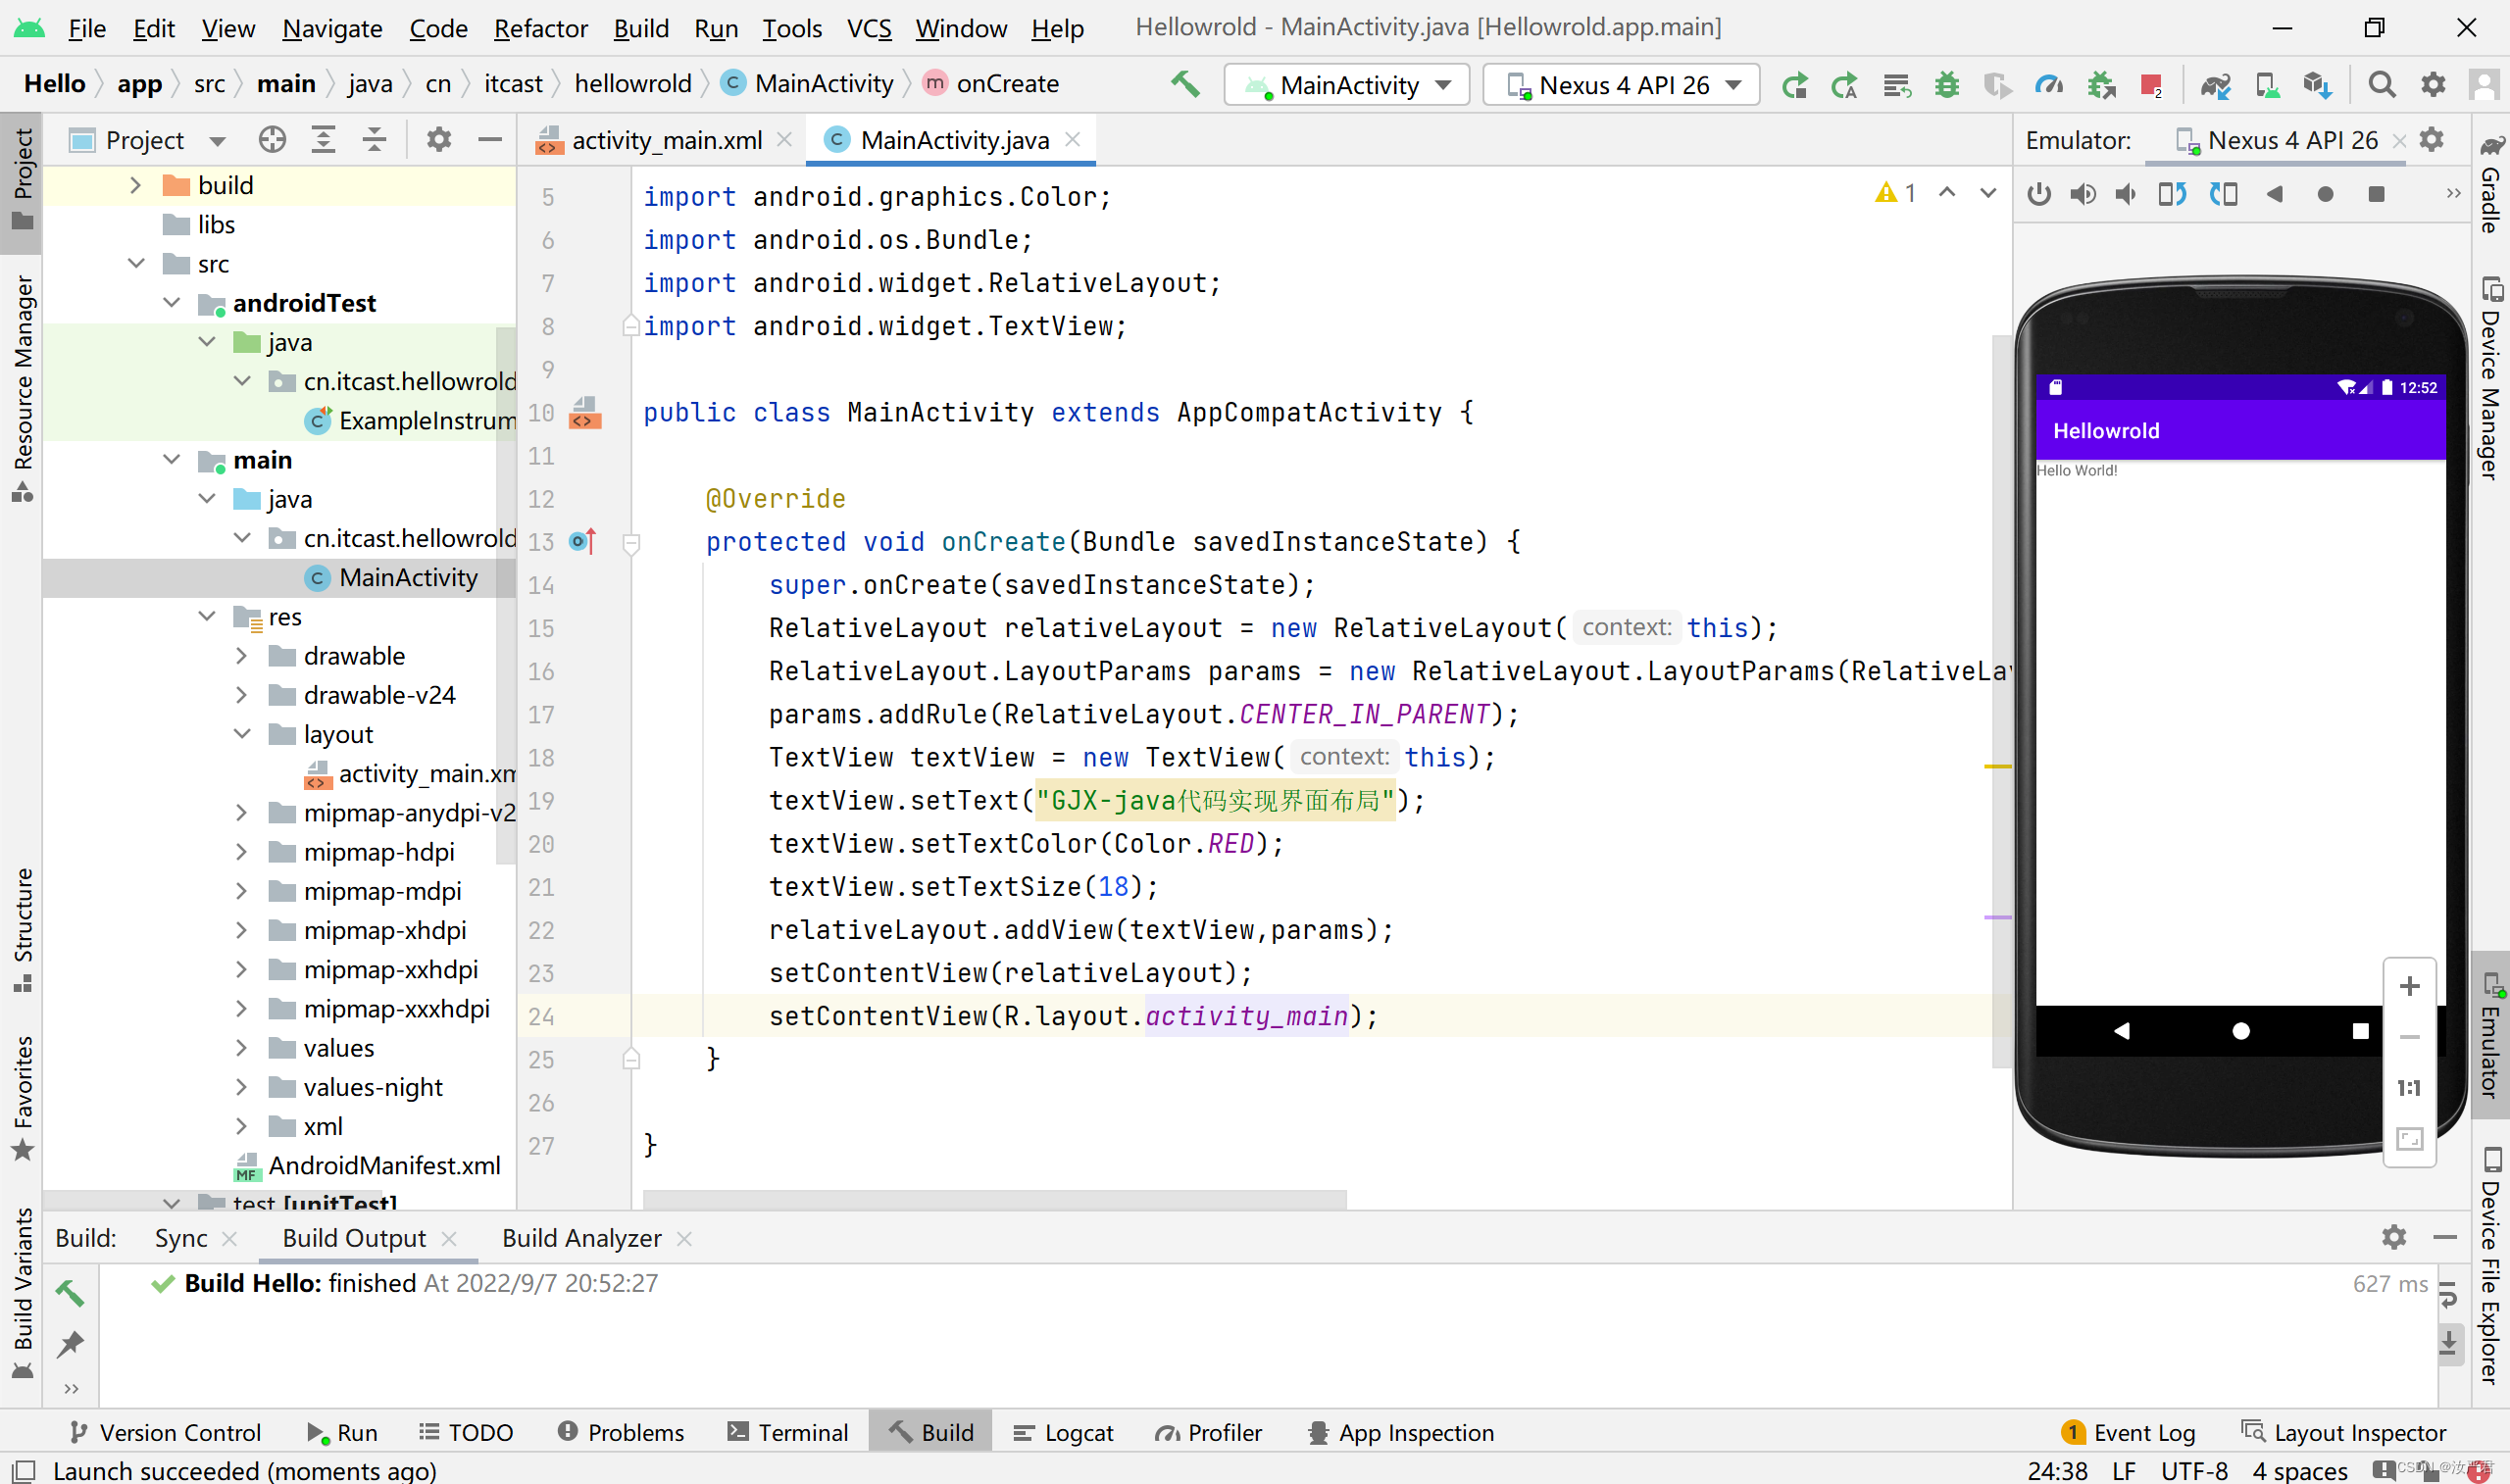
2、在用Java编写布局时,需要将
setContentView(R.layout.activity_main);
这行代码删掉,这行代码的意思是调用activity_main里的内容,如果没删掉的话会一直显示active_main.xml里的布局
5.实验总结
本次实验内容是我接触Android开发的首次尝试,内容不难,但是调整各个组件的位置让人抓狂,需要比较细心的进行调整,既是收获了Android开发的新知识,也回去重新巩固了一下Java的相关内容,这次实验总体收获蛮大的


 3156
3156


 被折叠的 条评论
为什么被折叠?
被折叠的 条评论
为什么被折叠?
 到【灌水乐园】发言


