


IDEA实训——从JDBC到Mybatis
一、从JDBC到Mybatis的改进
(一)什么是Mybatis?
MyBatis支持定制化SQL、存储过程以及高级映射的优秀的持久层框架。MyBatis 避免了几乎所有的
JDBC代码和手动设置参数以及获取结果集。MyBatis 可以对配置和原生Map使用简单的XML或注
解,将接口和Java的POJOs(Plain Old Java Objects,普通的Java对象)映射成数据库中的记录。
Mybatis架构

(二)JDBC编程的步骤
- 加载数据库驱动
- 创建并获取数据库链接
- 创建jdbc statement对象
- 设置sql语句
- 设置sql语句中的参数(使用preparedStatement)
- 通过statement执行sql并获取结果
- 对sql执行结果进行解析处理
- 释放资源(resultSet、preparedstatement、connection)
(三)从JDBC到Mybatis的改进
我们一个一个说问题,然后挨个说改进的过程。
1.问题描述一:
- 数据库链接创建、释放频繁造成系统资源浪费从而影响系统性能
解决问题:
数据库连接的获取和关闭我们可以使用数据库连接池来解决资源浪费的问题。通过连接池就可以反复利
用已经建立的连接去访问数据库了。减少连接的开启和关闭的时间。2.问题描述二:
- Sql语句在代码中硬编码,造成代码不易维护,实际应用sql变化的可能较大,sql变动需要改变java代
码。
解决问题:
Mybatis将SQL语句写在配置文件中通过xml或注解的方式将要执行的各种statement(statement、
preparedStatemnt、CallableStatement)配置起来,并通过java对象和statement中的sql进行映射生
成最终执行的sql语句,最后由mybatis框架执行sql并将结果映射成java对象并返回。这样当需要更改
SQL时,只需要更改配置文件。(不影响接口的情况下)3.问题描述三:
- 使用preparedStatement向占有位符号传参数存在硬编码,因为sql语句的where条件不一定,可能多也
可能少,修改sql还要修改代码,系统不易维护。
解决问题:
同上,配置文件。4.问题描述四:
- 对结果集解析存在硬编码(查询列名),sql变化导致解析代码变化,系统不易维护,如果能将数据库记
录封装成pojo对象解析比较方便。
解决问题:
Mapped Statement对sql执行输出结果进行定义,包括HashMap、基本类型、pojo,Executor通过
Mapped Statement在执行sql后将输出结果映射至java对象中,输出结果映射过程相当于jdbc编程中对
结果的解析处理过程。
(四)Mybatis执行过程
1.mybatis配置
- SqlMapConfig.xml,此文件作为mybatis的全局配置文件,配置了mybatis的运行环境等信息。
mapper.xml文件即sql映射文件,文件中配置了操作数据库的sql语句。此文件需要在SqlMapConfig.xml中加载。2.通过mybatis环境等配置信息构造SqlSessionFactory即会话工厂
3. 由会话工厂创建sqlSession即会话,操作数据库需要通过sqlSession进行。
4.mybatis底层自定义了Executor执行器接口操作数据库,Executor接口有两个实现,一个是基本执行器、一个是缓存执行器。
5.Mapped Statement也是mybatis一个底层封装对象,它包装了mybatis配置信息及sql映射信息等。
mapper.xml文件中一个sql对应一个Mapped Statement对象,sql的id即是Mapped statement的id。
6. Mapped Statement对sql执行输入参数进行定义,包括HashMap、基本类型、pojo,Executor通 过Mapped Statement在执行sql前将输入的java对象映射至sql中,输入参数映射就是jdbc编程中对preparedStatement设置参数。
7. Mapped Statement对sql执行输出结果进行定义,包括HashMap、基本类型、pojo,Executor通 过Mapped Statement在执行sql后将输出结果映射至java对象中,输出结果映射过程相当于jdbc编程中对结果的解析处理过程。
二、IDEA环境下Mybatis对JDBC进行改造示例对比
(一)JDBC操作数据库
1.Navicat数据表
(1)安装好jdk,并配置好环境变量。(此处不加赘述)
(2)下载MySQL的数据库驱动,下载链接:https://mvnrepository.com/artifact/mysql/mysql-connector-java/8.0.12 ,下载后存放到JRE的bin目录下。
3.所用工具navicat,选择数据库test1,新建查询

(4)新建user表,输入代码,点击运行
create table users(
	id int primary key auto_increment,
	name varchar(40),
	password varchar(40),
	email varchar(60),
	birthday date
)character set utf8 collate utf8_general_ci;


(5)插入数据
insert into users(name,password,email,birthday) values('zs','123456','zs@sina.com','1999-12-04');
insert into users(name,password,email,birthday) values('lisi','123456','lisi@sina.com','2001-12-04');
insert into users(name,password,email,birthday) values('wangwu','123456','wangwu@sina.com','2003-12-04');


2.IDEA创建项目
(1)File-New-Projest

(2)选择Java


(3)项目命名

(4)新建包Class,src-New-Java Class


(5)DatebaseLnk代码
import java.sql.Connection;
import java.sql.DriverManager;
import java.sql.ResultSet;
import java.sql.SQLException;
import java.sql.Statement;

public class DatebaseLink {
    static final String driverName="org.gjt.mm.mysql.Driver";
    static final String dbUrl="jdbc:mysql://localhost:3306/test";
    static final String userName="root";
    static final String password="xyp20000921";
    public static void main(String[] args) {
        // TODO Auto-generated method stub
        // MySQL 8.0 以下版本 - JDBC 驱动名及数据库 URL

        Connection conn = null;
        Statement stmt = null;
        try{
            // 注册 JDBC 驱动
            Class.forName(driverName);

            // 打开链接
            System.out.println("连接数据库...");
            conn = DriverManager.getConnection(dbUrl,userName,password);

            // 执行查询
            System.out.println(" 实例化Statement对象...");
            stmt = (Statement) conn.createStatement();
            String sql;
            sql = "SELECT id, name, password, email FROM users";
            ResultSet rs = stmt.executeQuery(sql);

            // 展开结果集数据库
            while(rs.next()){
                // 通过字段检索
                int id  = rs.getInt("id");
                String name = rs.getString("name");
                String password = rs.getString("password");
                String email = rs.getString("email");
                // 输出数据
                System.out.print("ID: " + id);
                System.out.print(", 姓名: " + name);
                System.out.print(", 密码: " +password);
                System.out.print(", 邮箱: " +email);
                System.out.print("\n");
            }
            // 完成后关闭
            rs.close();
            stmt.close();
            conn.close();
        }catch(SQLException se){
            // 处理 JDBC 错误
            se.printStackTrace();
        }catch(Exception e){
            // 处理 Class.forName 错误
            e.printStackTrace();
        }finally{
            // 关闭资源
            try{
                if(stmt!=null) stmt.close();
            }catch(SQLException se2){
            }// 什么都不做
            try{
                if(conn!=null) conn.close();
            }catch(SQLException se){
                se.printStackTrace();
            }
        }
        System.out.println("Goodbye!");
    }
}
3.引入JDBC的jar包
(1)File→Project Structure

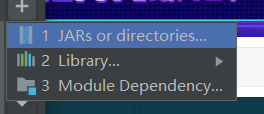
(2)Moudles→Dependencies→右边的加号

(3)点击第一个选项
(4)从相关目录下导入jar包

(5)应用成功

4.运行
(1)右击DatabaseLink,选择Run "DatabaseLink main()"

2.运行结果

(二) MyBatis应用
1.创建项目
(1)用IDEA新建项目,new-peoject

(2)Java Version 对于JDK选择8,点击next

(3)选择新建Sring Web项目


(4)创建成功

2.Mysql建表(Navicat)
步骤同上,新建查询后运行
1.创建学生表
create table student(
	no int primary key auto_increment,
	name varchar(40),
	age int
)character set utf8 collate utf8_general_ci;
2.插入记录
insert into student(no,name,age) values('1','张三','18');
insert into student(no,name,age) values('2','李四','21');
insert into student(no,name,age) values('3','王二','22');
insert into student(no,name,age) values('4','张飞','42');
insert into student(no,name,age) values('5','小米','74');


3.配置文件
(1)上一步选择的依赖,在pom.xml文件中,已经自动添加到我们的文件中了

pom.xml文件
<?xml version="1.0" encoding="UTF-8"?>
<project xmlns="http://maven.apache.org/POM/4.0.0" xmlns:xsi="http://www.w3.org/2001/XMLSchema-instance"
         xsi:schemaLocation="http://maven.apache.org/POM/4.0.0 https://maven.apache.org/xsd/maven-4.0.0.xsd">
    <modelVersion>4.0.0</modelVersion>
    <parent>
        <groupId>org.springframework.boot</groupId>
        <artifactId>spring-boot-starter-parent</artifactId>
        <version>2.5.5</version>
        <relativePath/> <!-- lookup parent from repository -->
    </parent>
    <groupId>com.example</groupId>
    <artifactId>databasedemo</artifactId>
    <version>0.0.1-SNAPSHOT</version>
    <name>databasedemo</name>
    <description>Demo project for Spring Boot</description>
    <properties>
        <java.version>1.8</java.version>
    </properties>
    <dependencies>
        <dependency>
            <groupId>org.springframework.boot</groupId>
            <artifactId>spring-boot-starter-jdbc</artifactId>
        </dependency>
        <dependency>
            <groupId>org.springframework.boot</groupId>
            <artifactId>spring-boot-starter-web</artifactId>
        </dependency>
        <dependency>
            <groupId>org.mybatis.spring.boot</groupId>
            <artifactId>mybatis-spring-boot-starter</artifactId>
            <version>2.2.0</version>
        </dependency>

        <dependency>
            <groupId>mysql</groupId>
            <artifactId>mysql-connector-java</artifactId>
            <scope>runtime</scope>
        </dependency>
        <dependency>
            <groupId>org.springframework.boot</groupId>
            <artifactId>spring-boot-starter-test</artifactId>
            <scope>test</scope>
        </dependency>
    </dependencies>

    <build>
        <plugins>
            <plugin>
                <groupId>org.springframework.boot</groupId>
                <artifactId>spring-boot-maven-plugin</artifactId>
            </plugin>
        </plugins>
    </build>

</project>
(2)application.properties配置
server.port=8080
spring.datasource.driver-class-name=com.mysql.cj.jdbc.Driver
spring.datasource.url=jdbc:mysql://localhost:3306/test?useUnicode=true&characterEncoding=UTF-8&serverTimezone=UTC
spring.datasource.username=root
spring.datasource.password=xyp20000921
mybatis.mapper-locations=classpath:mapper/*Mapper.xml

4.代码部分
(1)项目src-main-java-com下分别创建包:controller、entity、mapper、service,用来实现控制层、实体层、映射层、业务层
(2)src-main-resources下创建mapper包用于存放*Mapper.xml文件:

(3)创建entity实体类Student
package com.example.databasedemo.entity;

public class Student {
    private int no;
    private String name;
    private int age;

    public int getNo() {
        return no;
    }

    public void setNo(int no) {
        this.no = no;
    }

    public void setName(String name) {
        this.name = name;
    }

    public String getName() {
        return name;
    }

    public void setAge(int age) {
        this.age = age;
    }

    public int getAge() {
        return age;
    }
    @Override
    public String toString() {
        return "Student{" +
                "no=" + no +
                ", name='" + name + '\'' +
                ", age='" + age + '\'' +
                '}';
    }

}
(3)创建Mapper映射操作StudentMapper类:

package com.example.databasedemo.mapper;

import com.example.databasedemo.entity.Student;
import org.apache.ibatis.annotations.Mapper;

import java.util.List;

@Mapper
public interface StudentMapper {
    public List<Student> findAllStudent();

    List<Student> findStudentByno(int no);
}
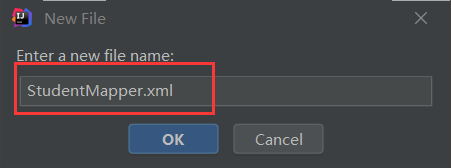
(4)创建Mapper映射对应的StudentMapper.xml文件:

<?xml version="1.0" encoding="UTF-8"?>
<!DOCTYPE mapper PUBLIC "-//mybatis.org/DTD Mapper 3.0//EN" "http://mybatis.org/dtd/mybatis-3-mapper.dtd">
<mapper namespace="com.example.databasedemo.mapper.StudentMapper">
    <resultMap id="result" type="com.example.databasedemo.entity.Student">
        <result column="no" jdbcType="INTEGER" property="no" />
        <result column="name" jdbcType="VARCHAR" property="name" />
        <result column="age" jdbcType="INTEGER" property="age" />
    </resultMap>

    <select id="findAllStudent" resultType="com.example.databasedemo.entity.Student">
        select  * from student;
    </select>

    <select id="findStudentByno" resultType="com.example.databasedemo.entity.Student">
        select * from student where no=#{no};
    </select>
</mapper
(5)创建service业务StudentService类:

package com.example.databasedemo.service;
import com.example.databasedemo.entity.Student;
import com.example.databasedemo.mapper.StudentMapper;
import org.springframework.beans.factory.annotation.Autowired;
import org.springframework.stereotype.Service;

import java.util.List;
@Service
public class StudentService {
    @Autowired(required = false)
    public StudentMapper studentMapper;
    public List<Student> findAllStudent() {
        return studentMapper.findAllStudent();
    }

    public List<Student> findStudentByno(int no) {
        return studentMapper.findStudentByno(no);
    }
}
(6)创建 controller控制层UserController类:

package com.example.databasedemo.controller;

import com.example.databasedemo.entity.Student;
import com.example.databasedemo.service.StudentService;
import org.springframework.beans.factory.annotation.Autowired;
import org.springframework.web.bind.annotation.PathVariable;
import org.springframework.web.bind.annotation.RequestMapping;
import org.springframework.web.bind.annotation.RestController;

import java.util.List;

@RestController
@RequestMapping("/Student")
class UserController {
    @Autowired
    private StudentService studentService;

    @RequestMapping("/getAllStudent")
    public List<Student> findAll(){
        return studentService.findAllStudent();
    }

    @RequestMapping("/getStudentByno/{no}")
    public List<Student> findUserByStudentId(@PathVariable int no){
        return studentService.findStudentByno(no);
    }
}
(7)总的架构

5.测试结果
(1)点击运行

(2)打开浏览器输入http://localhost:8080/Student/getAllStudent/

(3)输入http://localhost:8080/Student/getStudentByno/2

6.完整功能
以上为spring boot
整合mybatis实现的Student读取,接下来是添加StudentMapper类的增加、更新和删除方法,配置StudentMapper.xml文件,添加StudentService和StudentController相关功能
(1)StudentMapper类
package com.example.databasedemo.mapper;

        import com.example.databasedemo.entity.Student;
        import org.apache.ibatis.annotations.Mapper;

        import java.util.List;

@Mapper
public interface StudentMapper {
    public List<Student> findAllStudent();
    public List<Student> findStudentByno(int no);
    public List<Student> findStudentByname(String name);
    public int insertStudent(Student student);
    public int updateStudent(Student student);
    public int deleteStudent(Student student);
}
(2)完整StudentService类
package com.example.databasedemo.service;

import com.example.databasedemo.entity.Student;
import com.example.databasedemo.mapper.StudentMapper;
import org.springframework.beans.factory.annotation.Autowired;
import org.springframework.stereotype.Service;

import java.util.List;
@Service
public class StudentService {
    @Autowired(required = false)
    public StudentMapper studentMapper;
    public List<Student> findAllStudent() {
        return studentMapper.findAllStudent();
    }
    public List<Student> findStudentByno(int no) {
        return studentMapper.findStudentByno(no);
    }
    public List<Student> findStudentByname(String name){
        return studentMapper.findStudentByname(name);
    }
    public Student insertStudent(Student student){
        studentMapper.insertStudent(student);
        return student;
    }

    public int updateStudent(Student student){
        return studentMapper.updateStudent(student);
    }
    public int deleteStudent(Student student){
        return studentMapper.deleteStudent(student);
    }
}
(3)完整StudentController类
package com.example.databasedemo.controller;

import com.example.databasedemo.entity.Student;
import com.example.databasedemo.service.StudentService;
import org.springframework.beans.factory.annotation.Autowired;
import org.springframework.web.bind.annotation.PathVariable;
import org.springframework.web.bind.annotation.RequestMapping;
import org.springframework.web.bind.annotation.RestController;

import java.util.List;

@RestController
@RequestMapping("/Student")
public  class StudentController {
    @Autowired
    private StudentService studentService;

    @RequestMapping("/getAllStudent")
    public List<Student> findAll(){
        return studentService.findAllStudent();
    }

    @RequestMapping("/getStudentByno/{no}")
    public List<Student> findUserByStudentId(@PathVariable int no){
        return studentService.findStudentByno(no);
    }
    @RequestMapping("/getStudentByname/{name}")
    public List<Student> findStudentByname(@PathVariable String name){
        return studentService.findStudentByname(name);
    }

    @RequestMapping("/insertStudent")
    public Student insertStudent(Student student){
        return studentService.insertStudent(student);
    }

    @RequestMapping("/updateStudent")
    public int updateStudent(Student student){
        return studentService.updateStudent(student);
    }

    @RequestMapping("/deleteStudent")
    public int deleteStudent(Student student){
        return studentService.deleteStudent(student);
    }
}
(4)完整StudentController类
package com.example.databasedemo.controller;

import com.example.databasedemo.entity.Student;
import com.example.databasedemo.service.StudentService;
import org.springframework.beans.factory.annotation.Autowired;
import org.springframework.web.bind.annotation.PathVariable;
import org.springframework.web.bind.annotation.RequestMapping;
import org.springframework.web.bind.annotation.RestController;

import java.util.List;

@RestController
@RequestMapping("/Student")
public  class StudentController {
    @Autowired
    private StudentService studentService;

    @RequestMapping("/getAllStudent")
    public List<Student> findAll(){
        return studentService.findAllStudent();
    }

    @RequestMapping("/getStudentByno/{no}")
    public List<Student> findUserByStudentId(@PathVariable int no){
        return studentService.findStudentByno(no);
    }
    @RequestMapping("/getStudentByname/{name}")
    public List<Student> findStudentByname(@PathVariable String name){
        return studentService.findStudentByname(name);
    }

    @RequestMapping("/insertStudent")
    public Student insertStudent(Student student){
        return studentService.insertStudent(student);
    }

    @RequestMapping("/updateStudent")
    public int updateStudent(Student student){
        return studentService.updateStudent(student);
    }

    @RequestMapping("/deleteStudent")
    public int deleteStudent(Student student){
        return studentService.deleteStudent(student);
    }
}
(5)完整StudentMapper.xml文件
<?xml version="1.0" encoding="UTF-8"?>
<!DOCTYPE mapper PUBLIC "-//mybatis.org/DTD Mapper 3.0//EN" "http://mybatis.org/dtd/mybatis-3-mapper.dtd">
<mapper namespace="com.example.databasedemo.mapper.StudentMapper">
    <resultMap id="result" type="com.example.databasedemo.entity.Student">
        <result column="no" jdbcType="INTEGER" property="no" />
        <result column="name" jdbcType="VARCHAR" property="name" />
        <result column="age" jdbcType="INTEGER" property="age" />
    </resultMap>

    <select id="findAllStudent" resultType="com.example.databasedemo.entity.Student">
        select  * from student;
    </select>

    <select id="findStudentByno" resultType="com.example.databasedemo.entity.Student">
        select * from student where no=#{no};
    </select>
    <select id="findStudentByname" resultType="com.example.databasedemo.entity.Student">
        select * from student where name=#{name};
    </select>

    <insert id="insertStudent" parameterType="com.example.databasedemo.entity.Student" keyProperty="no" useGeneratedKeys="true">
        insert into student(name,age) values (#{name},#{age});
    </insert>

    <update id="updateStudent" parameterType="com.example.databasedemo.entity.Student">
        update student set name=#{name},age=#{age} where no=#{no};
    </update>

    <delete id="deleteStudent" parameterType="com.example.databasedemo.entity.Student">
        delete from  where no=#{no};
    </delete>
</mapper>
7.完整功能测试
(1)运行程序

(2)按姓名查找,输入http://localhost:8080/Student/getStudentByname/王二

(3)修改一信息http://localhost:8080/Student/updateStudent?no=5&name=王丽&age=99

查看结果http://localhost:8080/Student/getStudentByno/5

(4)插入一条信息http://localhost:8080/Student/insertStudent?name=花七&age=23

(5)删除一条信息http://localhost:8080/Student/deleteStudent?no=6

输入http://localhost:8080/Student/getAllStudent/查看删除成功

三、总结
JDBC是Java提供的一个操作数据库的API;MyBatis是一个支持普通SQL查询,存储过程和高级映射的优秀持久层框架。MyBatis消除了几乎所有的JDBC代码和参数的手工设置以及对结果集的检索封装。MyBatis可以使用简单的XML或注解用于配置和原始映射,将接口和Java的POJO(Plain Old Java Objects,普通的Java对象)映射成数据库中的记录。MyBatis使用SqlSessionFactoryBuilder来连接完成 JDBC需要代码完成的数据库获取和连接,减少了代码的重复。mybatis的sql统一放在xml文件 优雅 统一 ,好管理,Mapper的作用是发送SQL,然后返回需要的结果,或者执行SQL修改数据库的数据,所以它应该在一个SqlSession事务方法之内,如同JDBC中一条SQL语句的执行,它最大的范围和SqlSession是相同的。
四、参考文献
【Mybatis】从JDBC到Mybatis的改进
MyBatis-从JDBC到Spring整合MyBatis
idea中导入jdbc驱动步骤详解
IDEA数据库连接:从JDBC到Mybatis


 525
525


 被折叠的 条评论
为什么被折叠?
被折叠的 条评论
为什么被折叠?
 到【灌水乐园】发言


