


文章目录
一、HTML是什么?
超文本标记语言(英语:HyperText Markup Language,简称:HTML)是一种用于创建网页的标准标记语言。简单地说就是运用一些指定的标记在网页上进行编写文档和一些其他操作。
1.1 基础结构
<!DOCTYPE html>
<html>
<head>
  <meta charset="utf-8">
  <link rel="shortcut icon" href="favicon.ico" type="image/x-icon">
  <title>页面标题</title>
</head>
<body>
  <h1>我的第一个Web页</h1>
  <p>当前有点丑:)</p>
</body>
</html>
1)首先可以看出html都是由元素组成。元素一般由<>开头,</>来结尾。但是也有一些空元素,只有开头没有结尾。
2)<html>元素是根元素。
3)<head>这个元素是一个容器。把除了要显示的信息之外的语句都放在这里。
4)<title>这个元素的内容是网页的标题,这里就是“网页标题”。
5)<ink rel=“shortcut icon” href=“favicon.ico” type=“image/x-icon”>类似于引入头文件。
6)<body>放入网页里的内容
1.2 元素的语法
<元素名 元素的属性 > 内容 </元素名>
注意:下列空元素没有结尾只有开头
<br>换行,<hr>分界线, <input>输入, <img>图片, <a>超链接等等。
例子:
<!-- 带属性的段落输入框 -->
<p title="这是个title属性">鼠标移上来试试!</p>
<!-- 带属性的输入框 -->
<input type="text">
<input type="password">
1.在属性和元素名称之间有一个空格,多个属性之间也是空格分开。
2.属性名称,后面跟着一个 = 号。
3.一个属性值,由一对引号 “” 引起来。
1.3 标题元素
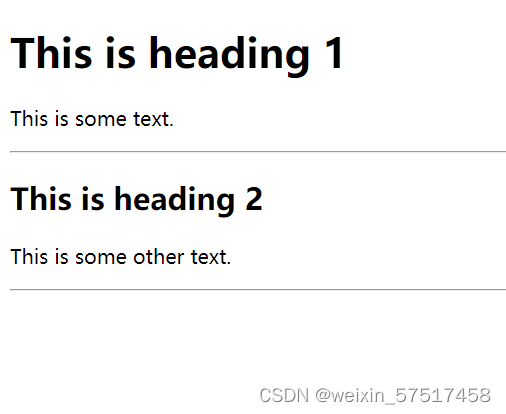
HTML有六个标题<h1> ~ <h6>,其中数字越小的标题越高级字体也越大
代码如下(示例):
<h1>This is heading 1</h1>
<p>This is some text.</p>
<hr>
<h2>This is heading 2</h2>
<p>This is some other text.</p>
<hr>
结果:
1.4 文本格式
<p>You can use the mark tag to <mark>highlight</mark> text.</p>
<p><del>This line of text is meant to be treated as deleted text.</del></p>
<p><s>This line of text is meant to be treated as no longer accurate.</s></p>
<p><ins>This line of text is meant to be treated as an addition to the document.</ins></p>
<p><u>This line of text will render as underlined</u></p>
<p><small>This line of text is meant to be treated as fine print.</small></p>
<p><strong>This line rendered as bold text.</strong></p>
<p><em>This line rendered as italicized text.</em></p>
其中<mark>标记;
<del> 带有已删除部分和新插入部分的文本;
<s>一段带有已删除部分;
<ins>带有已删除部分和新插入部分的文本;
<u>下划线;
<small>字体变小;
<strong>字体变粗;
<em>斜体;
1.5 超链接 a
超链接语法
<a herf="URL" target="_blank/_self">内容</a>
其中:
_blank在一个新的网页打开链接;
_self或者默认不写指的是在当前的网页打开。
例子
<a href="https://www.baidu.com/" target="_blank">百度一下</a>
还可以和id一起使用,当作锚点,实现跳转
<!-- 文档其余部分 -->
<h2 id="C4">第四章 论零号病人的重要性</h2>
<!-- 文档其余部分 -->
<a href="#C4">跳到第四章</a>
<!-- 文档其余部分 -->
2.图片及文件路径 img
代码如下(示例):
data = pd.read_csv(
    'https://labfile.oss.aliyuncs.com/courses/1283/adult.data.csv')
print(data.head())
该处使用的url网络请求的数据。
3.图片作为超链接
代码例子
<a href="https://www.baidu.com" target="_blank">
<img src="./123/123.jpg" height="100%" width="100%" title="点击" >
</a>
二、网页示例
我们现在已经基本了解了一些html的一些语法,直接上网页示例,更利于我们学习
HTML:
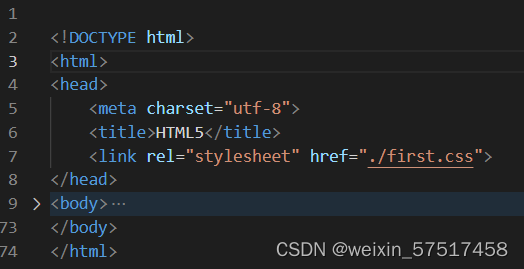
<!DOCTYPE html>
<html>
<head>
<meta charset="utf-8">
<title>HTML5</title>
<link rel="stylesheet" href="./first.css">
</head>
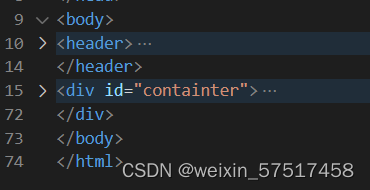
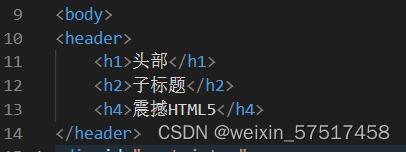
<body>
<header>
<h1>头部</h1>
<h2>子标题</h2>
<h4>震撼HTML5</h4>
</header>
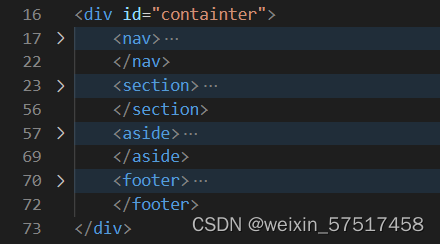
<div id="containter">
<nav>
<h3>导航</h3>
<a href="http://www.google.com">Google</a>
<a href="http://www.baidu.com" target="_blank">百度</a>
<a href="http://www.dapenti.com" target="_blank">打喷嚏</a>
</nav>
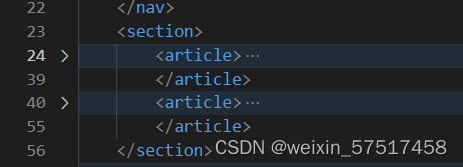
<section>
<article>
<header>
<h1>文章头部</h1>
</header>
<ul type="square">
<li>当一个人只为维持生计而思维的时候,他的思想就难以高尚。 ——卢梭</li>
<li>衣不如新,人不如旧</li>
<li>井蛙不可语天,夏虫不可语冰</li>
<li>有党性,没人性</li>
</ul>
<footer>
<h2>
文章底部
</h2>
</footer>
</article>
<article>
<header>
<h1>文章头部</h1>
</header>
<ol>
<li>不想解决人民提出的问题,老想解决提出问题的人民。</li>
<li>要不是美领馆按pm2.5标准向外公布空气检测结果,我们肯定还生活在“现在播报新闻,冬季来临,全国大部地区全天有大雾,空气质量良”的世界里。</li>
<li>某男问大师:“大师,我女朋友虽有优点,但缺点让我难以忍受,怎样才能让她只有优点没有缺点呢?”大师笑答:“方法很简单,不过若要我教你,你得先下山为我找一张只有正面没反面的纸回来。” 该男略一沉吟下山而去,很快又上山来,递给大师一张“人民日报” 。大师看后,从此遁入空门,不再过问世事。</li>
<li>人民对领导人情感的强烈程度,往往与领导人的牛逼程度无关,而是与人民的傻逼程度及国家的封闭程度成正比!</li>
</ol>
<footer>
<h2>
文章底部
</h2>
</footer>
</article>
</section>
<aside>
<h3>边条</h3>
<pre>
agony 痛苦 爱过你
pregnant 怀孕 扑来个男的
ambulance 救护车 俺不能死
ponderous 肥胖的 胖的要死
pest 害虫 拍死它
ambition 雄心 俺必胜
bale 灾祸 背噢
admire 羡慕 额的妈呀
</pre>
</aside>
<footer>
<h2>底部</h2>
</footer>
</div>
</body>
</html>
CSS:
body{
    background-color: #cccccc;
    font-family: "Microsoft Yahei","SimHei";
    margin: 0 auto;
    max-width: 900px;
    border: solid #FFFFFF;
}
header{
    background: #F47D31;
    display: block;
    color: #FFFFFF;
    text-align: center;
}
header h2{
    margin: 0;
}
h1{
    font-size: 72px;
    margin: 0;
}
h2{
    font-size: 24px;
    margin: 0;
    text-align: center;
    /*color: #F47D31;*/
}
h3{
    font-size: 18px;
    margin: 0;
    text-align: center;
    color: #F47D31;
}
h4{
    color: #F47D31;
    background-color: #FFFFFF;
    -webkit-box-shadow:2px 2px 20px #888;
    -webkit-transform:rotate(-45deg);
    -moz-box-shadow: 2px 2px 20px #888;
    -moz-transform:rotate(-45deg);
    position: absolute;
    padding: 0 150px;
    top: 50px;
    left: -120px;
    text-align: center;
}
nav{
    display: block;
    width:25%;
    float:left;
}
nav a:link, nav a:visited{
    display:block;
    color: #F47D31;
    border-bottom: 3px solid #FFFFFF;
    padding: 10px;
    text-decoration: none;
    font-weight: bold;
    margin: 5px;
}
nav a:hover{
    color: white;
    background-color: #F47D31;
}
nav h3{
    margin: 15px;
    color: white;
}
#container{
    background-color: #888888;
}
section{
    display: block;
    width: 50%;
    float:left;
}
article{
    background: #eee;
    display: block;
    margin: 10px;
    padding: 10px;
    /*
    -webkit-border-radius: 10px;
    -moz-border-radius: 10px;
    */
    border-radius: 10px;
    /*-webkit-box-shadow:2px 2px 20px #888;*/
    /*-webkit-transform:rotate(-10deg);*/
    /*-moz-box-shadow:2px 2px 20px #888;*/
    /*-moz-transform:rotate(-10deg);*/
    transform:rotate(-10deg);
    box-shadow: 2px 2px 20px #888;
}
article header{
    border-radius: 10px;
    padding: 5px;
}
article footer{
    border-radius: 10px;
    padding: 5px;
}
article h1{
    font-size: 18px;
}
aside {
    display: block;
    width: 25%;
    float: left;
}
aside h3{
    margin: 15px;
    color: white;
}
aside p{
    margin: 15px;
    color: white;
    font-weight: bold;
    font-style: italic;
}
footer{
    clear:both;
    display: block;
    background: #F47D31;
    color: #FFFFFF;
    text-align: center;
    padding: 15px;
}
footer h2{
    font-size: 14px;
    color: white;
}
大概的结果:

代码分析:
还是一样的在HTML里面结构非常清晰
主结构:<head>,<body>。
1.1 < head>
<meta> 元素可提供有关页面的元信息(meta-information),比如针对搜索引擎和更新频度的描述和关键词。
<tile>元素是网页的题目。这里就是HTML5。
如图:

<link> 标签定义文档与外部资源的关系。一般的作用是用来引入外部样式表,即CSS。
注意:
这里的地址十分有讲究
| 语句 | 内容 |
|---|---|
| href=“./first.css” | 当前目录下的css文件 |
| href=“../first.css” | 当前上一级目录下的css文件 |
类似于图片的路径。
1.2< body>
其中
<div>是单独开辟一行。其他的元素都要换行才行。是区块元素的一种。
<header>元素应该作为介绍内容或者导航链接栏的容器。
1.3 < header>
里面有三个标题,<h1>,<h2>,<h4>。
实际效果:
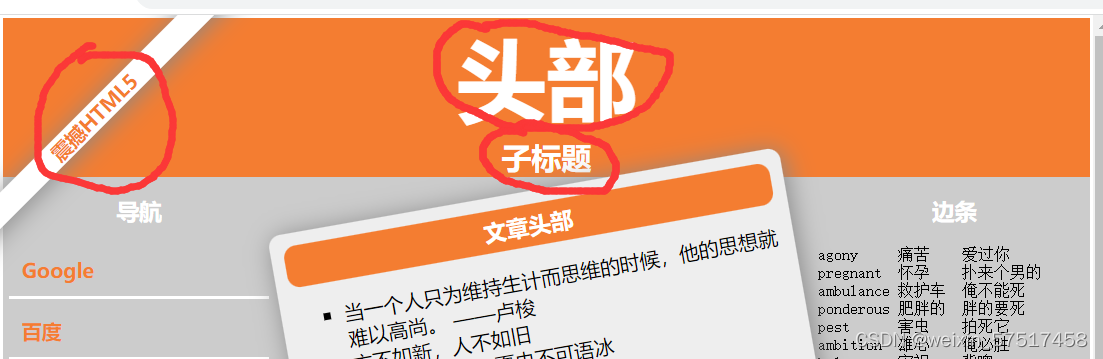
这里发现为什么和正常的标题看起来不一样?
因为这里使用了css,正因为有了这些网页才变得好看,这里我们打开css

首先我们看到header的样式里有
backgroud:背景颜色,这里是16进制的三原色。
display:block:成为“块级”元素,:inline是内连元素。
color:文字的颜色。
text-align:center :文本居中。
CSS 后代选择器
我们可以定义后代选择器来创建一些规则,使这些规则在某些文档结构中起作用,而在另外一些结构中不起作用。
header h2:表示这里的样式只在header中的<h2>里有效,而在其他的<h2>里无效。
盒子模型
从内到外,这个盒子是由内容 content, 内边距 padding, 边框 border, 外边距 margin构成的,如下图所示:

| 语句 | 内容 |
|---|---|
| Content | 盒子的内容,如文本、图片等 |
| Padding | 填充,也叫内边距,即内容和边框之间的区域 |
| Border | 边框,默认不显示 |
| Margin | 外边距,边框以外与其它元素的区域 |
这里margin: 0:指和其他元素的边距为0。

-webkit-box-shadow:这里是标题的阴影效果。
-webkit-transform:这里让其旋转-45度角。
-moz-是针对firefox的,-webkit-是针对safari和chrome的。
| static | 设置为静态定位position: static;,这是元素的默认定位方式,也即你设置与否,元素都将按正常的页面布局进行。 |
| relative | 设置为相对定位position: relative;,这将把元素相对于他的静态(原本)位置进行偏移 |
| fixed | 设置为固定定位position: fixed;,这将使得元素固定不动(即使你上下左右拖动浏览器的滚动条)。 |
| absolute | 设置为绝对定位position: absolute;,将使元素相对于其最近设置了定位属性(非static)的父元素进行偏移。如果该元素的所有父元素都没有设置定位属性,那么就相对于这个父元素。 |
position: absolute;这里是设置的绝对路径。
padding: 0 150px;上填充和下填充是 0,左填充和右填充是 150px
top: 50px;//距离父元素顶部50个像素
left: -120px;//距离父元素左边往左120个像素。
1.4 < div>
| 选择器 | HTML | CSS |
|---|---|---|
| id 选择器 | <p id=“sky”> | #sky{ color: blue;} |
| class 选择器 | <p class=“center”> | .center{ text-align: center;} |
注意:一个html文件里只有一个id,经常用作于锚点。
<div id=“containter”>:这里就是用的id选择器。
对应的css如图:

<nav> :标签定义导航链接的部分。
<section> :标签定义了文档的某个区域。比如章节、头部、底部或者文档的其他区域。
<aside>: 的内容可用作文章的侧栏。
<footer>: 标签定义文档或节的页脚。
1.5 < nav>

这里是导航条有三个超链接
看一下css
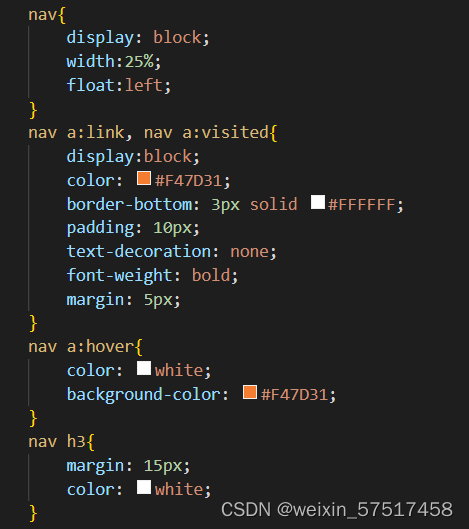
float:left:向左浮动,一个元素浮动后,其后的元素将尽可能包围它。如果希望浮动元素后面的元素在其下方显示,可使用clear: both样式来进行清除。
相对单位和绝对单位

一般为了适应不同的屏幕,相对单位的效果更好。
border-bottom:设置下边框。
text-decoration: none;:去掉超链接的下划线。
font-weight: bold;:变为粗体。
伪类
用于已有元素处于某种状态时(滑动、点击等)为其添加对应的样式,这个状态是根据用户行为而动态变化的。
用法:
选择器后使用 : 号,再跟上某个伪类/伪元素
例如:
nav a:hover{
color: white;
background-color: #F47D31;
}
1.6 < section>
<aritcle>:里面写的内容。
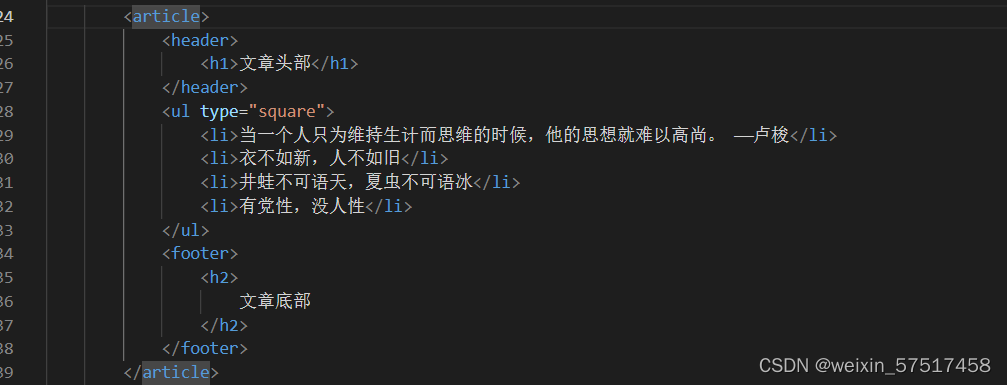
<ul type=“square”>:无序列表,type属性有:空心圆circle,实心方块square。
<li>:标签定义列表项目。(也可以用于有序列表)。
查看CSS
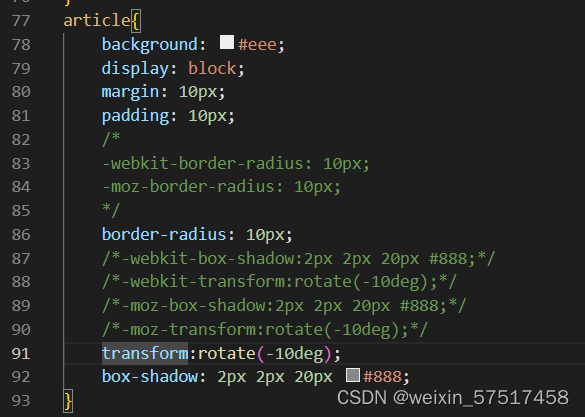
border-radius: 10px;:圆角程度。
另一个<article>类似这里不在重复。
总结
在学习过程中明显已经体会到了自己写CSS样式十分繁琐。现在一般都会用一些框架,接下来要继续进行对MDB的学习。


 2636
2636


 被折叠的 条评论
为什么被折叠?
被折叠的 条评论
为什么被折叠?
 到【灌水乐园】发言


