


因为不小心把wsl子系统删除了,所以重新配置一下微调环境。本文主要记录我微调 Qwen2.5-vl-3B-4bit的过程,使用windows的WSL-Ubuntu22.04部署。微调代码参考Unsloth官方微调Qwen2-vl的notebook。我的显卡使用是4060TI 16G,实际微调过程中的显存占用大约在6G左右。https://colab.research.google.com/drive/1whHb54GNZMrNxIsi2wm2EY_-Pvo2QyKh?usp=sharing#scrollTo=QmUBVEnvCDJv![]() https://colab.research.google.com/drive/1whHb54GNZMrNxIsi2wm2EY_-Pvo2QyKh?usp=sharing#scrollTo=QmUBVEnvCDJv
https://colab.research.google.com/drive/1whHb54GNZMrNxIsi2wm2EY_-Pvo2QyKh?usp=sharing#scrollTo=QmUBVEnvCDJv
主要流程从进入WSL系统开始:
1.安装miniconda:(如果要使用jupyter lab可以安装acconda)
参考https://zhuanlan.zhihu.com/p/683058297
输入以下命令
wget https://repo.anaconda.com/miniconda/Miniconda3-latest-Linux-x86_64.sh
sudo chmod 777 Miniconda3-latest-Linux-x86_64.sh
./Miniconda3-latest-Linux-x86_64.sh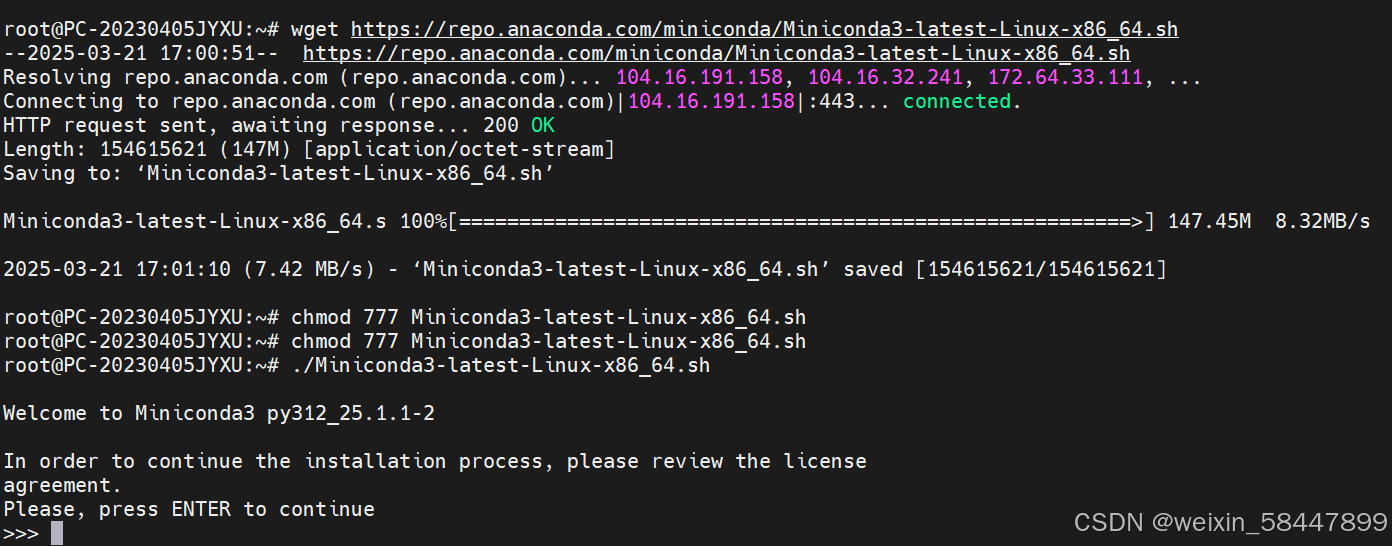 一直按enter安装即可
 输入yes,然后按enter,输入yes即可。
然后输入
nano ~/.bashrc在最后一行输入(YOURNAME换成你的用户名,我这里是root)
export PATH=/home/YOURNAME/miniconda3/bin/conda:$PATH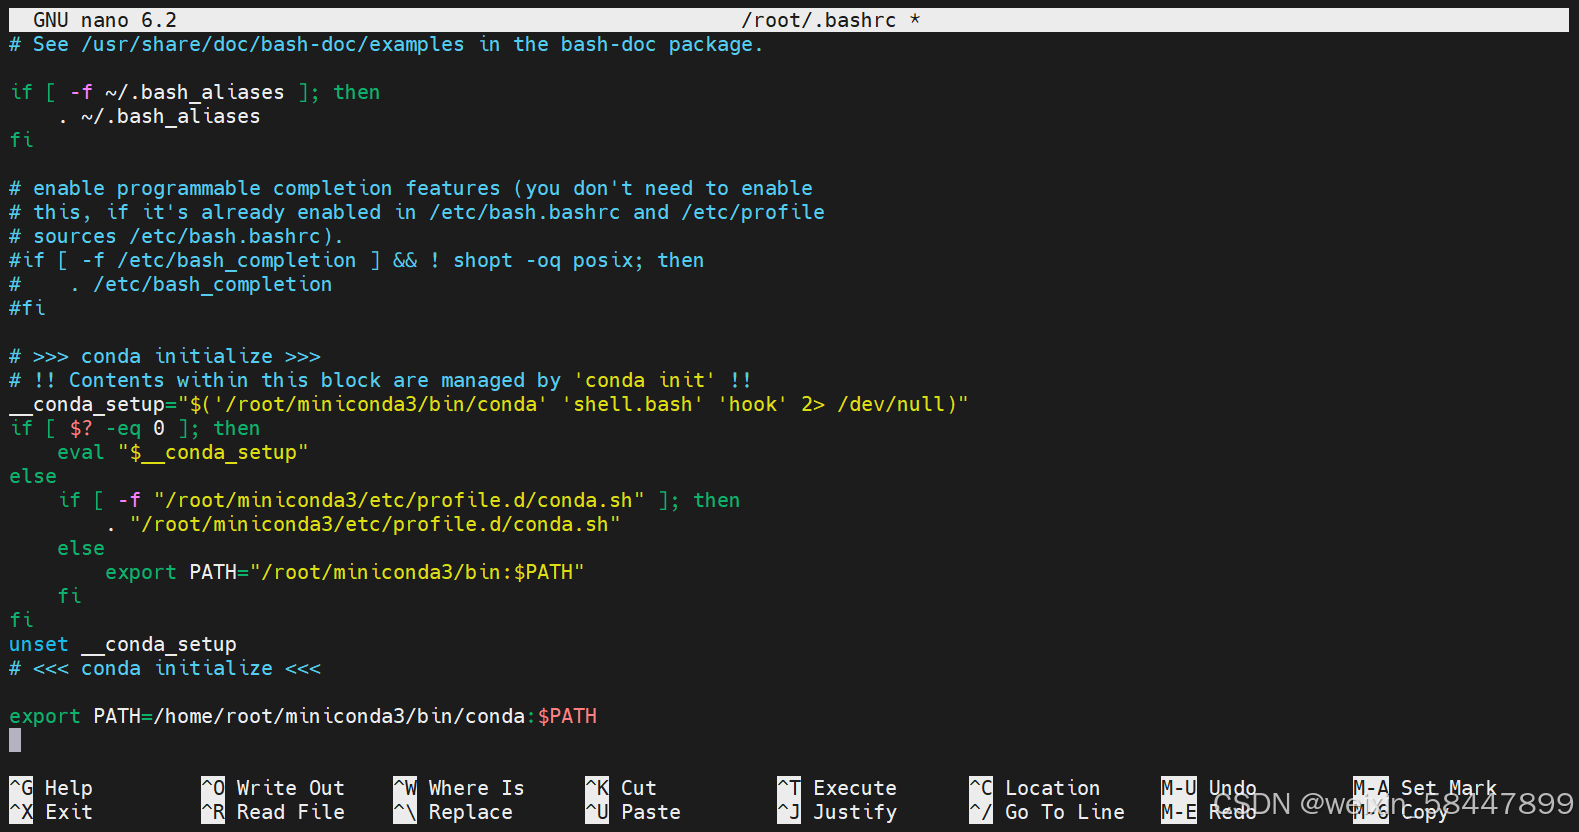
然后按ctrl+x,按下yes,然后按enter,修改完成。
输入下面命令重新加载bashrc文件:
source ~/.bashrc如果WSL命令提示符前出现(base)即代表配置成功

2.配置cuda
下面的方法一在我被删除的子系统配置时没有配置cuda这个环节也能直接运行,但是本次因为我是先在wsl装的cuda,才使用的方法一,没有具体测试不在wsl安装cuda是否完全可行。所以可以先尝试跳过这步,直接尝试方法一,如果出现问题也可以回来补充安装cuda。
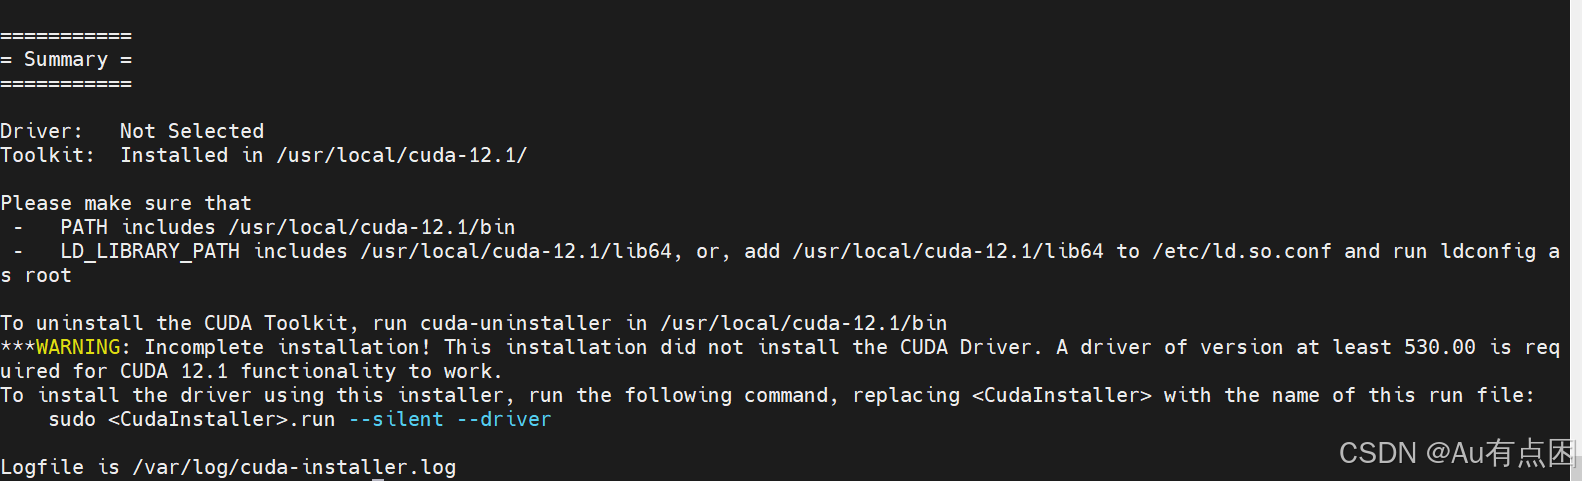
CUDA版本选择12.4,因为cuda12.1测试后发现训练会报错。
在下方官网找到对应系统的cuda,下面我提供的是WSL-cuda12.4的安装方法,部分图片还是显示12.1的,不过流程完全相同。参考Linux下安装cuda和对应版本的cudnn_linux怎么在自己的环境中安装cuda和cudnn-CSDN博客
CUDA Toolkit 12.4 Downloads | NVIDIA Developer
运行以下代码
wget https://developer.download.nvidia.com/compute/cuda/12.4.0/local_installers/cuda_12.4.0_550.54.14_linux.runsudo sh cuda_12.4.0_550.54.14_linux.run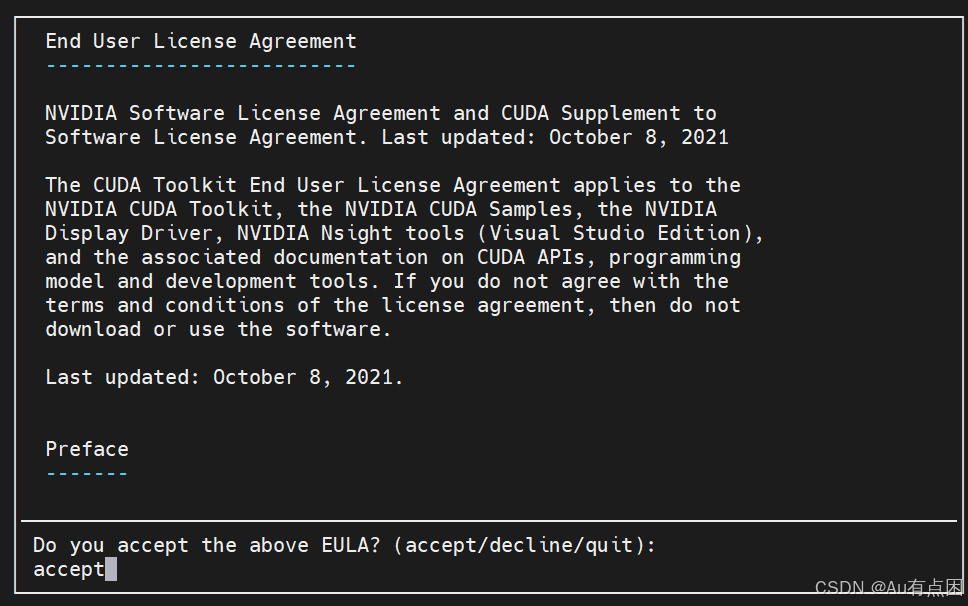

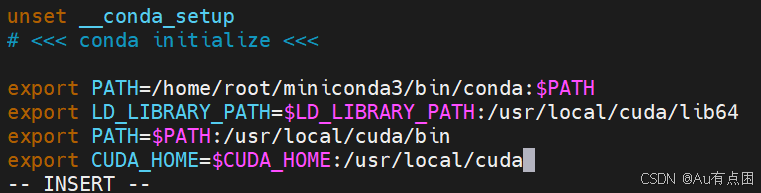
输入 vim ~/.bashrc ,按i输入,在最后一行输入下面代码
export LD_LIBRARY_PATH=$LD_LIBRARY_PATH:/usr/local/cuda/lib64
export PATH=$PATH:/usr/local/cuda/bin
export CUDA_HOME=$CUDA_HOME:/usr/local/cuda
按下esc,输入:wq保存并退出
source ~/.bashrc
3.环境配置
我尝试了两种方法,其中方法一最方便,只有方法一出现错误时再尝试方法二。两种方法经过测试都能够进行微调训练。
方法一
新建虚拟环境
conda create --name unsloth_env python=3.11
激活环境
conda activate unsloth_env
我的windows端安装的cuda12.4
直接输入以下命令
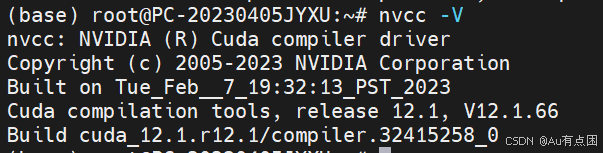
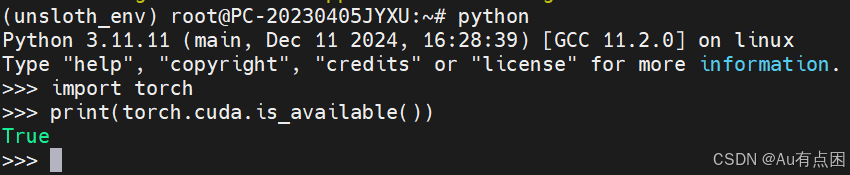
pip install unsloth安装完可以测试下torch是否支持cuda,如果不支持可以重新下载对应版本号的支持cuda的版本的torch,使用pip命令安装,测试过conda命令无法安装。
方法二
配置虚拟环境:(参考Unsloth官方文档)
https://github.com/unslothai/unsloth官方文档地址:https://github.com/unslothai/unsloth
输入以下命令创建unsloth环境:
conda create --name unsloth_env python=3.12
输入
conda activate unsloth_env
进入环境,安装pytorch
pip install torch==2.5.0 torchvision==0.20.0 torchaudio==2.5.0 --index-url https://download.pytorch.org/whl/cu124检查cuda是否可用
然后安装unsloth库
pip install "unsloth[cu124-torch250] @ git+https://github.com/unslothai/unsloth.git"补充
如果发现最新的unsloth和transfomers库不能微调qwen2.5-vl,可能需要重新安装这三个库
pip uninstall unsloth unsloth_zoo transformers我这次安装测试可以运行的版本
pip install unsloth==2025.3.18 unsloth_zoo==2025.3.16 transformers==4.50.0建议使用jupyter进行训练(因为unsloth库每次加载都需要一段时间),我的方法是使用vscode连接wsl,安装python和jupyter插件,并且在该环境中安装jupyter
pip install jupyter要使用国内社区魔搭下载模型和数据集可以安装此库
pip install modelscope3.训练流程
打开vscode,安装jupyter插件,然后点击view->command palette
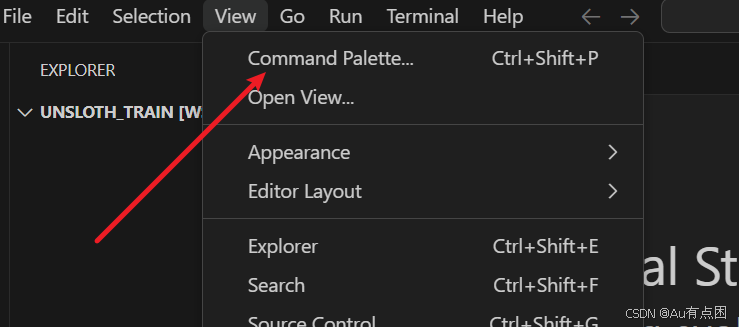
在上方输入jupyter,选择create:new jupyter notebook

Unsloth加载魔搭社区模型和数据集的方法:
进入这个路径/root/miniconda3/envs/unsloth_env/lib/python3.11/site-packages/unsloth/models/loader.py,注意路径前面对应你实际安装的miniconda3路径,如果你的环境名更改了也需要注意。
拉到第一行(15行),添加如下代码 USE_MODELSCOPE = 1
from ._utils import (
    is_bfloat16_supported,
    HAS_FLASH_ATTENTION,
    HAS_FLASH_ATTENTION_SOFTCAPPING,
    USE_MODELSCOPE,
)
USE_MODELSCOPE = 1
训练代码
这里省略了一些官方文档的细节,在创建我的数据集时我直接仿照转换后的数据集格式生成了json文件。
1.引入unsloth库
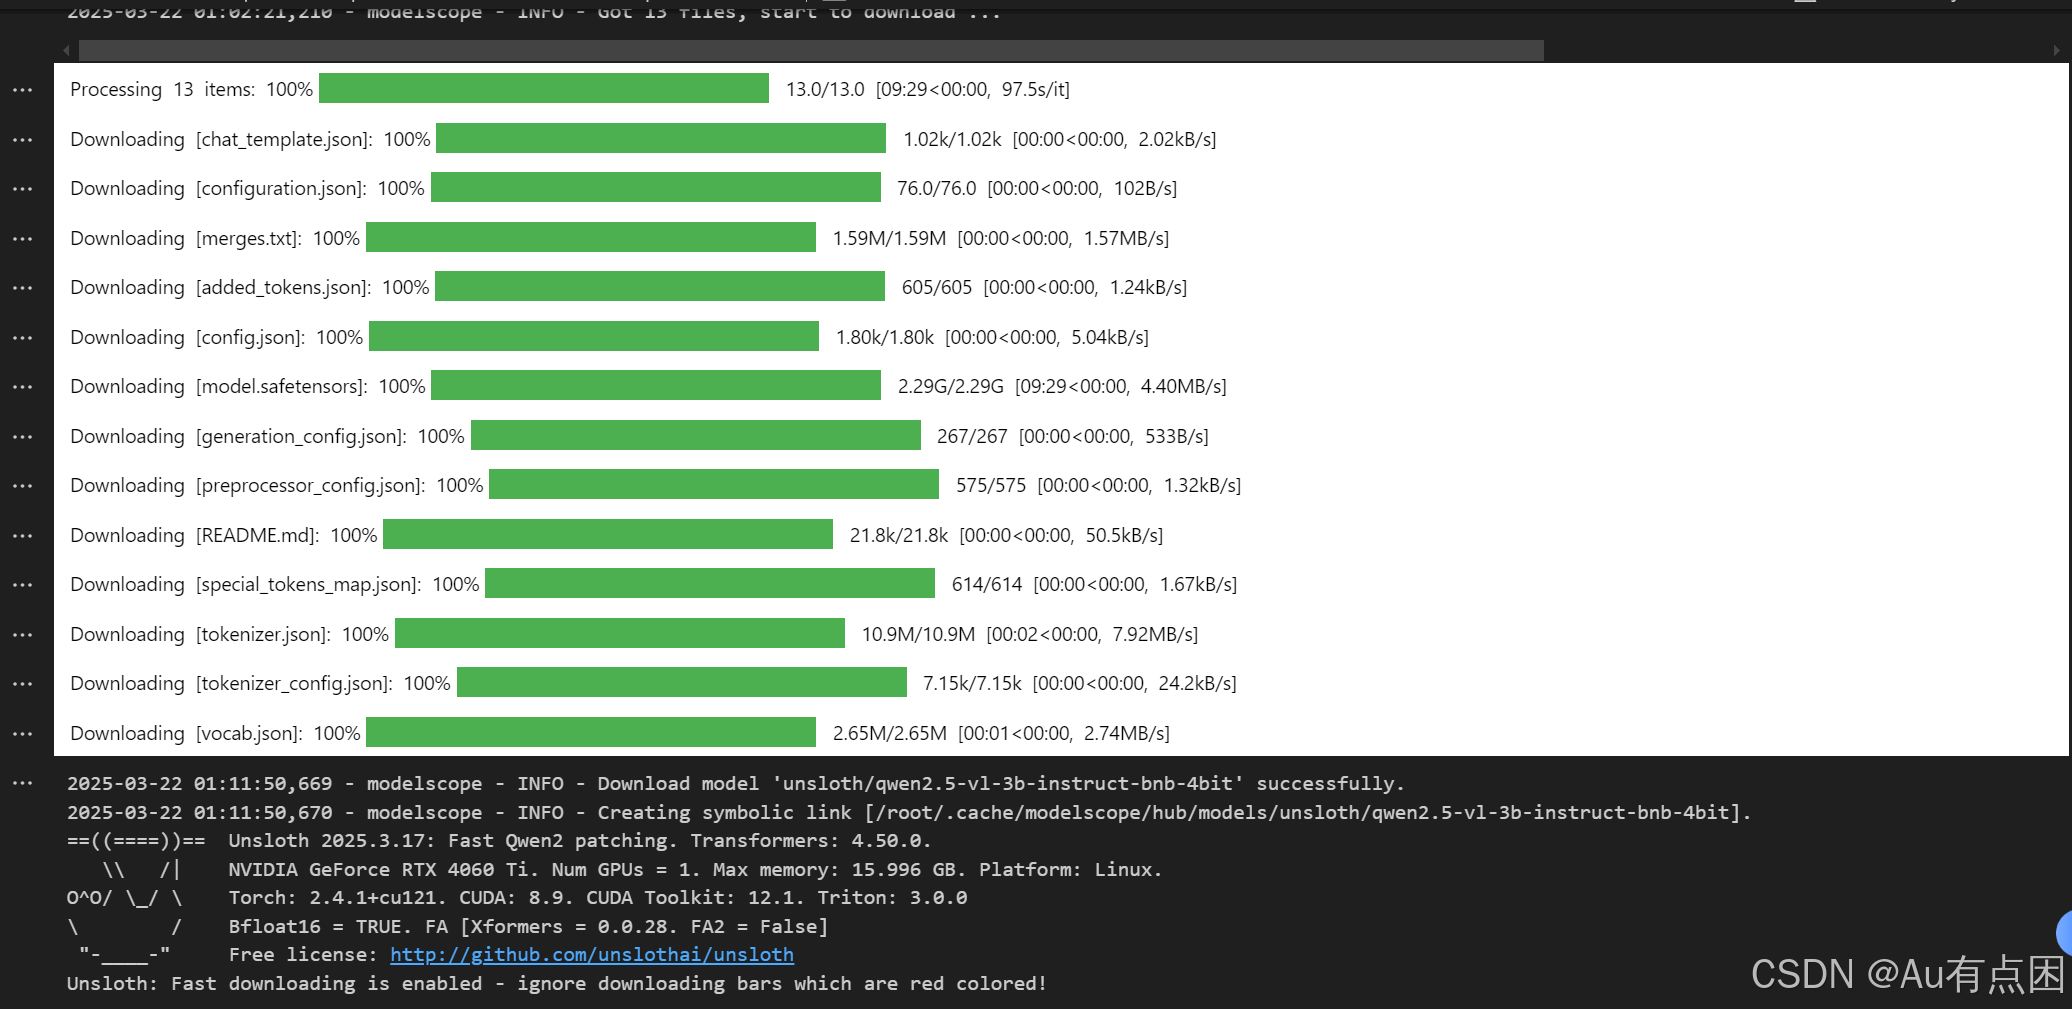
新建完jupyter以后,选择内核。选择完内核以后,在第一个代码块输入如下代码,加载unsloth的库和引入模型,"unsloth/Qwen2.5-VL-3B-Instruct-bnb-4bit"可以提前下载到本地文件夹路径(并修改该路径为你的本地路径,上下两个路径都要修改)。该模型国内下载地址魔搭社区汇聚各领域最先进的机器学习模型,提供模型探索体验、推理、训练、部署和应用的一站式服务。![]() https://www.modelscope.cn/models/unsloth/Qwen2.5-VL-3B-Instruct-bnb-4bit
https://www.modelscope.cn/models/unsloth/Qwen2.5-VL-3B-Instruct-bnb-4bit
from unsloth import FastVisionModel # FastLanguageModel for LLMs
import torch

# 4bit pre quantized models we support for 4x faster downloading + no OOMs.
fourbit_models = [
    "unsloth/Qwen2.5-VL-3B-Instruct-bnb-4bit",          # Qwen2 VL support
] # More models at https://huggingface.co/unsloth

model, tokenizer = FastVisionModel.from_pretrained(
    "unsloth/Qwen2.5-VL-3B-Instruct-bnb-4bit",
    load_in_4bit = True, # Use 4bit to reduce memory use. False for 16bit LoRA.
    use_gradient_checkpointing = "unsloth", # True or "unsloth" for long context
)
运行代码后如果出现如下报错:
 进入命令行,输入以下指令。
apt-get install --no-upgrade build-essential代码运行后输出(此处我是在魔搭在线下载的)
2.设置微调参数
(我这里对所有层进行微调)
model = FastVisionModel.get_peft_model(
    model,
    finetune_vision_layers     = True, # 微调视觉层
    finetune_language_layers   = True, # 微调语言层
    finetune_attention_modules = True, # 微调注意力层
    finetune_mlp_modules       = True, # 微调MLP层
    r = 16,           # r 秩 越高越准确,但可能过拟合
    lora_alpha = 16,  # Recommended alpha == r at least
    lora_dropout = 0,
    bias = "none",
    random_state = 3407,
    use_rslora = False,  # We support rank stabilized LoRA
    loftq_config = None, # And LoftQ
    # target_modules = "all-linear", # Optional now! Can specify a list if needed
)
3.加载unsloth提供的latex数据集
from datasets import load_dataset
dataset = load_dataset("unsloth/LaTeX_OCR", split = "train")
instruction = "Write the LaTeX representation for this image."
def convert_to_conversation(sample):
conversation = [
{ "role": "user",
"content" : [
{"type" : "text", "text" : instruction},
{"type" : "image", "image" : sample["image"]} ]
},
{ "role" : "assistant",
"content" : [
{"type" : "text", "text" : sample["text"]} ]
},
]
return { "messages" : conversation }
pass运行转换代码
converted_dataset = [convert_to_conversation(sample) for sample in dataset]测试效果
converted_dataset[0]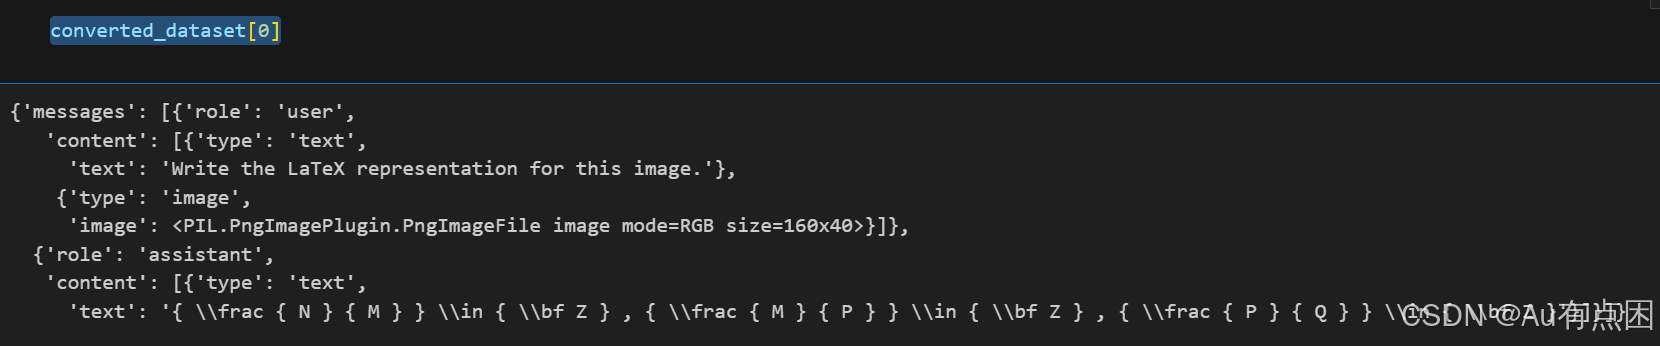
运行以下代码,设置训练参数,参数可以根据自身实际情况调节
from unsloth import is_bf16_supported
from unsloth.trainer import UnslothVisionDataCollator
from trl import SFTTrainer, SFTConfig
FastVisionModel.for_training(model) # Enable for training!
trainer = SFTTrainer(
model = model,
tokenizer = tokenizer,
data_collator = UnslothVisionDataCollator(model, tokenizer), # Must use!
train_dataset = converted_dataset,
args = SFTConfig(
per_device_train_batch_size = 2,
gradient_accumulation_steps = 4,
warmup_steps = 5,
max_steps = 30,
# num_train_epochs = 1, # Set this instead of max_steps for full training runs
learning_rate = 2e-4,
fp16 = not is_bf16_supported(),
bf16 = is_bf16_supported(),
logging_steps = 1,
optim = "adamw_8bit",
weight_decay = 0.01,
lr_scheduler_type = "linear",
seed = 3407,
output_dir = "outputs",
report_to = "none", # For Weights and Biases
# You MUST put the below items for vision finetuning:
remove_unused_columns = False,
dataset_text_field = "",
dataset_kwargs = {"skip_prepare_dataset": True},
dataset_num_proc = 4,
max_seq_length = 2048,
),
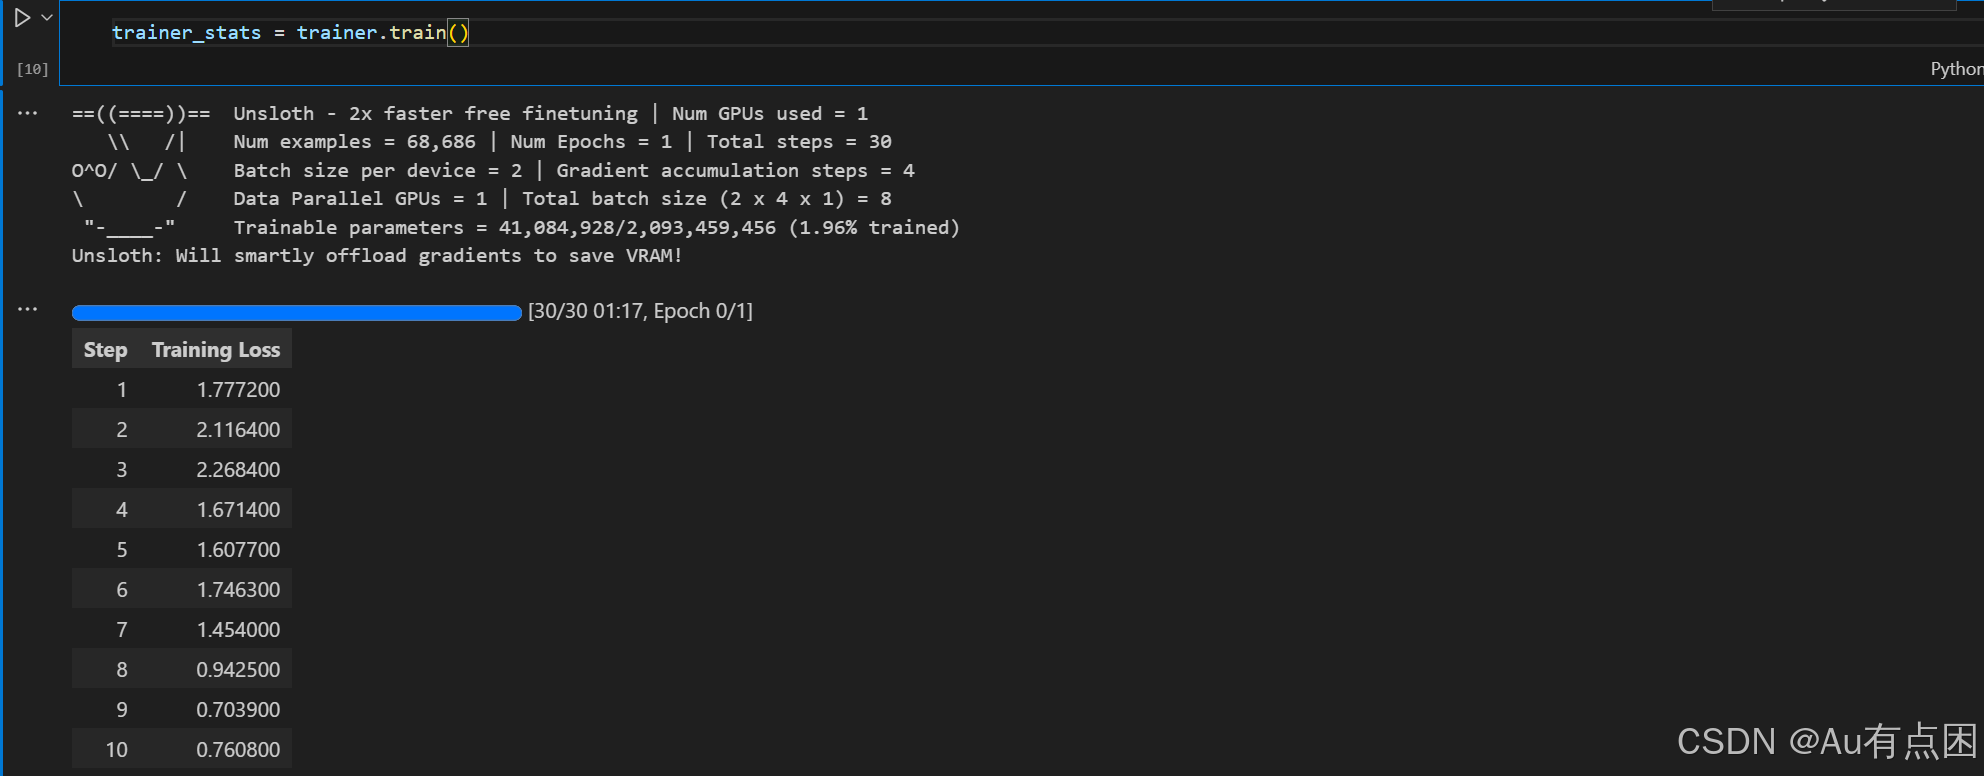
)运行以下代码,开始训练
trainer_stats = trainer.train()效果展示
训练结束后保存我们的lora
model.save_pretrained("lora_model") # Local saving
tokenizer.save_pretrained("lora_model")
测试训练后的lora检测效果
if True:
    from unsloth import FastVisionModel
    model, tokenizer = FastVisionModel.from_pretrained(
        model_name = "lora_model", # YOUR MODEL YOU USED FOR TRAINING
        load_in_4bit = True, # Set to False for 16bit LoRA
    )
    FastVisionModel.for_inference(model) # Enable for inference!

image = dataset[0]["image"]
instruction = "Write the LaTeX representation for this image."

messages = [
    {"role": "user", "content": [
        {"type": "image"},
        {"type": "text", "text": instruction}
    ]}
]
input_text = tokenizer.apply_chat_template(messages, add_generation_prompt = True)
inputs = tokenizer(
    image,
    input_text,
    add_special_tokens = False,
    return_tensors = "pt",
).to("cuda")

from transformers import TextStreamer
text_streamer = TextStreamer(tokenizer, skip_prompt = True)
_ = model.generate(**inputs, streamer = text_streamer, max_new_tokens = 128,
                   use_cache = True, temperature = 1.5, min_p = 0.1)
查看推理结果是否符合预期,如果不符合,尝试更改数据集,更改训练参数,如epoch和开始的R值。
结语
文章内容仅供参考,如果实际运行时发现有问题,欢迎交流和指正,互相进步!


 674
674

 被折叠的 条评论
为什么被折叠?
被折叠的 条评论
为什么被折叠?
 到【灌水乐园】发言


