


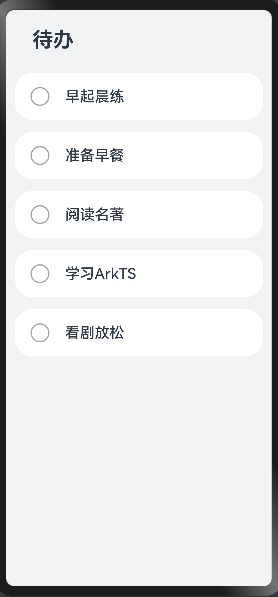
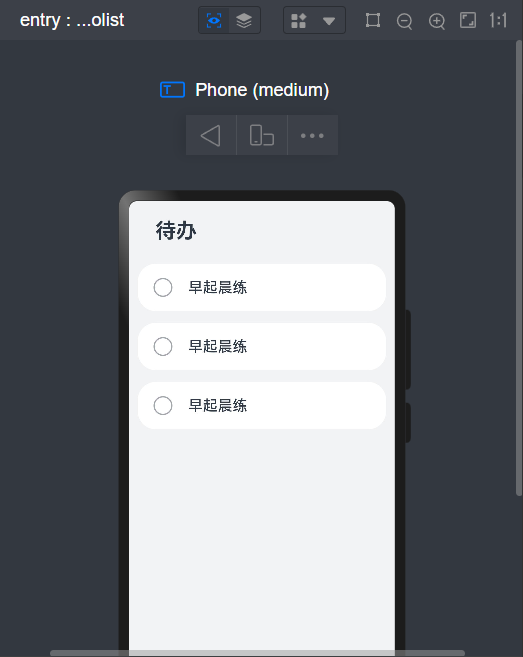
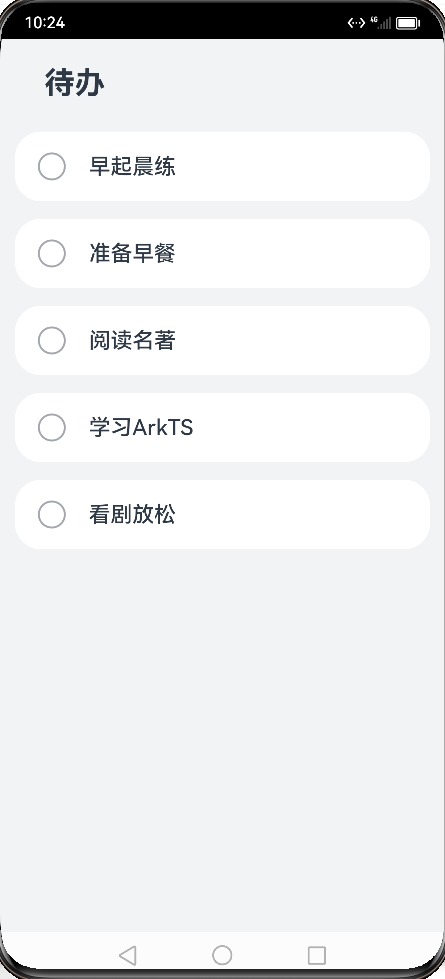
完成效果如下:
1. 创建空项目
该步骤可以参考本人的另一篇博客:DevEco Studio的安装以及第一个hello world程序的运行的第二部分
2. 创建todolist页面
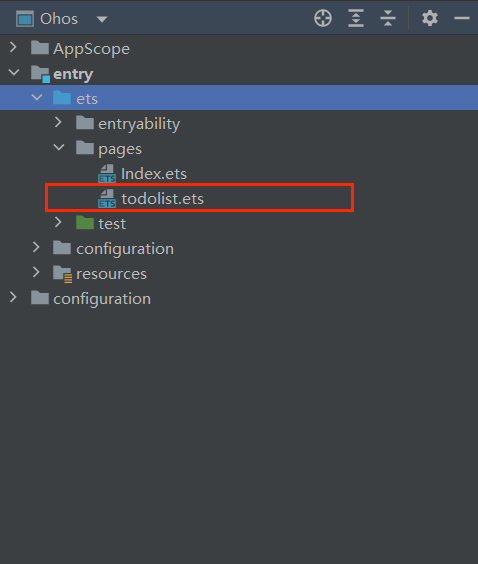
2.1. 在pages目录下创建一个todolist.ets文件
此处为了方便查看目录结构,使用Ohos视角查看工程目录
对工程目录结构不太清楚的同学们可以查看本人另外一篇博客:认识DevEco Studio界面与基本工程目录
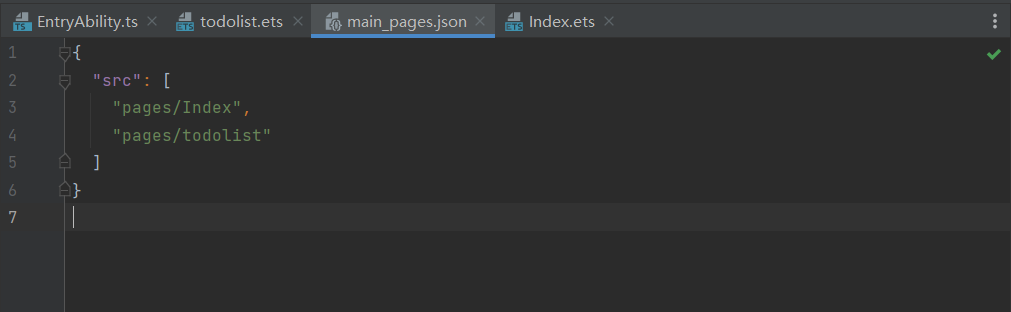
2.2. 在路径文件中添加该文件
在工程目录下,打开src/main/resources/base/profile/main_pages.json文件
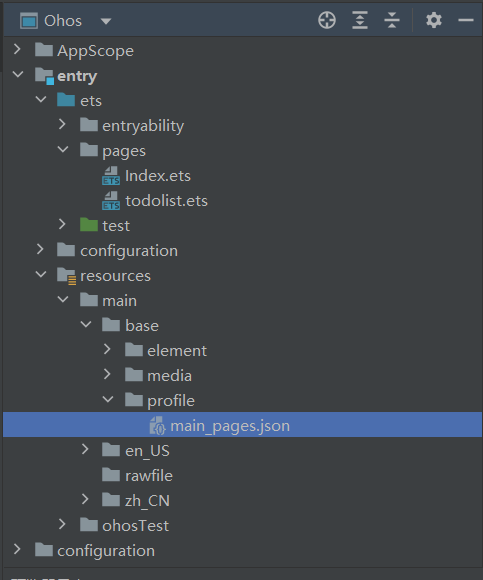
将路径添加进去:
3. 创建常见样式
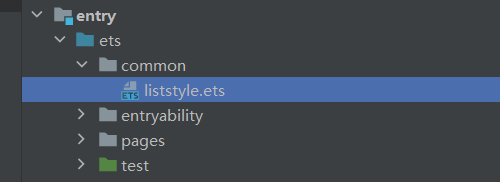
3.1. 创建common文件夹
该文件夹用于放入一些属性样式文件,此处创建一个liststyle.ets文件,用于放入待办列表的一些属性
以及一些写死的前端数据,此处没有连接数据库之类的操作所以将死数据放入在该文件中
3.2. 编写liststyle.ets文件
打开文件进行编写,文件内容如下:
export default class CommonConstants {
  /**
   * Full width or height.
   */
  static readonly FULL_LENGTH: string = '100%';

  /**
   * Title height.
   */
  static readonly TITLE_WIDTH: string = '80%';

  /**
   * List default width.
   */
  static readonly LIST_DEFAULT_WIDTH: string = '93.3%';

  /**
   * Opacity of default.
   */
  static readonly OPACITY_DEFAULT: number = 1;

  /**
   * Opacity of default.
   */
  static readonly OPACITY_COMPLETED: number = 0.4;

  /**
   * BorderRadius of list item.
   */
  static readonly BORDER_RADIUS: number = 24;

  /**
   * Font weight 500.
   */
  static readonly FONT_WEIGHT: number = 500;

  /**
   * Space of column.
   */
  static readonly COLUMN_SPACE: number = 16;

  /**
   * agents data.
   */
  static readonly TODO_DATA: Array<string> = [
    "早起晨练",
    "准备早餐",
    "阅读名著",
    "学习ArkTS",
    "看剧放松"
  ];
}
4. 添加一些本身就不会变化的常用资源
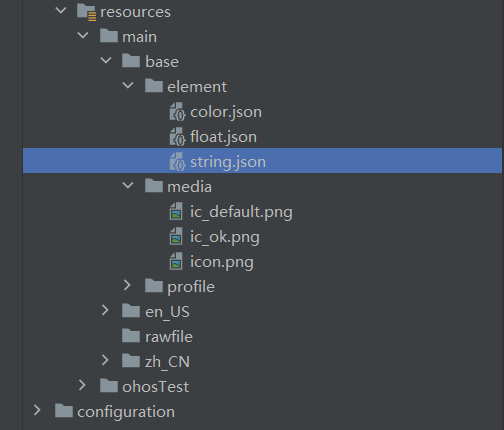
对该部分文件进行编辑,按下述顺序本身存在的文件替换内容,不存在的文件创建放入即可

全部完成后的文件目录如下:
4.1. color.json
{
  "color": [
    {
      "name": "start_window_background",
      "value": "#FFFFFF"
    },
    {
      "name": "page_background",
      "value": "#F1F3F5"
    }
  ]
}
4.2. float.json(放在element文件夹中)
{
  "float": [
    {
      "name": "checkbox_width",
      "value": "28vp"
    },
    {
      "name": "checkbox_margin",
      "value": "20vp"
    },
    {
      "name": "item_font_size",
      "value": "20fp"
    },
    {
      "name": "title_font_size",
      "value": "28fp"
    },
    {
      "name": "title_font_height",
      "value": "33vp"
    },
    {
      "name": "title_margin_top",
      "value": "24vp"
    },
    {
      "name": "title_margin_bottom",
      "value": "12vp"
    },
    {
      "name": "list_item_height",
      "value": "64vp"
    }
  ]
}
4.3. string.json
{
  "string": [
    {
      "name": "module_desc",
      "value": "module description"
    },
    {
      "name": "EntryAbility_desc",
      "value": "description"
    },
    {
      "name": "EntryAbility_label",
      "value": "待办列表"
    },
    {
      "name": "page_title",
      "value": "待办"
    }
  ]
}
4.4. icon图标
ic_default.png

ic_ok.png

将其放入media文件夹中,在待办替换中使用
5. 编写todolist.ets
5.1. 解析页面结构
首先观察,完成的待办列表,大致可以分成以下两个部分:
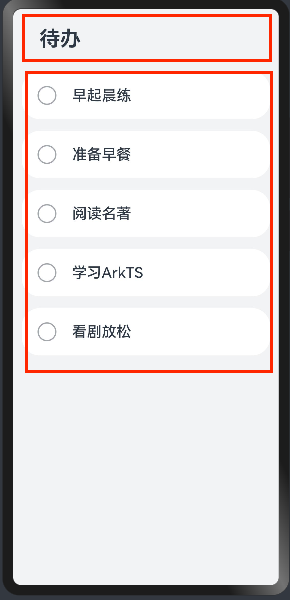
那么将整个页面视作一个容器,红圈部分视作该容器内的两个子容器,可以发现整体结构为沿垂直方向布局
第一个红圈使用文本即可实现
第二个红圈包含两个部分,左边的icon以及右边的文字,为沿水平方向布局
而在ArkTs中存在着沿水平方向布局的容器Row和沿垂直方向布局的容器Colum,这样的存在有x个
此处不对两个组件展开具体叙述
可知代码结构为:
@Entry
@Component
struct ToDoListPage {
build() {
Text('待办')
Row(){
Image($r('app.media.ic_ok'))//引用src/main/resources/base/media/ic_ok.png,即4.4中的图
Text('早起晨练')
}
Row(){
Image($r('app.media.ic_ok'))
Text('早起晨练')
}
//......不一一举例
}
}
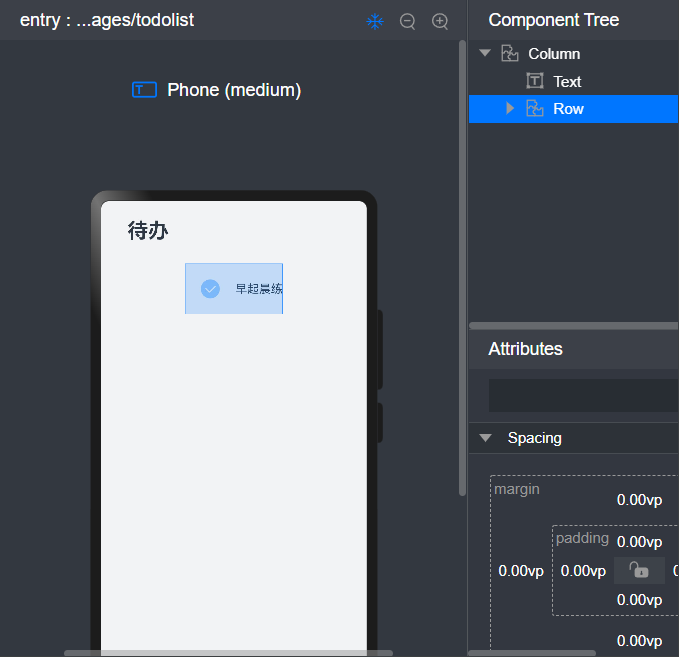
}但是出现了以下情况
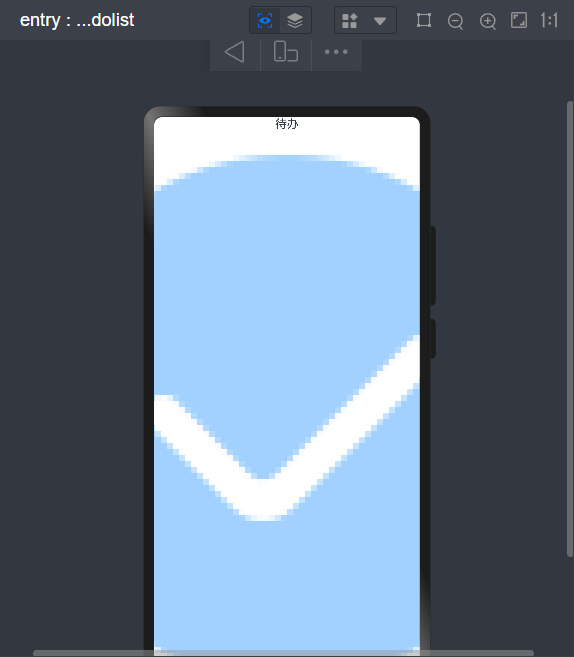
这是由于图片大小未进行设置导致的
5.2. 设置图片样式
具体样式可以在src/main/resources/base/element/float.json中查看,就是4.2中添加的文件
@Entry
@Component
struct ToDoListPage {
  build() {
    Column() {
      Text('待办')
      Row(){
        Image($r('app.media.ic_ok'))
          .objectFit(ImageFit.Contain)
          //设置图像对象的填充模式为 Contain,这意味着图像将按比例缩放以适应容器,并保持其宽高比,直到完全包含在容器内。
          .width($r('app.float.checkbox_width'))
          .height($r('app.float.checkbox_width'))
          //设置图像组件的宽度与高度
          .margin($r('app.float.checkbox_margin'))
        // 设置图像组件的外边距
         Text('早起晨练')
      }

      Row(){
        Image($r('app.media.ic_ok'))
          .objectFit(ImageFit.Contain)
          .width($r('app.float.checkbox_width'))
          .height($r('app.float.checkbox_width'))
          .margin($r('app.float.checkbox_margin'))
        Text('准备早餐')
      }
      //......不一一举例
    }
  }
}
更改后样式变为:
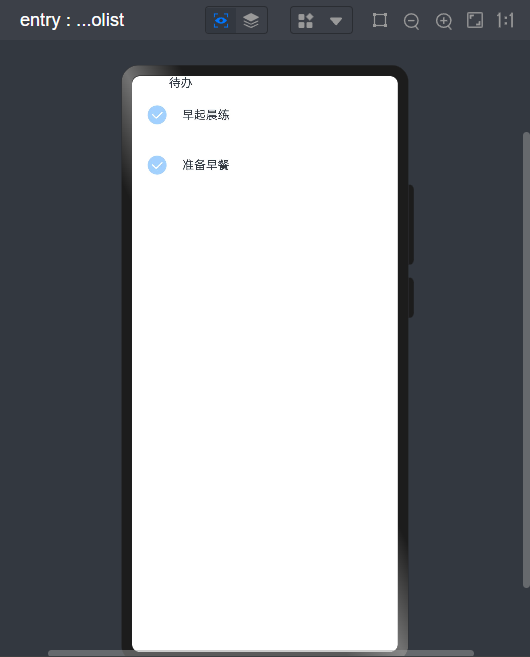
现在的样式看起来就感觉有点意思了,但是还是差点味道
5.3. 待办部分的实现
现在我们实现第一个红圈,待办部分
import CommonConstants from "../common/liststyle"
@Entry
@Component
struct ToDoListPage {
build() {
Column() {
Text($r('app.string.page_title'))
.fontSize($r('app.float.title_font_size'))
//设置文本的字体大小
.fontWeight(FontWeight.Bold)
//设置文本的字重为粗体
.lineHeight($r('app.float.title_font_height'))
// 设置文本的行高
.width(CommonConstants.TITLE_WIDTH)
// 设置文本组件的宽度
.margin({
top: $r('app.float.title_margin_top'),
bottom: $r('app.float.title_margin_bottom')
})
//设置文本组件的上边距和下边距
.textAlign(TextAlign.Start)
// 设置文本的水平对齐方式为起始对齐,即文本将从左向右排列。
Row(){
Image($r('app.media.ic_ok'))
.objectFit(ImageFit.Contain)
//设置图像对象的填充模式为 Contain,这意味着图像将按比例缩放以适应容器,并保持其宽高比,直到完全包含在容器内。
.width($r('app.float.checkbox_width'))
.height($r('app.float.checkbox_width'))
//设置图像组件的宽度与高度
.margin($r('app.float.checkbox_margin'))
// 设置图像组件的外边距
Text('早起晨练')
}
Row(){
Image($r('app.media.ic_ok'))
.objectFit(ImageFit.Contain)
.width($r('app.float.checkbox_width'))
.height($r('app.float.checkbox_width'))
.margin($r('app.float.checkbox_margin'))
Text('准备早餐')
}
//......不一一举例
}
}
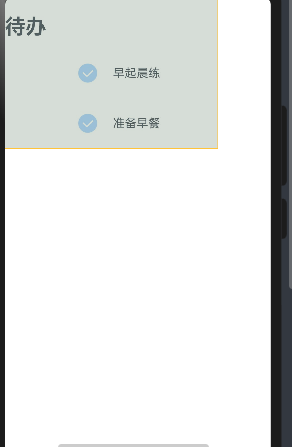
}实现效果:
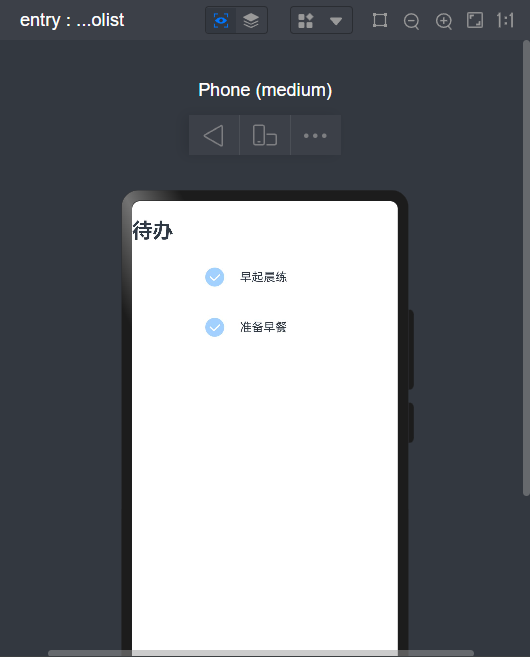
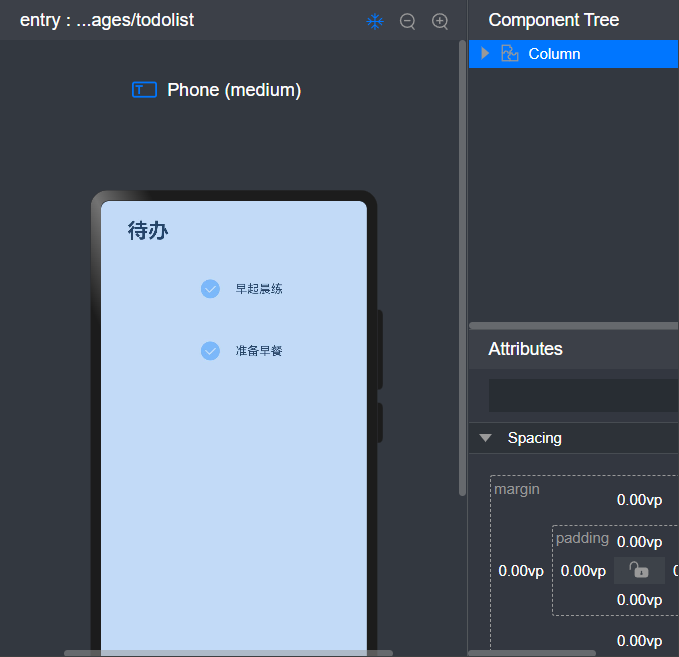
此时文本样式差不多,但是位置直接贴在左边,那么我们点击预览器的inspector按钮,查看容器的大小位置
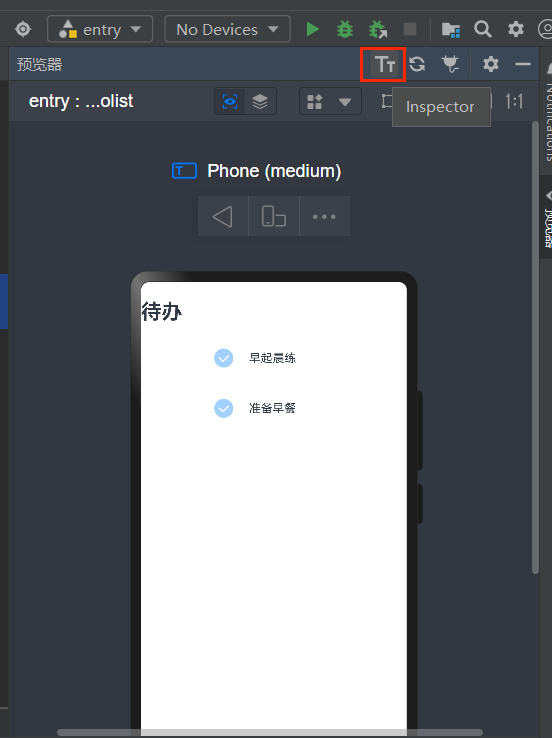
可以看到下图中,colum容器仅占据全页面的一小部分
5.4. 最外层Colum容器的样式
{ space: CommonConstants.COLUMN_SPACE }设置colum内子容器间的间距
import CommonConstants from "../common/liststyle"

@Entry
@Component
struct ToDoListPage {
  build() {
    Column({ space: CommonConstants.COLUMN_SPACE }) {
      Text($r('app.string.page_title'))
        .fontSize($r('app.float.title_font_size'))
          //设置文本的字体大小
        .fontWeight(FontWeight.Bold)
          //设置文本的字重为粗体
        .lineHeight($r('app.float.title_font_height'))
          // 设置文本的行高
        .width(CommonConstants.TITLE_WIDTH)
          // 设置文本组件的宽度
        .margin({
          top: $r('app.float.title_margin_top'),
          bottom: $r('app.float.title_margin_bottom')
        })
          //设置文本组件的上边距和下边距
        .textAlign(TextAlign.Start)
      // 设置文本的水平对齐方式为起始对齐,即文本将从左向右排列。

      Row(){
        Image($r('app.media.ic_ok'))
          .objectFit(ImageFit.Contain)
            //设置图像对象的填充模式为 Contain,这意味着图像将按比例缩放以适应容器,并保持其宽高比,直到完全包含在容器内。
          .width($r('app.float.checkbox_width'))
          .height($r('app.float.checkbox_width'))
            //设置图像组件的宽度与高度
          .margin($r('app.float.checkbox_margin'))
        // 设置图像组件的外边距
        Text('早起晨练')
      }

      Row(){
        Image($r('app.media.ic_ok'))
          .objectFit(ImageFit.Contain)
          .width($r('app.float.checkbox_width'))
          .height($r('app.float.checkbox_width'))
          .margin($r('app.float.checkbox_margin'))
        Text('准备早餐')
      }
      //......不一一举例
    }
     .width(CommonConstants.FULL_LENGTH)
       //设置宽度为最大
     .height(CommonConstants.FULL_LENGTH)
       //设置长度为最大
     .backgroundColor($r('app.color.page_background'))
    //设置背景颜色
  }
}
可以看到最外层Colum已经占据整个页面,并且待办也到了差不多对应的位置,接下来就是列表部分
5.5. 列表部分样式实现
5.5.1. icon
icon样式在5.2中已经提前实现,本处不在复述
5.5.2. Row容器总体样式
在整个Colum容器中,我们可以看出以下问题
- Row容器的宽度不适宜,整体居中
- Row容器与背景颜色没有做出区分
- 高度没有作出具体限制,仅是被icon的高度与上下边距撑起来的
- 容器为直角边,样式丑
做出以下限制
import CommonConstants from "../common/liststyle"
@Entry
@Component
struct ToDoListPage {
build() {
Column({ space: CommonConstants.COLUMN_SPACE }) {
Text($r('app.string.page_title'))
.fontSize($r('app.float.title_font_size'))
//设置文本的字体大小
.fontWeight(FontWeight.Bold)
//设置文本的字重为粗体
.lineHeight($r('app.float.title_font_height'))
// 设置文本的行高
.width(CommonConstants.TITLE_WIDTH)
// 设置文本组件的宽度
.margin({
top: $r('app.float.title_margin_top'),
bottom: $r('app.float.title_margin_bottom')
})
//设置文本组件的上边距和下边距
.textAlign(TextAlign.Start)
// 设置文本的水平对齐方式为起始对齐,即文本将从左向右排列。
Row(){
Image($r('app.media.ic_ok'))
.objectFit(ImageFit.Contain)
//设置图像对象的填充模式为 Contain,这意味着图像将按比例缩放以适应容器,并保持其宽高比,直到完全包含在容器内。
.width($r('app.float.checkbox_width'))
.height($r('app.float.checkbox_width'))
//设置图像组件的宽度与高度
.margin($r('app.float.checkbox_margin'))
// 设置图像组件的外边距
Text('早起晨练')
}
.borderRadius(CommonConstants.BORDER_RADIUS)
.backgroundColor($r('app.color.start_window_background'))
.width(CommonConstants.LIST_DEFAULT_WIDTH)
.height($r('app.float.list_item_height'))
//......不一一举例
}
.width(CommonConstants.FULL_LENGTH)
//设置宽度为最大
.height(CommonConstants.FULL_LENGTH)
//设置长度为最大
.backgroundColor($r('app.color.page_background'))
//设置背景颜色
}
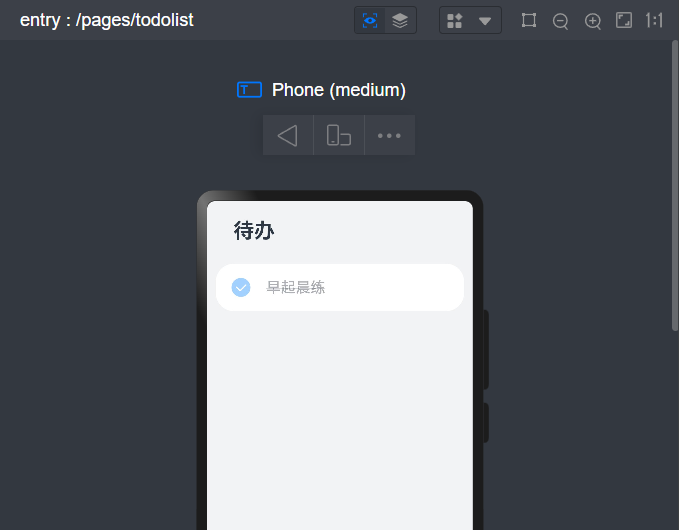
}样式变为:

5.5.3. 文字样式
对该部分的文字做出如下限制:
        Text('早起晨练')
          .fontSize($r('app.float.item_font_size'))
          .fontWeight(CommonConstants.FONT_WEIGHT)

5.5.4. 点击样式的切换
以上的样式的书写,已经可以让大家简单看到一个简洁合理的页面样式了,但是作为一个可行的待办列表,还需要点击后的样式切换:
两个方面实现:
- 图标的切换,上述文本中,icon的存在仅仅是看图标的例子,实际上在未点击状态下,icon应该存在两个状态,默认为⭕,点击后变为✔
- icon文本默认为上述样式,点击后变灰,加上删除线
此处引入bool类型的变量,作为两种状态的标志
如下:
@State isComplete: boolean = false;已知上述变量为列表样式的控制,那么就可以写下点击事件,做到点击切换上述变量
用一个.onClick() 方法调用来实现切换
.onClick() 方法接受一个回调函数作为参数,这个回调函数会在元素被点击时被触发执行。在这个回调函数内部,this.isComplete = !this.isComplete; 语句表示每次点击时,会将 this.isComplete 的值取反。
Row(){
  // ......
}
.onClick(() => {
    this.isComplete = !this.isComplete;
    console.log(String(this.isComplete))//查看this.isComplete的值
  })
点击后在日志中可以看到:

此处已经成功做到点击列表后将this.isComplete的值取反,那么接下来就是做到对应的样式变化:
- 图标样式变化
用注解器将image封装为一个方法:
以下定义一个名为 labelIcon 的方法。这个方法接受一个参数 icon,类型为 Resource
在这个方法内部,它创建了一个图像(Image)对象,该图像使用了传入的 icon 资源。然后,设置了图像的一些属性,包括 objectFit、width、height 和 margin 等属性,以便对图像进行适当的布局和样式设置。
样式跟5.2中没有任何区别,只是因为图片源换了所以封装该方法
@Builder labelIcon(icon: Resource) {
  Image(icon)
    .objectFit(ImageFit.Contain)
    .width($r('app.float.checkbox_width'))
    .height($r('app.float.checkbox_width'))
    .margin($r('app.float.checkbox_margin'))
}
然后在原来image的地方使用该方法:
if (this.isComplete) {
  this.labelIcon($r('app.media.ic_ok'));
} else {
  this.labelIcon($r('app.media.ic_default'));
}- 文本样式变换:
- 将列表容器中的Text容器做出如下改变
Text(this.content)
  .fontSize($r('app.float.item_font_size'))
  .fontWeight(CommonConstants.FONT_WEIGHT)
  .opacity(this.isComplete ? CommonConstants.OPACITY_COMPLETED : CommonConstants.OPACITY_DEFAULT)
  .decoration({ type: this.isComplete ? TextDecorationType.LineThrough : TextDecorationType.None })
如果 isComplete 为 true,则使用 CommonConstants.OPACITY_COMPLETED 的值作为透明度,并为文本添加删除线;否则,使用 CommonConstants.OPACITY_DEFAULT 的值作为透明度,并移除文本的删除线装饰。
最终得到可以切换的列表容器如下:

最终todolist.ets代码为:
import CommonConstants from "../common/liststyle"

@Entry
  @Component
  struct ToDoListPage {
    @State isComplete: boolean = false;

    @Builder labelIcon(icon: Resource) {
      Image(icon)
        .objectFit(ImageFit.Contain)
        //设置图像对象的填充模式为 Contain,这意味着图像将按比例缩放以适应容器,并保持其宽高比,直到完全包含在容器内。
        .width($r('app.float.checkbox_width'))
        .height($r('app.float.checkbox_width'))
        //设置图像组件的宽度与高度
        .margin($r('app.float.checkbox_margin'))
      // 设置图像组件的外边距
    }
    build() {

      Column({ space: CommonConstants.COLUMN_SPACE }) {
        Text($r('app.string.page_title'))
          .fontSize($r('app.float.title_font_size'))
          //设置文本的字体大小
          .fontWeight(FontWeight.Bold)
          //设置文本的字重为粗体
          .lineHeight($r('app.float.title_font_height'))
          // 设置文本的行高
          .width(CommonConstants.TITLE_WIDTH)
          // 设置文本组件的宽度
          .margin({
            top: $r('app.float.title_margin_top'),
            bottom: $r('app.float.title_margin_bottom')
          })
          //设置文本组件的上边距和下边距
          .textAlign(TextAlign.Start)
        // 设置文本的水平对齐方式为起始对齐,即文本将从左向右排列。

        Row(){
          if (this.isComplete) {
            this.labelIcon($r('app.media.ic_ok'));
          } else {
            this.labelIcon($r('app.media.ic_default'));
          }

          Text('早起晨练')
            .fontSize($r('app.float.item_font_size'))
            .fontWeight(CommonConstants.FONT_WEIGHT)
            .opacity(this.isComplete ? CommonConstants.OPACITY_COMPLETED : CommonConstants.OPACITY_DEFAULT)
            .decoration({ type: this.isComplete ? TextDecorationType.LineThrough : TextDecorationType.None })
        }
        .borderRadius(CommonConstants.BORDER_RADIUS)
          .backgroundColor($r('app.color.start_window_background'))
          .width(CommonConstants.LIST_DEFAULT_WIDTH)
          .height($r('app.float.list_item_height'))
          .onClick(() => {
            this.isComplete = !this.isComplete;
            console.log(String(this.isComplete))
          })

        //......不一一举例
      }
      .width(CommonConstants.FULL_LENGTH)
        //设置宽度为最大
        .height(CommonConstants.FULL_LENGTH)
        //设置长度为最大
        .backgroundColor($r('app.color.page_background'))
      //设置背景颜色
    }
  }
6. 列表组件封装
在上述中我们已经成功构建了待办列表的基本框架,实现了最外层Colum容器,text容器,以及列表样式的书写
但是仍旧存在问题:
list列表(即Row容器)我们不可能一直通过复制黏贴完成样式的实现,在后续可能会对数据库进行连接更是如此
(本文纯前端,只是对实际生产做出合理的说明)
所以要将会被重复复用的容器进行封装
6.1. 创建组件文件夹以及list组件文件
在如图所示的文件目录下创建如下文件夹以及文件
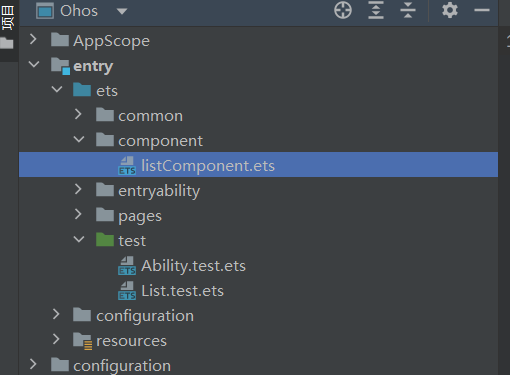
6.2. 文件内容
将原先todolist.ets文件中所有的跟list组件相关的内容剪切粘贴到listCompenent文件夹中
获得listComponent.ets文件如下:
import CommonConstants from "../common/liststyle"

@Preview
  @Component
  export default struct ToDoItem {
    @State isComplete: boolean = false;

    @Builder labelIcon(icon: Resource) {
      Image(icon)
        .objectFit(ImageFit.Contain)
        //设置图像对象的填充模式为 Contain,这意味着图像将按比例缩放以适应容器,并保持其宽高比,直到完全包含在容器内。
        .width($r('app.float.checkbox_width'))
        .height($r('app.float.checkbox_width'))
        //设置图像组件的宽度与高度
        .margin($r('app.float.checkbox_margin'))
      // 设置图像组件的外边距
    }

    build() {

      Row(){
        if (this.isComplete) {
          this.labelIcon($r('app.media.ic_ok'));
        } else {
          this.labelIcon($r('app.media.ic_default'));
        }

        Text('早起晨练')
          .fontSize($r('app.float.item_font_size'))
          .fontWeight(CommonConstants.FONT_WEIGHT)
          .opacity(this.isComplete ? CommonConstants.OPACITY_COMPLETED : CommonConstants.OPACITY_DEFAULT)
          .decoration({ type: this.isComplete ? TextDecorationType.LineThrough : TextDecorationType.None })
      }
      .borderRadius(CommonConstants.BORDER_RADIUS)
        .backgroundColor($r('app.color.start_window_background'))
        .width(CommonConstants.LIST_DEFAULT_WIDTH)
        .height($r('app.float.list_item_height'))
        .onClick(() => {
          this.isComplete = !this.isComplete;
          console.log(String(this.isComplete))
        })
    }
  }
在todolist.ets中引入文件
import CommonConstants from "../common/liststyle"
import ToDoItem from "../component/listComponent";
@Entry
  @Component
  struct ToDoListPage {

    build() {

      Column({ space: CommonConstants.COLUMN_SPACE }) {
        Text($r('app.string.page_title'))
          .fontSize($r('app.float.title_font_size'))
          //设置文本的字体大小
          .fontWeight(FontWeight.Bold)
          //设置文本的字重为粗体
          .lineHeight($r('app.float.title_font_height'))
          // 设置文本的行高
          .width(CommonConstants.TITLE_WIDTH)
          // 设置文本组件的宽度
          .margin({
            top: $r('app.float.title_margin_top'),
            bottom: $r('app.float.title_margin_bottom')
          })
          //设置文本组件的上边距和下边距
          .textAlign(TextAlign.Start)
        // 设置文本的水平对齐方式为起始对齐,即文本将从左向右排列。

        ToDoItem()
        ToDoItem()
        ToDoItem()
        //......不一一举例
      }
      .width(CommonConstants.FULL_LENGTH)
        //设置宽度为最大
        .height(CommonConstants.FULL_LENGTH)
        //设置长度为最大
        .backgroundColor($r('app.color.page_background'))
      //设置背景颜色
    }
  }
测试功能正常如下:
7. 对列表参数进行传参
在以上内容中,已经将列表封装为一个组件供复用,但是由于参数是写死的,所以最终列表的值也相同,那么我们就要想办法给列表进行传参,以实现不同列表的实现
- 在listComponent.ets创建一个参数如下:
private content?: string;并且将下列写死的“早起晨练”参数改为this.content,文件listComponent.ets改造为如下状态:
import CommonConstants from "../common/liststyle"

@Preview
  @Component
  export default struct ToDoItem {
    private content?: string;
    @State isComplete: boolean = false;

    @Builder labelIcon(icon: Resource) {
      Image(icon)
        .objectFit(ImageFit.Contain)
        //设置图像对象的填充模式为 Contain,这意味着图像将按比例缩放以适应容器,并保持其宽高比,直到完全包含在容器内。
        .width($r('app.float.checkbox_width'))
        .height($r('app.float.checkbox_width'))
        //设置图像组件的宽度与高度
        .margin($r('app.float.checkbox_margin'))
      // 设置图像组件的外边距
    }

    build() {
      Row(){
        if (this.isComplete) {
          this.labelIcon($r('app.media.ic_ok'));
        } else {
          this.labelIcon($r('app.media.ic_default'));
        }

        Text(this.content)
          .fontSize($r('app.float.item_font_size'))
          .fontWeight(CommonConstants.FONT_WEIGHT)
          .opacity(this.isComplete ? CommonConstants.OPACITY_COMPLETED : CommonConstants.OPACITY_DEFAULT)
          .decoration({ type: this.isComplete ? TextDecorationType.LineThrough : TextDecorationType.None })
      }
      .borderRadius(CommonConstants.BORDER_RADIUS)
        .backgroundColor($r('app.color.start_window_background'))
        .width(CommonConstants.LIST_DEFAULT_WIDTH)
        .height($r('app.float.list_item_height'))
        .onClick(() => {
          this.isComplete = !this.isComplete;
          console.log(String(this.isComplete))
        })
    }
}- 创建文件目录如下:
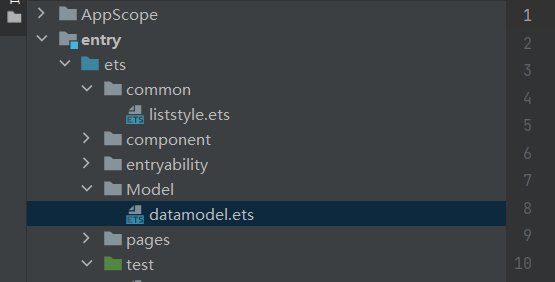
- 编写内容如下:
编写一个类,使用其方法进行数据传递
import CommonConstants from '../common/liststyle' ;

/**
 * Saving and manipulating data displayed on the page.
 */
export class DataModel {
  /**
   * Saved Data.
   */
  private tasks: Array<string> = CommonConstants.TODO_DATA;

  /**
   * Get the data.
   */
  getData(): Array<string> {
    return this.tasks;
  }
}

export default new DataModel();
// 当其他文件导入这个模块时,如果使用默认导出方式导入,那么会得到一个包含 DataModel 实例的对象- 在todolist中定义数组,承接数据:
定义了一个 aboutToAppear 方法。在 aboutToAppear 方法中,它调用了 DataModel.getData() 方法来获取数据,并将返回的数据赋值给 totalTasks 数组。
private totalTasks: Array<string> = [];

aboutToAppear() {
  this.totalTasks = DataModel.getData();
}- 用ForEach遍历数组
      ForEach(this.totalTasks, (item: string) => {
        ToDoItem({ content: item })
      }, (item: string) => JSON.stringify(item))
最终代码todolist代码:
import CommonConstants from "../common/liststyle"
import ToDoItem from "../component/listComponent";
import DataModel from '../Model/datamodel';
@Entry
  @Component
  struct ToDoListPage {
    private totalTasks: Array<string> = [];

    aboutToAppear() {
      this.totalTasks = DataModel.getData();
    }

    build() {

      Column({ space: CommonConstants.COLUMN_SPACE }) {
        Text($r('app.string.page_title'))
          .fontSize($r('app.float.title_font_size'))
          //设置文本的字体大小
          .fontWeight(FontWeight.Bold)
          //设置文本的字重为粗体
          .lineHeight($r('app.float.title_font_height'))
          // 设置文本的行高
          .width(CommonConstants.TITLE_WIDTH)
          // 设置文本组件的宽度
          .margin({
            top: $r('app.float.title_margin_top'),
            bottom: $r('app.float.title_margin_bottom')
          })
          //设置文本组件的上边距和下边距
          .textAlign(TextAlign.Start)
        // 设置文本的水平对齐方式为起始对齐,即文本将从左向右排列。


        ForEach(this.totalTasks, (item: string) => {
          ToDoItem({ content: item })
        },(item: string) => item)
        //......不一一举例
      }
      .width(CommonConstants.FULL_LENGTH)
        //设置宽度为最大
        .height(CommonConstants.FULL_LENGTH)
        //设置长度为最大
        .backgroundColor($r('app.color.page_background'))
      //设置背景颜色
    }
  }
8. 修改默认路径
在完成以上内容后,整个清单列表基本完成
但是打开文件,依旧是最初的helloword,那么应该怎么更改呢?
打开下图文件夹:
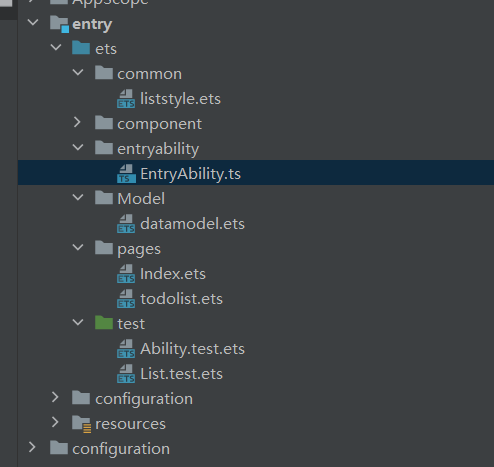
修改该处路径为todolist即可

最终:
9. 代码下载链接
想要示例代码请点击这里:todolist: 一个简单的harmonyos的demo,待办列表清单的实现


 817
817


 被折叠的 条评论
为什么被折叠?
被折叠的 条评论
为什么被折叠?
 到【灌水乐园】发言


