


一、环境准备
1、YOLOv5源码获取
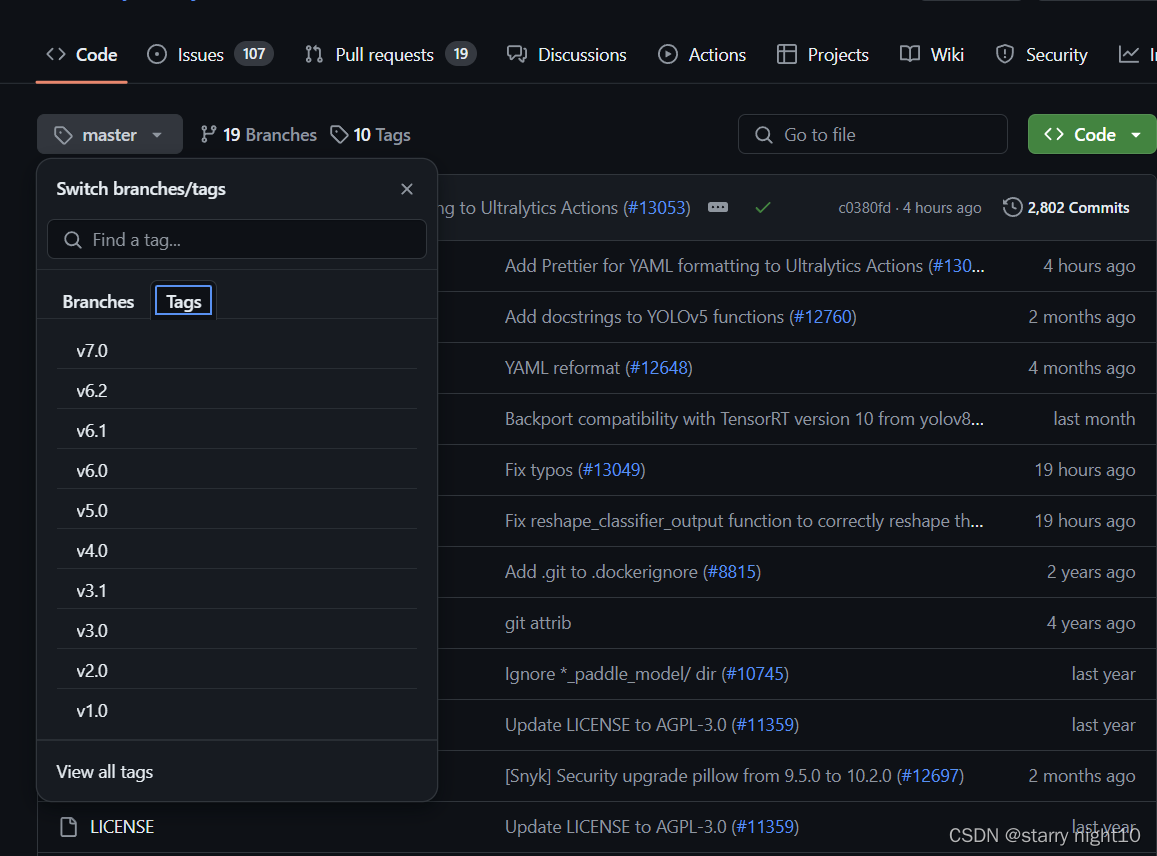
选择正确的YOLOv5版本:本文章使用的是YOLOv5 v6.0
YOLOv5源码下载:https://github.com/ultralytics/yolov5
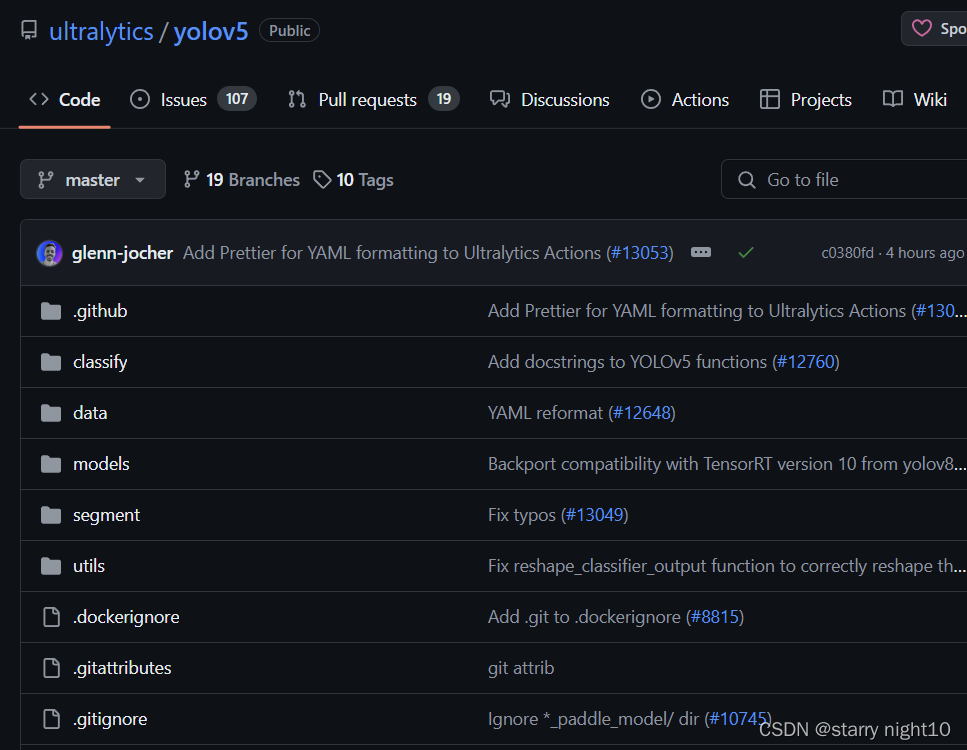
点击master分支:选择Tags -> v6.0
2、python环境
创建python环境,使用的是python3.8版本
打开pycharm切换环境,在终端进入requirements.txt所在的文件夹,运行以下代码安装所需的库。
pip install -r requirements.txt -i https://pypi.tuna.tsinghua.edu.cn/simple3、训练集获取
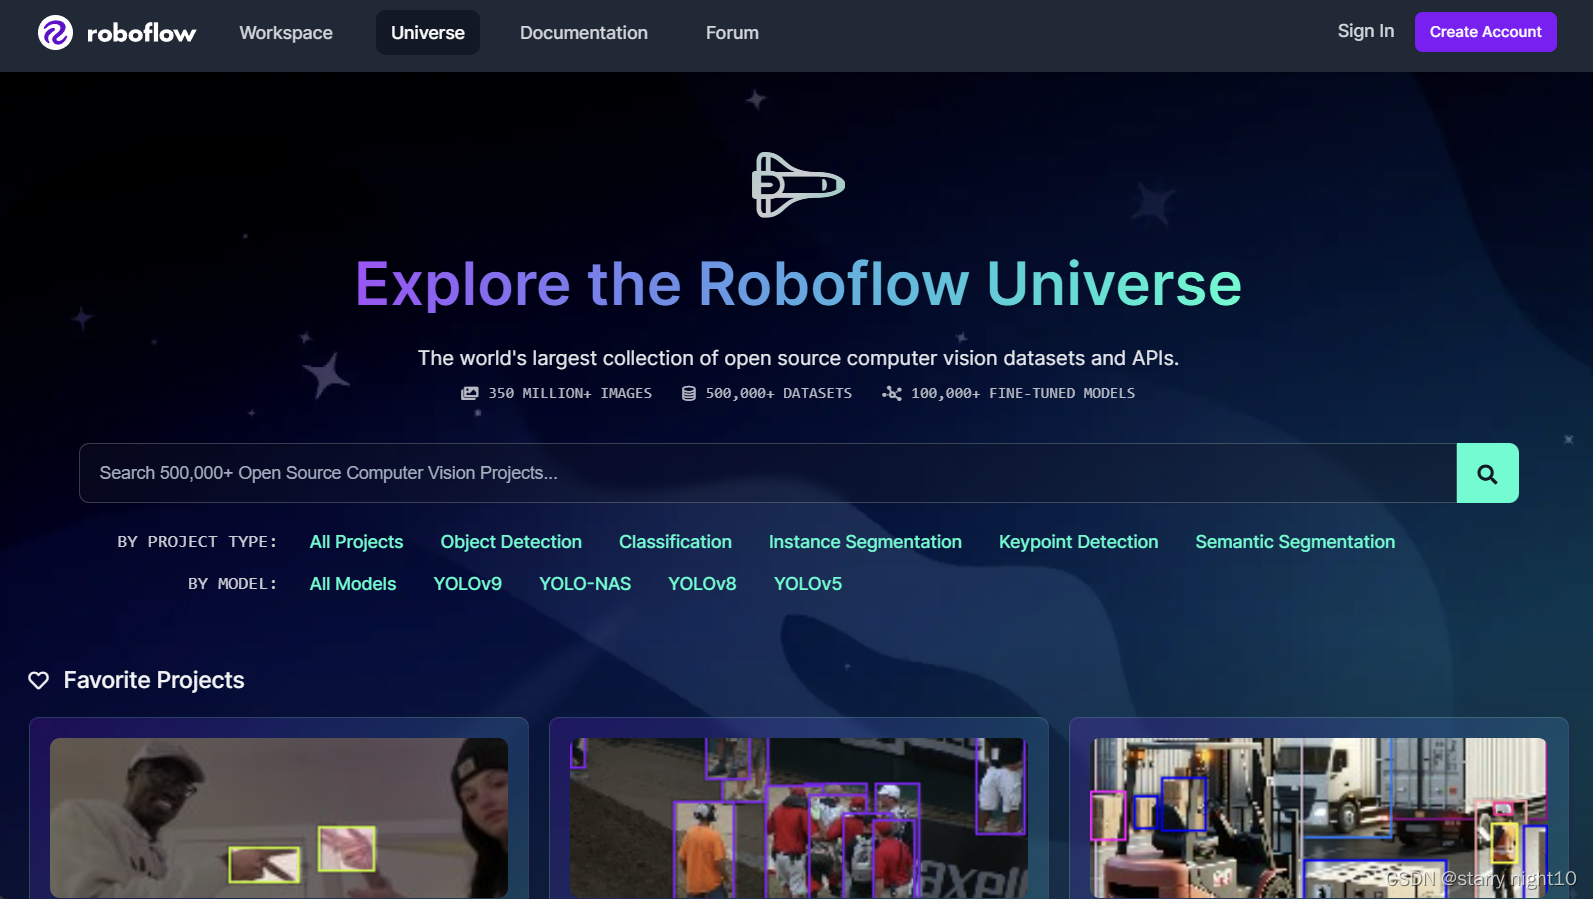
在本文中,训练集在roboflow网站获取:(需要科学上网)Roboflow Universe: Open Source Computer Vision Community
数据集格式为txt-yolov8,其他格式也可通过编写代码转换
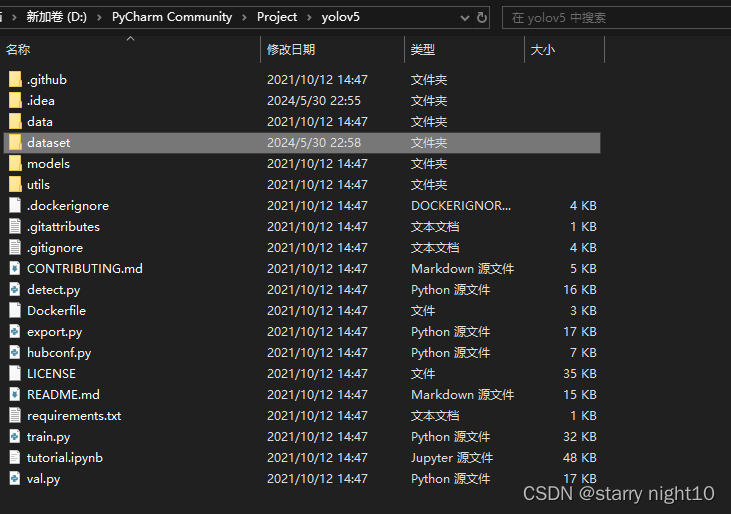
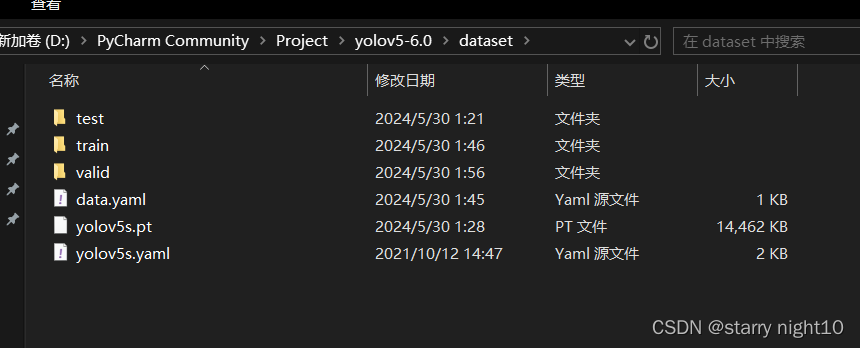
将数据集放置在新建dataset文件夹中,如图,data.yaml是数据集自带的文件,yolov5s.pt文件在GitHub - ultralytics/yolov5: YOLOv5 🚀 in PyTorch > ONNX > CoreML > TFLite页面下载,yolov5s.yaml文件在YOLOv5源码文件中有,仔细找一下即可
二、开始训练pt模型
1、打开文件
在pycharm中打开YOLOv5源码
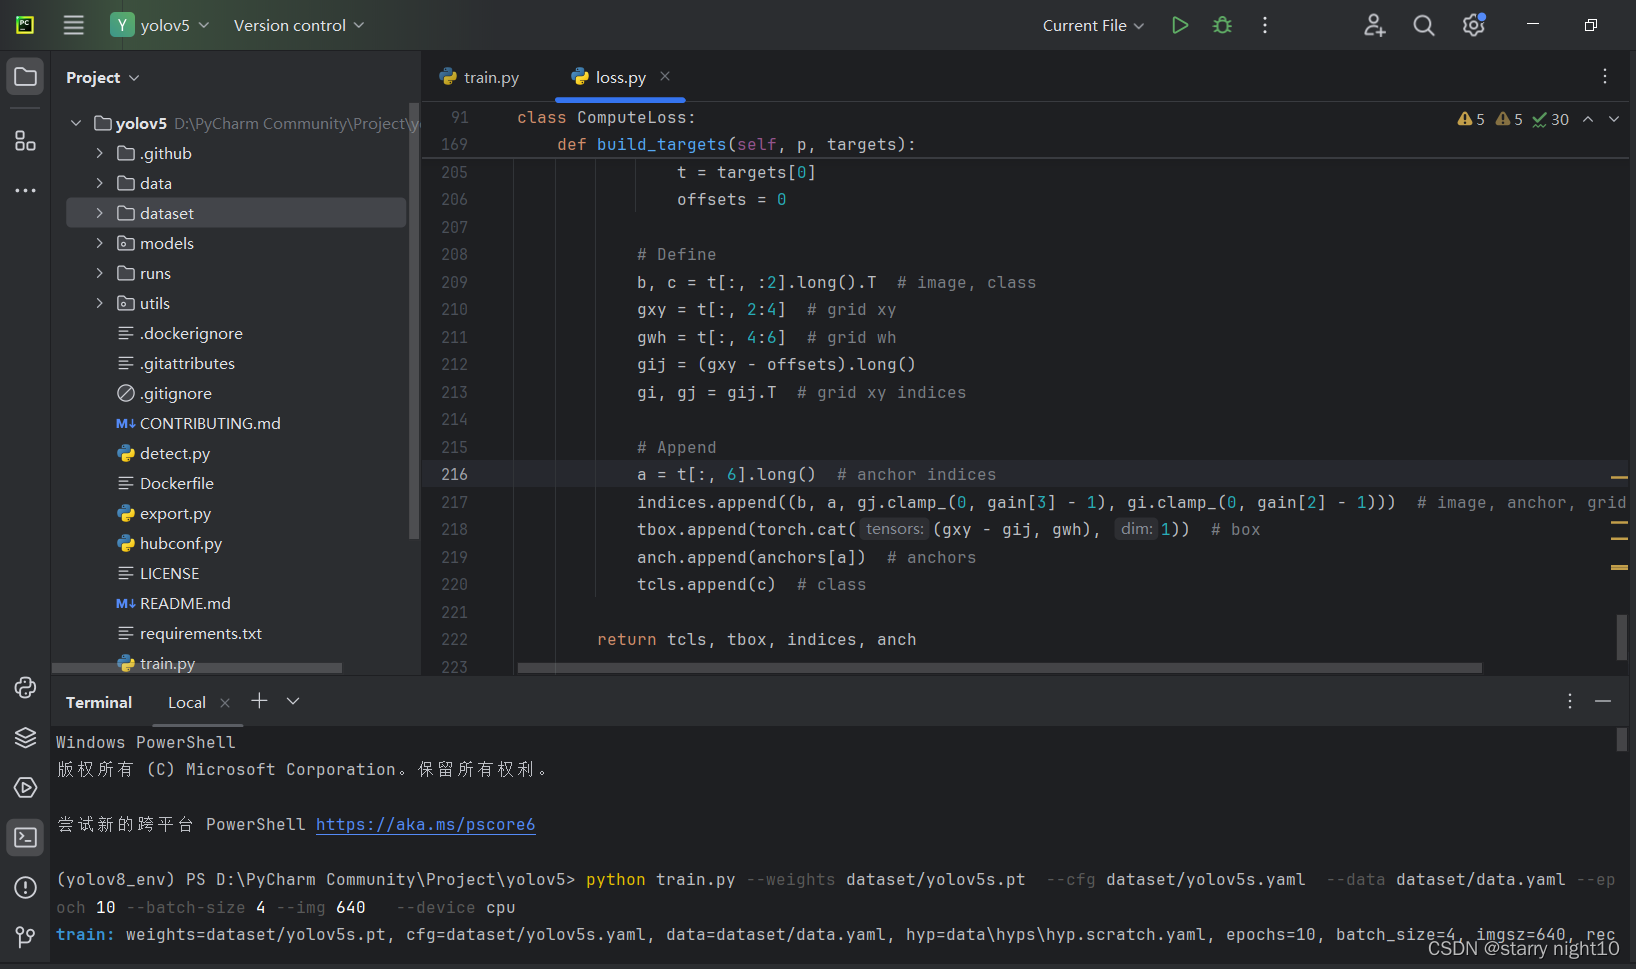
打开终端,输入以下指令,注意看相对路径
python train.py --weights dataset/yolov5s.pt --cfg dataset/yolov5s.yaml --data dataset/data.yaml --epoch 10 --batch-size 4 --img 640 --device cpuweights:权重文件路径
cfg:存储模型结构的配置文件
data:存储训练、测试数据的文件
epochs:指的就是训练过程中整个数据集将被迭代(训练)了多少次,显卡不行你就调小点。
batch-size:训练完多少张图片才进行权重更新,显卡不行就调小点。
img-size:输入图片宽高,显卡不行就调小点。
device:cuda device, i.e. 0 or 0,1,2,3 or cpu。选择使用GPU还是CPU
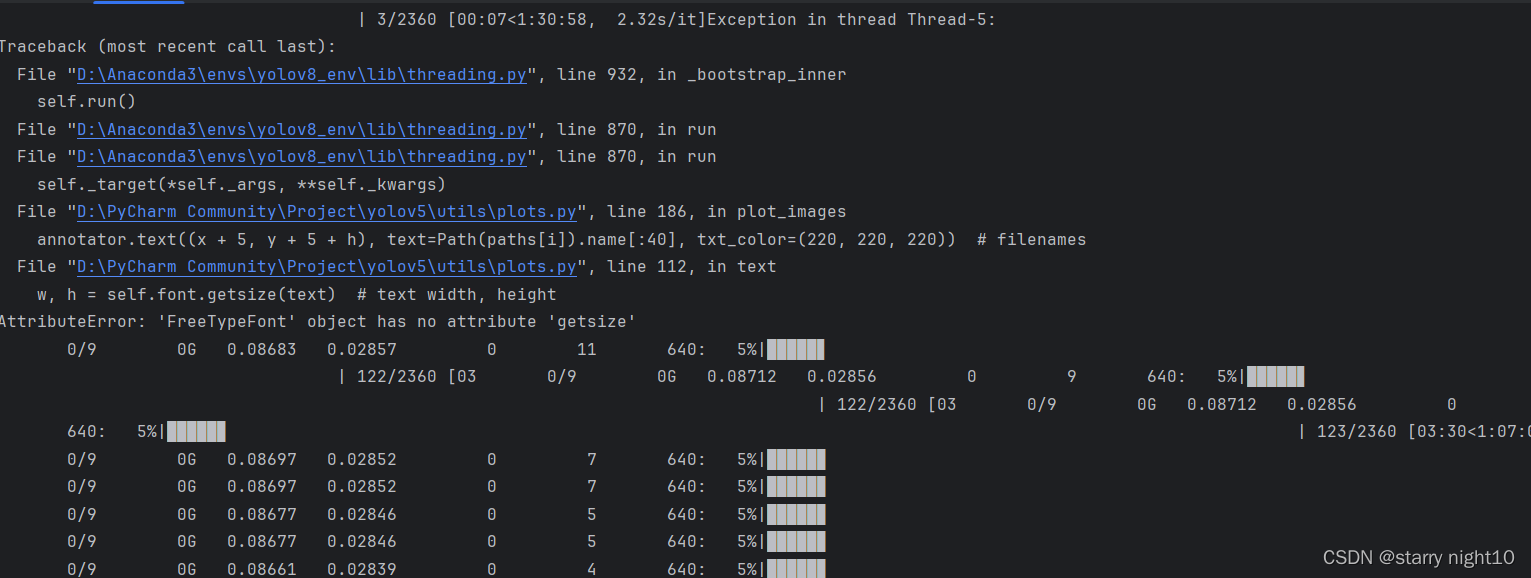
2、遇到的问题及解决
运行指令后,我遇到的问题是numpy库有些函数已经弃用了,降级即可,这部分问题忘记记录。
还有遇到问题如下
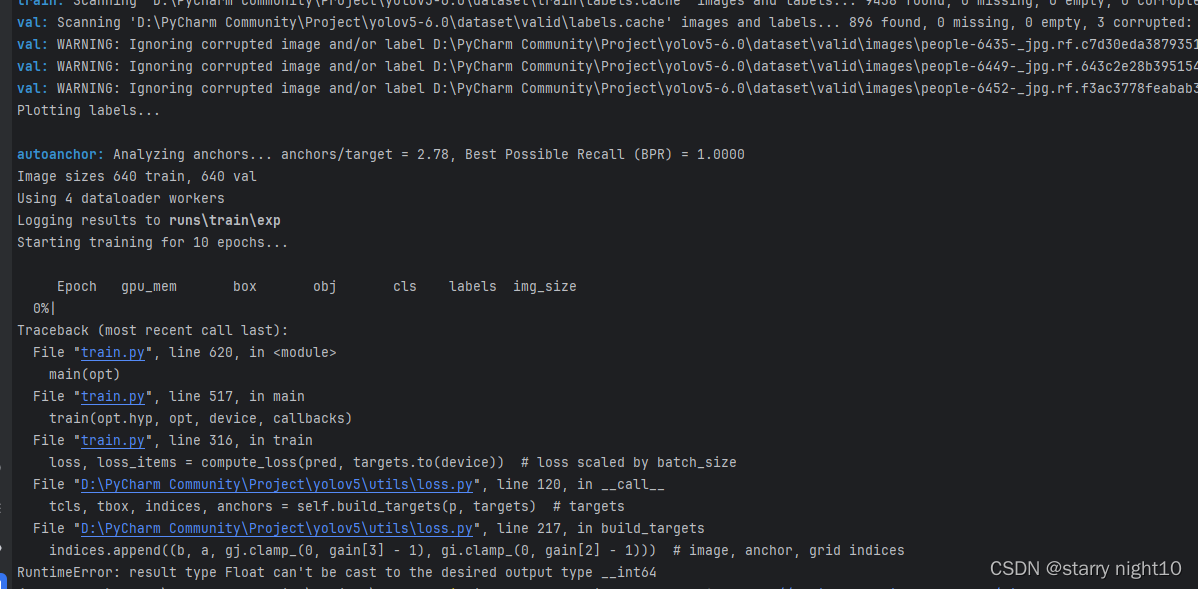
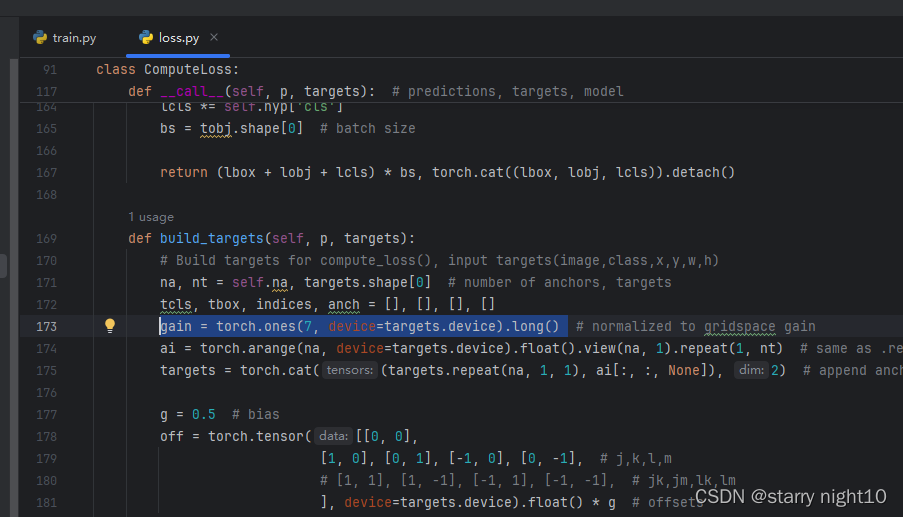
我的解决方法是将loss.py中173行左右的代码修改如下:
修改后重新运行train.py,已经开始训练了,这部分耐心等待即可。
3、测试模型
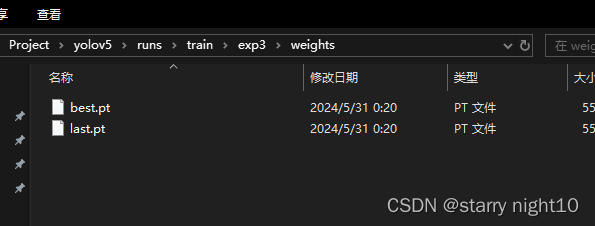
训练出来的模型存放位置如图:
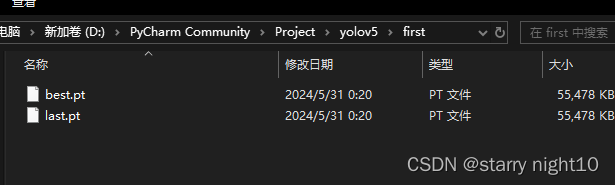
复制文件到yolov5文件夹中,如图
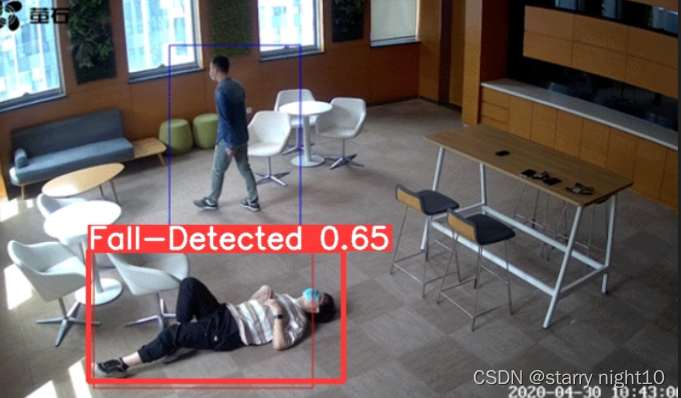
测试一下模型:执行语句:
python detect.py --weights first/best.pt --source ../yolov5/picture/0.jpg生成图像在\yolov5\runs\detect\exp中(框选的很准确,另外两个框原图就有)
三、根据pt文件生成onnx文件
1、修改yolo.py文件
将forward(self,x)函数
    def forward(self, x):
        z = []  # inference output
        for i in range(self.nl):
            x[i] = self.m[i](x[i])  # conv
            bs, _, ny, nx = x[i].shape  # x(bs,255,20,20) to x(bs,3,20,20,85)
            x[i] = x[i].view(bs, self.na, self.no, ny, nx).permute(0, 1, 3, 4, 2).contiguous()

            if not self.training:  # inference
                if self.grid[i].shape[2:4] != x[i].shape[2:4] or self.onnx_dynamic:
                    self.grid[i], self.anchor_grid[i] = self._make_grid(nx, ny, i)

                y = x[i].sigmoid()
                if self.inplace:
                    y[..., 0:2] = (y[..., 0:2] * 2. - 0.5 + self.grid[i]) * self.stride[i]  # xy
                    y[..., 2:4] = (y[..., 2:4] * 2) ** 2 * self.anchor_grid[i]  # wh
                else:  # for YOLOv5 on AWS Inferentia https://github.com/ultralytics/yolov5/pull/2953
                    xy = (y[..., 0:2] * 2. - 0.5 + self.grid[i]) * self.stride[i]  # xy
                    wh = (y[..., 2:4] * 2) ** 2 * self.anchor_grid[i]  # wh
                    y = torch.cat((xy, wh, y[..., 4:]), -1)
                z.append(y.view(bs, -1, self.no))

        return x if self.training else (torch.cat(z, 1), x)
修改为:
    def forward(self, x):
        z = []  # inference output
        for i in range(self.nl):
            if os.getenv('RKNN_model_hack', '0') != '0':
                x[i] = torch.sigmoid(self.m[i](x[i]))  # conv
        return x
2、修改export.py文件
在导库之后,添加代码行:
os.environ['RKNN_model_hack'] = 'npu_2'3、生成onnx文件
执行语句:(发现best.onnx文件在first文件夹中)
python export.py --weights ./first/best.pt --img 640 --batch 1 --include onnx --opset 12四、虚拟机环境准备(Ubuntu)
虚拟机需要预先安装git,python3.8
1、创建python虚拟环境
打开终端输入:
mkdir Val-Env && cd Val-Env创建环境:
python3 -m venv RK3566 python=3.8
进入环境:
source RK3566/bin/activate重新创建一个YOLO文件夹并进入,拉取git文件
git clone https://gitee.com/LubanCat/lubancat_ai_manual_code.git
cd lubancat_ai_manual_code/dev_env/rknn_toolkit2
配置pip源
pip3 config set global.index-url https://mirror.baidu.com/pypi/simple安装依赖库
pip3 install numpy
pip3 install -r doc/requirements_cp38-1.5.0.txt
pip3 install packages/rknn_toolkit2-1.5.0+1fa95b5c-cp38-cp38-linux_x86_64.whl
检测是否成功安装,exit()退出
(RK3566) cyl@ubuntu:~/YOLO$ python3
Python 3.8.10 (default, Nov 22 2023, 10:22:35)
[GCC 9.4.0] on linux
Type "help", "copyright", "credits" or "license" for more information.
>>> from rknn.api import RKNN
>>>
2、下载交叉编译器
官方软件包下载:Linaro Releases,下载版本【gcc-linaro-6.3.1-2017.05-x86_64_aarch64-linux-gnu】,下载文件夹里面是已经编译好的二进制可执行程序。下载后解压,bin目录下存放这所需的交叉编译器,可直接使用。
3、下载rknpu2工程
可以从GitHub - rockchip-linux/rknpu2获取,并解压即可。
五、根据onnx文件生成rknn文件
1、复制文件
../lubancat_ai_manual_code/dev_env/rknn_toolkit2/examples/conversion/yolov5
这个yolov5文件夹用来生成rknn文件,建议单独复制一份出来,用来生成自己的rknn文件
2、修改test.py文件 (rk3566)
修改代码如下,建议多对照着看,以免有疏忽
import os
import urllib
import traceback
import time
import sys
import numpy as np
import cv2
from rknn.api import RKNN

# Model from https://github.com/airockchip/rknn_model_zoo
# 你生成的onnx文件
ONNX_MODEL = 'best.onnx'
# 你想要生成的rknn文件名
RKNN_MODEL = 'fall.rknn'
# 用于测试的图片
IMG_PATH = './fall.jpg'
DATASET = './dataset.txt'

QUANTIZE_ON = True

OBJ_THRESH = 0.25
NMS_THRESH = 0.45
IMG_SIZE = 640

# 根据你的yaml文件的类改,我这里只有一个类别
CLASSES = ("Fall-Detected")


def xywh2xyxy(x):
    # Convert [x, y, w, h] to [x1, y1, x2, y2]
    y = np.copy(x)
    y[:, 0] = x[:, 0] - x[:, 2] / 2  # top left x
    y[:, 1] = x[:, 1] - x[:, 3] / 2  # top left y
    y[:, 2] = x[:, 0] + x[:, 2] / 2  # bottom right x
    y[:, 3] = x[:, 1] + x[:, 3] / 2  # bottom right y
    return y

def process(input, mask, anchors):

    anchors = [anchors[i] for i in mask]
    grid_h, grid_w = map(int, input.shape[0:2])

    box_confidence = input[..., 4]
    box_confidence = np.expand_dims(box_confidence, axis=-1)

    box_class_probs = input[..., 5:]

    box_xy = input[..., :2]*2 - 0.5

    col = np.tile(np.arange(0, grid_w), grid_w).reshape(-1, grid_w)
    row = np.tile(np.arange(0, grid_h).reshape(-1, 1), grid_h)
    col = col.reshape(grid_h, grid_w, 1, 1).repeat(3, axis=-2)
    row = row.reshape(grid_h, grid_w, 1, 1).repeat(3, axis=-2)
    grid = np.concatenate((col, row), axis=-1)
    box_xy += grid
    box_xy *= int(IMG_SIZE/grid_h)

    box_wh = pow(input[..., 2:4]*2, 2)
    box_wh = box_wh * anchors

    box = np.concatenate((box_xy, box_wh), axis=-1)

    return box, box_confidence, box_class_probs

def filter_boxes(boxes, box_confidences, box_class_probs):
    """Filter boxes with box threshold. It's a bit different with origin yolov5 post process!
    # Arguments
        boxes: ndarray, boxes of objects.
        box_confidences: ndarray, confidences of objects.
        box_class_probs: ndarray, class_probs of objects.
    # Returns
        boxes: ndarray, filtered boxes.
        classes: ndarray, classes for boxes.
        scores: ndarray, scores for boxes.
    """
    boxes = boxes.reshape(-1, 4)
    box_confidences = box_confidences.reshape(-1)
    box_class_probs = box_class_probs.reshape(-1, box_class_probs.shape[-1])

    _box_pos = np.where(box_confidences >= OBJ_THRESH)
    boxes = boxes[_box_pos]
    box_confidences = box_confidences[_box_pos]
    box_class_probs = box_class_probs[_box_pos]

    class_max_score = np.max(box_class_probs, axis=-1)
    classes = np.argmax(box_class_probs, axis=-1)
    _class_pos = np.where(class_max_score >= OBJ_THRESH)

    boxes = boxes[_class_pos]
    classes = classes[_class_pos]
    scores = (class_max_score* box_confidences)[_class_pos]

    return boxes, classes, scores


def nms_boxes(boxes, scores):
    """Suppress non-maximal boxes.
    # Arguments
        boxes: ndarray, boxes of objects.
        scores: ndarray, scores of objects.
    # Returns
        keep: ndarray, index of effective boxes.
    """
    x = boxes[:, 0]
    y = boxes[:, 1]
    w = boxes[:, 2] - boxes[:, 0]
    h = boxes[:, 3] - boxes[:, 1]

    areas = w * h
    order = scores.argsort()[::-1]

    keep = []
    while order.size > 0:
        i = order[0]
        keep.append(i)

        xx1 = np.maximum(x[i], x[order[1:]])
        yy1 = np.maximum(y[i], y[order[1:]])
        xx2 = np.minimum(x[i] + w[i], x[order[1:]] + w[order[1:]])
        yy2 = np.minimum(y[i] + h[i], y[order[1:]] + h[order[1:]])

        w1 = np.maximum(0.0, xx2 - xx1 + 0.00001)
        h1 = np.maximum(0.0, yy2 - yy1 + 0.00001)
        inter = w1 * h1

        ovr = inter / (areas[i] + areas[order[1:]] - inter)
        inds = np.where(ovr <= NMS_THRESH)[0]
        order = order[inds + 1]
    keep = np.array(keep)
    return keep


def yolov5_post_process(input_data):
    masks = [[0, 1, 2], [3, 4, 5], [6, 7, 8]]
    anchors = [[10, 13], [16, 30], [33, 23], [30, 61], [62, 45],
               [59, 119], [116, 90], [156, 198], [373, 326]]

    boxes, classes, scores = [], [], []
    for input, mask in zip(input_data, masks):
        b, c, s = process(input, mask, anchors)
        b, c, s = filter_boxes(b, c, s)
        boxes.append(b)
        classes.append(c)
        scores.append(s)

    boxes = np.concatenate(boxes)
    boxes = xywh2xyxy(boxes)
    classes = np.concatenate(classes)
    scores = np.concatenate(scores)

    nboxes, nclasses, nscores = [], [], []
    for c in set(classes):
        inds = np.where(classes == c)
        b = boxes[inds]
        c = classes[inds]
        s = scores[inds]

        keep = nms_boxes(b, s)

        nboxes.append(b[keep])
        nclasses.append(c[keep])
        nscores.append(s[keep])

    if not nclasses and not nscores:
        return None, None, None

    boxes = np.concatenate(nboxes)
    classes = np.concatenate(nclasses)
    scores = np.concatenate(nscores)

    return boxes, classes, scores


def draw(image, boxes, scores, classes):
    """Draw the boxes on the image.
    # Argument:
        image: original image.
        boxes: ndarray, boxes of objects.
        classes: ndarray, classes of objects.
        scores: ndarray, scores of objects.
        all_classes: all classes name.
    """
    for box, score, cl in zip(boxes, scores, classes):
        top, left, right, bottom = box
        print('class: {}, score: {}'.format(CLASSES[cl], score))
        print('box coordinate left,top,right,down: [{}, {}, {}, {}]'.format(top, left, right, bottom))
        top = int(top)
        left = int(left)
        right = int(right)
        bottom = int(bottom)

        cv2.rectangle(image, (top, left), (right, bottom), (255, 0, 0), 2)
        cv2.putText(image, '{0} {1:.2f}'.format(CLASSES[cl], score),
                    (top, left - 6),
                    cv2.FONT_HERSHEY_SIMPLEX,
                    0.6, (0, 0, 255), 2)


def letterbox(im, new_shape=(640, 640), color=(0, 0, 0)):
    # Resize and pad image while meeting stride-multiple constraints
    shape = im.shape[:2]  # current shape [height, width]
    if isinstance(new_shape, int):
        new_shape = (new_shape, new_shape)

    # Scale ratio (new / old)
    r = min(new_shape[0] / shape[0], new_shape[1] / shape[1])

    # Compute padding
    ratio = r, r  # width, height ratios
    new_unpad = int(round(shape[1] * r)), int(round(shape[0] * r))
    dw, dh = new_shape[1] - new_unpad[0], new_shape[0] - new_unpad[1]  # wh padding

    dw /= 2  # divide padding into 2 sides
    dh /= 2

    if shape[::-1] != new_unpad:  # resize
        im = cv2.resize(im, new_unpad, interpolation=cv2.INTER_LINEAR)
    top, bottom = int(round(dh - 0.1)), int(round(dh + 0.1))
    left, right = int(round(dw - 0.1)), int(round(dw + 0.1))
    im = cv2.copyMakeBorder(im, top, bottom, left, right, cv2.BORDER_CONSTANT, value=color)  # add border
    return im, ratio, (dw, dh)


if __name__ == '__main__':

    # Create RKNN object
    rknn = RKNN(verbose=True)

    # pre-process config
    print('--> Config model')
    rknn.config(mean_values=[[0, 0, 0]], std_values=[[255, 255, 255]])
    print('done')

    # # load RKNN model
    # ret = rknn.load_rknn(RKNN_MODEL)
    # if ret != 0:
    #     print('load rknn model failed!')
    #     exit(ret)
    # print('done')

    # Load ONNX model
    print('--> Loading model')
    ret = rknn.load_onnx(model=ONNX_MODEL)
    if ret != 0:
        print('Load model failed!')
        exit(ret)
    print('done')

    # Build model
    print('--> Building model')
    ret = rknn.build(do_quantization=QUANTIZE_ON, dataset=DATASET)
    if ret != 0:
        print('Build model failed!')
        exit(ret)
    print('done')

    # Export RKNN model
    print('--> Export rknn model')
    ret = rknn.export_rknn(RKNN_MODEL)
    if ret != 0:
        print('Export rknn model failed!')
        exit(ret)
    print('done')

    # Init runtime environment
    print('--> Init runtime environment')
    ret = rknn.init_runtime()
    if ret != 0:
        print('Init runtime environment failed!')
        exit(ret)
    print('done')

    # Set inputs
    img = cv2.imread(IMG_PATH)
    img, ratio, (dw, dh) = letterbox(img, new_shape=(IMG_SIZE, IMG_SIZE))
    img = cv2.cvtColor(img, cv2.COLOR_BGR2RGB)
    # img = cv2.resize(img, (IMG_SIZE, IMG_SIZE))

    # Inference
    print('--> Running model')
    outputs = rknn.inference(inputs=[img])
    np.save('./onnx_yolov5_0.npy', outputs[0])
    np.save('./onnx_yolov5_1.npy', outputs[1])
    np.save('./onnx_yolov5_2.npy', outputs[2])
    print('done')

    # post process
    input0_data = outputs[0]
    input1_data = outputs[1]
    input2_data = outputs[2]

    input0_data = input0_data.reshape([3, -1]+list(input0_data.shape[-2:]))
    input1_data = input1_data.reshape([3, -1]+list(input1_data.shape[-2:]))
    input2_data = input2_data.reshape([3, -1]+list(input2_data.shape[-2:]))

    input_data = list()
    input_data.append(np.transpose(input0_data, (2, 3, 0, 1)))
    input_data.append(np.transpose(input1_data, (2, 3, 0, 1)))
    input_data.append(np.transpose(input2_data, (2, 3, 0, 1)))
    print(input_data[0].shape)
    boxes, classes, scores = yolov5_post_process(input_data)

    img_1 = cv2.cvtColor(img, cv2.COLOR_RGB2BGR)
    if boxes is not None:
        draw(img_1, boxes, scores, classes)
        cv2.imwrite('result.jpg', img_1)

rknn.release()3、运行test.py文件
终端执行指令
python3 test.py顺利的话,这时yolov5文件夹中应该有生成对应的rknn文件以及测试效果图

六、Ubuntu交叉编译
进入../rknpu2-master/examples/rknn_yolov5_demo文件中
修改include文件中的头文件postprocess.h
#define OBJ_CLASS_NUM 1 #这里的数字修改为数据集的类的个数修改model目录下的coco_80_labels_list.txt文件,改为自己的类并保存
修改build-linux_RK3566_RK3568.sh文件,GCC_COMPILER修改为(需按照你之前的步骤修改地址)
/home/hr/YOLO/gcc-linaro-6.3.1-2017.05-x86_64_aarch64-linux-gnu/bin/aarch64-linux-gnu在model目录下放入需要推理的图片,在model/RK3566_RK3568目录下放入生成的rknn文件
终端运行build-linux_RK3566_RK3568.sh文件,成功后生成install目录。
七、泰山派中运行
坚持到这里就离胜利不远了!将install文件传输给泰山派,终端进入rknn_yolov5_demo_Linux目录中,执行
./rknn_yolov5_demo ./model/RK3566_RK3568/fall.rknn ./model/0.jpg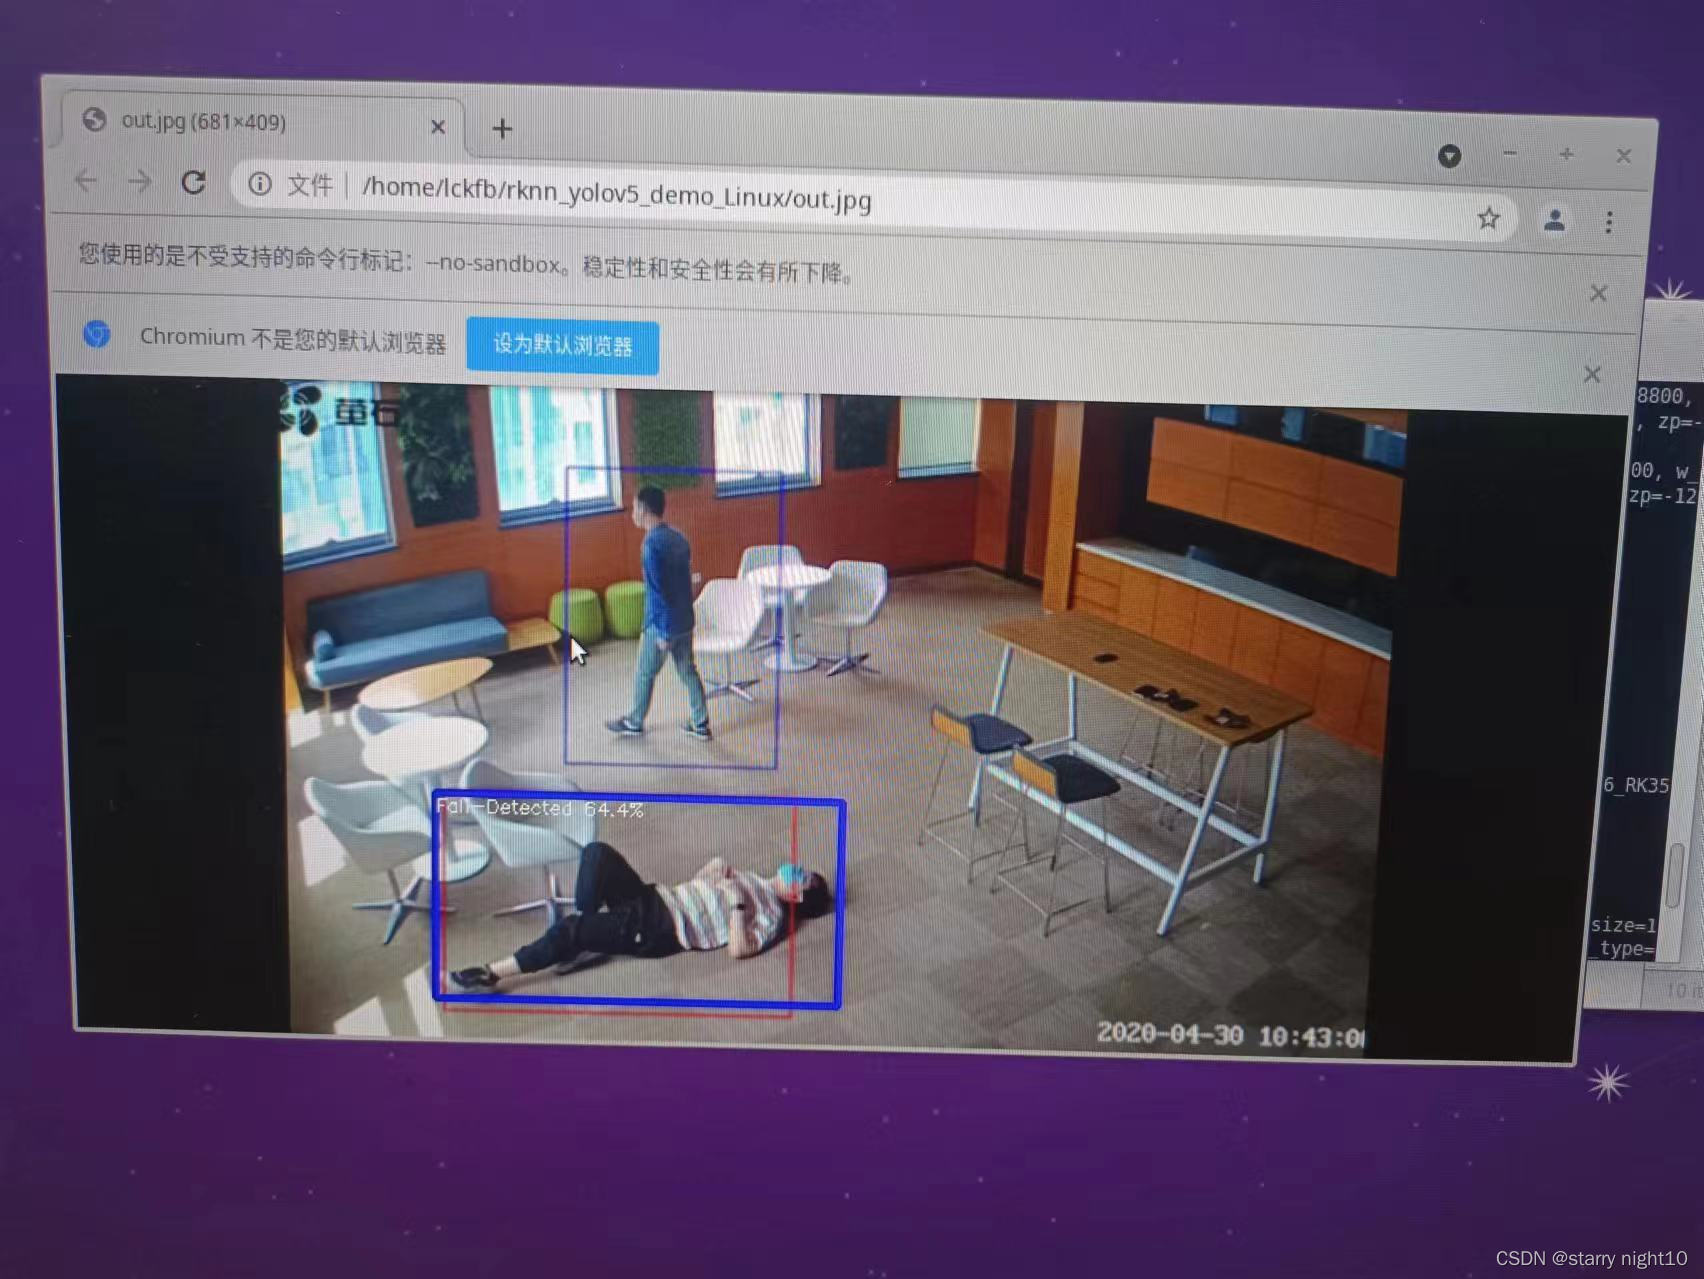
成功!!
参考资料
【yolov5系列】将模型部署到瑞芯微RK3566上面_yolov5部署到mcu-CSDN博客
4. RKNN Toolkit Lite2介绍 — [野火]嵌入式AI应用开发实战指南—基于LubanCat-RK系列板卡 文档 (embedfire.com)
Yolov5训练自己的数据集(详细完整版)_yolov5缔宇-CSDN博客
yolov5训练pt模型并转换为rknn模型,部署在RK3588开发板上——从训练到部署全过程_yolov5 rknn-CSDN博客
yolov5训练并生成rknn模型以及3588平台部署_rknn yolov5-CSDN博客
【已解决】pt文件转onnx后再转rknn时得到推理图片出现大量锚框变花屏_瑞芯微rknn模型转换和pc端仿真成功,在板端用c api推理出现乱框和置信度溢出-CSDN博客
【已解决】onnx转换为rknn置信度大于1,图像出现乱框问题解决_rknn inference画框-CSDN博客


 8662
8662

 被折叠的 条评论
为什么被折叠?
被折叠的 条评论
为什么被折叠?
 到【灌水乐园】发言


