


灰度图有256级灰度,而二值图只有黑白两色。颜色数目大大降低,直观感觉转换效果不会好。其实人眼类似于一个低通滤波器,你看到的并不是一个一个像素点,而是接受的颜色信息是一个区域内的颜色信息的综合效果。
Floyd-Steinberg方法实际是一种dithering的方法,将本像素的颜色信息,通过某种方式抖动到其他像素点上,就可以更好利用颜色的区域效果。
Floyd-Steinberg算法:
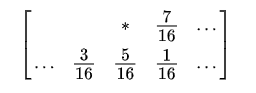
*表示当前像素。周围的4个分数为误差分配比例。
误差=理论值-实际值
理论值是真正的颜色值,而实际值为二值化的值
上代码
import cv2
import numpy as np
import matplotlib.pyplot as plt
plt.rcParams['font.sans-serif'] = ['KaiTi'] # 指定默认字体
plt.rcParams['axes.unicode_minus'] = False # 解决保存图像是负号'-'显示为方块的问题
img_gray0 = cv2.imread("img/david_head.jpg", cv2.IMREAD_GRAYSCALE)
img_gray0 = 255 - img_gray0
h, w= img_gray0.shape
img_gray0 = cv2.resize(img_gray0, (w//2, h//2))
h, w= img_gray0.shape
plt.figure()
plt.imshow(img_gray0, vmin=0, vmax=255, cmap=plt.get_cmap("Greys"))
plt.title("原图")
img_gray_eq = img_gray0
img_dither = np.zeros((h+1, w+1), dtype=np.float)
img_undither = np.zeros((h, w), dtype=np.uint8)
threshold = 128
for i in range(h):
for j in range(w):
img_dither[i, j] = img_gray_eq[i, j]
if img_gray_eq[i, j] > threshold:
img_undither[i, j] = 255
for i in range(h):
for j in range(w):
old_pix = img_dither[i, j]
if (img_dither[i, j] > threshold):
new_pix = 255
else:
new_pix = 0
img_dither[i, j] = new_pix
quant_err = old_pix - new_pix
if j > 0:
img_dither[i+1, j-1] = img_dither[i+1, j-1] + quant_err * 3 / 16
img_dither[i+1, j] = img_dither[i+1, j] + quant_err * 5 / 16
img_dither[i, j+1] = img_dither[i, j+1] + quant_err * 7 / 16
img_dither[i+1, j+1] = img_dither[i+1, j+1] + quant_err * 1 / 16
img_dither = img_dither.astype(np.uint8)
img_dither = img_dither[0:h, 0:w]
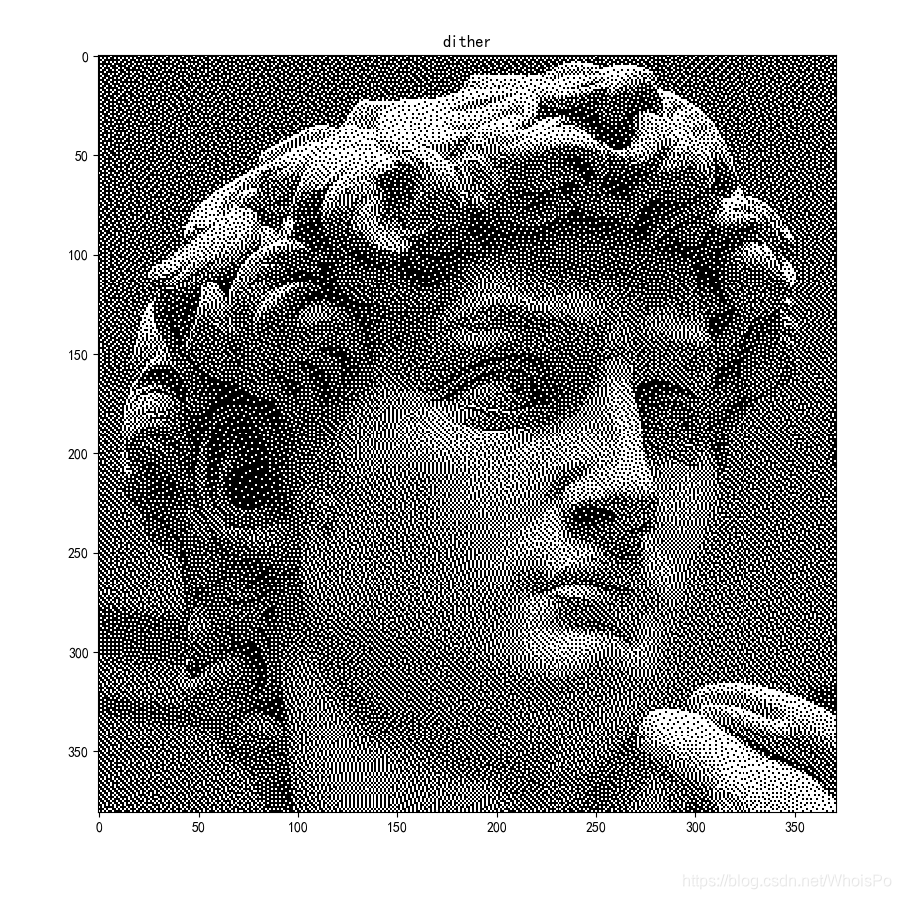
plt.figure()
plt.imshow(img_dither, vmin=0, vmax=255, cmap=plt.get_cmap("Greys"))
plt.title("dither")
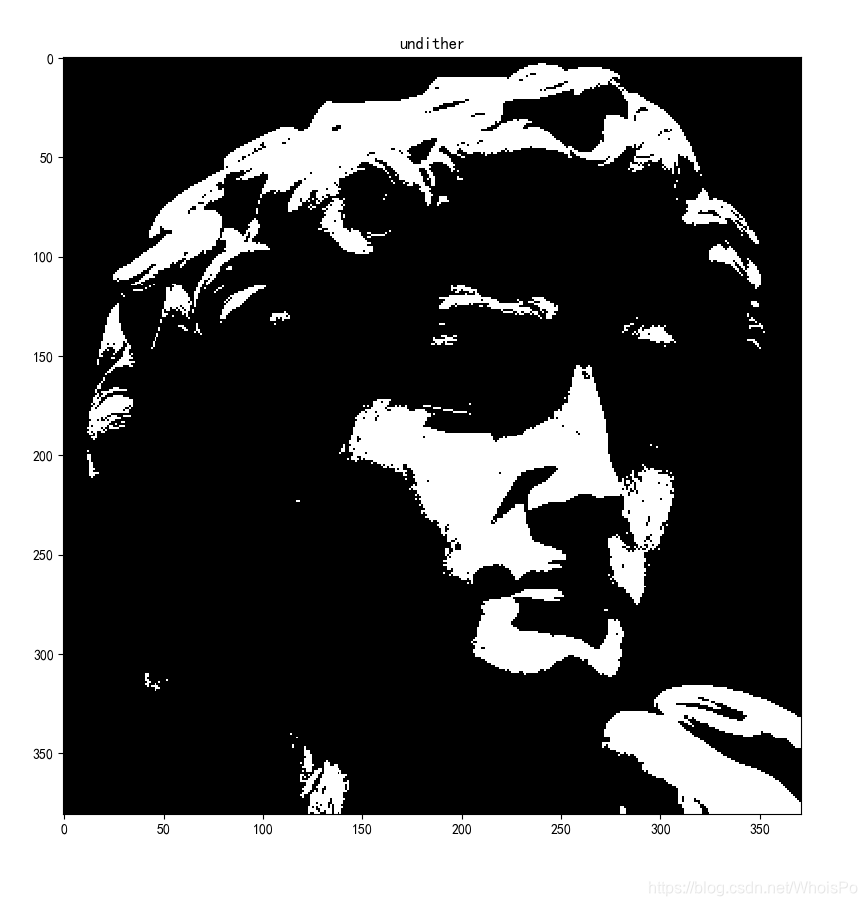
plt.figure()
plt.imshow(img_undither, vmin=0, vmax=255, cmap=plt.get_cmap("Greys"))
plt.title("undither")
plt.show()


 2772
2772

 被折叠的 条评论
为什么被折叠?
被折叠的 条评论
为什么被折叠?
 到【灌水乐园】发言


