Tensorflow 入门
通过示例学习基础知识
照片由来自 Unsplash 的 Marten Newhall 拍摄。
介绍
好,我们来讨论一下房间里的大象。应该学 Tensorflow 还是 PyTorch?
老实说,没有正确的答案。这两个平台背后都有一个大型开源社区,易于使用,并且能够构建复杂的深度学习解决方案。如果你真的想成为一名出色的深度学习研究者,你必须了解这两方面。
我们现在来讨论 Tensorflow 是如何产生的,以及如何利用它进行深度学习。
Tensorflow 是什么时候开发的?
人工神经网络(ANN)的研究已经存在了很长时间。沃伦·麦卡洛克和沃尔特·皮茨在 1943 年发表了其早期作品之一,其中作者开发了人工神经网络的第一个计算模型。
在 21 世纪初之前,只有粗略的框架可用,需要有经验的 ML 从业者来建立简单/适度的人工神经网络方法。
随着 2012 年对人工神经网络的兴趣激增,深度学习(DL)框架的前景开始发生变化。Caffe、Chainer 和 Theano 可以说是早期的顶级竞争者,它们使普通数据科学家更容易使用 DL。
谷歌在“机器学习和人工智能”类别下搜索 2012 年 1 月至 2021 年 7 月之间的顶级低/高级深度学习框架。图片来自作者。
2015 年 2 月,谷歌开源了 Tensorflow 1.0,这一框架迅速获得了关注。Tensorflow swift 的采用与几个因素有关,如家喻户晓的名字、快速和频繁的更新、简单的语法以及对可用性和可扩展性的关注(如移动和嵌入式 devices)⁴⁵.
随着 PyTorch 的日益普及和 Tensorflow⁶市场份额的减少,谷歌团队在 2019 年发布了对库“Tensorflow 2.0"⁷.”的重大更新这次更新引入了急切执行(PyTorch 的关键卖点之一),以及对 Keras 的本机支持(通过静态计算图极大地简化了开发)。
到 2021 年 6 月,超过 99%的谷歌搜索主要深度学习框架包含 Tensorflow、Keras 或 PyTorch。
通过例子学习
最简单的学习方法(至少对我来说)是通过例子。这种方法允许您测试一个工作过程,修改它,或者获取对您的项目有用的组件。
在这篇博客中,我将通过两个 ML 示例来指导您,说明构建简单张量流模型所需的关键组件。
为了提高可复制性,我建议使用 Google Colab 作为这里描述的例子。为此,只需打开这个链接,按照步骤创建一个新的 python 3 笔记本。
线性回归
在此示例中,我们将构建一个简单的 1 层神经网络来解决线性回归问题。这个例子将解释如何初始化你的权重(又名回归系数),以及如何通过反向传播来更新它们。
我们首先需要的是一个数据集。让我们模拟一个噪声线性模型如下
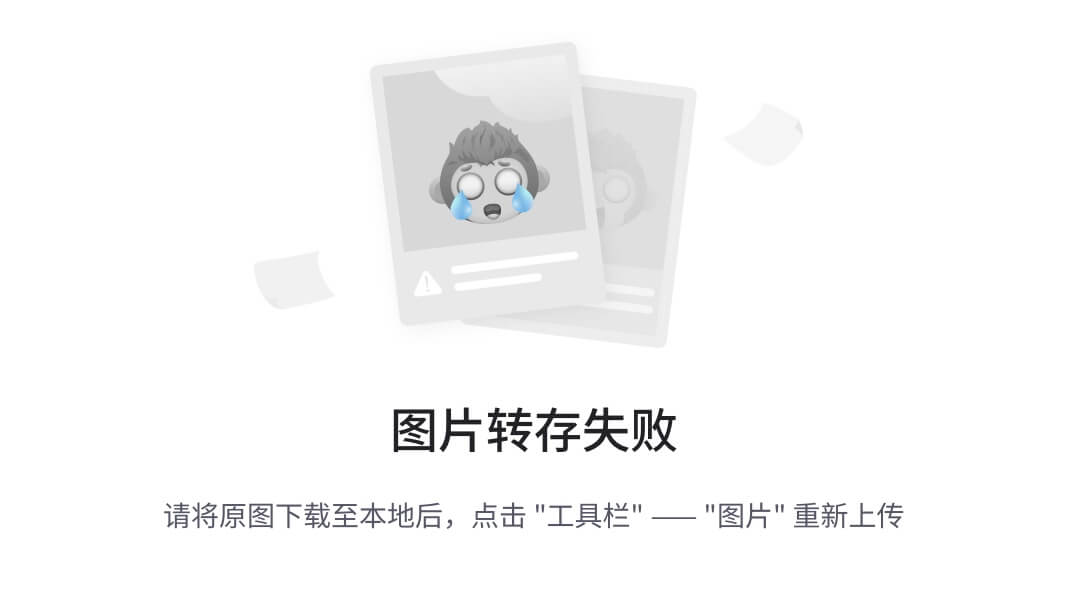
其中 Y 是我们的目标,X 是我们的输入,w 是我们要确定的系数,N 是高斯分布噪声变量。为此,在笔记本的第一个单元格中粘贴并运行以下代码片段。
这将显示 X 和 Y 之间关系的散点图,清楚地表明在一些高斯噪声下的线性相关性。在这里,我们期望一个合理的模型来估计 2 作为理想的回归系数。
代表高斯噪声下 X 和 Y 之间线性相关性的模拟数据。
现在让我们用一个常数(0.1)开始我们的回归系数(这里称为权重)。为此,我们首先需要导入 Tensorflow 库,然后将权重初始化为 Tensorflow 变量。
为了这个例子的目的,假设一个变量具有与张量相似的性质。张量是由 tf 表示的多维元素阵列。张量对象。张量只有一种数据类型(在下面的例子中为“float32”)和一种形状。该对象允许其他 Tensorflow 函数执行某些操作,例如计算与该变量相关的梯度并相应地更新其值。复制以下代码片段来初始化我们的权重变量。
运行这个代码片段将输出变量名、形状、类型和值。注意,这个变量有一个“()”形状,表示它是一个 0 维向量。
<tf.Variable ‘Variable:0’ shape=() dtype=float32, numpy=0.1>
给定初始化的权重张量和输入 X,为了获得预测的 Y (Yhat ),我们可以简单地调用“Yhat = x * w_tensor.numpy()”。的’。“numpy()”用于将权重向量转换为 numpy 数组。复制并运行下面的代码片段,看看初始化后的重量如何符合数据。
正如你所观察到的,‘w _ tensor’的当前值与理想值相差甚远。回归线完全符合数据。
训练前模型拟合的表示。
为了找到‘w _ tensor’的最佳值,我们需要定义一个损失度量和一个优化器。这里,我们将使用均方误差(MSE)作为我们的损失度量,随机梯度下降(SGD)作为我们的优化器。
我们现在有了优化我们的“w _ 张量”的所有部分。优化循环只需要定义“前进步骤”,并从我们的优化器调用最小化函数。
“前进步骤”告诉模型如何将输入与权重张量相结合,以及如何计算我们的目标与预测目标之间的误差(下面代码片段中的第 5 行)。在一个更复杂的例子中,这将是一组定义从输入 X 到目标 y 的计算图的指令。
为了最小化定义的损失,我们只需要告诉我们的优化器最小化关于‘w _ tensor’的‘损失’(下面代码片段中的第 17 行)。
将下面的代码片段添加到您的示例中,为模型定型 100 次迭代。这将动态绘制新的权重值和当前拟合。
在训练结束时,你的体重应该接近 2(理想值)。要使用此模型进行推理(即,在给定 X 值的情况下预测 Y 变量),只需执行` Yhat = x * w_tensor.numpy()’
训练后模型拟合的表示。
分类问题
在本例中,我们将引入 Keras 顺序模型定义来创建更复杂的神经网络。我们将把这个模型应用于一个线性可分的分类问题。
像以前一样,让我们从构建数据集开始。在下面的代码片段中,我们为第一个聚类创建了两个以(0.2,0.2)为中心的点聚类,为第二个聚类创建了两个以(0.8,0.8)为中心的点聚类。
我们可以很快观察到,用一条与两个聚类距离相等的线将两个数据集线性分离的模型是理想的。
模拟数据表示两个数据聚类,第一个聚类以(0.2,0.2)为中心,第二个聚类以(0.8,0.8)为中心。
像以前一样,让我们定义我们的损失度量和优化器。在这个例子中,我们应该使用分类损失度量,例如交叉熵。因为我们的目标被编码为整数,所以我们必须使用“SparseCategoricalCrossEntropy”方法。
对于优化器,我们可以像以前一样使用 SGD。然而,普通 SGD 的收敛速度慢得令人难以置信。相反,我们将使用最近的自适应梯度下降方法(RMSProp)。
下一步是定义自定义神经网络模型。让我们创建一个 5 层神经网络如下:
- 有 10 个节点的线性层。这将有一个 2 x 10(输入形状 x 图层大小)的形状。
- 批量标准化层。这一层将对每一批的第一层的输出进行归一化,避免爆炸/消失梯度。
- Relu 激活层。这一层将为我们的网络提供非线性能力。请注意,我们仅以此为例。对于这个问题,relu 层是不必要的,因为它是线性可分离的。
- 具有两个节点的线性层。这将有一个 10 x 2(层大小 x 输出形状)的形状。
- Softmax 层。该层会将第 4 层的输出转换为 softmax。
在网络用于训练之前,我们需要调用“编译”方法。这将允许 Tensorflow 将模型链接到优化器和上面定义的损失度量。
和以前一样,我们先来检查一下我们的网络在训练前表现如何。要使用该模型进行推理,我们只需键入“yhat = model.predict(x)”。现在,复制下面的片段来可视化网络输出。
你可以确认网络一点也不好。显然需要一些训练来正确区分这两个类别。
训练前模型拟合的表示。
要训练一个 Keras 模型,我们只需输入“model.fit(x,y,epochs=50)”。将下面的片段添加到您的笔记本中,以训练模型。
在训练循环结束时,你的网络应该能够很好地分离这两个类。要使用此模型进行推理(即,在给定 X 值的情况下预测 Y 变量),只需执行“yhat = model.predict(x)”。

训练后模型拟合的表示。
完整脚本
如需完整的脚本,请点击以下链接进入我的 Github 页面:
https://github.com/andreRibeiro1989/medium/blob/main/tensorflow_getting_started.ipynb
或者通过以下链接直接访问 Google Colab 笔记本:
结论
Tensorflow 是目前开发定制深度学习解决方案的最佳深度学习框架之一。在这篇博客中,我介绍了构建两个简单神经网络模型的关键概念。
**警告!!!**你的学习才刚刚开始。要变得更好,你需要练习。官方 Tensorflow 网站提供了从初学者到专家级别的示例,以及 Tensorflow 软件包的官方文档。祝你好运!
[1]沃伦·麦卡洛克和沃尔特·皮茨”神经活动中固有的逻辑思想演算(1943),《数学生物物理学通报》。5: 115–133.
https://link.springer.com/article/10.1007%2FBF02478259
[2]袁林。深度学习框架简史
https://towardsdatascience . com/A-Brief-History-of-Deep-Learning-Frameworks-8 deb F3 ba 6607
[3] Alex Krizhevsky 等著《深度卷积神经网络的 ImageNet 分类》(2012),neur IPS
https://papers . nips . cc/paper/2012/file/c 399862d 3 b 9 d6b 76 c 8436 e 924 a 68 c 45 b-paper . pdf
[4]苏尼思·谢蒂。"为什么 TensorFlow 总是高居机器学习和人工智能工具调查榜首"
https://hub . packtpub . com/tensor flow-always-tops-machine-learning-artificial-intelligence-tool-surveys/
[5]叶达鑫·瓦朗冈卡。十大深度学习框架
https://hub.packtpub.com/top-10-deep-learning-frameworks/
[6]贺拉斯何。"2019 年机器学习框架状况"
https://The gradient . pub/State-of-ml-Frameworks-2019-py torch-domains-research-tensor flow-domains-industry/
[7] TensorFlow 团队。" TensorFlow 2.0 现已上市!"
https://blog . tensor flow . org/2019/09/tensor flow-20-is-now-available . html
Trino 查询引擎入门
数据库ˌ资料库
关于如何安装 Trino、将其连接到 SQL server 以及编写简单 Python 客户端的分步教程。
赫耳墨斯·里维拉在 Unsplash 上拍摄的照片
Trino 是一款用于大数据分析的分布式开源 SQL 查询引擎。它可以运行分布式和并行查询,因此速度非常快。Trino 可以在内部和云环境中运行,如 Google、Azure 和 Amazon。
在本教程中,我描述了如何在本地安装 Trino,将其连接到 MySQL 数据库(由 XAMPP 提供),并连接一个简单的 Python 客户端。Trino 官方文档可在此链接找到。
1 配置 Trino 搜索引擎
Trino 通常由一群机器组成,有一个协调者和许多工人。所有工作人员都连接到协调器,协调器为客户机提供访问点。
在安装 Trino 之前,我应该确保运行 64 位机器。然后我可以继续安装 Python 和 Java:
- Python ≥ 2.6
- JDK,由 Azul Zulu 发行(推荐)
一旦我安装了前面的需求,我就可以下载 Trino 搜索引擎并将其解包。在使用 Trino 之前,我必须对它进行配置。
在解压后的目录中,我创建了另一个名为etc的目录,它将包含所有的配置文件。有三个主要的配置文件:
config.properties—Trino 服务器的配置文件jvm.config—用于启动 Java 虚拟机的命令行选项node.properties—每个节点的具体配置。
etc文件夹还应该包含另一个名为catalog的文件夹,其中包含所有数据源(即连接器)的列表。所有可用连接器的列表可在此链接获得。
1.1 配置属性
服务器的最低配置如下:
coordinator=true
node-scheduler.include-coordinator=true
http-server.http.port=8080
query.max-memory=5GB
query.max-memory-per-node=1GB
query.max-total-memory-per-node=2GB
discovery.uri=http://127.0.0.1:8080
在前面的例子中,参数node-scheduler.include-coordinator=true指定同一个主机既充当协调者又充当工作者。如果我想为协调者和工作者使用不同的机器,我不会使用前面的参数,而是为协调者使用coordinator=true,为每个工作者使用coordinator=false。
在前面的示例中,我还指定了发现 URI,即 HTTP 服务器可用的地址。在我的例子中,我利用了本地地址。
其他参数指定最大内存使用量。
1.2 jvm .配置
该文件包含用于运行 Java 虚拟机的命令行选项。此文件的一个很好的例子可能是下面这个:
-server
-Xmx16G
-XX:-UseBiasedLocking
-XX:+UseG1GC
-XX:G1HeapRegionSize=32M
-XX:+ExplicitGCInvokesConcurrent
-XX:+ExitOnOutOfMemoryError
-XX:+HeapDumpOnOutOfMemoryError
-XX:-OmitStackTraceInFastThrow
-XX:ReservedCodeCacheSize=512M
-XX:PerMethodRecompilationCutoff=10000
-XX:PerBytecodeRecompilationCutoff=10000
-Djdk.attach.allowAttachSelf=true
-Djdk.nio.maxCachedBufferSize=2000000
1.3 节点.属性
该文件包含每个节点的基本配置,包括机器集群的名称(node.environment)、存储数据的目录(node.data)和节点 id ( node.id)
node.environment=name_of_cluster
node.id=ffffffff-ffff-ffff-ffff-ffffffffffff
node.data-dir=/path/to/data/folder
1.4 目录
该文件夹包含 Trino 开发的所有连接器。连接器包含连接外部存储引擎所需的所有信息,比如 MySQL 服务器、MongoDB、Elastic Search 等等。每个连接器应该与一个单独的配置文件相关联,名为connector_name.properties(例如mysql.properties)。有关每个连接器的详细信息,请查看文档。
在本文中,我配置了一个 MySQL 连接器。我创建了一个名为mysql.properties的文件,其最小配置如下:
connector.name=mysql
connection-url=jdbc:mysql://localhost:3306
connection-user=root
connection-password=my_password
在我的例子中,我利用了 XAMPP 提供的 MariaDB 服务器。效果非常好!😄
2 运行 Trino 搜索引擎
现在,一切都准备好运行了。假设 MySQL 服务器已经在运行,Trino 服务器可以以两种方式启动,后台,作为一个单独的守护进程,或者前台。
要在后台运行服务器,请进入 trino 主目录并运行以下命令:
bin/launcher start
要在前台运行服务器,请从 trino 主目录运行以下命令:
bin/launcher run
这种最后启动方式的好处是,如果有一些问题,我可以很容易地识别出来。出于这个原因,我更喜欢在前台启动服务器。
现在可以查询服务器了。
我可以从浏览器访问一些服务器信息,地址如下:
[http://127.0.0.1:8080](http://127.0.0.1:8080/ui/login.html)
浏览器显示以下登录页面:
作者图片
我可以输入在mysql.properties文件中定义的用户名和密码。
然后,我应该能够看到下面的控制台,它显示了集群概述,以及关于查询和工作者的信息:
作者图片
3 Python 客户端
可以编写不同的 Trino 客户端来查询 Trino DB,如官方文档中所述。在本教程中,我将描述如何为 Trino 实现一个简单的 Python 客户端。
我利用了trino包,它可以如下安装:
pip3 install trino
这个包的官方文档可以在这个链接找到。
客户端的代码非常简单:
首先,我通过trino.dbapi.connect()函数定义连接参数,其中我还指定了要使用的目录(在我的例子中是mysql)。然后,我连接并执行一个简单的查询,它显示了我的 SQL server 中包含的所有表。
作为要传递给cur.execute()函数的字符串,我可以编写任何 SQL 查询。
运行脚本后,我可以在浏览器中返回 Trino 控制台。如果我单击底部菜单的 Finished 按钮,我会得到一些关于上一个查询的信息:
作者图片
摘要
在本文中,我描述了如何配置和运行 Trino 搜索引擎的基本配置,以及连接到它的简单 Python 脚本。
Trino 的主要优势是可以运行分布式查询,从而使得非常快速地查询大数据成为可能。
如果你已经走了这么远来阅读,对我来说今天已经很多了。谢谢!你可以在这篇文章里读到更多关于我的内容。
参考
相关文章
https://alod83.medium.com/how-to-represent-and-query-hierarchical-data-in-sql-69b6b77577e8
奖金
您知道 Trino 还允许运行机器学习功能,包括支持向量机(SVM)分类器和回归器来解决监督问题吗?
如果你对这个话题感兴趣,可以在这里阅读。
Weaviate Python 库入门
关于新的基于机器学习的矢量搜索引擎的完整教程
0.新的更新。
- 什么是 Weaviate?
- 可以用在哪里?
- 有什么优势?
- 什么是 Weaviate Python 客户端?
- 如何在 Weaviate 集群中使用 Weaviate Python 客户端?
- 5.0.创建一个弱实例/集群。
- 5.1.连接到集群。
- 5.2.获取数据并进行分析。
- 5.3.创建适当的数据类型。
- 5.4.加载数据。
- 5.5.查询数据。
0.新的更新。
Weaviate-client 版本 3.0.0 带来了一些新的变化,查看官方文档了解所有信息这里。
整篇文章现在包含了旧版本和新版本的例子(只有那些被改变的)。
1.什么是 Weaviate?
Weaviate 是一个开源、云原生、模块化的实时矢量搜索引擎。它是为扩展你的机器学习模型而构建的。因为 Weaviate 是模块化的,所以你可以将其用于任何进行数据编码的机器学习模型。Weaviate 带有可选的文本、图像和其他媒体类型的模块,可以根据您的任务和数据进行选择。此外,根据数据的种类,可以使用多个模块。更多信息点击这里。
在本文中,我们将使用文本模块来了解 Weaviate 最重要的功能和能力。文本模块,也称为 text2vec-contextionary ,捕捉文本对象的语义,并将其置于一个概念超空间中。这允许进行语义搜索,与其他搜索引擎的“单词匹配搜索”形成对比。
欲了解更多关于 Weaviate 和 SeMI 技术公司的信息,请访问官方网站。
2.可以用在哪里?
目前,Weaviate 用于以下情况:
- 语义搜索,
- 相似性搜索,
- 图片搜索,
- 电力推荐引擎,
- 电商搜索,
- 网络安全威胁分析,
- 自动化数据协调,
- 异常检测,
- ERP 系统中的数据分类,
以及更多的案例。
3.有什么优势?
要了解什么是我们的优势,你应该问自己这些问题:
- 你目前的搜索引擎给你的搜索结果质量够好吗?
- 让你的机器学习模型规模化是不是工作量太大了?
- 您是否需要快速且近乎实时地对大型数据集进行分类?
- 你需要将你的机器学习模型扩展到生产规模吗?
我们可以解决所有这些问题。
4.什么是 Weaviate Python 客户端?
Weaviate Python 客户端是一个 Python 包,允许您与 Weaviate 实例进行连接和交互。python 客户端不是一个 Weaviate 实例,但是你可以用它在 Weaviate 云服务上创建一个。它提供了用于导入数据、创建模式、进行分类、查询数据的 API 我们将浏览其中的大部分,并解释如何以及何时可以使用它们。
这个包被发布到 PyPI ( 链接)。另外,PyPI 上有一个 CLI 工具(链接)。
5.如何在一个脆弱的集群中使用 python-client?
在这一节中,我们将经历创建一个 Weaviate 实例的过程,连接到它并探索一些功能。
(jupyter-notebook 可以在这里找到。)
5.0.创建一个弱实例/集群。
创建一个 Weaviate 实例有多种方式。这可以通过使用一个docker-compose.yaml文件来完成,该文件可以在这里生成。对于此选项,您必须安装docker和docker-compose,并在您的驱动器上留出空间。
另一个选择是在 Weaviate 云服务控制台 (WCS 控制台)上创建一个帐户,并在那里创建一个集群。有不同的集群选项可供选择。如果您没有帐户,请创建一个。
在本教程中,我们将直接从 python 在 WCS 上创建一个集群(您只需要您的 WCS 凭证)。
我们现在要做的第一件事是安装 Weaviate Python 客户端。这可以使用 pip 命令来完成。
>>> import sys
>>> !{sys.executable} -m pip install weaviate-client==2.5.0
为版本 3.0.0 更新。
>>> import sys
>>> !{sys.executable} -m pip install weaviate-client==3.0.0
现在,让我们导入软件包,并在 WCS 上创建一个集群。
>>> from getpass import getpass # hide password
>>> import weaviate # to communicate to the Weaviate instance
>>> from weaviate.tools import WCS
将更新为 3.0.0 版本。
>>> from getpass import getpass # hide password
>>> import weaviate # to communicate to the Weaviate instance
>>> from weaviate.wcs import WCS
为了对 WCS 或 Weaviate 实例进行身份验证(如果 Weaviate 实例启用了身份验证),我们需要创建一个身份验证对象。目前,它支持两种类型的认证凭证:
- 密码凭证:
weaviate.auth.AuthClientPassword(username='WCS_ACCOUNT_EMAIL', password='WCS_ACCOUNT_PASSWORD') - 令牌凭证
weaviate.auth.AuthClientCredentials(client_secret=YOUR_SECRET_TOKEN)
对于 WCS,我们将使用密码凭据。
>>> my_credentials = weaviate.auth.AuthClientPassword(username=input("User name: "), password=getpass('Password: '))User name: WCS_ACCOUNT_EMAIL
Password: ········
my_credentials对象包含你的凭证,所以小心不要公开它。
>>> my_wcs = WCS(my_credentials)
现在我们已经连接到 WCS,我们可以使用create、delete、get_clusters、get_cluster_config和is_ready方法检查集群的状态。
下面是create方法的原型:
my_wcs.create(cluster_name:str=None,
    cluster_type:str='sandbox',
    config:dict=None,
    wait_for_completion:bool=True) -> str
返回值是创建的集群的 URL。
注意: WCS 名称必须是全局唯一的,因为它们用于创建公共 URL,以便以后访问实例。因此,请确保为 *cluster_name* 选择一个唯一的名称。
如果你想检查笔记本中任何方法的原型和 docstring,运行这个命令: *object.method?* 。您也可以使用 *help()* 功能。
例如:WCS.is_ready?或my_wcs.is_ready?或help(WCS.is_ready)。
>>> cluster_name = 'my-first-weaviate-instance'
>>> weaviate_url = my_wcs.create(cluster_name=cluster_name)
>>> weaviate_url100%|██████████| 100.0/100 [00:56<00:00,  1.78it/s]
'https://my-first-weaviate-instance.semi.network'>>> my_wcs.is_ready(cluster_name)True
5.1.连接到集群。
现在我们可以用Client对象连接到创建的 weaviate 实例。构造函数如下所示:
weaviate.Client(
    url:str,
    auth_client_secret:weaviate.auth.AuthCredentials=None,
    timeout_config:Union[Tuple[int, int], NoneType]=None,
)
构造函数只有一个必需的参数url,和两个可选的参数:auth_client_secret——如果 weaviate 实例启用了身份验证,则使用timeout_config——设置 REST 超时配置,并且是一个元组(重试次数,超时秒数)。有关参数的更多信息,请查看 docstring。
>>> client = weaviate.Client(weaviate_url)
现在我们连接到了 Weavite,但这并不意味着它已经设置好了。它可能仍会在后台执行一些设置过程。我们可以通过调用.is_live方法来检查 Weaviate 实例的健康状况,并通过调用.is_ready来检查 Weaviate 是否为请求做好了准备。
>>> client.is_ready()True
5.2.获取数据并进行分析。
我们设置了 Weaviate 实例,连接到它并为请求做好准备,现在我们可以后退一步,获取一些数据并对其进行分析。
这一步,对于所有的机器学习模型来说,是最重要的一步。在这里,我们必须决定什么是相关的,什么是重要的,以及使用什么数据结构/类型。
在这个例子中,我们将使用新闻文章来构建数据。为此,我们需要newspaper3k包。
>>> !{sys.executable} -m pip install newspaper3k
注意:如果没有下载任何文章,可能是因为没有下载 nltk punkt 工具。要修复它,请运行下面的单元格。
>>> import nltk *# it is a dependency of newspaper3k*
>>> nltk.download('punkt')
感谢 GitHub 用户@gosha1128 在下面的
get_articles_from_newspaper函数中发现了这个被抑制在try/except块中的 bug。
>>> import newspaper
>>> import uuid
>>> import json
>>> from tqdm import tqdm

>>> def get_articles_from_newspaper(
...         news_url: str,
...         max_articles: int=100
...     ) -> None:
...     """
...     Download and save newspaper articles as weaviate schemas.
...     Parameters
...     ----------
...     newspaper_url : str
...         Newspaper title.
...     """
...
...     objects = []
...
...     # Build the actual newspaper
...     news_builder = newspaper.build(news_url, memoize_articles=False)
...
...     if max_articles > news_builder.size():
...         max_articles = news_builder.size()
...     pbar = tqdm(total=max_articles)
...     pbar.set_description(f"{news_url}")
...     i = 0
...     while len(objects) < max_articles and i < news_builder.size():
...         article = news_builder.articles[i]
...         try:
...             article.download()
...             article.parse()
...             article.nlp()

...             if (article.title != '' and \
...                 article.title is not None and \
...                 article.summary != '' and \
...                 article.summary is not None and\
...                 article.authors):
...
...                 # create an UUID for the article using its URL
...                 article_id = uuid.uuid3(uuid.NAMESPACE_DNS, article.url)
...
...                 # create the object
...                 objects.append({
...                     'id': str(article_id),
...                     'title': article.title,
...                     'summary': article.summary,
...                     'authors': article.authors
...                 })
...
...                 pbar.update(1)
...
...         except:
...             # something went wrong with getting the article, ignore it
...             pass
...         i += 1
...     pbar.close()
...     return objects>>> data = []
>>> data += get_articles_from_newspaper('https://www.theguardian.com/international')
>>> data += get_articles_from_newspaper('http://cnn.com')https://www.theguardian.com/international: 100%|██████████| 100/100 [00:34<00:00,  2.90it/s]
http://cnn.com: 100%|██████████| 100/100 [02:11<00:00,  1.32s/it]
5.3.创建适当的数据类型。
在函数get_articles_from_newspaper中,我们保留文章的标题、摘要和作者。我们还为每篇文章计算一个 UUID(通用唯一标识符)。所有这些字段都可以在上面的单元格中看到。
有了这些信息,我们就可以定义一个模式,即每种对象类型的数据结构以及它们之间的关系。该模式是一个嵌套字典。
所以让我们创建Article类模式。我们知道文章有 标题,摘要有作者有 。
>>> article_class_schema = {
...     # name of the class
...     "class": "Article",
...     # a description of what this class represents
...     "description": "An Article class to store the article summary and its authors",
...     # class properties
...     "properties": [
...         {
...             "name": "title",
...             "dataType": ["string"],
...             "description": "The title of the article",
...         },
...         {
...             "name": "summary",
...             "dataType": ["text"],
...             "description": "The summary of the article",
...         },
...         {
...             "name": "hasAuthors",
...             "dataType": ["Author"],
...             "description": "The authors this article has",
...         }
...     ]
... }
在上面的类模式中,我们创建了一个名为Article的类,描述为An Article class to store the article summary and its authors。描述是为了向用户解释这个类是关于什么的。
我们还定义了 3 个属性:title -文章的标题,类型为string(区分大小写),summary -文章的摘要,数据类型为text(不区分大小写),hasAuthor -文章的作者,数据类型为Author。Author不是原始数据类型,它是我们应该定义的另一个类。原始数据类型的列表可以在这里找到。
注 1: 属性应该总是 cameCase 格式,并且以小写字母开头。
注 2: 属性数据类型始终是列表,因为它可以接受多种数据类型。
将另一个类指定为数据类型称为交叉引用。这样,您可以将数据对象链接在它们之间,并创建一个关系图。
现在让我们以同样的方式创建Author类模式,但是使用属性name和wroteArticles。
>>> author_class_schema = {
...     "class": "Author",
...     "description": "An Author class to store the author information",
...     "properties": [
...         {
...             "name": "name",
...             "dataType": ["string"],
...             "description": "The name of the author",
...         },
...         {
...             "name": "wroteArticles",
...             "dataType": ["Article"],
...             "description": "The articles of the author",
...         }
...     ]
... }
既然我们决定了数据结构,我们可以告诉 Weaviate 我们将导入什么类型的数据。这可以通过访问客户端的schema属性来完成。
可以通过两种不同的方式创建模式:
- 使用
.create_class()方法,这个选项每次调用只创建一个类。 - 使用
.create()方法,这个选项一次创建多个类(如果您有完整的模式,这很有用)
我们还可以用.contains()方法检查模式是否存在,或者特定的类模式是否存在。
更多关于模式方法的信息,点击这里。
因为我们分别定义了每个类,所以我们应该使用.create_class()方法。
client.schema.create_class(schema_class:Union[dict, str]) -> None
它还接受指向类定义文件的文件路径或 URL。
>>> client.schema.create_class(article_class_schema)---------------------------------------------------------------------------

UnexpectedStatusCodeException             Traceback (most recent call last)

<ipython-input-12-6d56a74d9293> in <module>
----> 1 client.schema.create_class(article_class_schema)

~/miniconda3/envs/test/lib/python3.6/site-packages/weaviate/schema/crud_schema.py in create_class(self, schema_class)
    138         check_class(loaded_schema_class)
    139         self._create_class_with_premitives(loaded_schema_class)
--> 140         self._create_complex_properties_from_class(loaded_schema_class)
    141
    142     def delete_class(self, class_name: str) -> None:

~/miniconda3/envs/test/lib/python3.6/site-packages/weaviate/schema/crud_schema.py in _create_complex_properties_from_class(self, schema_class)
    352                 raise type(conn_err)(message).with_traceback(sys.exc_info()[2])
    353             if response.status_code != 200:
--> 354                 raise UnexpectedStatusCodeException("Add properties to classes", response)
    355
    356     def _create_complex_properties_from_classes(self, schema_classes_list: list) -> None:

UnexpectedStatusCodeException: Add properties to classes! Unexpected status code: 422, with response body: {'error': [{'message': "Data type of property 'hasAuthors' is invalid; SingleRef class name 'Author' does not exist"}]}
正如我们所看到的,我们不能创建引用不存在的数据类型的 class 属性。这并不意味着根本没有创建类Article。让我们从 weaviate 获取模式,看看创建了什么。
>>> # helper function
>>> def prettify(json_dict):
...     print(json.dumps(json_dict, indent=2))>>> prettify(client.schema.get()){
  "classes": [
    {
      "class": "Article",
      "description": "An Article class to store the article summary and its authors",
      "invertedIndexConfig": {
        "cleanupIntervalSeconds": 60
      },
      "properties": [
        {
          "dataType": [
            "string"
          ],
          "description": "The title of the article",
          "name": "title"
        },
        {
          "dataType": [
            "text"
          ],
          "description": "The summary of the article",
          "name": "summary"
        }
      ],
      "vectorIndexConfig": {
        "cleanupIntervalSeconds": 300,
        "maxConnections": 64,
        "efConstruction": 128,
        "vectorCacheMaxObjects": 500000
      },
      "vectorIndexType": "hnsw",
      "vectorizer": "text2vec-contextionary"
    }
  ]
}
我们没有指定的配置不是强制性的,而是被设置为默认值。
正如我们所看到的,只有hasAuthor属性没有被创建。所以让我们创建Author类。
>>> client.schema.create_class(author_class_schema)
>>> prettify(client.schema.get()){
  "classes": [
    {
      "class": "Article",
      "description": "An Article class to store the article summary and its authors",
      "invertedIndexConfig": {
        "cleanupIntervalSeconds": 60
      },
      "properties": [
        {
          "dataType": [
            "string"
          ],
          "description": "The title of the article",
          "name": "title"
        },
        {
          "dataType": [
            "text"
          ],
          "description": "The summary of the article",
          "name": "summary"
        }
      ],
      "vectorIndexConfig": {
        "cleanupIntervalSeconds": 300,
        "maxConnections": 64,
        "efConstruction": 128,
        "vectorCacheMaxObjects": 500000
      },
      "vectorIndexType": "hnsw",
      "vectorizer": "text2vec-contextionary"
    },
    {
      "class": "Author",
      "description": "An Author class to store the author information",
      "invertedIndexConfig": {
        "cleanupIntervalSeconds": 60
      },
      "properties": [
        {
          "dataType": [
            "string"
          ],
          "description": "The name of the author",
          "name": "name"
        },
        {
          "dataType": [
            "Article"
          ],
          "description": "The articles of the author",
          "name": "wroteArticles"
        }
      ],
      "vectorIndexConfig": {
        "cleanupIntervalSeconds": 300,
        "maxConnections": 64,
        "efConstruction": 128,
        "vectorCacheMaxObjects": 500000
      },
      "vectorIndexType": "hnsw",
      "vectorizer": "text2vec-contextionary"
    }
  ]
}
现在我们已经创建了两个类,但是我们仍然没有hasAuthor属性。不用担心,它可以在任何时候创建,使用模式的属性property和方法create。
client.schema.property.create(schema_class_name:str, schema_property:dict) -> None>>> client.schema.property.create('Article', article_class_schema['properties'][2])
现在让我们得到模式,看看它是否是我们所期望的。
>>> prettify(client.schema.get()){
  "classes": [
    {
      "class": "Article",
      "description": "An Article class to store the article summary and its authors",
      "invertedIndexConfig": {
        "cleanupIntervalSeconds": 60
      },
      "properties": [
        {
          "dataType": [
            "string"
          ],
          "description": "The title of the article",
          "name": "title"
        },
        {
          "dataType": [
            "text"
          ],
          "description": "The summary of the article",
          "name": "summary"
        },
        {
          "dataType": [
            "Author"
          ],
          "description": "The authors this article has",
          "name": "hasAuthors"
        }
      ],
      "vectorIndexConfig": {
        "cleanupIntervalSeconds": 300,
        "maxConnections": 64,
        "efConstruction": 128,
        "vectorCacheMaxObjects": 500000
      },
      "vectorIndexType": "hnsw",
      "vectorizer": "text2vec-contextionary"
    },
    {
      "class": "Author",
      "description": "An Author class to store the author information",
      "invertedIndexConfig": {
        "cleanupIntervalSeconds": 60
      },
      "properties": [
        {
          "dataType": [
            "string"
          ],
          "description": "The name of the author",
          "name": "name"
        },
        {
          "dataType": [
            "Article"
          ],
          "description": "The articles of the author",
          "name": "wroteArticles"
        }
      ],
      "vectorIndexConfig": {
        "cleanupIntervalSeconds": 300,
        "maxConnections": 64,
        "efConstruction": 128,
        "vectorCacheMaxObjects": 500000
      },
      "vectorIndexType": "hnsw",
      "vectorizer": "text2vec-contextionary"
    }
  ]
}
一切都如我们所愿。
如果您不想考虑哪个类是在何时创建的,以及哪些属性可能失败或不失败(由于尚不存在的类),有一个解决方案。解决方案是用create方法创建整个模式。所以让我们从 weaviate 中删除这个模式,看看它是如何工作的。
>>> schema = client.schema.get() # save schema
>>> client.schema.delete_all() # delete all classes
>>> prettify(client.schema.get()){
  "classes": []
}
注意,如果我们删除一个模式或一个类,我们会删除与之相关的所有对象。
现在让我们从保存的模式中创建它。
>>> client.schema.create(schema)
>>> prettify(client.schema.get()){
  "classes": [
    {
      "class": "Article",
      "description": "An Article class to store the article summary and its authors",
      "invertedIndexConfig": {
        "cleanupIntervalSeconds": 60
      },
      "properties": [
        {
          "dataType": [
            "string"
          ],
          "description": "The title of the article",
          "name": "title"
        },
        {
          "dataType": [
            "text"
          ],
          "description": "The summary of the article",
          "name": "summary"
        },
        {
          "dataType": [
            "Author"
          ],
          "description": "The authors this article has",
          "name": "hasAuthors"
        }
      ],
      "vectorIndexConfig": {
        "cleanupIntervalSeconds": 300,
        "maxConnections": 64,
        "efConstruction": 128,
        "vectorCacheMaxObjects": 500000
      },
      "vectorIndexType": "hnsw",
      "vectorizer": "text2vec-contextionary"
    },
    {
      "class": "Author",
      "description": "An Author class to store the author information",
      "invertedIndexConfig": {
        "cleanupIntervalSeconds": 60
      },
      "properties": [
        {
          "dataType": [
            "string"
          ],
          "description": "The name of the author",
          "name": "name"
        },
        {
          "dataType": [
            "Article"
          ],
          "description": "The articles of the author",
          "name": "wroteArticles"
        }
      ],
      "vectorIndexConfig": {
        "cleanupIntervalSeconds": 300,
        "maxConnections": 64,
        "efConstruction": 128,
        "vectorCacheMaxObjects": 500000
      },
      "vectorIndexType": "hnsw",
      "vectorizer": "text2vec-contextionary"
    }
  ]
}
这看起来和我们一个类一个类一个属性地创建的模式一模一样。这样,我们现在可以将模式保存在一个文件中,并在下一个会话中通过提供文件路径直接导入它。
# save schema to file
with open('schema.json', 'w') as outfile:
    json.dump(schema, outfile)
# remove current schema from Weaviate, removes all the data too
client.schema.delete_all()
# import schema using file path
client.schema.create('schema.json')
# print schema
print(json.dumps(client.schema.get(), indent=2))
5.4.加载数据。
现在我们已经准备好了数据,Weaviate 也知道我们拥有什么样的数据,我们可以将Articles和Authors添加到 Weaviate 实例中。
可以通过三种不同的方式导入数据。
- 逐个对象地迭代添加对象。这可以使用客户端的
data_object对象属性来完成。 - 分批。这可以通过创建一个适当的批处理请求对象并使用客户机的
batch对象属性提交它来完成。(仅在weaviate-client版本< 3.0.0 中。 - 使用来自
weaviate.tools模块的Batcher对象。(仅在weaviate-client版本< 3.0.0 中出现。) - 新的
Batch类在 weaviate-client 版本 3.0.0 中引入。
我们将看到它们的实际应用,但首先让我们强调一下它们之间的区别。
- 备选方案 1。是添加数据对象和创建引用的最安全的方法,因为它在创建对象之前进行对象验证,而批量导入数据会跳过大部分验证以提高速度。这个选项要求每个对象有一个 REST 请求,因此比成批导入数据要慢。如果您不确定您的数据是否有效,建议使用此选项。
- 选项 2。如上所述,跳过了大部分数据验证,每批只需要一个 REST 请求。对于这种方法,您只需向一个批处理请求中添加尽可能多的数据(有两种类型:
ReferenceBatchRequest和ObjectsBatchRequest),然后使用客户端的batch对象属性提交它。此选项要求您首先导入数据对象,然后导入引用(确保引用中使用的对象在创建引用之前已经导入)。(仅在weaviate-client版本< 3.0.0 中。) - 选项 3。依赖于来自 2 的批处理请求。但是对于一个
Batcher,你不需要提交任何批量请求,当它满了的时候,它会自动为你做。(只出现在weaviate-client版本< 3.0.0 中。) - 选项 4: 新的
Batch**类在 weaviate-client 版本 3.0.0 中引入。**新的Batch对象不需要来自 2 的BatchRequests。而是在内部使用。新类还支持 3 种不同的批量加载数据的情况:a)手动——用户可以完全控制何时以及如何添加和创建批量;b)满时自动创建批次;c)使用动态批处理自动创建批次,即每次创建批次时调整批次大小,以避免任何Timeout错误。
5.4.1 使用data_object属性加载数据
在这种情况下,我们只取一篇文章(data[0])并使用data_object属性将其导入 Weaviate。
方法是首先创建对象,然后创建链接它们的引用。
在笔记本中运行client.data_object.create?以获得关于该方法的更多信息。或help(client.data_object.create)处于空转状态。
每个数据对象都应该具有模式中定义的相同格式。
>>> prettify(data[0]){
  "id": "df2a2d1c-9c87-3b4b-9df3-d7aed6bb6a27",
  "title": "Coronavirus live news: Pfizer says jab 100% effective in 12- to 15-year-olds; Macron could announce lockdown tonight",
  "summary": "11:08Surge testing is being deployed in Bolton, Greater Manchester after one case of the South African variant of coronavirus has been identified.\nDr Helen Lowey, Bolton\u2019s director of public health, said that \u201cthe risk of any onward spread is low\u201d and there was no evidence that the variant caused more severe illness.\nPublic Health England identified the case in the area of Wingates Industrial Estate.\nDr Matthieu Pegorie from Public Health England North West said that there was no link to international travel, therefore suggesting that there are some cases in the community.\nThe Department of Health says that enhanced contact tracing will be deployed where a positive case of a variant is found.",
  "authors": [
    "Helen Sullivan",
    "Yohannes Lowe",
    "Martin Belam",
    "Maya Wolfe-Robinson",
    "Melissa Davey",
    "Jessica Glenza",
    "Jon Henley",
    "Peter Beaumont"
  ]
}>>> article_object = {
...     'title': data[0]['title'],
...     'summary': data[0]['summary'].replace('\n', '') # remove newline character
...     # we leave out the `hasAuthors` because it is a reference and will be created after we create the Authors
... }
>>> article_id = data[0]['id']

>>> # validated the object
>>> result = client.data_object.validate(
...     data_object=article_object,
...     class_name='Article',
...     uuid=article_id
... )

>>> prettify(result){
  "error": null,
  "valid": true
}
对象通过了验证测试,现在可以安全地创建/导入它了。
>>> # create the object
>>> client.data_object.create(
...     data_object=article_object,
...     class_name='Article',
...     uuid=article_id # if not specified, weaviate is going to create an UUID for you.
...)'df2a2d1c-9c87-3b4b-9df3-d7aed6bb6a27'
client.data_object.create返回对象的 UUID,如果你指定了一个,它也将被返回。如果你没有指定,Weaviate 会为你生成一个并返回。
恭喜我们已经添加了第一个 weaviate 对象!!!
现在我们实际上可以使用get_by_id或get方法通过 UUID 从 Weaviate 中“获取”这个对象。(get未指定和 UUID 返回前 100 个对象)
>>> prettify(client.data_object.get(article_id, with_vector=False)){
  "additional": {},
  "class": "Article",
  "creationTimeUnix": 1617191563170,
  "id": "df2a2d1c-9c87-3b4b-9df3-d7aed6bb6a27",
  "lastUpdateTimeUnix": 1617191563170,
  "properties": {
    "summary": "11:08Surge testing is being deployed in Bolton, Greater Manchester after one case of the South African variant of coronavirus has been identified.Dr Helen Lowey, Bolton\u2019s director of public health, said that \u201cthe risk of any onward spread is low\u201d and there was no evidence that the variant caused more severe illness.Public Health England identified the case in the area of Wingates Industrial Estate.Dr Matthieu Pegorie from Public Health England North West said that there was no link to international travel, therefore suggesting that there are some cases in the community.The Department of Health says that enhanced contact tracing will be deployed where a positive case of a variant is found.",
    "title": "Coronavirus live news: Pfizer says jab 100% effective in 12- to 15-year-olds; Macron could announce lockdown tonight"
  },
  "vectorWeights": null
}
现在让我们创建作者以及Article和Authors之间的交叉引用。
添加参考的方式相同,但添加参考时使用client.data_object.reference.add方法。
>>> # keep track of the authors already imported/created and their respective UUID
>>> # because same author can write more than one paper.
>>> created_authors = {}

>>> for author in data[0]['authors']:
...     # create Author
...     author_object = {
...         'name': author,
...         # we leave out the `wroteArticles` because it is a reference and will be created after we create the Author
...     }
...     author_id = client.data_object.create(
...         data_object=author_object,
...         class_name='Author'
...     )
...
...     # add author to the created_authors
...     created_authors[author] = author_id
...
...     # add references
...     ## Author -> Article
...     client.data_object.reference.add(
...         from_uuid=author_id,
...         from_property_name='wroteArticles',
...         to_uuid=article_id
...     )
...     ## Article -> Author
...     client.data_object.reference.add(
...         from_uuid=article_id,
...         from_property_name='hasAuthors',
...         to_uuid=author_id
...     )
在上面的单元格中,我们遍历了文章的所有作者。对于每次迭代,我们首先创建Author,然后添加引用:从Author到Article的引用——通过Author的wroteArticles属性链接,以及从Article到Author的引用——通过Article的hasAuthors属性。
请注意,双向引用不是必需的。
现在让我们得到这个物体,并看看它。
>>> prettify(client.data_object.get(article_id, with_vector=False)){
  "additional": {},
  "class": "Article",
  "creationTimeUnix": 1617191563170,
  "id": "df2a2d1c-9c87-3b4b-9df3-d7aed6bb6a27",
  "lastUpdateTimeUnix": 1617191563170,
  "properties": {
    "hasAuthors": [
      {
        "beacon": "weaviate://localhost/1d0d3242-1fc2-4bba-adbe-ab9ef9a97dfe",
        "href": "/v1/objects/1d0d3242-1fc2-4bba-adbe-ab9ef9a97dfe"
      },
      {
        "beacon": "weaviate://localhost/c1c8afce-adb6-4b3c-bbe0-2414d55b0c8e",
        "href": "/v1/objects/c1c8afce-adb6-4b3c-bbe0-2414d55b0c8e"
      },
      {
        "beacon": "weaviate://localhost/b851f6fc-a02b-4a63-9b53-c3a8764c82c1",
        "href": "/v1/objects/b851f6fc-a02b-4a63-9b53-c3a8764c82c1"
      },
      {
        "beacon": "weaviate://localhost/e6b6c991-5d7a-447f-89c8-e6e01730f88f",
        "href": "/v1/objects/e6b6c991-5d7a-447f-89c8-e6e01730f88f"
      },
      {
        "beacon": "weaviate://localhost/d03f9353-d4fc-465d-babe-f116a29ccaf5",
        "href": "/v1/objects/d03f9353-d4fc-465d-babe-f116a29ccaf5"
      },
      {
        "beacon": "weaviate://localhost/8ab84df5-c92b-49ac-95dd-bf65f53a38cc",
        "href": "/v1/objects/8ab84df5-c92b-49ac-95dd-bf65f53a38cc"
      },
      {
        "beacon": "weaviate://localhost/e667d7c9-0c9b-48fe-b671-864cbfc84962",
        "href": "/v1/objects/e667d7c9-0c9b-48fe-b671-864cbfc84962"
      },
      {
        "beacon": "weaviate://localhost/9d094f60-3f58-46dc-b7fd-40495be2dd69",
        "href": "/v1/objects/9d094f60-3f58-46dc-b7fd-40495be2dd69"
      }
    ],
    "summary": "11:08Surge testing is being deployed in Bolton, Greater Manchester after one case of the South African variant of coronavirus has been identified.Dr Helen Lowey, Bolton\u2019s director of public health, said that \u201cthe risk of any onward spread is low\u201d and there was no evidence that the variant caused more severe illness.Public Health England identified the case in the area of Wingates Industrial Estate.Dr Matthieu Pegorie from Public Health England North West said that there was no link to international travel, therefore suggesting that there are some cases in the community.The Department of Health says that enhanced contact tracing will be deployed where a positive case of a variant is found.",
    "title": "Coronavirus live news: Pfizer says jab 100% effective in 12- to 15-year-olds; Macron could announce lockdown tonight"
  },
  "vectorWeights": null
}
如我们所见,我们将参考设置为beacon和href。我们无法通过从 weaviate 获取对象来查看数据。我们可以通过查询数据来完成(参见 5.5 节查询数据)。)或通过 UUID(或beacon,或href)获取对象。
>> from weaviate.util import get_valid_uuid # extract UUID from URL (beacon or href)

>>> # extract authors references, lets take only the first one as an example (the article might have only one)
>>> author = client.data_object.get(article_id, with_vector=False)['properties']['hasAuthors'][0]

>>> # get and print data object by providing the 'beacon'
>>> author_uuid = get_valid_uuid(author['beacon']) # can be 'href' too
>>> prettify(client.data_object.get(author_uuid, with_vector=False)){
  "additional": {},
  "class": "Author",
  "creationTimeUnix": 1617191569894,
  "id": "1d0d3242-1fc2-4bba-adbe-ab9ef9a97dfe",
  "lastUpdateTimeUnix": 1617191569894,
  "properties": {
    "name": "Helen Sullivan",
    "wroteArticles": [
      {
        "beacon": "weaviate://localhost/df2a2d1c-9c87-3b4b-9df3-d7aed6bb6a27",
        "href": "/v1/objects/df2a2d1c-9c87-3b4b-9df3-d7aed6bb6a27"
      }
    ]
  },
  "vectorWeights": null
}
到目前为止,还不错(…那又怎样!)
数据对象(client.data_object)的方法更多:.delete、.exists、.replace、.update。
也有一些引用的方法(client.data_object.reference ): .add、.delete、.update。
5.4.2 使用批处理加载数据
(只在 weaviate-client 版本< 3.0.0 中。)
批量导入数据与逐个对象添加非常相似。
我们要做的第一件事是为每个对象类型创建一个BatchRequest对象:DataObject和Reference。它们被相应地命名为:ObjectsBatchRequest和ReferenceBatchRequest。
让我们为每一批创建一个对象,并导入接下来的 99 篇文章。
**注意:**我想再次提醒您,批量导入/创建数据会跳过一些验证步骤,可能会导致图形损坏。
>>> from weaviate import ObjectsBatchRequest, ReferenceBatchRequest
让我们创建一个向批处理请求添加单个文章的函数。
>>> def add_article(batch: ObjectsBatchRequest, article_data: dict) -> str:
...
...     article_object = {
...         'title': article_data['title'],
...         'summary': article_data['summary'].replace('\n', '') # remove newline character
...     }
...     article_id = article_data['id']
...
...     # add article to the object batch request
...     batch.add(
...         data_object=article_object,
...         class_name='Article',
...         uuid=article_id
...     )
...
...     return article_id
现在让我们创建一个函数,向批处理请求添加一个作者,如果还没有创建作者的话。
>>> def add_author(batch: ObjectsBatchRequest, author_name: str, created_authors: dict) -> str:
...
...     if author_name in created_authors:
...         # return author UUID
...         return created_authors[author_name]
...
...     # generate an UUID for the Author
...     author_id = generate_uuid(author)
...
...     # add author to the object batch request
...     batch.add(
...         data_object={'name': author_name},
...         class_name='Author',
...         uuid=author_id
...     )
...
...     created_authors[author_name] = author_id
...     return author_id
最后一个功能是添加交叉引用。
>>> def add_references(batch: ReferenceBatchRequest, article_id: str, author_id: str)-> None:
...     # add references to the reference batch request
...     ## Author -> Article
...     batch.add(
...         from_object_uuid=author_id,
...         from_object_class_name='Author',
...         from_property_name='wroteArticles',
...         to_object_uuid=article_id
...     )
...
...     ## Article -> Author
...     batch.add(
...         from_object_uuid=article_id,
...         from_object_class_name='Article',
...         from_property_name='hasAuthors',
...         to_object_uuid=author_id
...     )
现在我们可以遍历数据并使用批处理导入数据。
>>> from weaviate.tools import generate_uuid
>>> from tqdm import trange

>>> objects_batch = ObjectsBatchRequest()
>>> reference_batch = ReferenceBatchRequest()

>>> for i in trange(1, 100):
...
...     # add article to batch request
...     article_id = add_article(objects_batch, data[i])
...
...     for author in data[i]['authors']:
...
...         # add author to batch request
...         author_id = add_author(objects_batch, author, created_authors)
...
...         # add cross references to the reference batch
...         add_references(reference_batch, article_id=article_id, author_id=author_id)
...
...     if i % 20 == 0:
...         # submit the object batch request to weaviate, can be done with method '.create_objects'
...         client.batch.create(objects_batch)
...
...         # submit the reference batch request to weaviate, can be done with method '.create_references'
...         client.batch.create(reference_batch)
...
...         # batch requests are not reusable, so we create new ones
...         objects_batch = ObjectsBatchRequest()
...         reference_batch = ReferenceBatchRequest()

>>> # submit the any object that are left
>>> status_objects = client.batch.create(objects_batch)
>>> status_references = client.batch.create(reference_batch)0%|          | 0/99 [00:00<?, ?it/s]
为了批量导入数据,我们应该为想要导入的数据对象类型创建一个BatchRequest对象。批处理请求对象没有大小限制,因此您应该在需要多少对象时提交它。(请记住,如果您将使用包含太多对象的批处理,可能会导致超时错误,因此请将它保持在合理的大小,以便您的 Weaviate 实例可以处理它。)此外,我们会跟踪已经创建的作者,这样我们就不会一遍又一遍地创建同一个作者。
对client.batch.create的调用返回每个被创建对象的状态。如果你想确定一切正常,就检查一下。另外注意即使 Weaviate 未能创建对象,也不意味着批量提交也失败,更多信息请阅读client.batch.create的文档。
5.4.3 使用批处理程序对象加载数据。
(仅在 weaviate-client 版本< 3.0.0 中出现。)
Batcher是一个自动提交对象 weaviate 的类,包括DataObject和References。Batcher可以在weaviate.tools模块中找到,它有以下构造器原型:
Batcher(
    client : weaviate.client.Client,
    batch_size : int=512,
    verbose : bool=False,
    auto_commit_timeout : float=-1.0,
    max_backoff_time : int=300,
    max_request_retries : int=4,
    return_values_callback : Callable=None,
)
有关每个参数的解释,请参见文档。
让我们看看它是如何对我们从data中提取的其余对象起作用的。
>>> from weaviate.tools import Batcher
对于 a Batcher,我们只需要将我们想要导入的对象添加到 Weaviate。Batcher有添加objects ( batcher.add_data_object)和添加references ( batcher.add_reference)的特殊方法。此外,它还提供了一个带有关键字参数的batcher.add方法,该方法可以检测您试图添加的数据类型。batcher.add方法使得重用我们上面定义的add_article、add_author和add_references函数成为可能。
注:Batcher.add是在weaviate-client版本 2.3.0 中引入的。
让我们使用批处理程序添加来自data的剩余文章和作者。因为Batcher自动提交对象进行 weaviate,所以我们需要在我们完成之后总是.close()它,以确保我们提交的是Batcher中剩余的内容。
如果你像我一样,有时忘记关闭对象,Bather可以在上下文管理器中使用,即与with一起使用。让我们看看它是如何与上下文管理器一起工作的。
>>> # we still need the 'created_authors' so we do not add the same author twice
>>> with Batcher(client, 30, True) as batcher:
...     for i in trange(100, 200):
...
...         # add article to batcher
...         article_id = add_article(batcher, data[i]) # NOTE the 'bather' object instead of 'objects_batch'
...
...         for author in data[i]['authors']:
...
...             # add author to batcher
...             author_id = add_author(batcher, author, created_authors) # NOTE the 'bather' object instead of 'objects_batch'
...
...             # add cross references to the batcher
...             add_references(batcher, article_id=article_id, author_id=author_id) # NOTE the 'bather' object instead of 'reference_batch'Batcher object created!

  0%|          | 0/100 [00:00<?, ?it/s]

Updated object batch successfully
Updated reference batch successfully
Updated object batch successfully
Updated reference batch successfully
Updated object batch successfully
Updated reference batch successfully
Updated object batch successfully
Updated reference batch successfully
Updated object batch successfully
Updated reference batch successfully
Updated object batch successfully
Updated reference batch successfully
Updated object batch successfully
Updated reference batch successfully
Updated object batch successfully
Updated reference batch successfully
Updated object batch successfully
Updated reference batch successfully
Updated object batch successfully
Updated reference batch successfully
Updated object batch successfully
Updated reference batch successfully
Updated object batch successfully
Updated reference batch successfully
Updated object batch successfully
Updated reference batch successfully
Updated object batch successfully
Updated reference batch successfully
Updated object batch successfully
Updated reference batch successfully
Updated object batch successfully
Updated reference batch successfully
Updated object batch successfully
Updated reference batch successfully
Updated object batch successfully
Updated reference batch successfully
Updated object batch successfully
Updated reference batch successfully
Batcher object closed!
这就是分批配料器。
这是导入数据的三种方式。选择一个适合你和你的项目。
5.4.4 新增Batch对象
(只在 weaviate-client 版本> =3.0.0。)
新的Batch对象可以用同样的方式访问:client.batch。如 5.4 节所述,这个类有 3 种不同的用法,所以让我们来看看我们到底是怎么做的,以及它们之间的区别。
我们首先要做的是重新定义以下函数:add_article、add_author和add_references。
>>> from weaviate.batch import Batch # for the typing purposes
>>> from weaviate.util import generate_uuid5 # old way was from weaviate.tools import generate_uuid>>> def add_article(batch: Batch, article_data: dict) -> str:
...
...     article_object = {
...         'title': article_data['title'],
...         'summary': article_data['summary'].replace('\n', '') # remove newline character
...     }
...     article_id = article_data['id']
...
...    # add article to the object batch request
...   batch.add_data_object(  # old way was batch.add(...)
...        data_object=article_object,
...        class_name='Article',
...        uuid=article_id
...    )
...
...    return article_id>>> def add_author(batch: Batch, author_name: str, created_authors: dict) -> str:
...
...    if author_name in created_authors:
...        # return author UUID
...        return created_authors[author_name]
...
...    # generate an UUID for the Author
...    author_id = generate_uuid5(author)
...
...    # add author to the object batch request
...    batch.add_data_object(  # old way was batch.add(...)
...        data_object={'name': author_name},
...        class_name='Author',
...        uuid=author_id
...    )
...
...    created_authors[author_name] = author_id
...    return author_id>>> def add_references(batch: Batch, article_id: str, author_id: str)-> None:
...    # add references to the reference batch request
...    ## Author -> Article
...    batch.add_reference(  # old way was batch.add(...)
...        from_object_uuid=author_id,
...        from_object_class_name='Author',
...        from_property_name='wroteArticles',
...        to_object_uuid=article_id
...    )
...
...    ## Article -> Author
...    batch.add_reference(  # old way was batch.add(...)
...        from_object_uuid=article_id,
...        from_object_class_name='Article',
...        from_property_name='hasAuthors',
...        to_object_uuid=author_id
...    )
现在我们已经修改了上面的函数,使之与新的Batch对象兼容,让我们来看看它们的运行情况。
a)手动
这种方法使用户可以完全控制何时以及如何添加和创建批处理。它非常类似于weaviate-client版本< 3.0.0 的BatchRequests方法,所以让我们来看看我们到底如何使用它(或者从旧版本迁移到它)。
参见下面代码单元中相同方法的上下文管理器方式。(不要同时运行两个单元!
>>> from tqdm import trange>>> for i in trange(1, 100):
...
...    # add article to the batch
...    article_id = add_article(client.batch, data[i])
...
...    for author in data[i]['authors']:
...
...        # add author to the batch
...        author_id = add_author(client.batch, author, created_authors)
...
...        # add cross references to the batch
...        add_references(client.batch, article_id=article_id, author_id=author_id)
...
...    if i % 20 == 0:
...        # submit the objects from the batch to weaviate
...        client.batch.create_objects()
...
...        # submit the references from the batch to weaviate
...        client.batch.create_references()>>> # submit any objects that are left
>>> status_objects = client.batch.create_objects()
>>> status_references = client.batch.create_references()
>>> # if there is no need for the output from batch creation, one could flush both
>>> # object and references with one call
>>> client.batch.flush()
或者,我们可以使用带有上下文管理器的Batch实例,当它存在于上下文中时,就会调用flush()方法。
>>> from tqdm import trange>>> with client.batch as batch:
...     for i in trange(1, 100):
...
...        # add article to the batch
...        article_id = add_article(batch, data[i])
...
...        for author in data[i]['authors']:
...
...            # add author to the batch
...            author_id = add_author(batch, author, created_authors)
...
...            # add cross references to the batch
...            add_references(batch, article_id=article_id, author_id=author_id)
...
...        if i % 20 == 0:
...            # submit the objects from the batch to weaviate
...            batch.create_objects()
...
...            # submit the reference from the batch to weaviate
...            batch.create_references()
b)满时自动创建批次
该方法类似于weaviate-client版本< 3.0.0 的Batcher对象。让我们看看它是如何工作的。
>>> # we still need the 'created_authors' so we do not add the same author twice
>>> client.batch.configure(
...     batch_size=30,
...    callback=None, # use this argument to set a callback function on the batch creation results
...)
>>> for i in trange(100, 200):
...
...    # add article to the batch
...    article_id = add_article(client.batch, data[i])...    for author in data[i]['authors']:...        # add author to the batch
...        author_id = add_author(client.batch, author,                             created_authors)...        # add cross references to the batch
...        add_references(client.batch, article_id=article_id, author_id=author_id)
>>> client.batch.flush()
当然,我们也可以在这里使用上下文管理器。
>>> # we still need the 'created_authors' so we do not add the same author twice
>>> client.batch.configure(
...     batch_size=30,
...    callback=None, # use this argument to set a callback function on the batch creation results
... )
>>> with client.batch(batch_size=30) as batch: # the client.batch(batch_size=30) is the same as client.batch.configure(batch_size=30)
...     for i in trange(100, 200):...        # add article to the batch
...        article_id = add_article(batch, data[i])...        for author in data[i]['authors']:...            # add author to the batch
...            author_id = add_author(batch, author, created_authors)...            # add cross references to the batch
...            add_references(batch, article_id=article_id, author_id=author_id)
c)使用动态批处理自动创建批次,即每次创建批次时都会调整批次大小,以避免任何Timeout错误。
该方法的工作方式与 b)中描述的方法相同。我们不会用它来运行任何单元格,但是我要提到的是,要启用动态批处理,我们需要做的就是为configure / __call__方法提供另一个参数。
示例:
client.batch.configure(
    batch_size**=**30,
    dynamic**=True**
)
要查看这个新的Batch对象的全部功能,请参见完整的文档这里的或者对Batch或/和任何Batch方法执行help功能,就像这样:help(Batch)
5.5.查询数据。
现在我们已经导入了数据,并准备好进行查询。可以使用客户端对象的query属性(client.query)来查询数据。
使用 GraphQL 语法查询数据,可以通过三种不同的方式完成:
- GET :从 Weaviate 获取对象的查询。更多信息此处使用
client.query.get(class_name, properties).OTHER_OPTIONAL_FILTERS.do() - 聚合:聚合数据的查询。更多信息此处使用
client.query.aggregate(class_name, properties).OTHER_OPTIONAL_FILTERS.do() - 或者使用表示为
str的 GraphQL 查询。
使用client.query.raw()
注意:.get和.aggregate都需要调用.do()方法来运行查询。.raw()不会。
现在让我们只获取文章对象及其相应的标题。
获得
>>> result = client.query.get(class_name='Article', properties="title")\
...     .do()
>>> print(f"Number of articles returned: {len(result['data']['Get']['Article'])}")
>>> resultNumber of articles returned: 100

{'data': {'Get': {'Article': [{'title': "The soft power impact of Ruth Bader Ginsburg's decorative collars"},
    {'title': 'After centuries in the ground, these French oaks will soon form part of the new spire at Notre Dame'},
    {'title': 'With tradition and new tech, these Japanese designers are crafting more sustainably made clothing'},
    {'title': "LEGO won't make modern war machines, but others are picking up the pieces"},
    {'title': 'Remember when Jane Fonda revolutionized exercise in a leotard and leg warmers?'},
    {'title': 'Be brave, Taylor tells Manchester City Women before Barcelona return leg'},
    {'title': "'In the middle of a war zone': thousands flee as Venezuela troops and Colombia rebels clash"},
    {'title': "Destruction of world's forests increased sharply in 2020"},
    {'title': "Climate crisis 'likely cause' of early cherry blossom in Japan"},
    {'title': "What's in a vaccine and what does it do to your body?"},
    {'title': 'Zunar and Fahmi Reza: the cartoonists who helped take down Najib Razak'},
    {'title': 'Downing Street suggests UK should be seen as model of racial equality'},
    {'title': "'It's hard, we're neighbours': the coalmine polluting friendships on Poland's borders"},
    {'title': 'Why we are all attracted to conspiracy theories – video'},
    {'title': 'UK criticised for ignoring Paris climate goals in infrastructure decisions'},
    {'title': 'GameStop raids Amazon for another heavy-hitter exec'},
    {'title': 'The World Economic Forum says it will take an extra 36 years to close the gender gap'},
    {'title': 'Share a story with the Guardian'},
    {'title': "Paddleboarding and a released alligator: Tuesday's best photos"},
    {'title': "Ballerina Chloé Lopes Gomes alleged racism at her company. Now she says it's time for change"},
    {'title': 'How ancient Egyptian cosmetics influenced our beauty rituals'},
    {'title': 'Why is Australia trying to regulate Google and Facebook – video explainer'},
    {'title': 'Back in the swing and the swim: England returns to outdoor sport – in pictures'},
    {'title': "Biden's tariffs threat shows how far Brexit Britain is from controlling its own destiny"},
    {'title': 'Our cities may never look the same again after the pandemic'},
    {'title': "World's first digital NFT house sells for $500,000"},
    {'title': "The untold story of Ann Lowe, the Black designer behind Jackie Kennedy's wedding dress"},
    {'title': 'Deliveroo shares slump on stock market debut'},
    {'title': 'Hundreds of people missing after fire in Rohingya refugee camp in Bangladesh – video'},
    {'title': "Why Beijing's Serpentine Pavilion signals a new age for Chinese architecture"},
    {'title': 'My Brother’s Keeper: a former Guantánamo detainee, his guard and their unlikely friendship - video'},
    {'title': 'Has your family been affected by the Brazilian or South African variants of Covid-19?'},
    {'title': 'New Zealand raises minimum wage and increases taxes on the rich'},
    {'title': 'Deliveroo shares plunge on market debut - business live'},
    {'title': "Seoul's burgeoning drag scene confronts conservative attitudes"},
    {'title': "David Hockney at 80: An encounter with the world's most popular artist"},
    {'title': 'Una avanzada licuadora Nutribullet al mejor precio'},
    {'title': "The 'fox eye' beauty trend continues to spread online. But critics insist it's racist"},
    {'title': 'Lupita: the indigenous activist leading a new generation of Mexican women – video'},
    {'title': "Hong Kong's vast $3.8 billion rain-tunnel network"},
    {'title': 'See how tattoo art has changed since the 18th century'},
    {'title': "Hong Kong Disneyland's new castle is an architectural vision of diversity"},
    {'title': 'Rosamund Pike in "I Care a Lot" and six more recommendations if you love an antiheroine'},
    {'title': 'How NFTs are fueling a digital art boom'},
    {'title': "'We’re not little kids': leading agents ready for war with Fifa over new rules"},
    {'title': 'A photographic history of men in love'},
    {'title': "Hedge fund meltdown: Elizabeth Warren suggests regulators should've seen it coming"},
    {'title': 'Palau to welcome first tourists in a year with presidential escort'},
    {'title': 'Coronavirus: how wealthy nations are creating a ‘vaccine apartheid’'},
    {'title': 'UK economy poised to recover after Covid-19 second wave'},
    {'title': 'Missed it by that much: Australia falls 3.4m doses short of 4m vaccination target by end of March'},
    {'title': "Meet North Korea's art dealer to the West"},
    {'title': 'Why Australia remains confident in AstraZeneca vaccine as two countries put rollout on ice'},
    {'title': 'Exclusive: Jamie Dimon speaks out on voting rights even as many CEOs remain silent'},
    {'title': "Green investing 'is definitely not going to work’, says ex-BlackRock executive"},
    {'title': 'European commission says AstraZeneca not obliged to prioritise vaccines for UK'},
    {'title': '‘Honey, I forgot to duck’: the attempt to assassinate Ronald Reagan, 40 years on'},
    {'title': 'Graba tus próximas aventuras con esta GoPro de oferta'},
    {'title': "Europe’s 'baby bust': can paying for pregnancies save Greece? - video"},
    {'title': "After the deluge: NSW's flood disaster victims begin cleanup – in pictures"},
    {'title': "Wolfsburg v Chelsea: Women's Champions League quarter-final – live!"},
    {'title': "'A parallel universe': the rickety pleasures of America's backroads - in pictures"},
    {'title': "'Nomadland': Chloé Zhao and crew reveal how they made one of the year's best films"},
    {'title': 'Seaspiracy: Netflix documentary accused of misrepresentation by participants'},
    {'title': 'Unblocking the Suez canal – podcast'},
    {'title': 'About half of people in UK now have antibodies against coronavirus'},
    {'title': 'Top 10 books about New York | Craig Taylor'},
    {'title': 'Is Moldova ready to embrace an unmarried, childfree president? | Europe’s baby bust – video'},
    {'title': 'This woman left North Korea 70 years ago. Now virtual reality has helped her return'},
    {'title': "'Immediate and drastic.' The climate crisis is seriously spooking economists"},
    {'title': "Under Xi's rule, what is China's image of the 'ideal' man?"},
    {'title': "'Hamlet' in the skies? The story behind Taiwan's newest airline, STARLUX"},
    {'title': 'Pokémon at 25: How 151 fictional species took over the world'},
    {'title': '‘Similar to having a baby, the euphoria’: rediscovery of rare gecko delights experts'},
    {'title': 'How Budapest became a fine dining force to be reckoned with'},
    {'title': "Teen who filmed killing tells court George Floyd was 'begging for his life'"},
    {'title': 'Empowering, alluring, degenerate? The evolution of red lipstick'},
    {'title': 'Real-world locations straight out of a Wes Anderson movie'},
    {'title': 'The club kid designer dressing the most powerful women in US politics'},
    {'title': "Fashion gaffes are a reflection of the industry's diversity problem"},
    {'title': 'Our colorful clothes are killing the environment'},
    {'title': 'Hazte con un Roku SE a mitad de precio'},
    {'title': 'Why does Bollywood use the offensive practice of brownface in movies?'},
    {'title': "Why Washington Football Team may stick with their 'so bad it’s good' name"},
    {'title': "Graphic novel on the Tiananmen Massacre shows medium's power to capture history"},
    {'title': 'Could a Norway boycott of the Qatar World Cup change the future of football?'},
    {'title': 'Las 5 cosas que debes saber este 31 de marzo: Así es una instalación que alberga a menores migrantes'},
    {'title': 'Multiplica el alcance de tu Wi-Fi con este repetidor rebajado un 50%'},
    {'title': "'Lack of perspective': why Ursula von der Leyen's EU vaccine strategy is failing"},
    {'title': 'Redder Days by Sue Rainsford review – waiting for the end of the world'},
    {'title': 'Dita Von Teese and Winnie Harlow star in a star-studded fashion film'},
    {'title': 'The Suez fiasco shows why ever bigger container ships are a problem'},
    {'title': 'The most anticipated buildings set to shape the world in 2020'},
    {'title': "Elite minority of frequent flyers 'cause most of aviation's climate damage'"},
    {'title': "I love my boyfriend – but I really don't want to have sex with him"},
    {'title': 'Amazon-backed Deliveroo crashes in London IPO'},
    {'title': 'People are calling for museums to be abolished. Can whitewashed American history be rewritten?'},
    {'title': 'Ruby Rose on gender, bullying and breaking free: ‘I had a problem with authority’'},
    {'title': 'Merkel, Macron and Putin in talks on using Sputnik V jab in Europe, says Kremlin'},
    {'title': 'After fighting cancer, Tracey Emin returns to the art world with raw, emotional works'}]}},
 'errors': None}
因此我们可以看到result只包含 100 篇文章,这是由于默认的限制 100。让我们改变它。
>>> result = client.query.get(class_name='Article', properties="title")\
...     .with_limit(200)\
...     .do()
>>> print(f"Number of articles returned: {len(result['data']['Get']['Article'])}")Number of articles returned: 200
通过堆叠多种方法,我们可以做得更多。.get可用的方法有:
.with_limit-设置返回对象的另一个限制。.with_near_object-获取与传递给该方法的对象相似的对象。.with_near_text-获取与传递给该方法的文本相似的对象。.with_near_vector-获取与传递给该方法的 vector 相似的对象。.with_where-获取使用Where过滤器过滤的对象,参见此链接获取示例和解释。
此外,可以使用将 GraphQL 查询作为字符串返回的.build()方法来代替.do()。这个字符串可以传递给.raw()方法。
**注意:**每个查询只能使用一个.with_near_*。
>>> client.query.get(class_name='Article', properties="title")\
...     .with_limit(5)\
...     .with_near_text({'concepts': ['Fashion']})\
...     .do(){'data': {'Get': {'Article': [{'title': 'Dita Von Teese and Winnie Harlow star in a star-studded fashion film'},
    {'title': "Fashion gaffes are a reflection of the industry's diversity problem"},
    {'title': "Bottega Veneta ditches Instagram to set up 'digital journal'"},
    {'title': 'Heir to O? Drew Barrymore launches lifestyle magazine'},
    {'title': 'Our colorful clothes are killing the environment'}]}},
 'errors': None}
使用Get我们可以看到每个对象的交叉引用。我们将为此使用.raw()方法,因为用任何现有的.with_*方法都不可能。
>>> query = """
... {
...   Get {
...     Article(limit: 2) {
...       title
...
...       hasAuthors {         # the reference
...         ... on Author {    # you always set the destination class
...           name             # the property related to target class
...         }
...       }
...     }
...   }
... }
... """

>>> prettify(client.query.raw(query)['data']['Get']['Article'])[
  {
    "hasAuthors": [
      {
        "name": "Rhonda Garelick"
      }
    ],
    "title": "The soft power impact of Ruth Bader Ginsburg's decorative collars"
  },
  {
    "hasAuthors": [
      {
        "name": "Saskya Vandoorne"
      }
    ],
    "title": "After centuries in the ground, these French oaks will soon form part of the new spire at Notre Dame"
  }
]
骨料
我们可以使用.aggregate来计算满足特定条件的对象数量。
>>> # no filter, count all objects of class Article
>>> client.query.aggregate(class_name='Article')\
...     .with_meta_count()\
...     .do(){'data': {'Aggregate': {'Article': [{'meta': {'count': 200}}]}},
 'errors': None}>>> # no filter, count all objects of class Author
>>> client.query.aggregate(class_name='Author')\
...     .with_meta_count()\
...     .do(){'data': {'Aggregate': {'Author': [{'meta': {'count': 258}}]}}, 'errors': None}
以下是.aggregate支持的方法。
.with_meta_count将元计数设置为真。用于计算每个过滤组的对象数。.with_fields-聚合查询返回的字段。.with_group_by_filter-设置一个GroupBy滤镜。查看此链接了解更多关于过滤器的信息。.with_where-使用Where过滤器聚集物体。参见此链接获取示例和解释。
当然,在查询数据时,可能性是无穷无尽的。体验这些功能的乐趣。
(jupyter-notebook 可以在这里找到。)
请随时在 GitHub 上查看并为 weaviate-client 投稿。
获得 TensorFlow 开发者认证
即使你有一台 M1 Mac 电脑,你也可以用它来通过测试
准备了很久,最近参加并通过了 TensorFlow 开发者证书考试。该考试测试您使用 TensorFlow 处理图像、时间序列和文本数据的熟练程度。除了这些领域,它还涵盖了减少过度拟合的策略,如增强和辍学层。
路易斯·基根在 Unsplash 上的照片
你为什么要获得认证?
有两个原因你应该尝试考试。第一,拿到这个证书对学习 TensorFlow 是一个很大的激励。其次,这也是证明和展示你技能的绝佳机会。
如果你以前没有任何机器学习的经验,那么最好先学习一下(使用这些示例资源作为开端: 1 、 2 、 3 、 4 ),然后再回来应付考试。
资源
我一年前第一次读到关于考试的消息,但只是在去年圣诞节才开始积极地追求它。我最初的计划是在寒假里做准备课程,但最终,我忙于大学的工作,不得不推迟。在三月份,我开始准备,为此我使用了以下资源。
1.深度学习。AI TensorFlow 开发者专业证书
费用:七天免费后每月约 50 美元。或者免费审核。
它教什么
尽管我已经在 TensorFlow 和 Keras 上有了两年左右的经验,我还是决定开始进行深度学习。Coursera 上的 AI TensorFlow 开发者专业证书。它首先介绍 TensorFlow,教你如何建立和训练基本的神经网络。如果您对这些主题有经验,可以跳过这一部分。第二部分涵盖卷积神经网络,更大的网络,转移学习,和增强技术。然后,在第三个课程中,你将关注自然语言处理:你从嵌入开始,前进到序列模型,并以创作诗歌结束。最后,在最后一门课程中,您将学习时间序列数据。
对考试的用处
如果你有一到两年的 TensorFlow 经验,那么你可以跳过这个课程。或者,甚至更好的是:免费旁听个别课程,并检查到目前为止你可能错过了什么。如果你没有任何经验,那么这个课程是强烈推荐的。有两种选择。首先,你可以在 YouTube 上免费观看《T4》。其次,还可以做 2021 年 TensorFlow 开发者证书:零到精通课程(也可以这里,代码是这里)。
尽管证书是一个很好的正面评价的资源,但它不是我唯一的资源。此外,我还参加了一个定制课程来学习更多知识,主要是在我为大学和个人项目所做的基础上。
2.重新实施一份文件
费用:免费。
它教什么
为了深入了解 TensorFlow,我接受了重新实现一篇论文的挑战。作为参考,我选择了一篇 CycleGAN 的论文,它涵盖了将象征性音乐从一种流派翻译成另一种流派。结果,我学到了很多东西:如何编写高效的输入管道、高效的预处理和定制的训练循环。
对考试的用处
很难评估我学到的关于证书的知识有多大用处。它通常超出了考试的要求,但在幕后仍然证明是有价值的。这是因为它不仅仅是编码,而且是如何处理问题和寻找让你进步的解决方案。但是,在后续证书中,可能会对此进行测试。尽管如此,我还是有一个很好的机会用 PyCharm 深入研究编码,这是考试所必需的。
3.使用 TFRecords
费用:免费。
它教什么
如前所述,在重新实现论文时,我还使用了 TFRecords,TensorFlow 存储数据的原生格式。这对于开始来说有点挑战性,但是一旦你掌握了它,它就非常有价值。这种格式的最大好处是与 TensorFlow 的数据集处理的高度互操作性、从磁盘的快速流式传输以及存储数据的高效方式。更详细的信息可以在这个 TensorFlow 教程和这个 Colab 笔记本中找到。
对考试的有用性
我发现这个不是考试必考的,可以跳过这一部分。然而,对于证书范围之外的项目,使用 TFRecords 肯定是好的。
4.深度学习简介
费用:免费。
它教什么
深度学习的介绍由麻省理工学院免费提供。这个讲座在 12 节课中涵盖了深度学习领域,同时也适用于非技术人员。它从深度学习的一般介绍开始,并继续处理序列和图像数据。之后,它涵盖了其他主题,如强化学习和生成技术。
对考试的有用性
前三节课和第八节课是对考试最有用的。但是,我建议您看完整个课程,因为它的表现非常好。此外,检查附带的代码。
5.习惯 PyCharm
费用:免费。
它教什么
考试需要 PyCharm 代码编辑器。跟随示例项目教你如何设置项目、运行和调试代码。
对考试的用处
如果您有使用 PyCharm 的经验,那么您可以跳过这一步。如果您是 PyCharm 的新手,那么这是必须的。在我看来,这将进一步帮助你在尝试证书之前进行几个较小的项目,因为它们将教会你更多关于 PyCharm 的知识。而你已经知道的,考试的时候就不用查了。
6.候选人手册
费用:免费。
它教什么
这本手册介绍了考试,考什么,怎么考等等。
对考试的用处
强制性的。即使您有使用 TensorFlow 的经验,也请阅读此文档。
7.TensorFlow 教程
费用:免费。
他们教什么
在 TensorFlow 的主页上列出了很多教程。不过初学者类别就足够了;它涵盖了图像和文本分类、回归和基本的 I/O 工具。
对考试的有用性
如果您已经完成了 TensorFlow 开发者证书课程或其替代课程,那么您可以跳过此课程。如果您还没有,那么教程是很有价值的资源。
我是如何准备的
我在三月份参加了 TensorFlow 课程,每天留出一个小时来进步。以这样的速度,我在近三周内完成了它。我没有为其他资源留出任何特定的时间:大部分工作是为大学项目做的,这教会了我有价值的东西。
如果你正在寻找一门课程,我推荐如下:
- 观看深度学习介绍讲座
- 每天留出一两个小时,先学习张量流课程或其他课程
- 在此期间,使用 PyCharm 进行编码
- 为了加深理解,重新实现一篇论文或做几个 TensorFlow 的教程
- 阅读候选人手册
- 设置一个示例测试环境(说明在上面的手册中;如有问题,请参见下文)
- 购买并最终通过考试
在考试中使用 M1 Mac 电脑
在较新的苹果 M1 电脑上,设置考试环境可能会有问题。如果这是你的情况,诉诸以下两个选项。
第一种解决方案是故意让环境设置失败,然后开始测试。然后,就
- 把考试代码复制到谷歌实验室,
- 在那里解决
- 在那里训练模特
- 下载它们
- 将它们放在正确的文件夹中(考试时会很清楚,不要担心)
- 上传它们(也变得清晰)
- 并且让他们毫无问题的打分。
第二种解决方案需要更多的设置:
- 创建一个单独的环境:这也可以是 Anaconda 环境
- 从任何来源(pip、conda 等)安装尽可能多的软件包——实际的软件包版本不是关键的
- 开始检查(即使设置可能已经失败)
- 在考试期间,将 python 解释器切换到之前创建的独立环境
- 通过考试(如果考试失败,就求助于 Colab 解决方案)。
我在 M1 的 MacBook 上应付考试时,成功地混合使用了这两种方法。如果你设置虚拟环境有困难,请参考这些链接:苹果官方文档;更详细的版本由我;尼科斯的方法在这里。
考试
一旦你购买了每次 100 美元的考试,你将会得到详细的操作说明。在不暴露任何细节的情况下,考试涵盖了你在各个方面的能力。这些类别越来越难解决。但是,你可以使用任何你想要的资源;最后你只需要上传每个类别的训练模型。
对于其中一个类别,我不能运行代码,所以我切换到 Colab。然后我在那里训练模型,把它下载到我的电脑上,并作为考试的一部分上传。
您有五个小时的时间来完成所有问题。我发现这是相当多的时间。考试的时候,你已经有过的感觉了。如果你能解决所有问题(即上传一个在评分基础设施上达到 100%的经过训练的模型),你就通过了。总的来说,我的目标是在进步之前完美地解决一个类别。除了一个例外,这种方法效果很好。
提交考试或考试时间结束后,我们会通过电子邮件通知您考试结果。对我来说,这花了不到一分钟,迎接我的是
“恭喜你,你已经通过了 TensorFlow 开发者证书考试!”
如果你使用了上面描述的资源,你也会听到这些话!
充分利用 scikit-learn 管道
帮助您在单个网格搜索中组合转换和建模参数的高级技术
Pipelines是 scikit-learn 包中极其有用和通用的对象。它们可以与其他 sklearn 对象嵌套和组合,以创建可重复且易于定制的数据转换和建模工作流。
使用Pipeline可以做的最有用的事情之一是将数据转换步骤与最后的估计器(模型)联系在一起。然后,您可以将这个复合估计器传递给一个GridSearchCV对象,并在一个镜头中搜索转换参数和模型超参数。但是学习如何构造这些对象,以及如何在不同的级别获取和设置属性需要一些实践。
这篇文章将使用一个 NLP 分类示例来演示如何将一个ColumnTransformer与一个Pipeline和GridSearchCV结合起来。我们将介绍一些具体的技术和技巧,比如如何:
- 使用
ColumnTransformer作为Pipeline步骤,以不同的方式转换不同类型的数据列 - 构建一个复合管道,可用于同时为数据转换和建模进行网格搜索参数
- 指定要一起应用的复杂网格搜索参数集(例如二进制文本矢量化或 Tf-Idf 规范化,但不能同时应用两者)
- 使用
passthrough绕过或跳过Pipeline中的一个步骤 - 使用
set_params()动态设置Pipeline中的单个参数,以便在GridSearchCV之外进行测试 - 从最佳估计器的深度检索特征名称,用于解释
示例数据介绍
我将使用我为之前的项目收集的示例数据,包括《纽约时报》发布到脸书的一组文章的文本和元数据。
数据已经被清理,但是仍然需要在建模之前进行转换。这对我们来说是一个很好的例子,因为有几种不同类型的功能需要以不同的方式进行转换:
article_text:要进行标记化和矢量化的文本topics:包含每篇文章的适用主题列表的列,将被转换为每个主题的单独特性- 其余的是我们需要一次性编码的分类特征
我们的示例数据集中的列存储在数据帧中
这里的target已经被二进制化了,0 表示读者对《脸书邮报》的参与度低,1 表示参与度高。此示例分类问题的目标是预测敬业度。
为了做好准备,我们将灵活地为变量分配不同的列名集,并将数据分成训练集和测试集。
执行训练-测试-分割,并为不同组的列创建变量
为转换生成 ColumnTransformer
首先,我们将创建一个ColumnTransformer来转换用于建模的数据。我们将使用ColumnTransformer来代替Pipeline,因为它允许我们为不同的列指定不同的转换步骤,但是会产生一个单一的特性矩阵。
提醒一下(或者介绍一下,如果你以前没有用过的话)regular Pipelines将一个元组列表作为输入,其中每个元组中的第一个值是步骤名,第二个值是估计器对象。
pipe = Pipeline([
    ('vect', CountVectorizer()),
    ('clf', LogisticRegression())
])
ColumnTransformers的构建与Pipelines相似,除了在每个元组中包含第三个值,表示在步骤中要转换的列。因为我们的数据在 DataFrame 中,所以我们可以传递表示 DataFrame 列名的字符串和字符串列表。如果数据存储在数组中,可以传递列索引或列索引数组。
我已经将不同类别的列的名称存储为变量,所以它们可以像这样动态地传递给ColumnTransformer:
cols_trans = ColumnTransformer([
    ('txt', TfidfVectorizer(), **text_col**),
    ('txt_kw', CountVectorizer(), **topic_col**),
    ('ohe', OneHotEncoder(drop='first'), **cat_cols**),
    remainder='drop'
])
Pipeline步骤是连续执行的,第一步的输出传递给第二步,依此类推。**ColumnTransformers** 的不同之处在于,每一步都是单独执行的,转换后的特征在最后连接在一起。这使我们不必自己做连接,并且当我们准备好解释我们的最佳模型时,可以很容易地获得特性名称的完整列表。
默认情况下,传递到ColumnTransformer中的任何没有被指定转换的列都将被删除(remainder='drop')。如果您有想要包含但不需要转换的列,请指定 remainder='passthrough'。稍后我们将再次看到passthrough参数,因为它可以在 sklearn 的其他上下文中使用,以跳过或绕过一个处理步骤。
以下是我们示例工作流中该步骤的完整代码,解释如下:
创建 ColumnTransformer 来转换我们拥有的不同类型的数据列
text_col将使用TfidfVectorizer进行转换,T5 将标记每个文档的文本并创建向量以形成文档术语矩阵。我们将能够为这种转换指定许多不同的选项,这些选项将影响最终的模型性能,例如要删除的停用词、要生成的 n 元语法的大小、要包含的最大特征数量,以及如何标准化文档术语矩阵中的标记计数。然而,由于我们将为网格搜索中要尝试的那些参数指定不同的选项,我们现在将只创建 transformer 的一个普通实例。topic_col已经是一个单列的主题列表,我们想从中创建一个二进制文档术语矩阵。我们将使用CountVectorizer,并给它一个不做任何事情的自定义analyzer。默认的analyzer通常执行预处理、标记化和 n 元语法生成,并输出一个标记列表,但是因为我们已经有了一个标记列表,我们将按原样传递它们,并且CountVectorizer将返回一个现有主题的文档术语矩阵,而不进一步标记它们。cat_cols由我们的分类列组成,我们将使用OneHotEncoder对其进行一次性编码。我们将指定的唯一参数是删除每一列中的第一个类别,因为我们将使用回归模型。
提示:
TfidfVectorizer和CountVectorizer都期望一个一维数组,所以列名需要作为字符串而不是列表传递给ColumnTransformer,即使列表只有一个条目。如果您给这些变压器中的任何一个一个列表,您将得到一个关于incompatible row dimensions的错误。大多数其他 sklearn 变形器期望一个 2-D 数组(比如OneHotEncoder),所以即使你只变形一列,你也需要传递一个列表。
很好,现在我们有了cols_trans,一个ColumnTransformer对象,它将输出一个带有我们转换后的数据的特征矩阵。
使用 ColumnTransformer 和模型创建管道
接下来,我们将创建一个Pipeline,其中cols_trans是第一步,逻辑回归分类器是第二步。
from sklearn.pipeline import Pipeline
from sklearn.linear_model import LogisticRegressionpipe = Pipeline([
    ('trans', cols_trans),
    ('clf', LogisticRegression(max_iter=300, class_weight='balanced'))
])
如果我们调用pipe.fit(X_train, y_train),我们将转换我们的X_train数据,并在一个单一的步骤中拟合逻辑回归模型。注意,我们可以简单地使用fit(),并且不需要做任何特殊的事情来指定我们想要在第一步中拟合和转换数据;管道会知道该做什么。
一旦你开始嵌套Pipelines和其他对象,你想要刷新你自己关于如何执行这些步骤。一种方法是将 sklearn 的display参数设置为'diagram',以便在调用管道对象本身的display()时显示一个 HTML 表示。HTML 将在 Jupyter 笔记本中进行交互,您可以点击每一步来展开它,并查看其当前参数。
from sklearn import set_configset_config(display='diagram')# with display='diagram', simply use display() to see the diagram
display(pipe)# if desired, set display back to the default
set_config(display='text')
管道的 HTML 显示示例,显示了参数
准备网格搜索参数
我们将能够把我们的pipe对象传递给GridSearchCV来同时搜索转换和分类器模型的参数。GridSearchCV将需要一个搜索参数字典来尝试,其中键是管道步骤/参数名,值是要搜索的参数列表。
像我们这样将一个ColumnTransformer嵌套在一个Pipeline中,可能很难得到这个字典的正确键,因为它们是以每个步骤的标签命名的,用邓德尔斯__作为分隔符。获得所有可用选项列表的最简单方法是使用pipe.get_params()。
您应该会看到类似这样的内容:
{'memory': None,
 'steps': [('trans',
   ColumnTransformer(transformers=[('txt', TfidfVectorizer(), 'article_text'),
                                   ('txt_kw',
                                    CountVectorizer(analyzer=<function no_analyzer at 0x7fbc5f4bac10>),
                                    'topics'),
                                   ('ohe', OneHotEncoder(drop='first'),
                                    ['section_name', 'word_count_cat',
                                     'is_multimedia', 'on_weekend'])])),
  ('clf', LogisticRegression(class_weight='balanced', max_iter=300))],
 'verbose': False,
 'trans': ColumnTransformer(transformers=[('txt', TfidfVectorizer(), 'article_text'),
                                 ('txt_kw',
                                  CountVectorizer(analyzer=<function no_analyzer at 0x7fbc5f4bac10>),
                                  'topics'),
                                 ('ohe', OneHotEncoder(drop='first'),
                                  ['section_name', 'word_count_cat',
                                   'is_multimedia', 'on_weekend'])]),
 'clf': LogisticRegression(class_weight='balanced', max_iter=300),
 'trans__n_jobs': None,
 'trans__remainder': 'drop',
 'trans__sparse_threshold': 0.3,
 'trans__transformer_weights': None,
 'trans__transformers': [('txt', TfidfVectorizer(), 'article_text'),
  ('txt_kw',
   CountVectorizer(analyzer=<function no_analyzer at 0x7fbc5f4bac10>),
   'topics'),
  ('ohe',
   OneHotEncoder(drop='first'),
   ['section_name', 'word_count_cat', 'is_multimedia', 'on_weekend'])],
 'trans__verbose': False,
 'trans__txt': TfidfVectorizer(),
 'trans__txt_kw': CountVectorizer(analyzer=<function no_analyzer at 0x7fbc5f4bac10>),
 'trans__ohe': OneHotEncoder(drop='first'),
 'trans__txt__analyzer': 'word',
 'trans__txt__binary': False,
 'trans__txt__decode_error': 'strict',
 'trans__txt__dtype': numpy.float64,
 'trans__txt__encoding': 'utf-8',
 'trans__txt__input': 'content',
 'trans__txt__lowercase': True,
 'trans__txt__max_df': 1.0,
 'trans__txt__max_features': None,
 'trans__txt__min_df': 1,
 'trans__txt__ngram_range': (1, 1),
 'trans__txt__norm': 'l2',
 'trans__txt__preprocessor': None,
 'trans__txt__smooth_idf': True,
 'trans__txt__stop_words': None,
 'trans__txt__strip_accents': None,
 'trans__txt__sublinear_tf': False,
 'trans__txt__token_pattern': '(?u)\\b\\w\\w+\\b',
 'trans__txt__tokenizer': None,
 'trans__txt__use_idf': True,
 'trans__txt__vocabulary': None,
 'trans__txt_kw__analyzer': <function __main__.no_analyzer(doc)>,
 'trans__txt_kw__binary': False,
 'trans__txt_kw__decode_error': 'strict',
 'trans__txt_kw__dtype': numpy.int64,
 'trans__txt_kw__encoding': 'utf-8',
 'trans__txt_kw__input': 'content',
 'trans__txt_kw__lowercase': True,
 'trans__txt_kw__max_df': 1.0,
 'trans__txt_kw__max_features': None,
 'trans__txt_kw__min_df': 1,
 'trans__txt_kw__ngram_range': (1, 1),
 'trans__txt_kw__preprocessor': None,
 'trans__txt_kw__stop_words': None,
 'trans__txt_kw__strip_accents': None,
 'trans__txt_kw__token_pattern': '(?u)\\b\\w\\w+\\b',
 'trans__txt_kw__tokenizer': None,
 'trans__txt_kw__vocabulary': None,
 'trans__ohe__categories': 'auto',
 'trans__ohe__drop': 'first',
 'trans__ohe__dtype': numpy.float64,
 'trans__ohe__handle_unknown': 'error',
 'trans__ohe__sparse': True,
 'clf__C': 1.0,
 'clf__class_weight': 'balanced',
 'clf__dual': False,
 'clf__fit_intercept': True,
 'clf__intercept_scaling': 1,
 'clf__l1_ratio': None,
 'clf__max_iter': 300,
 'clf__multi_class': 'auto',
 'clf__n_jobs': None,
 'clf__penalty': 'l2',
 'clf__random_state': None,
 'clf__solver': 'lbfgs',
 'clf__tol': 0.0001,
 'clf__verbose': 0,
 'clf__warm_start': False}
向下滚动到输出的底部,您将看到以您需要传递给GridSearchCV的精确格式列出的每一步的参数。将只列出每个参数的当前值,因此您可能需要查看每个估计器的文档,以了解还支持哪些其他值。
假设我决定搜索以下文本矢量化参数和我的逻辑回归模型:
grid_params = {
    'trans__txt__binary': [True, False],
    'trans__txt__use_idf': [True, False],
    'trans__txt__max_features': [None, 100000, 10000],
    'trans__txt__ngram_range': [(1, 1), (1, 2), (1, 3)],
    'trans__txt__stop_words': [None, nltk_stopwords],
    'clf__C': [1.0, 0.1, 0.01],
    'clf__fit_intercept': [True, False],
    'clf__penalty': ['l2', 'l1'],
    'clf__solver': ['lbfgs','saga']
}
但是如果我想把'trans__txt__binary': True只和'trans__txt__use_idf': False一起用,这样真的得到二进制的 0 或者 1 输出呢?而我想单独尝试一个正则项频率,还有 TF + IDF,但那样的话我只希望 binary 为 False?
如果我用上面写的参数运行搜索,GridSearchCV将尝试每种组合,甚至是那些可能没有意义的组合。
事实证明, **GridSearchCV 也将接受一个参数字典列表,并且足够聪明地尝试列表中所有字典的唯一组合。**我们需要将公共参数放在两个字典中,二进制的参数放在一个字典中,常规令牌计数的参数放在另一个字典中。
创建搜索参数,说明我想要测试的特定组合
请注意,如果您只有几个要搜索的参数,这可能是不必要的,但当您想要尝试许多参数时,就像我们在这里做的那样,这真的变得很重要。每个组合都需要一定的计算能力和时间,所以我们不想运行任何不必要的组合。
如何绕过或跳过整个步骤
如果您想在不使用该选项的情况下测试结果,许多实际参数都有一个None值。然而,如果您有一个想要绕过或跳过管道中整个步骤的工作流,这就行不通了。
例如,如果您有连续的数据,并且想要同时使用MinMaxScaler和StandardScaler来评估线性回归模型的性能,以查看哪一个效果更好。你可以在你的Pipeline中添加每一个单独的步骤,并使用上述技术的一个版本来创建一个 gris 参数列表,以尝试MinMax或Standard缩放器,但不能同时尝试两者。您可以将'passthrough'作为参数值提供给指定的流水线步骤来绕过它,这样就只使用另一个缩放器。
使用“通过”跳过最小最大或标准缩放器,这样我们可以在单个网格搜索中单独测试它们
请注意,如果您只是想尝试应用和不应用给定的步骤(而不是用一个步骤替换另一个步骤,就像我们上面所做的那样),您可以将 transformer 对象本身的一个实例与'passthrough'一起包含在参数列表中。例如,在 sklearn 文档的示例中,如果您有一个用于主成分分析的标注为'pca'的降维步骤,您可以在网格搜索参数中包含'pca': ['passthrough', PCA(5), PCA(10)]来测试不使用 PCA、使用具有 5 个成分的 PCA 以及使用具有 10 个成分的 PCA。
单独设置管道参数
好了,假设我们的网格搜索完成了,gs对象将会自动被安装上最佳估计器,我们可以使用gs.best_estimator_来访问它(不要忘记最后的下划线;很有必要!).
由于我们给了gs我们的pipe对象作为估计器,拟合的最佳估计器是pipe的副本,应用了最佳参数,并且已经在当前 X_train 上拟合。我们可以做这样的事情:
- 调用
gs.best_estimator_.get_params()获取性能最佳的流水线的参数 - 使用 pickle 或 joblib 将
gs.best_estimator_导出到文件,以备份最佳管道及其参数和 X_train 上的当前拟合 - 调用
gs.best_estimator_.predict(X_test)获得对未知测试数据的预测 - 使用
set_params()以防我们想要单独测试调整任何单个参数
例如,我们在网格搜索中测试了[10000, 5000, 2000]中的max_features,其中2000表现最好。因为它是最低的,也许我想只用1000来评估性能,看看更低是否真的会更好。
我可以使用set_params()和我们在指定网格搜索参数时使用的类似语法,手动将参数值设置为其他值:
gs.best_estimator_.set_params(**{'trans__txt__max_features': 1000})
注意,我将参数作为字典传递,如果需要,可以包含多个参数。我还需要字典前的**来解包它,这样set_params()就会接受它。
从 ColumnTransformer 访问功能名称
让我们假设1000中的max_features没有帮助,所以我已经将它设置回2000,在看不见的测试数据上评估性能,现在我准备对模型系数做一些解释。
要做到这一点,在我们对文章文本进行标记化、拆分主题并对分类特征进行一次性编码之后,我需要获得最终转换的特征名称。我们可以很容易地做到这一点,但我们必须使用正确的语法来深入嵌套层次。
首先,让我们使用 HTML 显示技巧来提醒自己这些步骤是什么以及它们的标签是什么:
GridSearch 最佳估计值的 HTML 显示
请记住,尽管我们将ColumnTransformer对象命名为cols_trans,但在我们提供给gs的最终管道中,我们只将其标记为trans。所以 **trans** 是我们这里需要处理的第一个标签。
虽然这里显示的转换步骤是并行的,但是它们实际上是按照连接的顺序进行的。如果我们希望我们的特性名称列表的完整列表是准确的,我们需要按照最初应用的顺序从每个转换器中获取特性名称,然后将它们连接起来。在图中,该层的正确顺序可以从左到右阅读。
我们将使用named_steps()属性来访问转换层,然后从该层的每个named_transformers_()中依次获取get_feature_names()属性。
按顺序从每个转换器获取特征名称,用于模型解释
注意,对于ohe转换器,我将cat_cols传递给了get_feature_names(),这是在这一步中被转换的原始列名的列表。将原始列名作为列前缀传递到此处;否则它们将是通用的。
结论
希望这是一个有用的例子,说明如何构建嵌套的Pipeline来处理转换和建模。虽然构建需要一些额外的工作,但是如果您想在网格搜索中尝试不同的转换和模型参数,这样做是非常有益的。
欢迎反馈和提问!
了解需求预测
要理解需求预测是如何工作的,需要的不仅仅是统计学和机器学习。
见见朱莉。她在月球上卖冰淇淋
这是朱莉。从六岁起,她想做的一切就是在每个夏天卖美味的冰淇淋,给人们带来欢乐。她相信她能做到,所以她做到了。
朱莉现在是 Salty & Icy 的老板,这是月球上最好的冰淇淋品牌之一。最初是一架小型航天飞机,现在向渴望探索环形山、爱上美丽的月球景观并最终像朱莉一样在月球上定居的太空游客分发了数百万个冰淇淋桶。
听起来像一个梦,但经营一家企业不仅仅是知道如何制作美味的冰淇淋!
制作冰淇淋,然后把它送到全月球的商店需要很多时间。然而,当顾客想要冰淇淋时,他们不会满足于超过 10 分钟的等待或任何其他口味,除非是他们渴望的口味。
简单地说,在顾客知道他们想买冰淇淋之前,冰淇淋必须提前做好。但是朱莉应该生产多少呢?每天 1000 还是 2000 桶?巧克力或草莓或以咸冰闻名的 20 多种异国风味?单杯还是 16 盎司的容器?
生产太多顾客不想买的东西将会带来巨大的损失,因为两周内卖不出去的产品将会被扔掉。对高需求产品生产过少会迫使她宝贵的客户选择其他竞争对手,并永远失去他们。
信不信由你,这项任务可以归结为一个问题:客户将来可能会购买每种产品的多少?找到这个问题的答案就叫做需求预测。
需求预测使 Julie 能够更好地进行业务规划和决策
作者图片
总的来说,这就是为什么需求预测对 Salty & Icy(以及其他企业)如此重要。
能够预测未来两周内的需求可以帮助 Salty & Icy 团队减少缺货,同时及时执行促销和降价以推动销售。
长达 2 个月的稍长的预测范围可以实现更好的生产计划,以保持冰淇淋搅拌,以满足客户的需求。
超过 2 个月之后,对预测需求的合理看法可以指导 Julie 和她的团队更好地开发产品和制定未来增长的业务战略。
从更广阔的角度来看,预测的时间越长,Julie 就能更好地规划、安排和提供原材料、劳动力和生产能力,以满足客户需求并执行增长战略。
要是朱莉有一个水晶球能告诉她未来的生意会怎么样就好了!
模式和无法解释的差异:需求预测的两个组成部分
没有所有辉煌的统计方法或人工智能炒作,需求预测的唯一目标是根据现有数据预测未来要消费的产品或服务的数量。就是这样!
关于从过去到现在影响产品需求的因素的数据越多,就越容易发现潜在的模式和关系,并对未来业务的发展做出合理的预测。
但是什么构成了需求预测呢?以下是对小查尔斯·w·蔡斯在书中所写内容的简短而甜蜜的总结。
预测=模式+未解释的差异
——出自小查尔斯·w·蔡斯
模式
模式通常有以下三种形式:趋势、季节性和周期性因素。
- **趋势:**由于在过去的五年中,对纯素冰淇淋的历史需求每年增长 x %, Julie 预计未来纯素冰淇淋的销量将增长 x%。
- **季节性:**当太阳照射到月球表面时,温度上升。这时,太空旅行者会疯狂地吃冰淇淋来缓解酷热。反之亦然,当太阳下山时,温度会降到零度以下。很少有人喜欢在冰淇淋桶里冷冻大脑。
- **周期性:**月球一侧的白天和极热持续约 13.5 天,随后是 13.5 夜的黑暗和冰冻温度。月球每一面对冰淇淋的需求也随着月球自转而起伏。
这里的基本假设是,客户未来想要购买的东西会模仿他们过去购买的东西。因此,如果 Julie 能够确定过去影响其产品需求的趋势、季节性或周期因素,她就能预测未来的需求。
听起来好得难以置信?
我同意。未来不会像过去一样。这就是第二个组成部分出现的地方。
不可解释的变异数
无法解释的差异表示历史需求和未来需求之间的差异,无法用趋势、季节性或周期性因素来解释。
但这可能是什么呢?嗯,很多很多不同的事情。
Firmbee.com在 Unsplash 上拍照
这可能是一个买一送一的促销活动,或者是其他冰淇淋品牌为了与 Salty & Icy 竞争而降价 5%。在月球上举办的星际杯可能会看到对大尺寸多口味冰淇淋桶的需求增加,因为朋友和家人往往会一起观看足球比赛。与航天飞机有关的不幸事故可能会使人们对太空旅行变得谨慎,从而影响月球上的整体贸易和经济。
这些现象都在不同程度上影响着朱莉冰淇淋的需求。只有上帝知道还有多少因素会推动销售上升或下降。
但是**因为很难 100%准确地预测未来,并不意味着朱莉应该完全放弃它。**事实上,目标和期望应该是在合理的时间和成本限制内,尽可能基于数据量化无法解释的差异。
但是怎么做呢?好吧,让我们探索一下人们一直在做些什么来实现合理准确的需求预测!
预测未来需求的方法不止一种
我无意列出天底下所有预测方法的清单。这会让你直接进入深度睡眠。
但让我简要介绍 3 大类需求预测方法。每一类都代表了现实生活中经营企业的人的一种潜在信念或行为,值得了解。所以听我说完!
时间序列:历史会重演
你听说过移动平均线吗?指数平滑怎么样?哦,我怎么能省略时间序列预测的全能 ARIMA 模型呢?
如果你需要快速回顾一下这些是什么,看看这篇文章。但是下面是你需要知道的最重要的一点。
使用这些统计方法,人们有意或无意地假设历史会重演。因此用时间序列模型外推历史数据似乎足以预测需求。
例如,朱莉本月销售的冰淇淋数量将表明下个月对咸冰产品的需求。朱莉自创业以来观察到的基于月球自转的冰淇淋需求的周期性波动或纯素食冰淇淋越来越受欢迎,会告诉她下一季度、明年和未来许多年她应该生产多少冰淇淋。
但是过去的历史真的会在几个月甚至几周内保持不变吗?让我们看看。
个人判断:相信你的直觉
你见过基线预测是如何在委员会中传阅以收集反馈和批准的吗?
每个季度,Julie 通常会根据时间序列建模来准备基线预测。然后,她将基线预测发送给整个管理团队。
每个人都根据自己的判断、经验或直觉在预测中加入自己的想法,因为每个人都知道历史不会完全重演。一些人会高兴地上调预测需求,而另一些人似乎对未来几个月的需求过于悲观。
那么谁是对的呢?谁错了?更重要的是,为什么人们会选择依靠直觉呢?
许多研究人员研究了这种有趣的行为。简单来说,这里有三个主要的信念可以解释地面上正在发生的事情。
作者图片
当做出决策的时间紧迫,而时间序列预测不可用或不足以捕捉复杂的市场行为时,人们会依赖领域知识、个人判断或两者兼而有之。
不幸的是,无论判断是由一位高管还是整个委员会做出的,领域知识和个人偏见之间都有一条非常细微的界限。研究表明,大多数时候,当数字反映某人的愿望或有缺陷的推理,而不是对市场和客户行为的真正理解时,基于直觉的调整可能产生非常不准确的预测。
嗯,一定有别的办法,对吧?
回归:首先,给我看数据

除了趋势、季节性和周期性因素,还有什么可以帮助解释与未来需求相关的任何无法解释的差异?随着朱莉对过去记录的深入挖掘,她观察到了几种关系。
- 花更多的钱把她的产品陈列在超市冷冻通道的中央与眼睛齐平的位置,销售量将是其他区域的两倍。
- 在去年 5 月的“冷冻价格战”期间,月球上大多数冰淇淋品牌的售价都是 Salty & Icy 的一半。销售量下降了 25%。
虽然相关性并不意味着因果关系,外部和内部因素之间的相互关系可以用来预测未来的需求。例如,炎热的天气与比平均销量高 5%相关,而比其他品牌高 5%的价格可能会使企业损失 20%的周需求。
量化这种关系,并定义一个数学函数,根据目前对这些因素的了解来预测未来的需求,这就是所谓的回归。
还记得我们讨论过需求预测的两个组成部分吗?虽然时间序列方法有助于揭示与时间相关的模式,但回归在量化无法解释的差异方面极具价值。
包扎
将我们的讨论引向 Julie,以及她对预测未来咸冰产品需求的需求,以下是她需要牢记的内容。
首先,做出那些判断性的调整来提高定量预测模型的准确性是绝对不允许的。一个更好的方法是通过假设测试用现有数据验证领域知识。
其次,历史会重演的时间序列方法只有在产品多年来有相当稳定的销量,随机波动非常小的情况下才有效。然而,由于市场变化如此之快,新的进入者到处涌现,很少有公司能够继续享有稳定的销量。
第三,代表不同来源的产品需求的各种影响因素的数据越多,提高业务洞察力和预测准确性的可能性就越大。但是用 Excel 对许多潜在因素进行回归分析很快就会变成一场噩梦。
最后,除了人工智能宣传之外,生成可用于决策的准确需求预测需要的不仅仅是机器学习,因为:
- 机器学习并不能解决数据问题。如果历史数据缺失或质量差,单靠机器学习无法生成具有精度和准确度的需求预测模型。
- 当人们不相信预测数字的准确性或不理解这些数字是如何产生的,很难说服他们少依赖一点直觉,多依赖一点数据。因此,机器学习之旅可能需要时间、大量的试点项目和文化转变,才能达到“足够准确”的模型和“可解释”的模型之间的最佳平衡点,以便理解和采用。
这就是我这篇博文的全部内容。感谢您的阅读。对我如何能做得更好有反馈,或者只是想聊天?在评论里告诉我或者在 LinkedIn 上找到我。祝大家度过美好的一周!
参考
- 对统计预测进行判断性调整的“重大损失”会影响专家的行为吗?作者彼得罗保罗斯等人。
- 需求驱动的预测:一种结构化的预测方法
- Nick T. Thomopoulos 的库存控制需求预测
原载于 2021 年 5 月 23 日 http://thedigitalskye.com**的 。


 被折叠的 条评论
为什么被折叠?


