


版本opencv-python (4.4.0.46)
第一步:rgb图像转为灰度图像
import cv2
import numpy as np

image = cv2.imread("E:/code/python/medfilter/1lena.png")
width = image.shape[0]
height = image.shape[1]
grayimg = np.zeros([width,height,1],np.uint8)
for i in range(height):
    for j in range(width):
        grayimg[i,j] = 0.299 * image[i,j][0] + 0.587 * image[i,j][1] +  0.114 * image[i,j][2]
cv2.imshow('srcImage', image)
cv2.imshow('grayImage', grayimg)
cv2.imwrite("E:/code/python/medfilter/2graylena.png", grayimg)
cv2.waitKey(0)

#gray=R*0.299+G*0.587+B*0.114  Gray = (R*306 + G*601 + B*117) >> 10


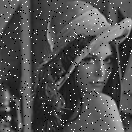
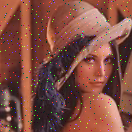
第二步:添加椒盐噪声
from PIL import Image
import numpy as np

def AddNoise(src, dst, probility = 0.05, method = "salt_pepper"):#灰度图像

	imarray = np.array(Image.open(src))
	height, width = imarray.shape

	for i in range(height):
		for j in range(width):
			if np.random.random(1) < probility:#随机加盐或者加椒
				if np.random.random(1) < 0.5:
					imarray[i, j] = 0
				else:
					imarray[i, j] = 255
	new_im = Image.fromarray(imarray)
	new_im.save(dst)

def RGBAddNoise(src,dst,prob): #同时加杂乱(RGB单噪声)RGB图噪声 prob:噪声占比

    imarray = np.array(Image.open(src))
    height, width, channels = imarray.shape

    #prob = 0.05 #噪声占比 已经比较明显了 >0.1 严重影响画质
    NoiseImg = imarray.copy()
    NoiseNum = int(prob * height * width)
    for i in range(NoiseNum):
        rows = np.random.randint(0, height - 1)
        cols = np.random.randint(0, width - 1)
        channel = np.random.randint(0, 3)
        if np.random.randint(0, 2) == 0:
            NoiseImg[rows, cols, channel] = 0
        else:
            NoiseImg[rows, cols, channel] = 255
    #return NoiseImg
    new_im = Image.fromarray(NoiseImg)
    new_im.save(dst)

lena = "E:/code/python/medfilter/1lena.png"
graylena = "E:/code/python/medfilter/2graylena.png"
saltlena = "E:/code/python/medfilter/3saltlena.png"
rgbsaltlena = "E:/code/python/medfilter/5rgbsaltlena.png"

#AddNoise(gray_girl, tar)
RGBAddNoise(lena,rgbsaltlena,0.05)
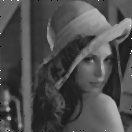
第三步:中值滤波
1、没有调用cv函数
#https://blog.csdn.net/baidu_41902768/article/details/94451787
from PIL import Image
import numpy as np

def MedianFilter(src, dst, k = 3, padding = None):
	#k=3表示窗口大小

	imarray = np.array(Image.open(src))
	height, width = imarray.shape

	if not padding:
		edge = int((k-1)/2)
		if height - 1 - edge <= edge or width - 1 - edge <= edge:
			print("The parameter k is to large.")
			return None
		new_arr = np.zeros((height, width), dtype = "uint8")
		for i in range(height):
			for j in range(width):
				if i <= edge - 1 or i >= height - 1 - edge or j <= edge - 1 or j >= height - edge - 1:
					new_arr[i, j] = imarray[i, j]
				else:
					new_arr[i, j] = np.median(imarray[i - edge:i + edge + 1, j - edge:j + edge + 1])
		new_im = Image.fromarray(new_arr)
		new_im.save(dst)


src = "E:/code/python/medfilter/3saltlena.png"
dst = "E:/code/python/medfilter/4medlena.png"

MedianFilter(src, dst)
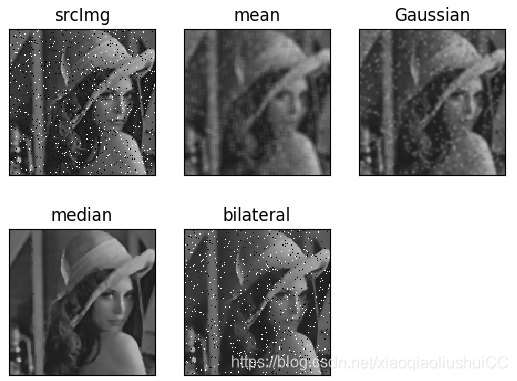
2、调用cv函数
#https://blog.csdn.net/qq_27261889/article/details/80822270
import numpy as np
import cv2
import matplotlib.pyplot as plt
#src = "E:/code/python/medfilter/3saltlena.png"#灰度图像
src = "E:/code/python/medfilter/5rgbsaltlena.png"#彩色图像
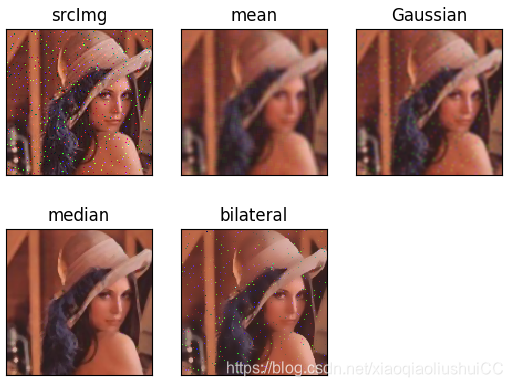
######## 四个不同的滤波器 #########
img = cv2.imread(src)
img = cv2.cvtColor(img, cv2.COLOR_BGR2RGB)#颜色模式转换
# 均值滤波
img_mean = cv2.blur(img, (5,5))
# 高斯滤波
img_Guassian = cv2.GaussianBlur(img,(5,5),0)
# 中值滤波
img_median = cv2.medianBlur(img, 3)
# 双边滤波
img_bilater = cv2.bilateralFilter(img,9,75,75)
# 展示不同的图片
titles = ['srcImg','mean', 'Gaussian', 'median', 'bilateral']
imgs = [img, img_mean, img_Guassian, img_median, img_bilater]
for i in range(5):
plt.subplot(2,3,i+1)#注意,这和matlab中类似,没有0,数组下标从1开始
plt.imshow(imgs[i])
plt.title(titles[i])
plt.xticks([]), plt.yticks([])
plt.show()


 6728
6728


 被折叠的 条评论
为什么被折叠?
被折叠的 条评论
为什么被折叠?
 到【灌水乐园】发言


