


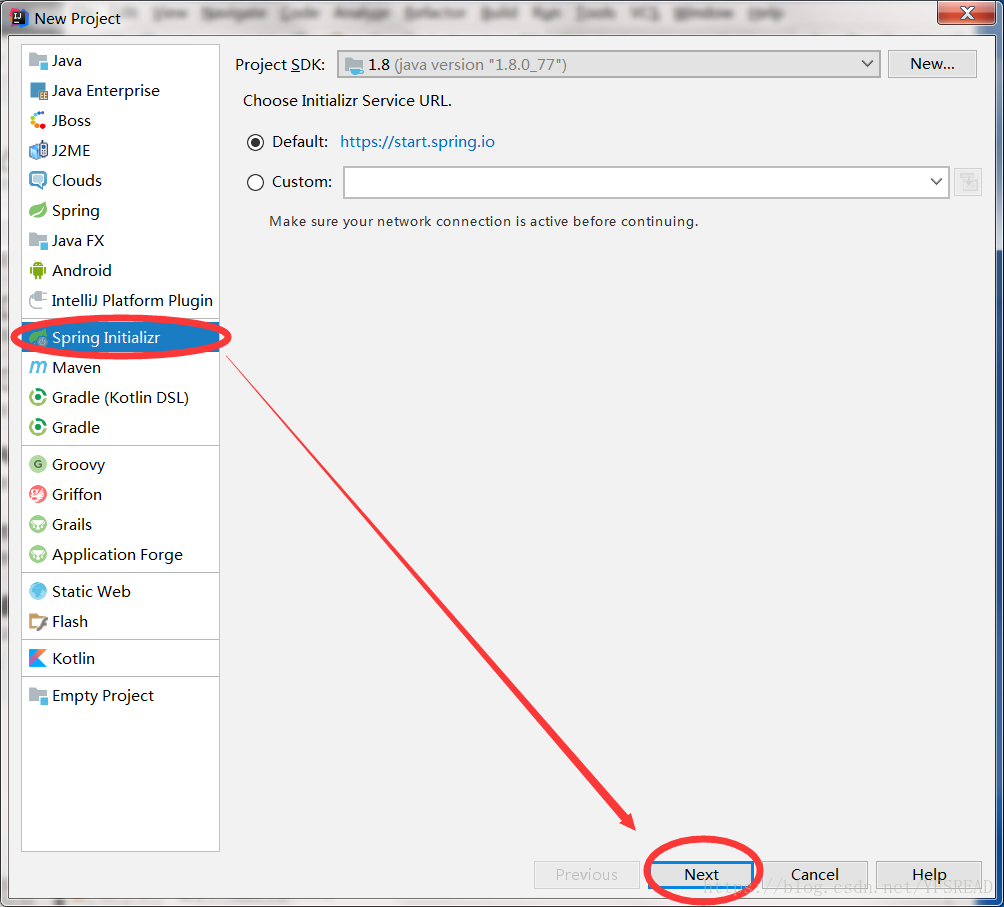
选类型
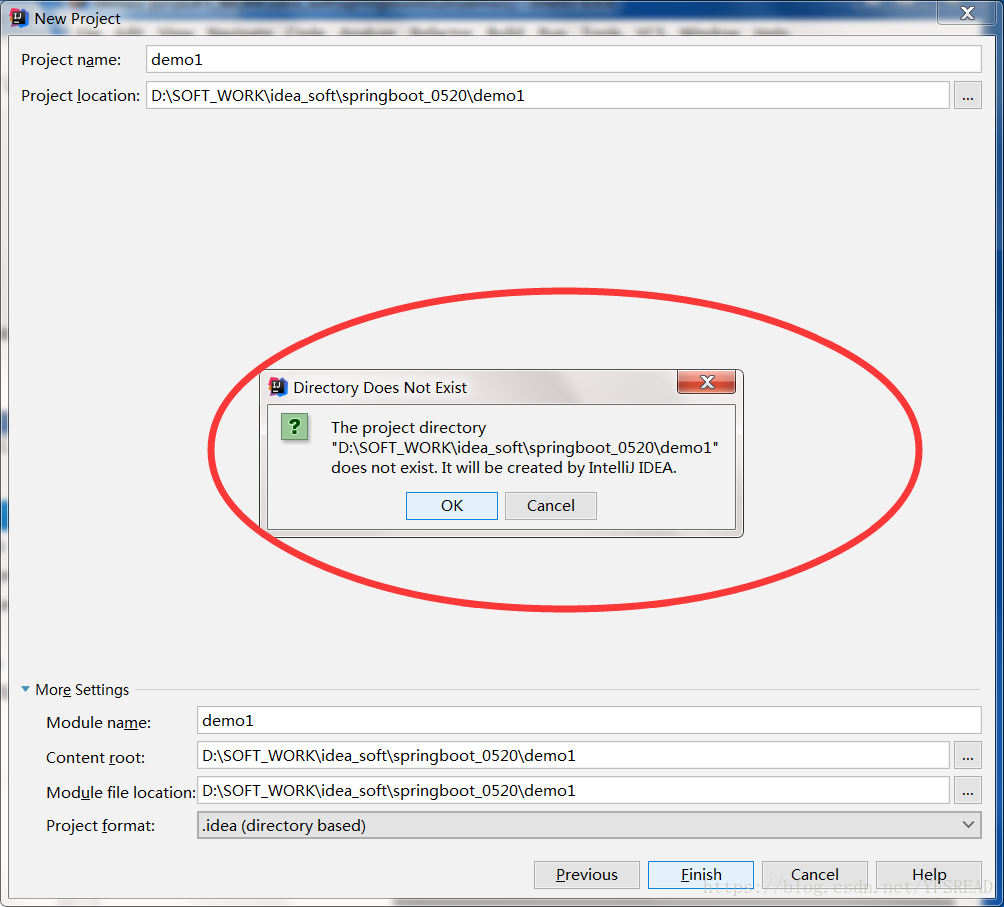
提示新建文件夹
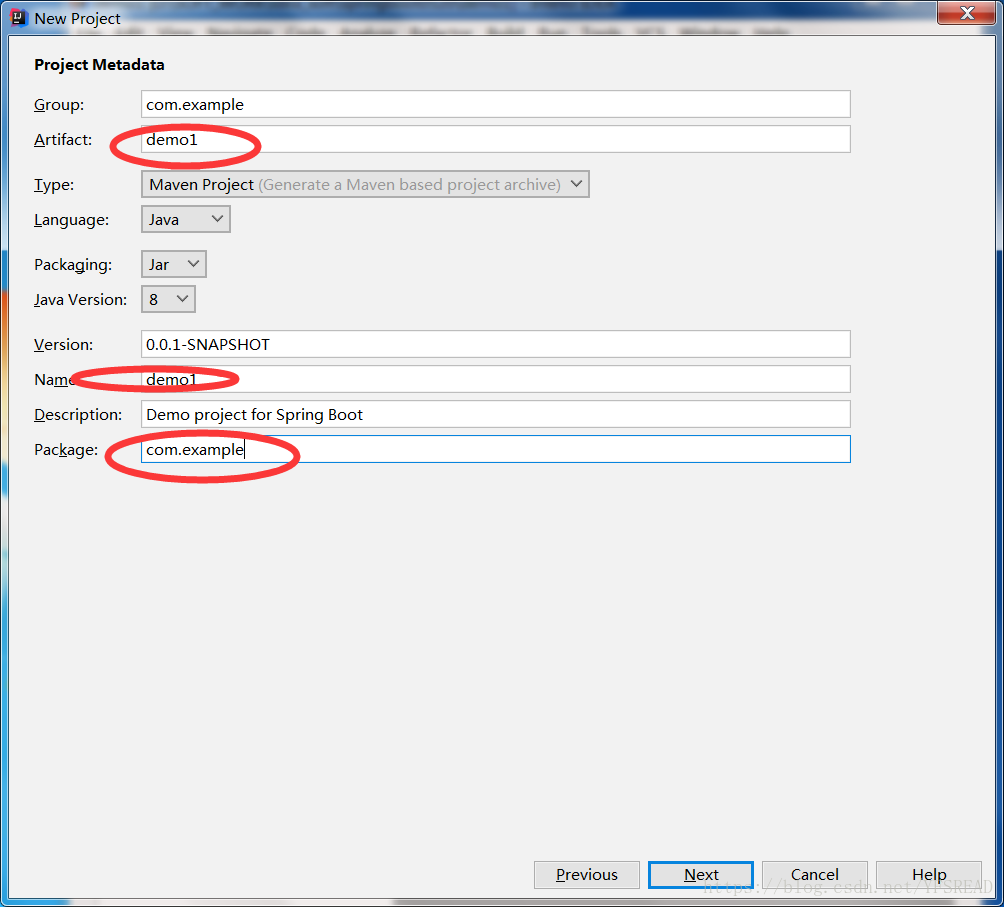
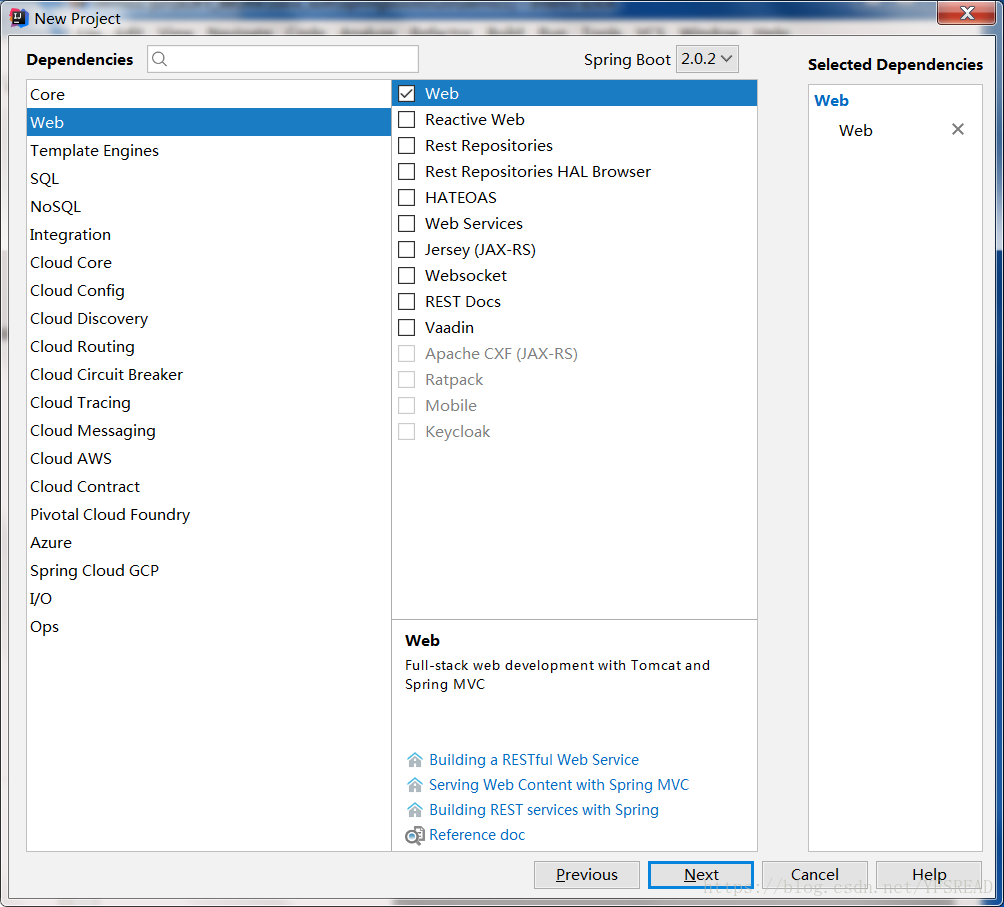
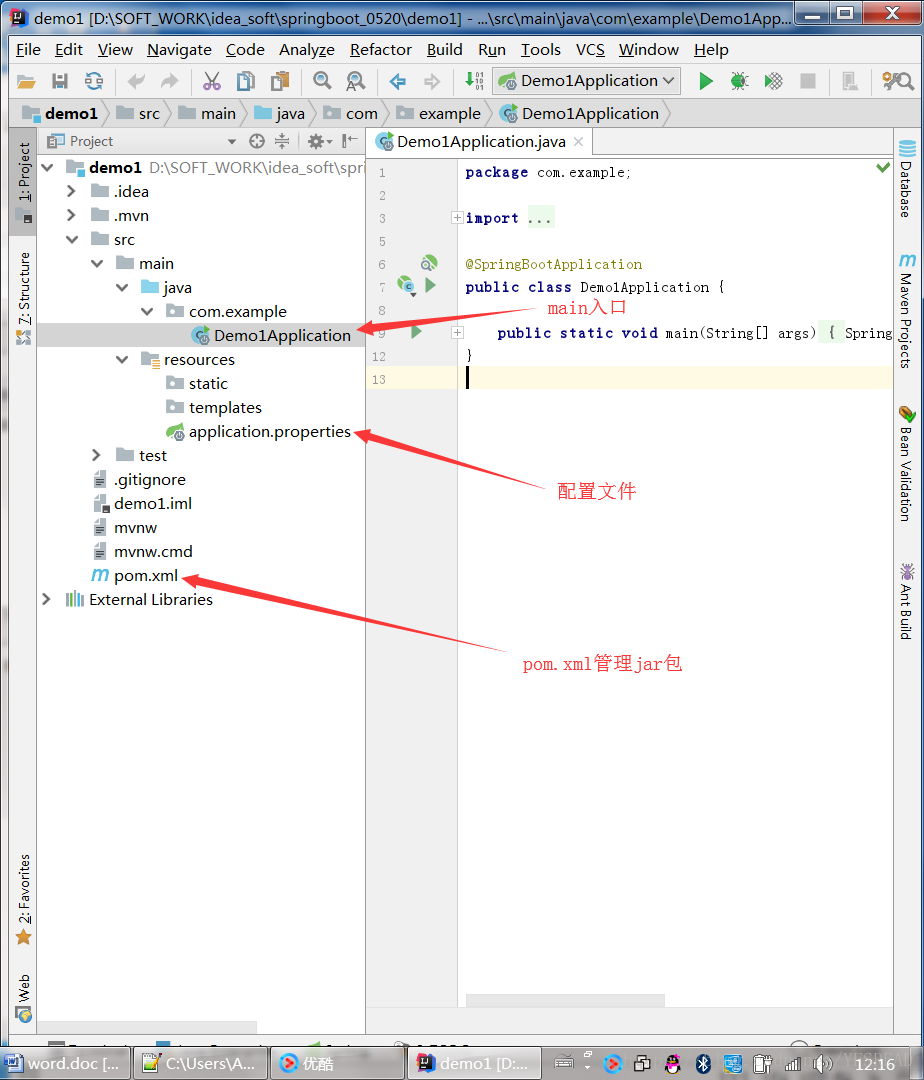
框架
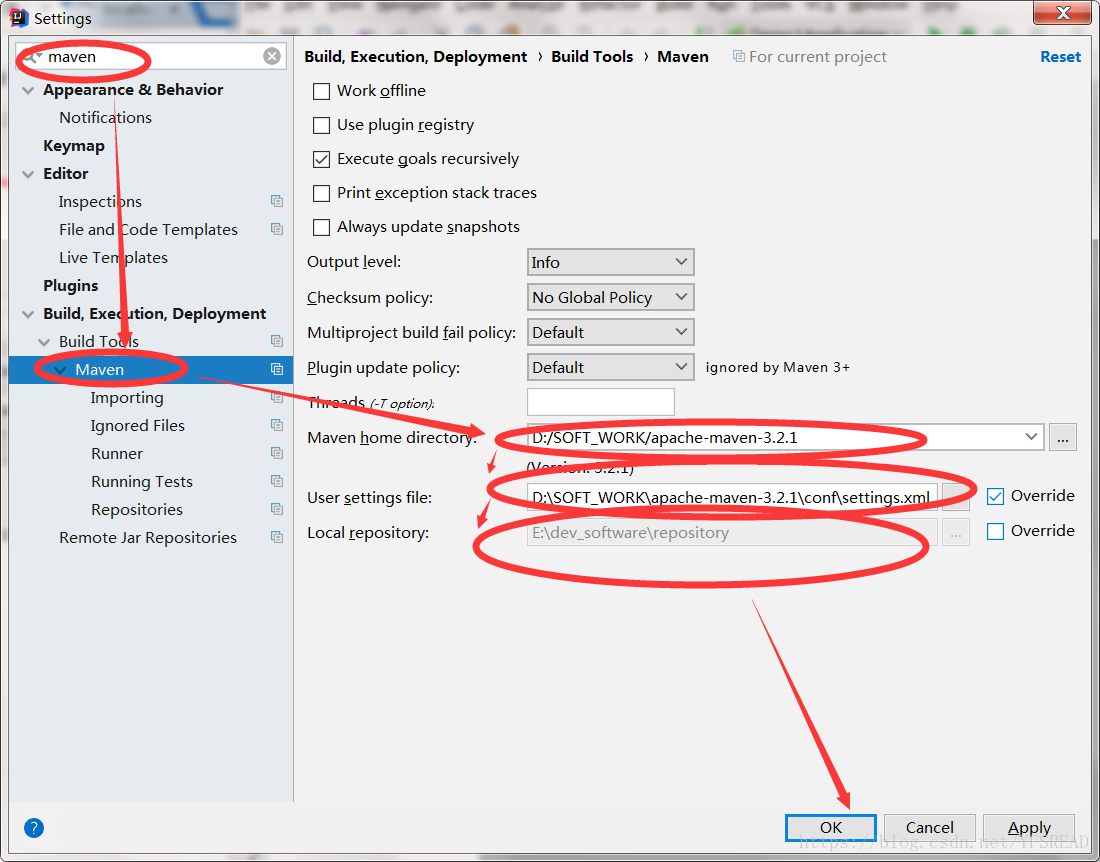
配置maven和maven仓库
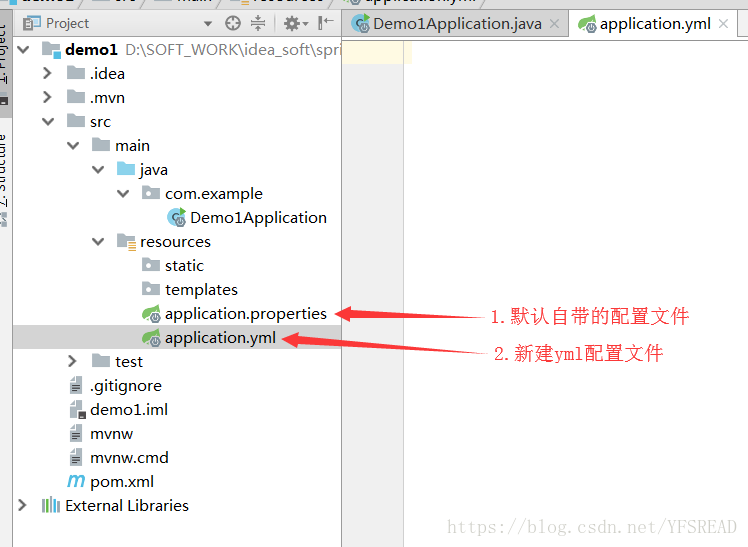
新建yml配置文件
YMAL:Yet AnotherMarkup Language(仍是一种标记语言)是一个可读性高,用来表达资料序列的格式。
用自己新建的yml配置文件设置配置端口和其它参数(也可在application.properties中,项目默认加载的是application.properties中的配置,两者可以同时并存)
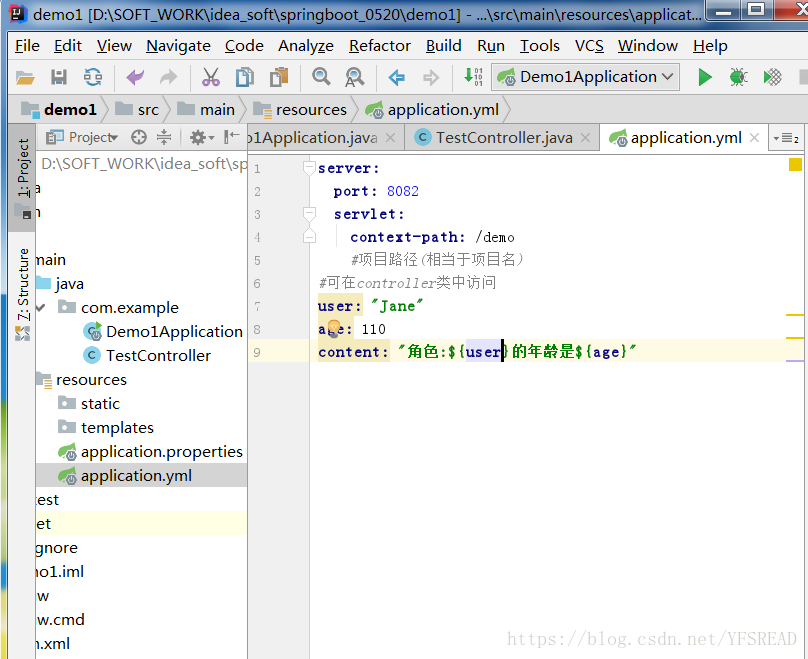
server:
port: 8082
servlet:
context-path: /demo
#项目路径(相当于项目名)
#可在controller类中访问
user: "Jane"
age: 110
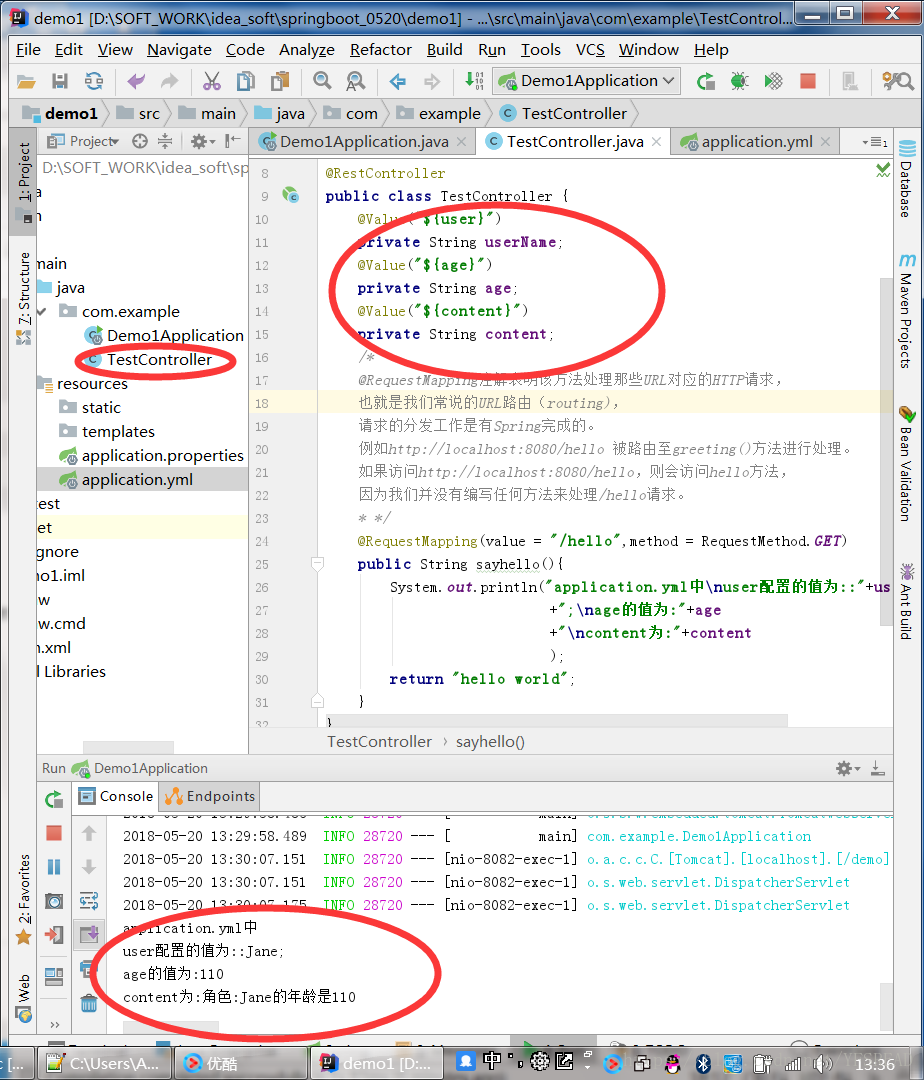
content: "角色:${user}的年龄是${age}"新建controller类
@RestController是一类特殊的@Controller,它的返回值直接作为HTTP Response的Body部分返回给浏览器。
package com.example;
import org.springframework.beans.factory.annotation.Value;
import org.springframework.web.bind.annotation.RequestMapping;
import org.springframework.web.bind.annotation.RequestMethod;
import org.springframework.web.bind.annotation.RestController;

@RestController
public class TestController {
    @Value("${user}")
    private String userName;
    @Value("${age}")
    private String age;
    @Value("${content}")
    private String content;
    /*
    @RequestMapping注解表明该方法处理那些URL对应的HTTP请求,
    也就是我们常说的URL路由(routing),
    请求的分发工作是有Spring完成的。
    例如http://localhost:8080/hello 被路由至greeting()方法进行处理。
    如果访问http://localhost:8080/hello,则会访问hello方法,
    因为我们并没有编写任何方法来处理/hello请求。
    * */
    @RequestMapping(value = "/hello",method = RequestMethod.GET)
    public String sayhello(){
        System.out.println("application.yml中\nuser配置的值为::"+userName
                            +";\nage的值为:"+age
                            +"\ncontent为:"+content
                            );
        return "hello world";
    }
}
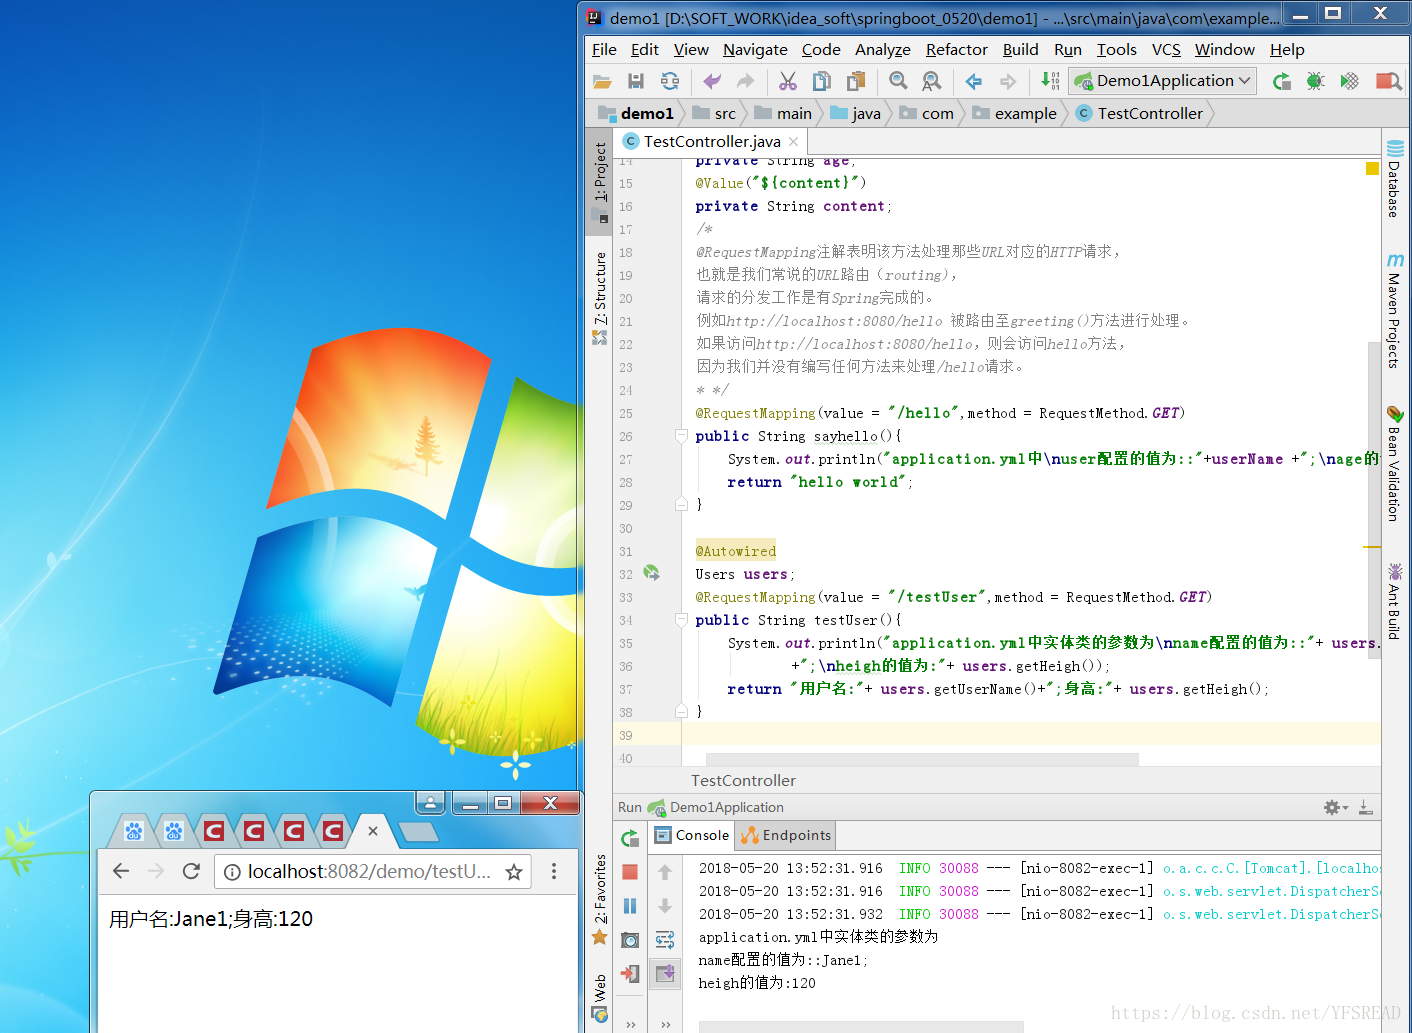
application.yml配置实体类(记得userobj最好别大写,有可能会报错)
#创建实体类例子
userobj:
  userName: Jane1
  heigh: 120
创建实体类
package com.example;
import org.springframework.boot.context.properties.ConfigurationProperties;
import org.springframework.stereotype.Component;
@ConfigurationProperties(prefix = "userobj")
@Component
public class Users {
    String userName;
    int heigh;
    public String getUserName() {
        return userName;
    }
    public void setUserName(String userName) {
        this.userName = userName;
    }
    public int getHeigh() {
        return heigh;
    }
    public void setHeigh(int heigh) {
        this.heigh = heigh;
    }
}
测试调用
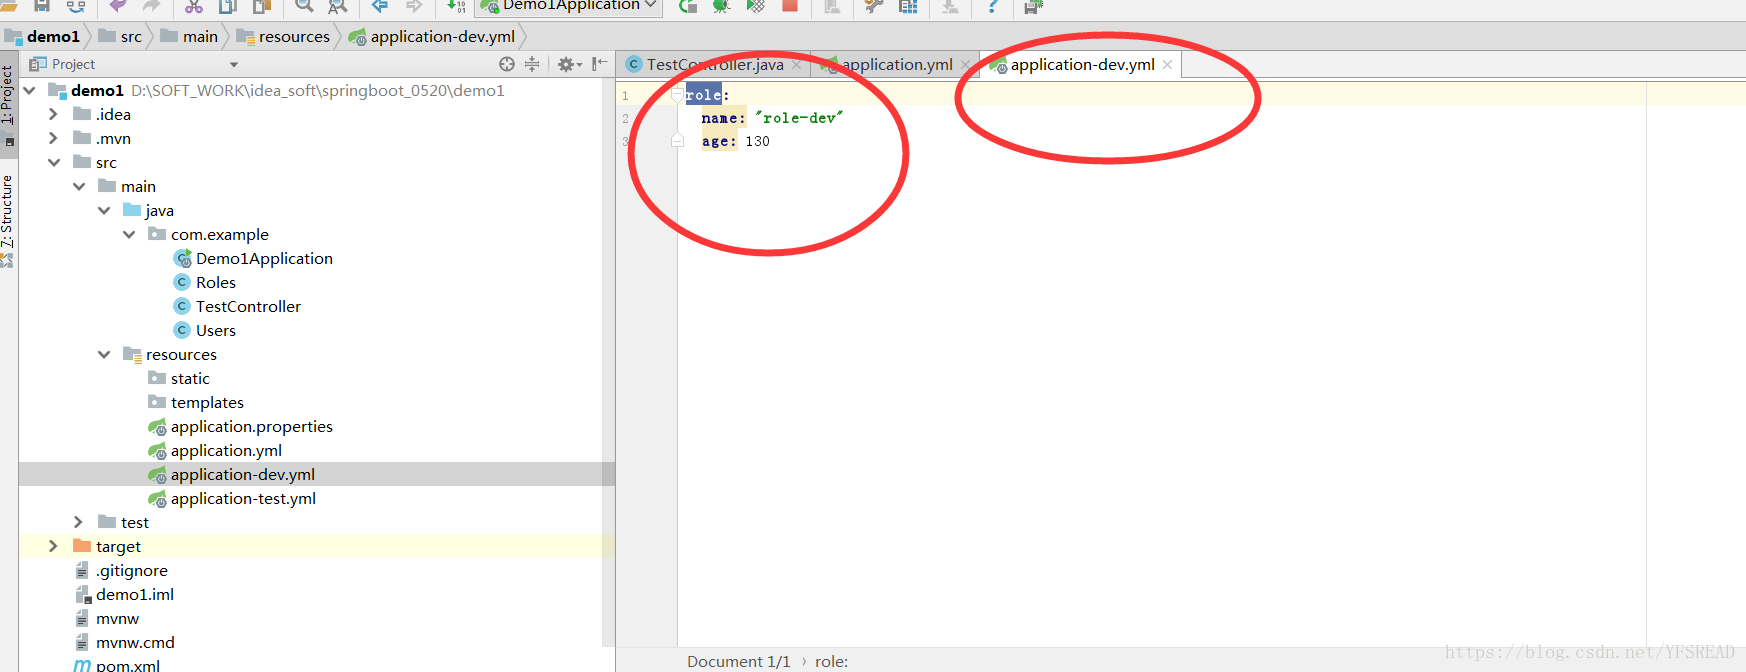
多配置文件
新建role类
package com.example;
import org.springframework.boot.context.properties.ConfigurationProperties;
import org.springframework.stereotype.Component;
@Component
@ConfigurationProperties(prefix = "role")
public class Roles {
String name;
String age;
public String getName() {
return name;
}
public void setName(String name) {
this.name = name;
}
public String getAge() {
return age;
}
public void setAge(String age) {
this.age = age;
}
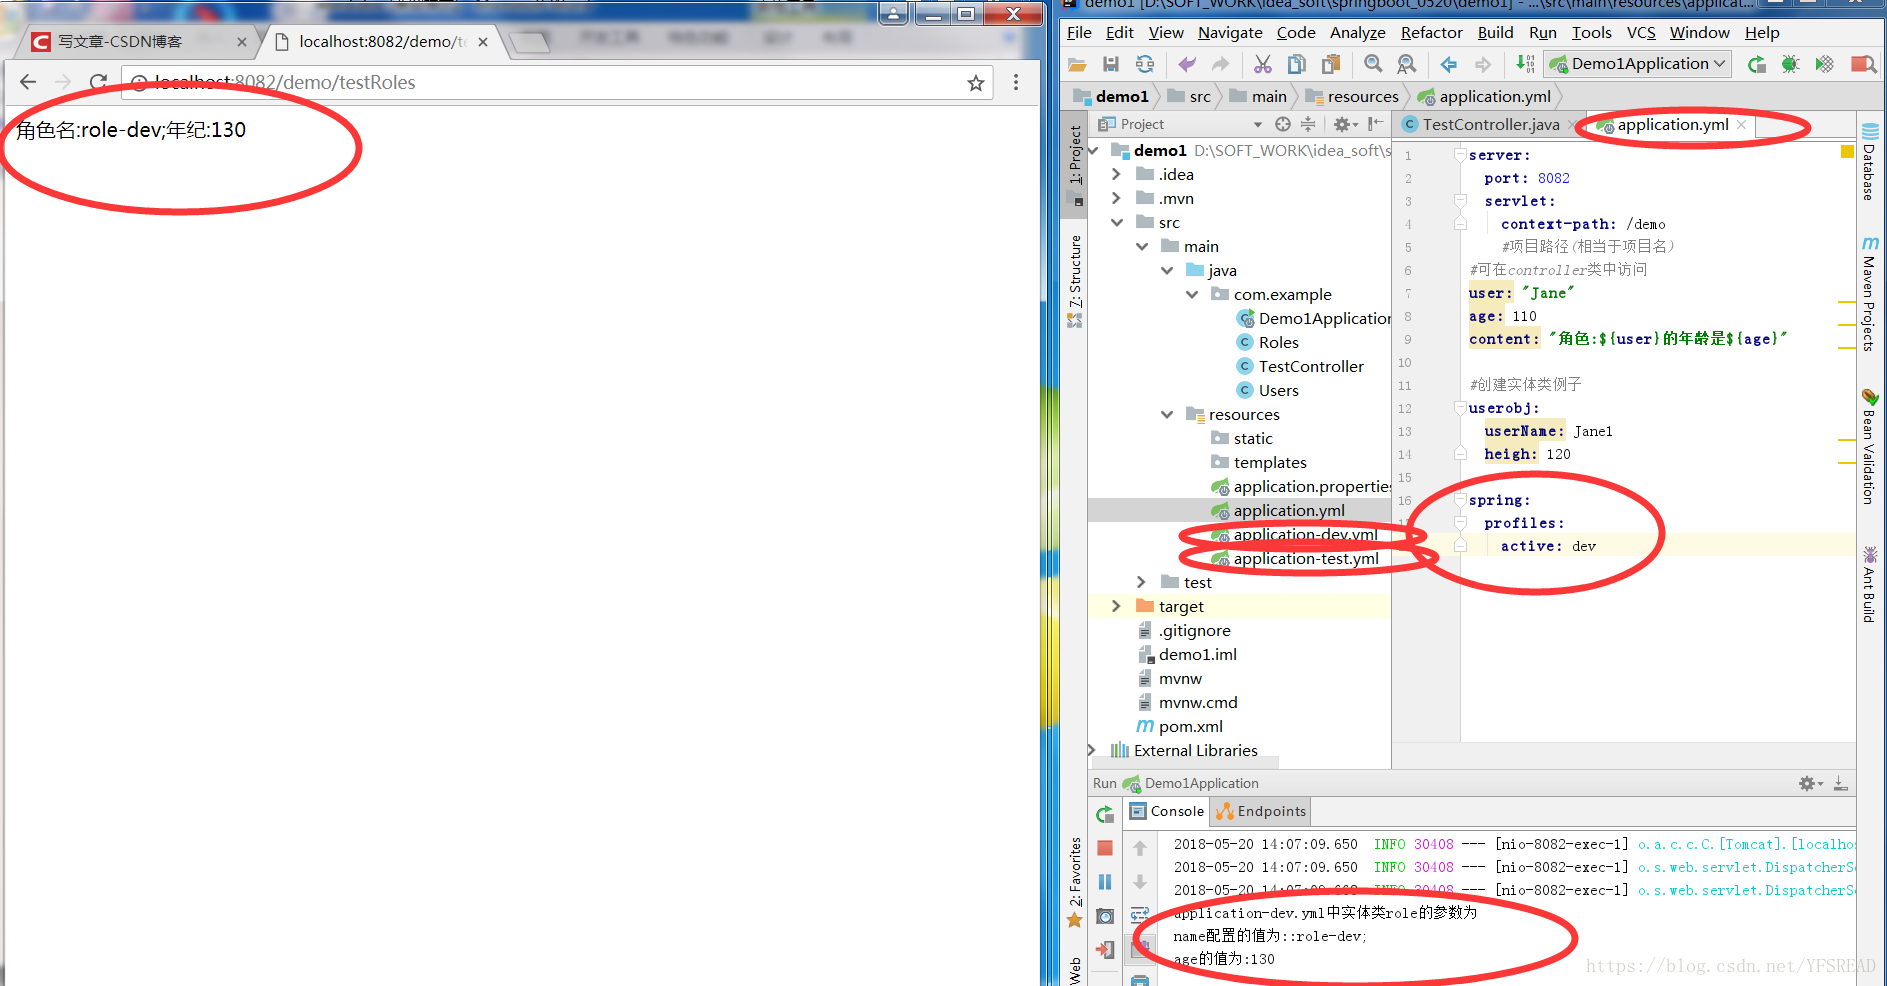
}测试
@Autowired
Roles roles;
@RequestMapping(value = "/testRoles",method = RequestMethod.GET)
public String testRoles(){
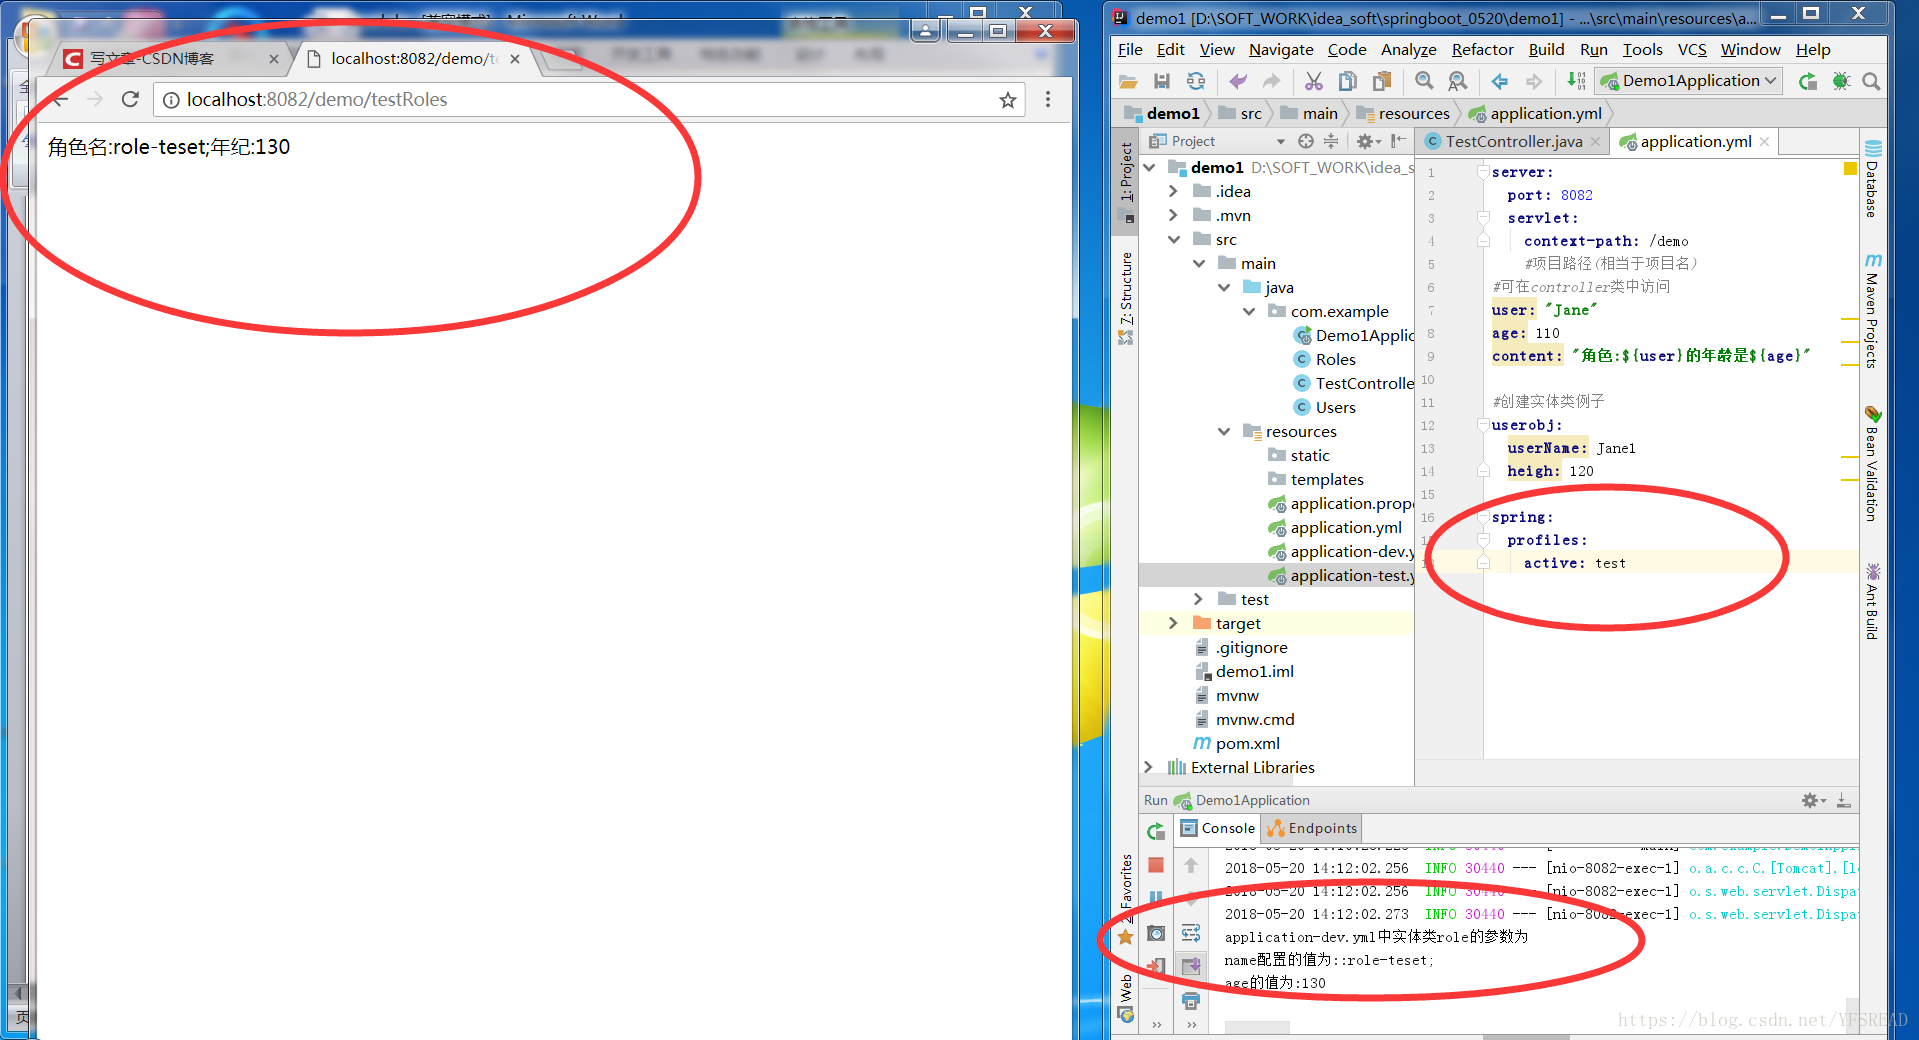
System.out.println("application-dev.yml中实体类role的参数为\nname配置的值为::"+ roles.getName()
+";\nage的值为:"+ roles.getAge());
return "角色名:"+roles.getName()+";年纪:"+ roles.getAge();
}application-dev.yml配置
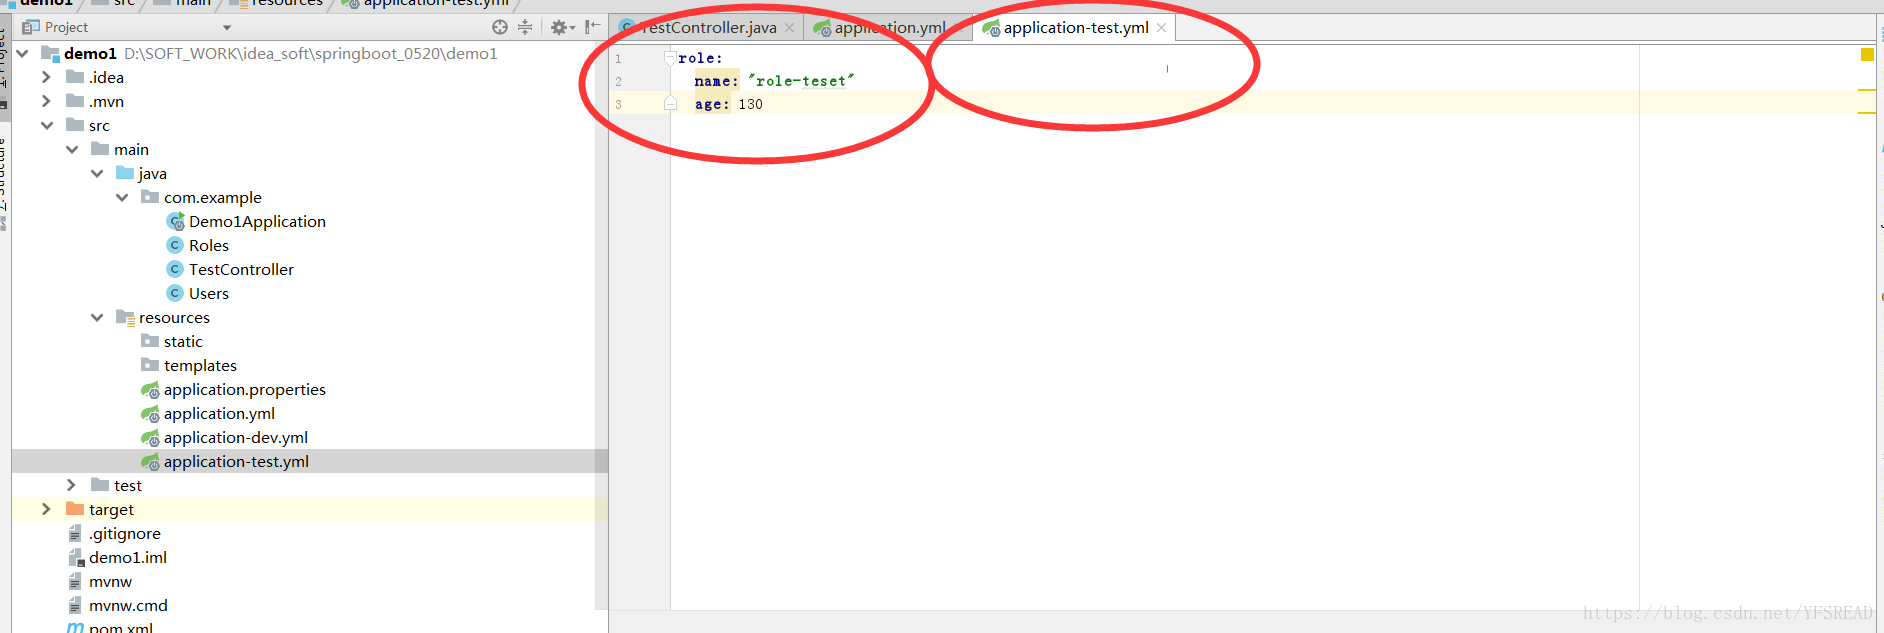
application-test.yml配置
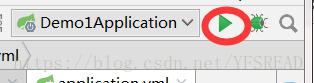
启动
1.点击直接起动
2.第二种启动方式:也可以在目录下使用命令行mvn spring-boot:run进行启动(需要配置java的环境变量1.8版本)
3.第三种启动方式:
3.1.在项目目录下使用mvn install编译项目
3.2.进入到target目录下
3.3.使用java -jar 项目名.jar 启动项目


 2082
2082


 被折叠的 条评论
为什么被折叠?
被折叠的 条评论
为什么被折叠?
 到【灌水乐园】发言


