


Adetailer: Automatically fix faces and hands Adetailer:自动固定面部和手部
After Detailer (adetailer) is a Stable Diffusion Automatic11111 web-UI extension that automates inpainting and more. It saves you time and is great for quickly fixing common issues like garbled faces. In this post, you will learn how it works, how to use it, and some common use cases.
After Detailer (adetailer) 是一个 Stable Diffusion Automatic11111 web-UI 扩展,可自动修复等。它可以节省您的时间,并且非常适合快速解决常见问题,例如乱码。在这篇文章中,您将了解它的工作原理、如何使用它以及一些常见的用例
Table of Contents 目录
-
Software 软件
-
Installing After Detailer extension
安装 After Detailer 扩展 -
- Google Colab 谷歌合作
- Windows or Mac Windows 或 Mac
-
Inpaint to fix faces
Inpaint 以固定面部 -
- Problems with generating small faces
生成小面孔的问题 - Automatic inpainting with After Detailer
使用 After Detailer 自动修复
- Problems with generating small faces
-
Using After Detailer 使用 After Detailer
-
- Use in Txt2img 在 Txt2img 中使用
- Use in img2img 在 img2img 中使用
-
ADetailer parameters explained
ADetailer 参数说明 -
- ControlNet Openpose
- ControlNet Tile ControlNet 磁贴
- ControlNet inpaint ControlNet 油漆
- ControlNet Line art ControlNet 线条艺术
- Detection model 检测模型
- Using a different prompt in inpainting
在修复中使用不同的提示 - Detection 检波
- Mask Preprocessing 掩模预处理
- Inpainting 修复
- Using ADetailer with ControlNet
将 ADetailer 与 ControlNet 结合使用
-
ADetailer vs face restoration
ADetailer 与面部修复 -
When to use ADetailer
何时使用 ADetailer -
Tips 技巧
-
Reference 参考
Software 软件
We will use AUTOMATIC1111 Stable Diffusion GUI. You can use this GUI on Windows, Mac, or Google Colab.
我们将使用AUTOMATIC1111 Stable Diffusion GUI。您可以在 Windows、Mac 或 Google Colab 上使用此 GUI。
Check out the Quick Start Guide if you are new to Stable Diffusion.
如果您不熟悉 Stable Diffusion,请查看快速入门指南。
Installing After Detailer extension 安装 After Detailer 扩展
Google Colab 谷歌合作
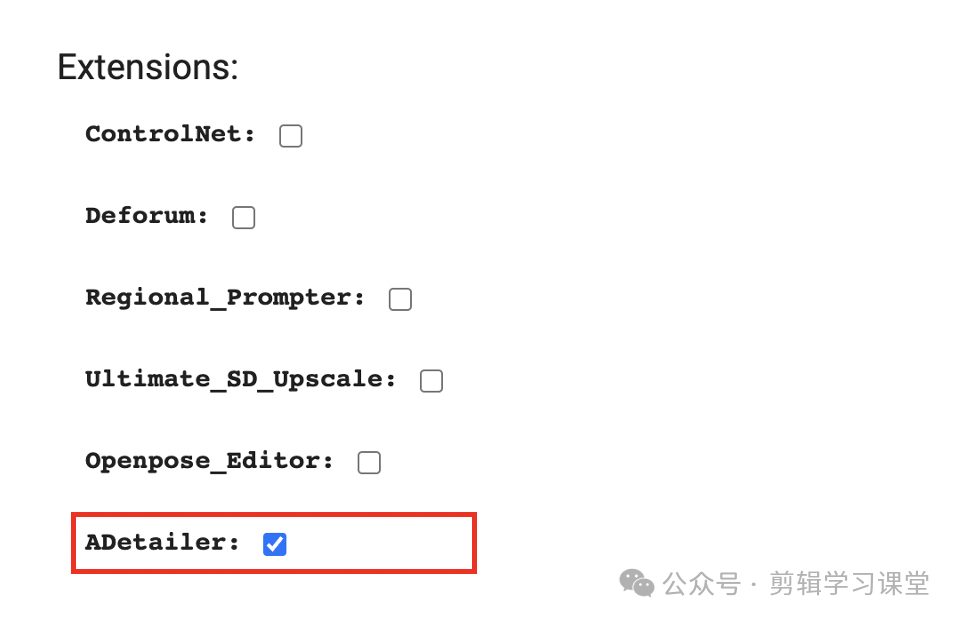
Using After Detailer in our Google Colab notebook is easy. All you need to do is select the ADetailer option in the Extensions section.
在我们的 Google Colab 笔记本中使用 After Detailer 非常简单。您需要做的就是选择“扩展”部分中的“ADetailer”选项。
Windows or Mac Windows 或 Mac
Follow these steps to install the Regional Prompter extension in AUTOMATIC1111.
按照以下步骤在 AUTOMATIC1111 中安装区域提示器扩展。
- Start AUTOMATIC1111 Web-UI normally.
正常启动AUTOMATIC1111 Web-UI。
\2. Navigate to the Extension Page.
\2. 导航到扩展页面。
\3. Click the Install from URL tab.
\3. 单击“从 URL 安装”选项卡。
\4. Enter the following URL in the URL for extension’s git repository field.
\4. 在扩展的 git 存储库字段的 URL 中输入以下 URL。
https://github.com/Bing-su/adetailer
\5. Wait for the confirmation message that the installation is complete.
\5. 等待安装完成的确认消息。
\6. Restart Web-UI. 6. 重新启动 Web-UI。
Inpaint to fix faces Inpaint 以固定面部
Before learning how to use After Detailer, it is helpful to go through what you would do without it.
在学习如何使用 After Detailer 之前,先了解一下没有它你会做什么。
Problems with generating small faces 生成小面孔的问题
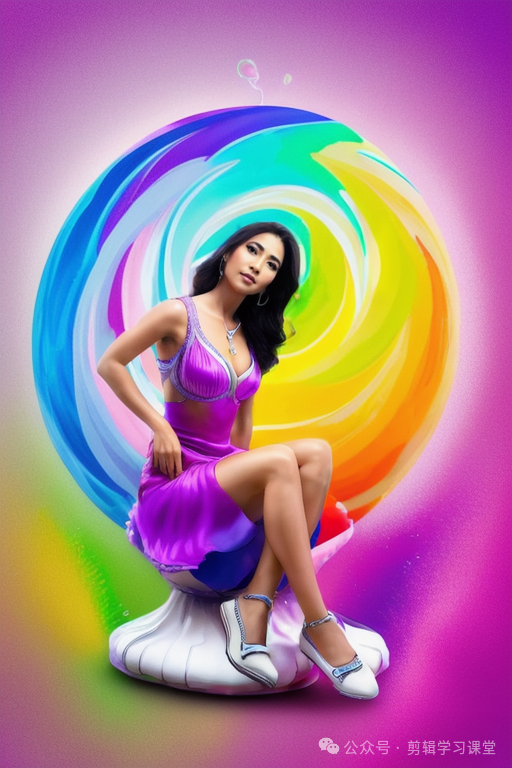
Let’s say you generate a full-body image of a person. Because you are using a v1 model, you should not set the resolution too high (too much larger than 512 pixels). Otherwise, you will have duplicate persons.
假设您生成了一个人的全身图像。由于使用的是 v1 型号,因此不应将分辨率设置得太高(大于 512 像素)。否则,您将有重复的人。
Model: Realistic Vision v2
型号:Realistic Vision v2
这份完整版的学习资料已经上传CSDN,朋友们如果需要可以微信扫描下方CSDN官方认证二维码免费领取【保证100%免费】

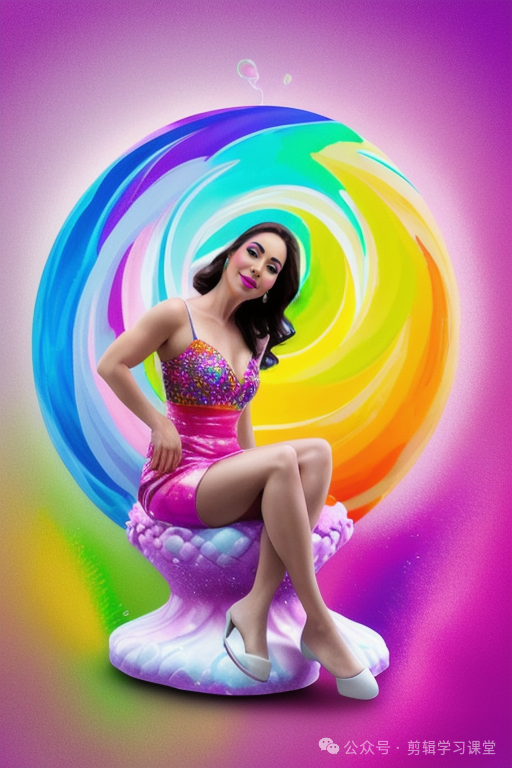
Prompt: 提示:
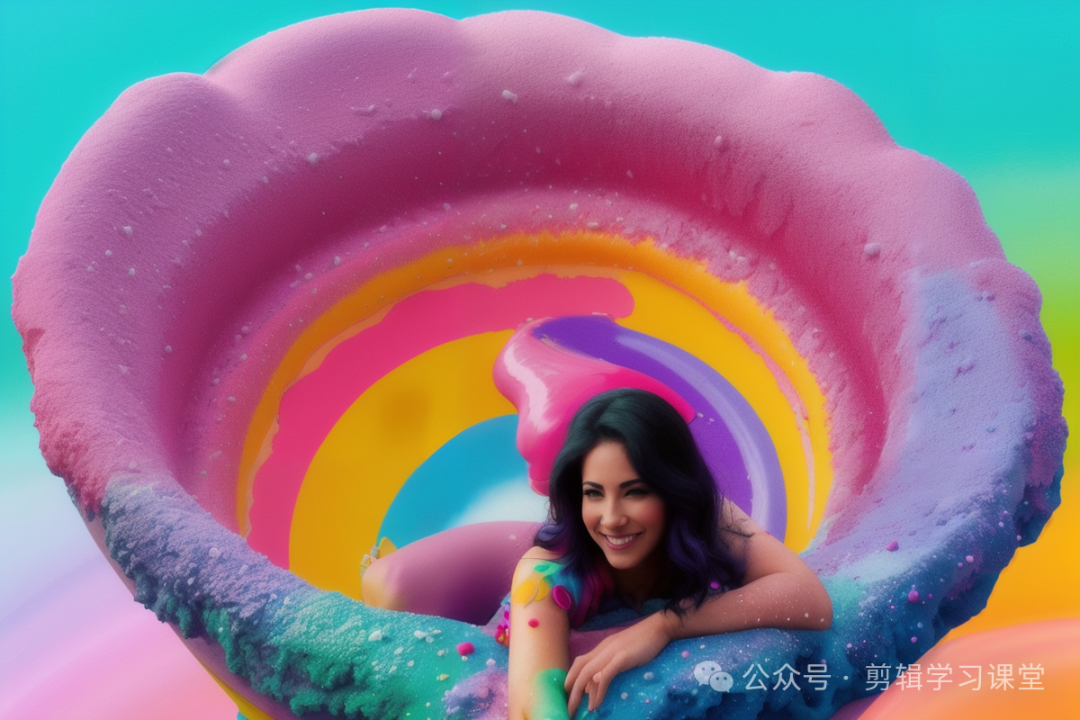
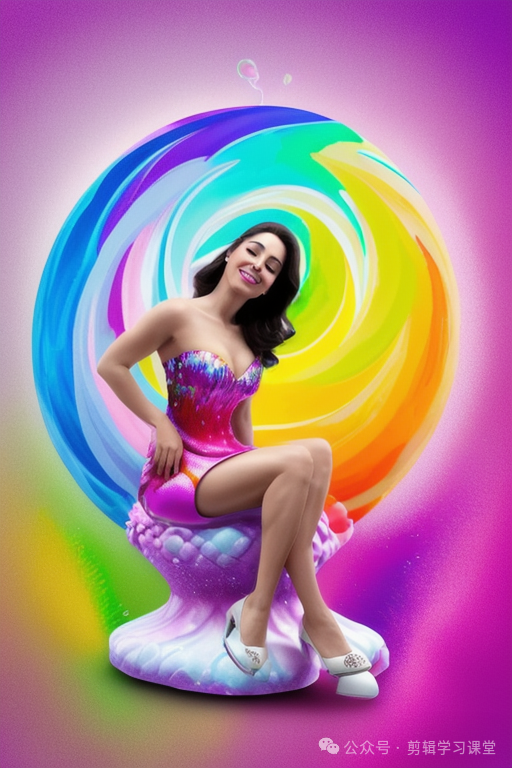
A woman sitting on a giant ice cream, which is adorned with vibrant colors, delightful, and rainbow sprinkles. sweetness and joy, happiness, enchanting fusion, imagination and a fantastical world,fantasy, high contrast, ink strokes, explosions, over exposure, purple and red tone impression , abstract, negative space
一个女人坐在一个巨大的冰淇淋上,上面装饰着鲜艳的色彩、令人愉悦的彩虹洒。甜蜜与喜悦,幸福,迷人的融合,想象与奇幻世界,幻想,高对比度,水墨笔触,爆炸,过度曝光,紫色和红色调的印象,抽象,负空间Negative prompt: 否定提示:
underage, immature, disfigured, deformed, ugly
未成年、未成熟、毁容、畸形、丑陋Size: 512×768 尺寸: 512×768

Because the face is small and the resolution is low, there are not many pixels covering the face. The VAE does not have enough pixels to generate a good face. So the face is garbled.
因为脸部小,分辨率低,所以覆盖脸部的像素不多。VAE 没有足够的像素来生成一张好脸。所以脸是乱码。
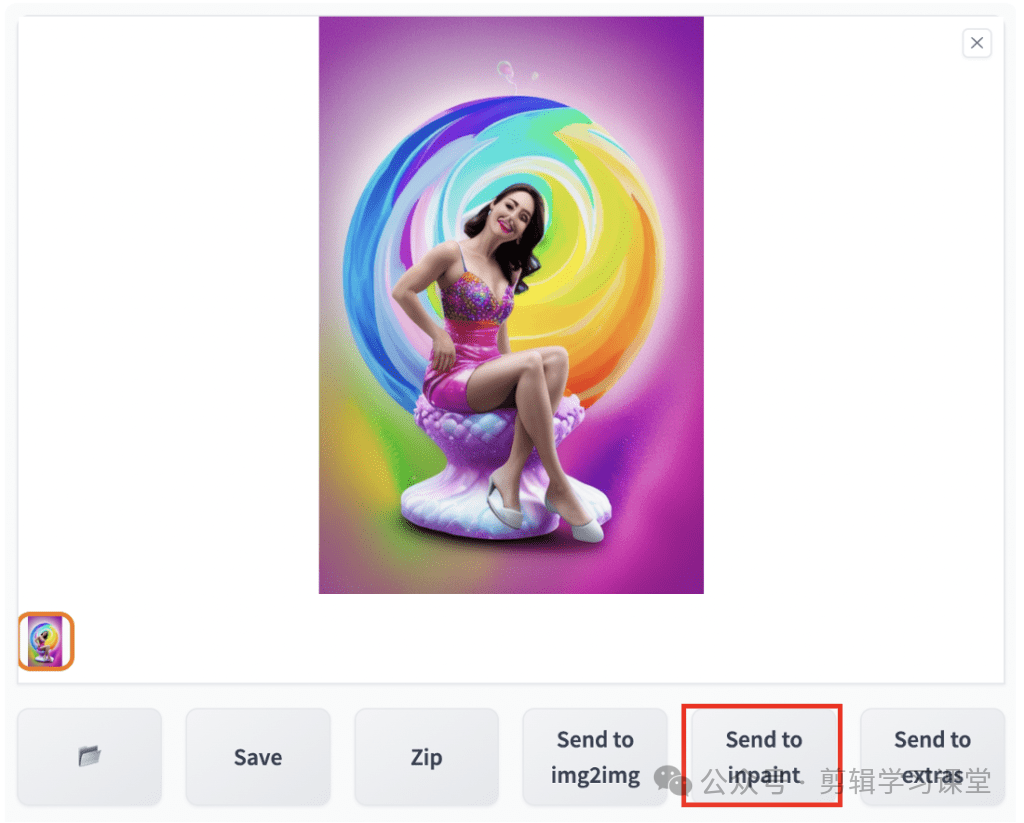
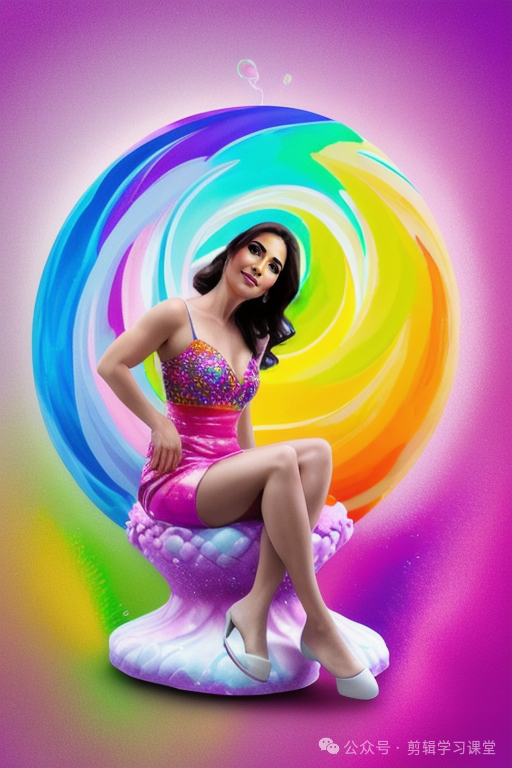
What you would normally do is send the image to Inpainting using the Send to inpaint button.
您通常要做的是使用“发送到 inpaint”按钮将图像发送到 Inpainting。
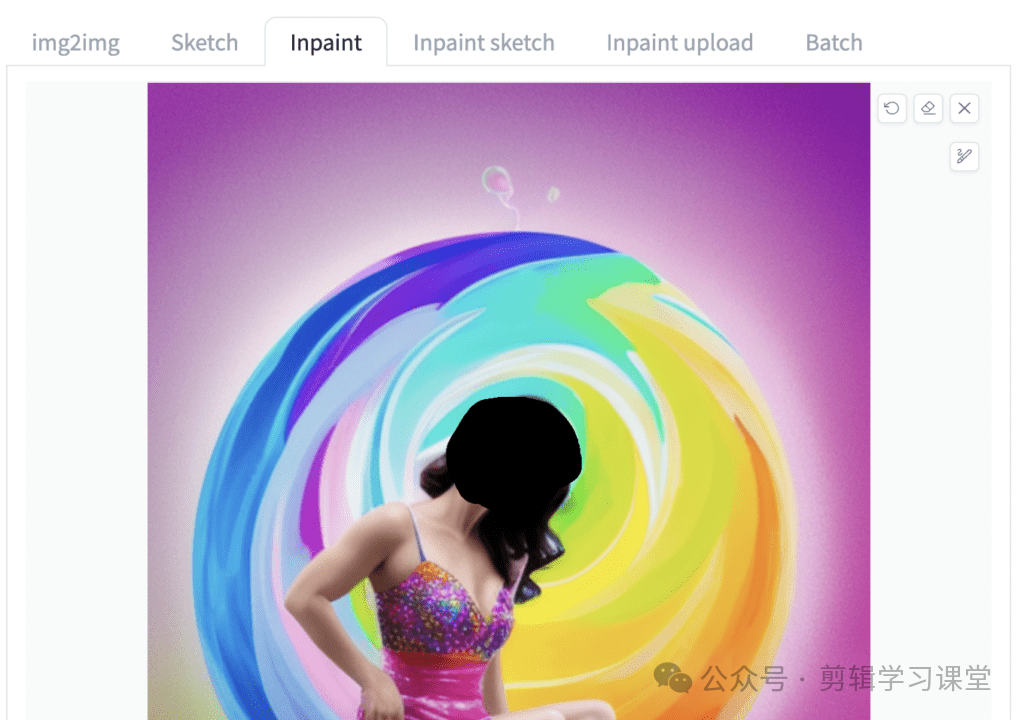
In the Inpaint tab, draw a mask around the garbled face.
在“画图”选项卡中,在乱码脸周围绘制蒙版。
Use the following settings:
使用以下设置:
- Mask mode: Inpaint masked
蒙版模式:Inpaint蒙版 - Masked content: Original 屏蔽内容:原创
- Inpaint area: Only masked
涂装区域:仅遮罩 - Denoising strength: 0.5 降噪强度:0.5
Press Generate. 按生成。

You will see the face fixed nicely. The inpaint only masked option is especially important because it uses the whole resolution (512×768) to regenerate the masked area. Effectively, it regenerates the face at a much higher resolution and then scales it back down to the original resolution. That’s why the face now looks much better.
你会看到脸部修得很好。仅涂装遮罩选项尤为重要,因为它使用整个分辨率 (512×768) 来再生遮罩区域。实际上,它以更高的分辨率重新生成面部,然后将其缩小到原始分辨率。这就是为什么现在的脸看起来好多了。
Automatic inpainting with After Detailer 使用 After Detailer 自动修复
After Detailer automates this process and more. What it does is use a face recognition model to detect the face and create the inpaint mask automatically.
之后,Detailer 会自动执行此过程以及更多功能。它的作用是使用人脸识别模型来检测人脸并自动创建油漆蒙版。

The extension then performs inpainting with only the masked area, like what was done in the last section. The result is:
然后,扩展仅使用遮罩区域执行修复,就像在上一节中所做的那样。结果是:
So it is essentially a time saver extension.
因此,它本质上是一个节省时间的扩展。
Using After Detailer 使用 After Detailer
Use in Txt2img 在 Txt2img 中使用
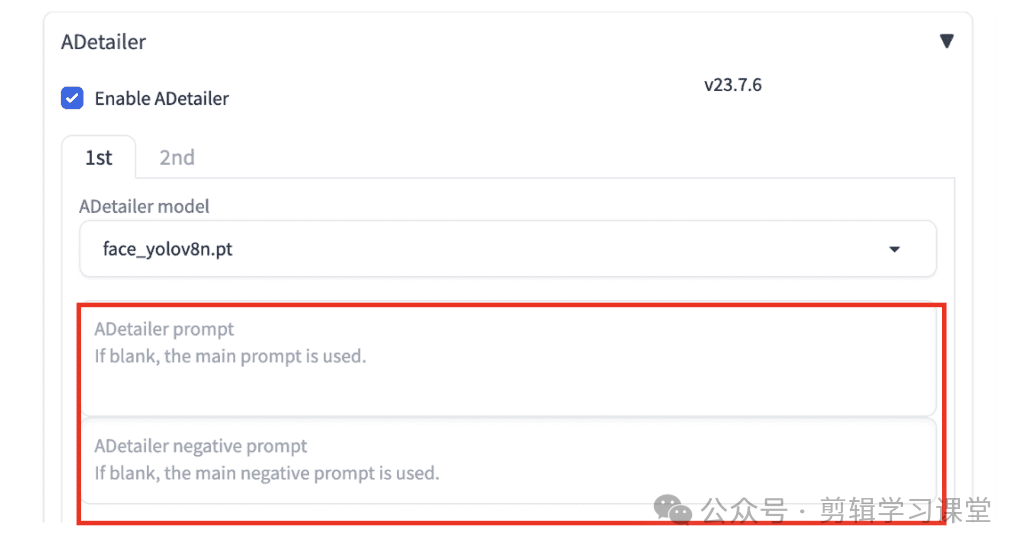
To use After Detailer in txt2img, expand the ADetailer.
要在 txt2img 中使用 After Detailer,请展开 ADetailer。
Select Enable ADetailer. 选择“启用 ADetailer”。
Select the face_yolo8n.pt model in the ADetailer model dropdown menu.
在 ADetailer 模型下拉菜单中选择 face_yolo8n.pt 模型。
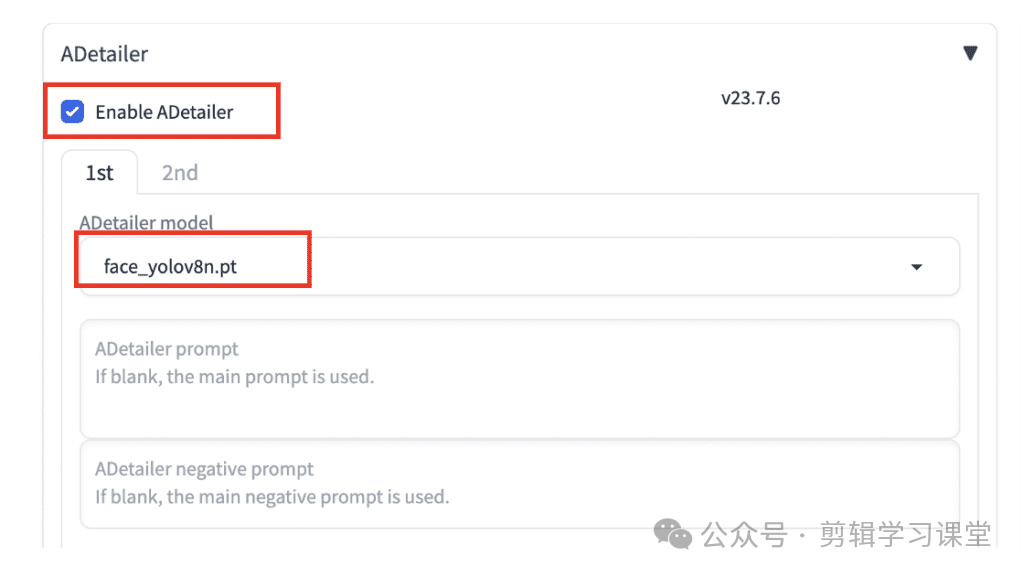
That’s all you need to do to use the basic function of restoring the face.
这就是使用恢复面部的基本功能所需要做的全部事情。
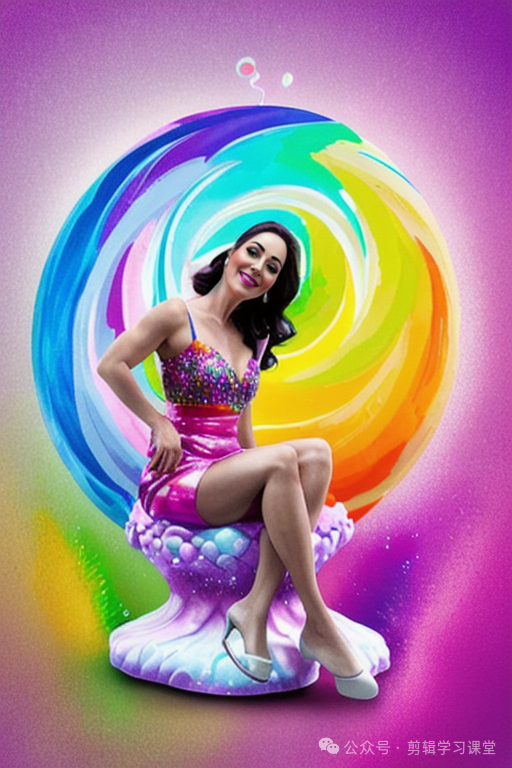
Press Generate. You get the following image. The reason you don’t get exactly the same face as manual inpainting is that the inpainting masks are drawn differently.
按生成。您将得到下图。您无法获得与手动上漆完全相同的面的原因是上漆蒙版的绘制方式不同。
Use in img2img 在 img2img 中使用
You can also use After Detailer with image-to-image. The benefit is you can restore faces and add details to the whole image at the same time.
您还可以将 After Detailer 与图像到图像一起使用。好处是您可以同时恢复人脸并向整个图像添加细节。
In the txt2img page, send an image to the img2img page using the Send to img2img button. The generation parameters, such as the prompt and the negative prompt, should be automatically populated.
在 txt2img 页面中,使用“发送到 img2img”按钮将图像发送到 img2img 页面。应自动填充生成参数,例如提示和否定提示。
Set denoising strength (of img2img, not ADetailer) to a low value, e.g. 0.1.
将去噪强度(img2img,而不是 ADetailer)设置为低值,例如 0.1。
Enable After Detailer in the ADetailer section.
在 ADetailer 部分中启用 After Detailer。
Hit Generate. More details are added to the image!
点击生成。更多细节被添加到图像中!
Adjust denoising strength to control the level of details added.
调整去噪强度以控制添加的细节级别。
 Denoising strength 0.1 降噪强度 0.1
 Denoising strength 0.2 降噪强度 0.2
You can also use ADetailer in the inpaint tab. If the masked area is changed.
您还可以在 inpaint 选项卡中使用 ADetailer。如果遮罩区域已更改。
ADetailer parameters explained ADetailer 参数说明
Now you know the basic function, let’s learn some extra parameters to fine-tune its function.
现在您知道了基本功能,让我们学习一些额外的参数来微调其功能。
Detection model 检测模型
Select the detection model in the ADetailer model dropdown menu. The models are divided into a few different groups:
在 ADetailer 模型下拉菜单中选择检测模型。这些模型分为几个不同的组:
- Face_xxxx: Detect and redraw faces
Face_xxxx:检测和重绘人脸 - Hand_xxxx: Detect and redraw hands
Hand_xxxx:检测并重新绘制指针 - Person_xxxx: Detect and redraw a whole person
Person_xxxx:检测并重绘整个人 - Mediapipe_face_xxxxx: Detect and redraw faces
Mediapipe_face_xxxxx:检测和重绘人脸
The most useful ones are the face_yolo and person_yolo models. The YOLO (You Only Look Once) models are good at detecting faces and objects, and inpainting works well.
最有用的是 face_yolo 和 person_yolo 模型。YOLO(You Only Look Once)模型擅长检测人脸和物体,并且修复效果很好。
Face_yolo_8n
Inpainted 涂漆
 Person_yolo_8n_seg
 Inpainted
However, because more pixels are needed for inpainting the whole person, the face was not inpainted as much detail as when using the face model. It is usually not a good idea to inpaint a large area. If you have an image like this, you are better off inpainting the foot, the skirt,… etc, manually one at a time.
但是,由于对整个人进行上色需要更多的像素,因此在使用人脸模型时,人脸的细节上色不多。涂上大面积通常不是一个好主意。如果你有这样的图像,你最好在脚、裙子上涂漆,…等等,一次手动一个。
Mediapipe_face is hit or miss. They don’t do too well when the faces are garbled, which is why we need them in the first place…
Mediapipe_face被击中或未命中。当面孔乱码时,它们不会做得太好,这就是为什么我们首先需要它们的原因…
The hand models are for redrawing hands. But don’t put too much hope on this one because Stable Diffusion is still not good at drawing hands, no matter how many times it redraws them.
手部模型用于重绘手部。但不要对这个抱太大希望,因为 Stable Diffusion 仍然不擅长抽牌,无论它重新抽多少次。
Finally, you may wonder about the difference between the YOLO 8n and 8s models. The 8n model is faster but is about 3 times smaller than the 8s model (hence less powerful). I find the 8n model does a good job. Switch to the 8s model if After Detailer has difficulty detecting faces.
最后,您可能想知道 YOLO 8n 和 8s 型号之间的区别。8n 型号更快,但比 8s 型号小约 3 倍(因此功能较弱)。我发现 8n 模型做得很好。如果 After Detailer 难以检测人脸,请切换到 8s 型号。
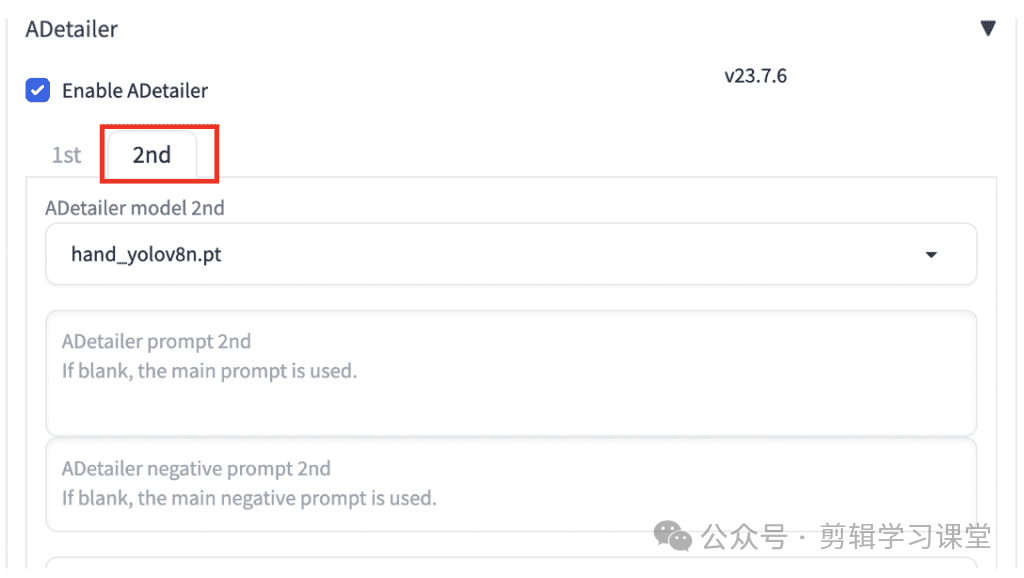
Finally, you can use up to two detection models each time. Just switch to the 2nd tab and select an additional model.
最后,每次最多可以使用两个检测模型。只需切换到第 2 个选项卡并选择其他型号即可。
Now it detects the face followed by the hand. It then inpaints to fix both one at a time.
现在它检测的是脸,然后是手。然后,它进行涂漆以一次修复一个。
Detecting face. 检测人脸。
 Detecting Hand. 检测手。
 Inpaint face and hand. 涂上脸部和手部。
Using a different prompt in inpainting 在修复中使用不同的提示
Using a different prompt allows you to, for example, change the face after inpainting. Put in the prompts and negatives for inpainting in the ADetailer section below.
例如,使用不同的提示可以让您在上漆后更改面。在下面的 ADetailer 部分输入修复的提示和底片。
One common trick is to use multiple celebrity names to dial in the look you want. For example, I want the face to be a blend of two actresses.
一个常见的技巧是使用多个名人的名字来调整你想要的外观。例如,我希望这张脸是两个女演员的混合体。
(Emma Watson:0.8), Ana de Armas
(艾玛·沃特森:0.8),安娜·德·阿玛斯Keyword weight was used to reduce the effect of Emma Watson, who is usually more powerful.
关键词权重被用来降低艾玛·沃特森(Emma Watson)的效果,艾玛·沃特森(Emma Watson)通常更强大。
Adjust the inpainting denoising strength (The one in ADetailer, NOT txt2img) to dial in the effect. Now you get the new blended look!
调整修复降噪强度(ADetailer 中的那个,而不是 txt2img)以调整效果。现在你得到了新的混合外观!

If you see an inconsistent style on the face, use the celebrity names AND the original prompt instead of using the names alone.
如果您在脸上看到不一致的风格,请使用名人姓名和原始提示,而不是单独使用姓名。
You may wonder why couldn’t you use the celebrity names in the original prompt. You surely can, but because of the association effect, you will inadvertently get objects and styles associated with these powerful names.
您可能想知道为什么不能在原始提示中使用名人姓名。你当然可以,但是由于关联效应,你会不经意地得到与这些强大的名称相关的对象和样式。
Finally, you can use LoRA in the prompt too. Below is the face inpainted with Tifa Lockhart LoRA.
最后,您也可以在提示中使用 LoRA。下面是涂有 Tifa Lockhart LoRA 的脸。
lora:tifa-nvwls-v1:1 <Lora:tifa-nvwls-v1:1>

Detection 检波
The default values work well, but here is what they meant.
默认值效果很好,但这就是它们的含义。
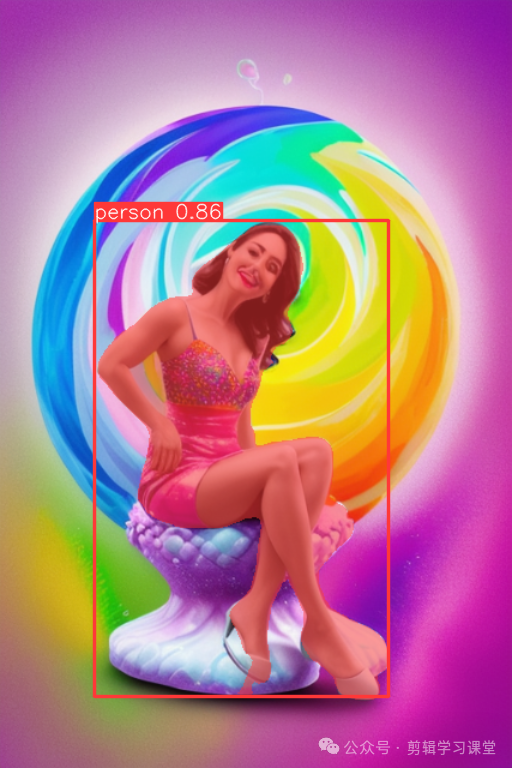
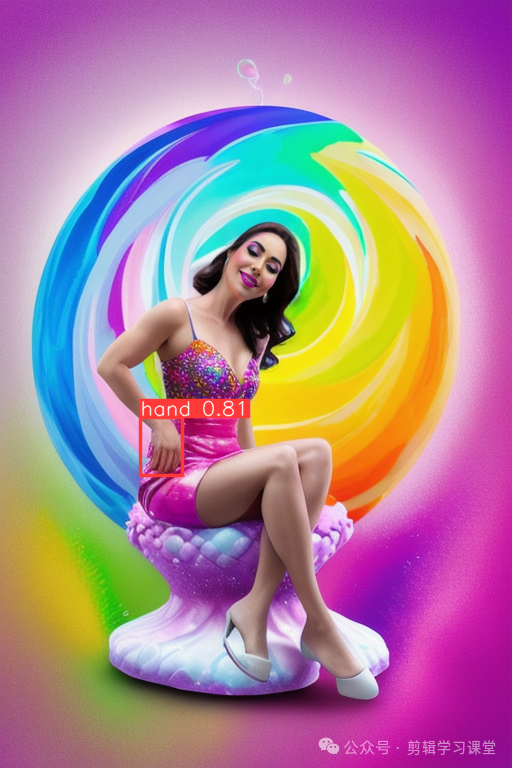
Detection model confidence threshold: Remember the box around the face with a number on top? The number is called the confidence score. 0.8 means the model is 80% confident that this is a face. The threshold is the minimum confidence score needed. If you set it to 0.9, a face with a confidence score 0.8 would not be considered. Keep it low at 0.3. Lower it if you have issues detecting the face. Increase it if you detect too many.
检测模型置信度阈值:还记得脸部周围顶部有数字的框吗?该数字称为置信度分数。0.8 表示模型有 80% 的置信度认为这是一张脸。阈值是所需的最低置信度分数。如果将其设置为 0.9,则不会考虑置信度得分为 0.8 的人脸。将其保持在0.3的低水平。如果您在检测人脸时遇到问题,请降低它。如果检测到太多,请增加它。
Mask min/max area ratio: The minimum and the maximum area of the detected mask allowed. For example, if you set the min area ratio to 0.1, the extension will reject the detections with masks smaller than 10% of the size of the image. Increase the min if you detect unwanted small objects.
掩模最小/最大面积比:检测到的掩模允许的最小和最大面积。例如,如果将最小面积比设置为 0.1,则扩展将拒绝使用小于图像大小 10% 的蒙版进行检测。如果检测到不需要的小物体,请增加最小值。
Mask Preprocessing 掩模预处理
You usually don’t need to change them.
您通常不需要更改它们。
These are for moving and resizing the mask before inpainting. For best results, enable “Save mask previews” in Settings > ADetailer to understand how the masks are changed. A mask preview image will be saved for each detection.
这些用于在涂装之前移动和调整蒙版的大小。为获得最佳效果,请在 ADetailer >设置中启用“保存蒙版预览”,以了解蒙版的更改方式。每次检测都会保存一个掩码预览图像。
Mask x/y offset: Move the mask in the x/y direction, in pixels.
蒙版 x/y 偏移:沿 x/y 方向移动蒙版,以像素为单位。
Mask erosion (-) / dilation (+): Reduce/Enlarge the mask.
掩模侵蚀 (-) / 扩张 (+):缩小/放大掩模。
Mask Merge mode: 蒙版合并模式:
- None: Inpaint each mask. 无:给每个蒙版上色。
- Merge: Merge the masks and then inpaint.
合并:合并蒙版,然后进行内画。 - Merge and invert: Inpaint the unmasked area.
合并和反转:绘制未遮罩区域。
Inpainting 修复
The most important setting in the Inpainting section is the Inpaint denoising strength. It controls the denoising strength used in automatic inpainting. Increase to make more changes. Decrease to change less.
Inpainting 部分中最重要的设置是 Inpaint 去噪强度。它控制自动修复中使用的去噪强度。增加以进行更多更改。减少变化以减少变化。
You almost always want to use Inpaint only masked for inpainting faces.
您几乎总是希望仅使用 Inpaint 蒙版来美化面。
You can optimally define image width, height, CFG scale, and number of sampling steps used in inpainting. But the defaults are ok.
您可以优化定义图像宽度、高度、CFG 比例和修复中使用的采样步骤数。但是默认值还可以。
Using ADetailer with ControlNet 将 ADetailer 与 ControlNet 结合使用
ControlNet is an indispensable tool to precisely control image generation. Check out the ControlNet article if you are unfamiliar with it. To use ADetailer with ControlNet, you must have ControlNet installed on your AUTOMATIC1111.
ControlNet是精确控制图像生成的不可或缺的工具。如果您不熟悉 ControlNet 文章,请查看它。要将 ADetailer 与 ControlNet 配合使用,必须在AUTOMATIC1111上安装 ControlNet。
You can select the ControlNet model in the last section.
您可以在最后一节中选择 ControlNet 模型。
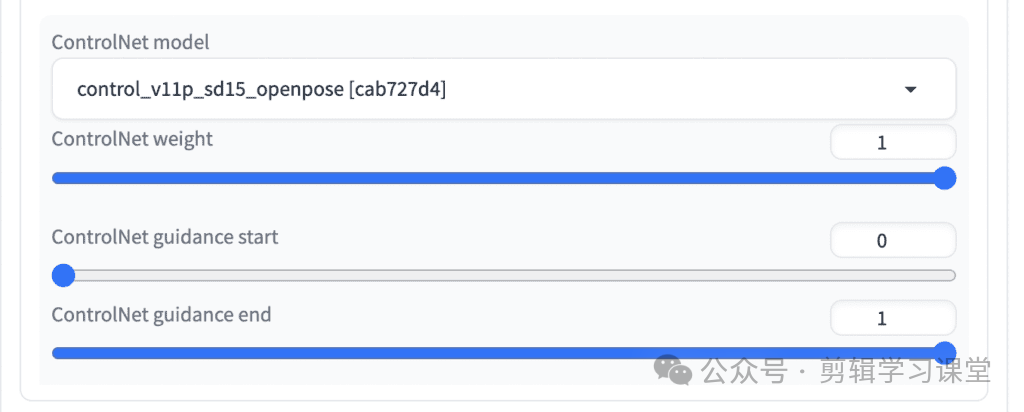
ControlNet Openpose
Use the ControlNet Oopenpose model to inpaint the person with the same pose. Use the openpose model with the person_yolo detection model.
使用 ControlNet Oopenpose 模型以相同的姿势对人物进行上色。将 openpose 模型与 person_yolo 检测模型一起使用。
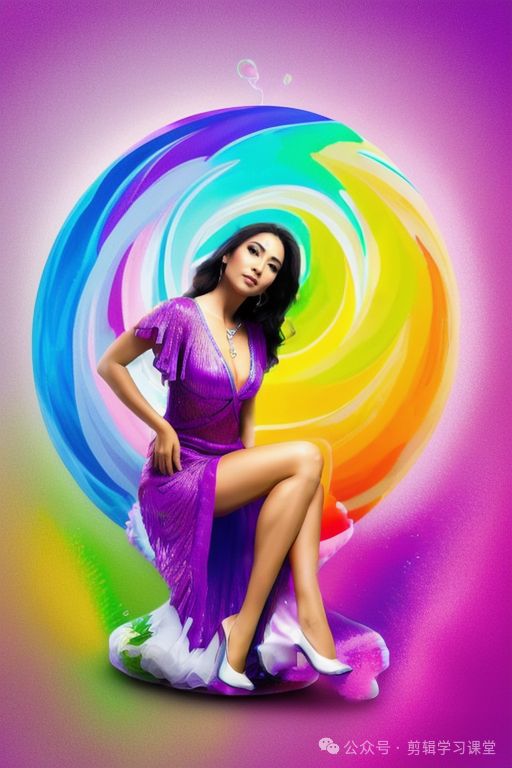
For example, without any ControlNet enabled and with high denoising strength (0.74), the pose is likely to change in a way that is inconsistent with the global image. See the example below.
例如,在未启用任何 ControlNet 且具有高去噪强度 (0.74) 的情况下,姿势可能会以与全局图像不一致的方式发生变化。请参阅以下示例。
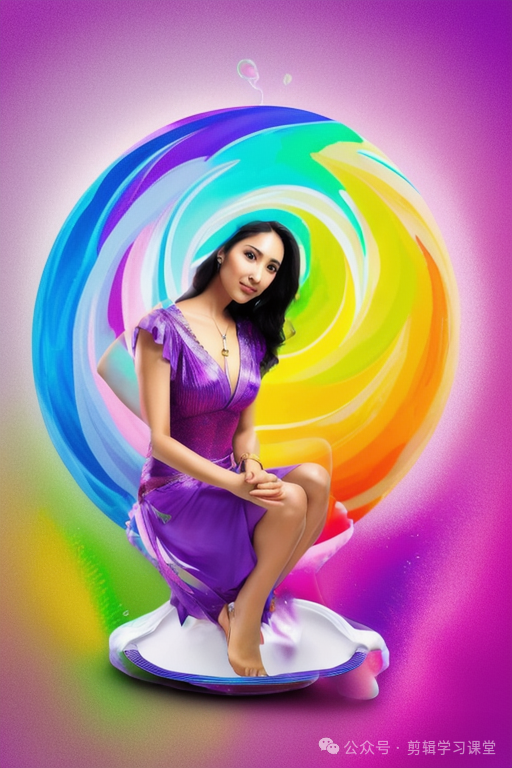 No ControlNet. 没有 ControlNet。
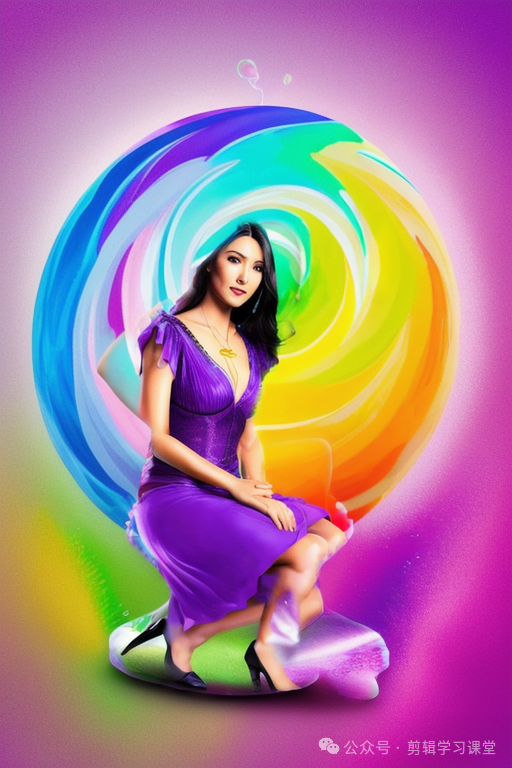
With ControlNet Openpose enabled, the girl’s pose is kept the same after inpainting.
启用 ControlNet Openpose 后,女孩的姿势在涂装后保持不变。
ControlNet Tile ControlNet 磁贴
Enable ControlNet Tile to have inpainting better follows the original image.
启用 ControlNet Tile 以更好地修复原始图像。
Below is the result without and with ControlNet Tile.
以下是没有和使用 ControlNet Tile 的结果。
 Without ControlNet Tile 不带 ControlNet 磁贴
 With ControlNet Tile 使用 ControlNet 磁贴
Enable ControlNet Tile if you want inpainting to be guided by the original content.
如果希望修复受原始内容的引导,请启用 ControlNet 磁贴。
ControlNet inpaint ControlNet 油漆
ControlNet inpaint model (control_xxxx_inpaint) with global_inpaint_harmonious preprocessor improves the consistency between the inpainted area and the rest of the image.
带有预处理器global_inpaint_harmonious ControlNet 上漆模型 (control_xxxx_inpaint) 提高了上漆区域与图像其余部分之间的一致性。
For example, it is disastrous to set the inpainting denoising strength to 1 (the maximum) in After Detailer.
例如,在 After Detailer 中将修复去噪强度设置为 1(最大值)是灾难性的。
 Inpainting denoising strength = 1.
修复去噪强度 = 1。
The inpainting process has too much freedom to change the masked area and has messed up.
涂装过程有太多的自由来改变遮罩区域,并且已经搞砸了。
This problem can be resolved by turning on the ControlNet inpainting model and the global_inpaint_harmonious preprocessor.
可以通过打开 ControlNet 修复模型和 global_inpaint_harmonious 预处理器来解决此问题。
 Inpainting denoising strength = 1 with global_inpaint_harmonious.
修复去噪强度 = 1 和 global_inpaint_harmonious。
Use global_inpaint_harmonious when you want to set the inpainting denoising strength high. Adjust the value slightly or change the seed to get a different generation.
当您想将修复降噪强度设置为高时,请使用 global_inpaint_harmonious。稍微调整值或更改种子以获得不同的世代。
ControlNet Line art ControlNet 线条艺术
ControlNet line art lets the inpainting process follows the general outline of the original image.
ControlNet 线条艺术允许修装过程遵循原始图像的大致轮廓。
Original 源语言
 After Detailer with ControlNet Line art.
在带有 ControlNet 线条艺术的 Detailer 之后。
Use ControlNet line art if you want the inpainted image to follow the outline of the original content.
如果希望内画图像遵循原始内容的轮廓,请使用 ControlNet 线条艺术。
ADetailer vs face restoration ADetailer 与面部修复
Both ADetialer and the face restoration option can be used to fix garbled faces. After Detailer uses inpainting at a higher resolution and scales it back down to fix a face. Face restoration uses another AI model, such as CodeFormer and GFGAN, to restore the face.
ADetialer 和面部恢复选项都可用于修复乱码面部。After Detailer 使用更高分辨率的修复并将其缩小以修复面部。人脸恢复使用另一个 AI 模型(如 CodeFormer 和 GFGAN)来恢复人脸。
Using inpainting (such as using ADetailer) is preferred because
使用修复(例如使用 ADetailer)是首选,因为
- The face restoration model could produce a style that is inconsistent with your Stable Diffusion model.
人脸恢复模型可能会产生与 Stable Diffusion 模型不一致的样式。 - You can further direct the inpainting by modifying the prompt and ControlNet.
您可以通过修改提示符和 ControlNet 来进一步指导修复。
When to use ADetailer 何时使用 ADetailer
There’s nothing you can do in ADetailer that you can’t do manually. ADetailer automates the following process.
在 ADetailer 中,没有什么是手动无法执行的。ADetailer 自动执行以下过程。
- Send the image to inpainting
将图像发送到修复 - Create inpaint mask 创建涂图蒙版
- Setup ControlNet (Optional)
设置 ControlNet(可选) - Generate inpaint 生成 inpaint
The most valuable aspect of using this extension is automation so that you can use create multiple images with the same settings (batch size larger than 1). This is tedious to do with a manual workflow.
使用此扩展最有价值的方面是自动化,以便您可以使用相同的设置(批处理大小大于 1)创建多个图像。这与手动工作流程有关很乏味。
So that’s it. I hope you’ve enjoyed this tutorial. Let me know if you have any comments or feedback in the comments below.
就是这样。我希望你喜欢这个教程。如果您在下面的评论中有任何意见或反馈,请告诉我。
Tips 技巧
When using ADetailer with img2img, there are two denoising strengths to set. The denoising strength of img2img sets the value for the whole image. The inpaint denoising strength in ADetailer sets the denoising strength for inpainting.
将 ADetailer 与 img2img 一起使用时,需要设置两个去噪强度。img2img 的去噪强度设置了整个图像的值。ADetailer 中的油漆去噪强度设置了内漆的去噪强度。
You can optionally turn on saving the result of the detection model in Settings > ADetailer. It will save an additional image with the detected area and the confidence scores.
您可以选择在 ADetailer >设置中打开保存检测模型的结果。它将保存一个包含检测到的区域和置信度分数的附加图像。
Reference 参考
Bing-su/adetailer: Auto detecting, masking and inpainting with detection model. – Official GitHub page.
Bing-su/adetailer:使用检测模型进行自动检测、遮罩和修复。– 官方 GitHub 页面。
关于AI绘画技术储备
学好 AI绘画 不论是就业还是做副业赚钱都不错,但要学会 AI绘画 还是要有一个学习规划。最后大家分享一份全套的 AI绘画 学习资料,给那些想学习 AI绘画 的小伙伴们一点帮助!
对于0基础小白入门:
如果你是零基础小白,想快速入门AI绘画是可以考虑的。
一方面是学习时间相对较短,学习内容更全面更集中。
二方面是可以找到适合自己的学习方案
包括:stable diffusion安装包、stable diffusion0基础入门全套PDF,视频学习教程。带你从零基础系统性的学好AI绘画!
1.stable diffusion安装包 (全套教程文末领取哈)
随着技术的迭代,目前 Stable Diffusion 已经能够生成非常艺术化的图片了,完全有赶超人类的架势,已经有不少工作被这类服务替代,比如制作一个 logo 图片,画一张虚拟老婆照片,画质堪比相机。
最新 Stable Diffusion 除了有win多个版本,就算说底端的显卡也能玩了哦!此外还带来了Mac版本,仅支持macOS 12.3或更高版本。
2.stable diffusion视频合集
我们在学习的时候,往往书籍代码难以理解,阅读困难,这时候视频教程教程是就很适合了,生动形象加上案例实战,一步步带你入门stable diffusion,科学有趣才能更方便的学习下去。
3.stable diffusion模型下载
stable diffusion往往一开始使用时图片等无法达到理想的生成效果,这时则需要通过使用大量训练数据,调整模型的超参数(如学习率、训练轮数、模型大小等),可以使得模型更好地适应数据集,并生成更加真实、准确、高质量的图像。
4.stable diffusion提示词
提示词是构建由文本到图像模型解释和理解的单词的过程。可以把它理解为你告诉 AI 模型要画什么而需要说的语言,整个SD学习过程中都离不开这本提示词手册。
5.AIGC视频教程合集
观看全面零基础学习视频,看视频学习是最快捷也是最有效果的方式,跟着视频中老师的思路,从基础到深入,还是很容易入门的。
实战案例
纸上得来终觉浅,要学会跟着视频一起敲,要动手实操,才能将自己的所学运用到实际当中去,这时候可以搞点实战案例来学习。
这份完整版的学习资料已经上传CSDN,朋友们如果需要可以微信扫描下方CSDN官方认证二维码免费领取【保证100%免费】


 1万+
1万+

 被折叠的 条评论
为什么被折叠?
被折叠的 条评论
为什么被折叠?
 到【灌水乐园】发言


