


1.在角色对象上挂在animator组件,并将动作控制器与其关联

2.在角色对象上挂在audio source组件。
3.新建voice control脚本,编写代码如下:
using System;
using System.Collections;
using System.Collections.Generic;
using UnityEngine;
using UnityEngine.UI;
using UnityEngine.Animations;
public class VoiceControl : MonoBehaviour
{
    public Animator animator;
    public float volumeThreshold = 0f; // 调整为一个更合理的阈值
    private string talkingParamName = "Talk";
    public AudioSource audioLocal;
    private string device;
    private IEnumerator coroWaitMic;
    private const float coroutineLoggingIfDebug = 5f; // debug log ERROR every 5 seconds while audiodevice error
    const int loopLength = 5;
    const int sampleRate = 16000;
    // Start is called before the first frame update
    void Start()
    {
        // 设置初始动画状态为NotTalking

        audioLocal = GameObject.Find("xiaoyang").GetComponent<AudioSource>(); // 1 定位本地音频设备audioLocal
        if (Microphone.devices.Length <= 0)
        {
            Debug.LogError("没有麦克风或麦克风权限未打开");
            throw new Exception("没有麦克风或麦克风权限未打开");
        }
        else
        {
            device = Microphone.devices[0];//获取麦克风名
        }
        StartMicrophone(device);
        animator.SetBool(talkingParamName, false);
    }
    // Update is called once per frame
    void Update()
    {
        float currentVolume = GetAverageAmplitude();
        Debug.Log($"Current Average Amplitude: {currentVolume}, Volume Threshold: {volumeThreshold}");
        // 根据音量大小切换Talk参数和动画状态
        // 根据当前音量大小决定是否切换动画状态
        if (currentVolume > volumeThreshold)
        {
            animator.SetBool("Talk", true);
            Debug.Log("true执行");
        }
        else
        {
            animator.SetBool("Talk", false);
            Debug.Log("false执行");
        }
    }
    private void StartMicrophone(string mic)
    {
        // Start and wait for the microphone to start recording data
        if (coroWaitMic != null)
            StopCoroutine(coroWaitMic);
        coroWaitMic = WaitForMic(device);
        StartCoroutine(coroWaitMic);
    } // end StartMicrophone()
    IEnumerator WaitForMic(string mic)
    {
        float timeCheck = Time.time;
        if (audioLocal == null)
        {
            Debug.LogWarning("[WaitForMic()] - AudioSource is not present...bailing...");
            yield break;
        }
        audioLocal.clip = Microphone.Start(mic, true, loopLength, sampleRate);
        // Let the Microphone start filling the buffer prior to activating the AudioSource.
        while (!(Microphone.GetPosition(mic) > 0))
        {
            if (Time.time - timeCheck > coroutineLoggingIfDebug)
            {
                Debug.Log("[WaitForMic()] - is waiting for the mic to record.");
                timeCheck = Time.time;
            }
            // Wait for Microphone to start gathering data.
            yield return null;
        }
        audioLocal.Play();
        audioLocal.loop = true;
    } // end WaitForMic() 录音设备开始录音


    private float GetAverageAmplitude()
    {
        float[] data = new float[sampleRate]; // 假设每次读取sampleRate个样本数据,实际项目中可以根据需要调整
        audioLocal.clip.GetData(data, 0); // 获取麦克风实时输入的数据

        float sumOfSquares = 0f;
        for (int i = 0; i < data.Length; i++)
        {
            float sampleValue = Mathf.Abs(data[i]); // 取绝对值计算振幅
            sumOfSquares += Mathf.Pow(sampleValue, 2); // 将样本平方累加,用于计算均方根(RMS)
        }
        float averageAmplitude = Mathf.Sqrt(sumOfSquares / data.Length); // 计算均方根得到平均振幅大小
        Debug.Log($"Current Average Amplitude: {averageAmplitude}, Volume Threshold: {volumeThreshold}");
        return averageAmplitude;
    }
}
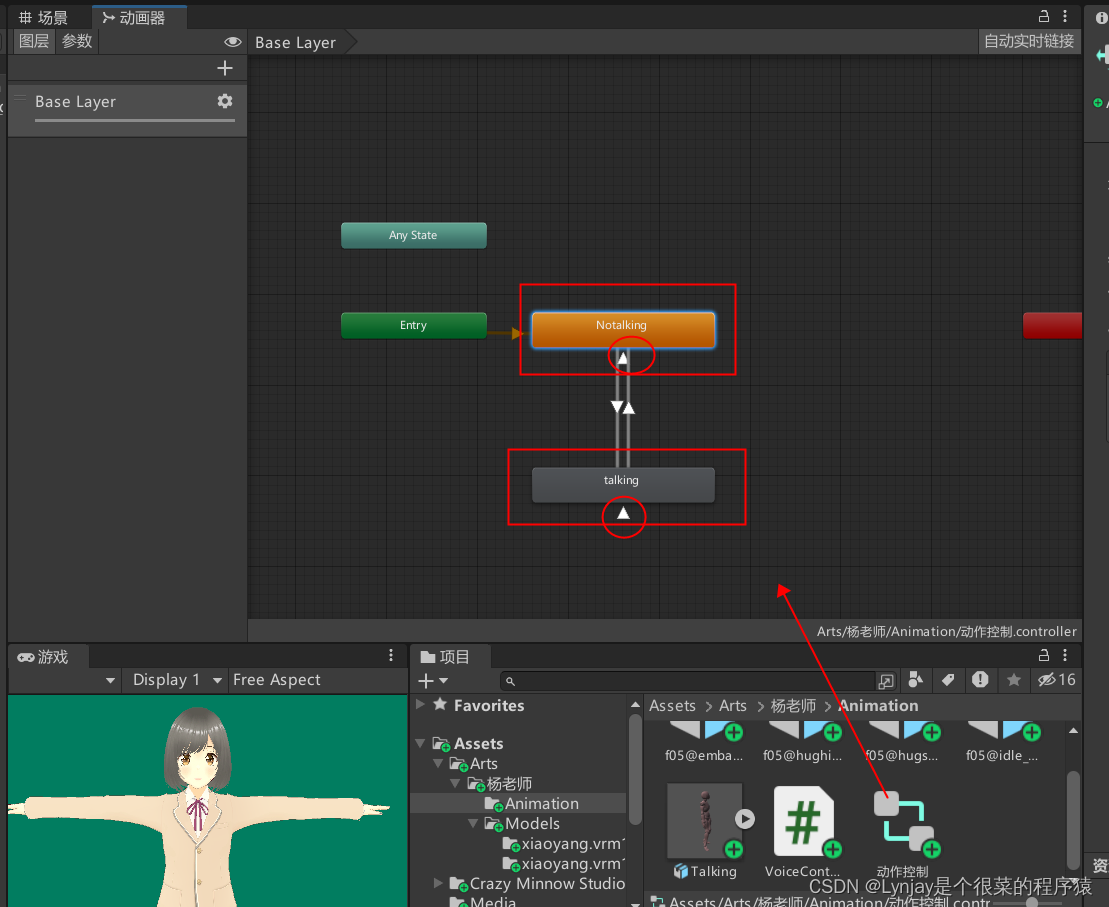
4.将动作控制器关联到脚本上

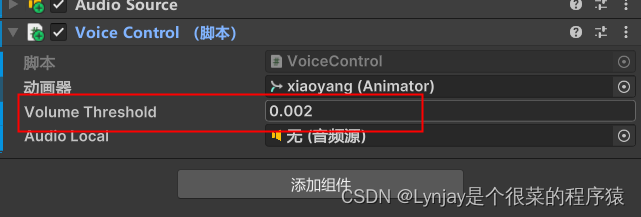
5.设置音量阈值,使得当达到某个音量值时切换动画
6.在动作控制器中设置不同的动作状态
(1)添加没说话时和说话时的状态并添加自循环,使动作能够重复播放
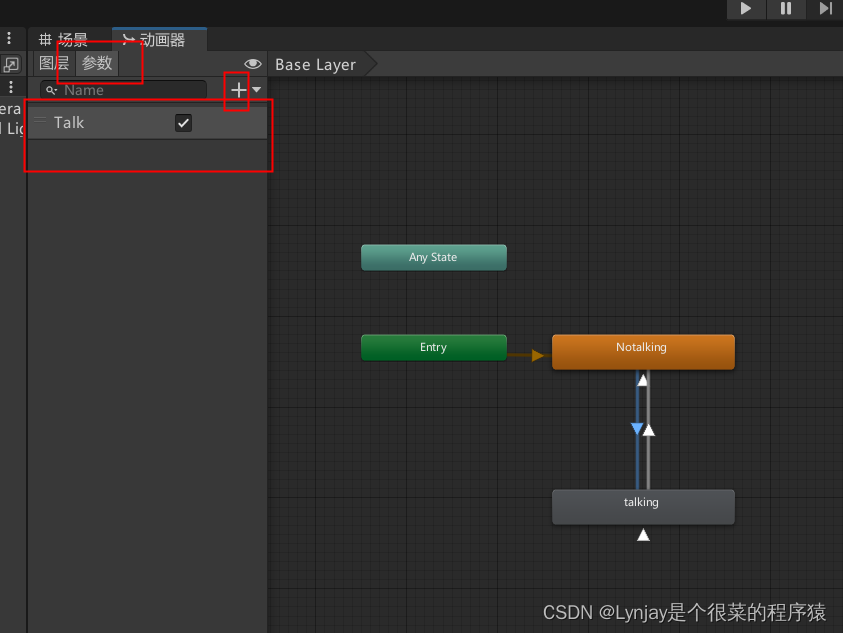
(2)新建布尔参数,用于控制状态
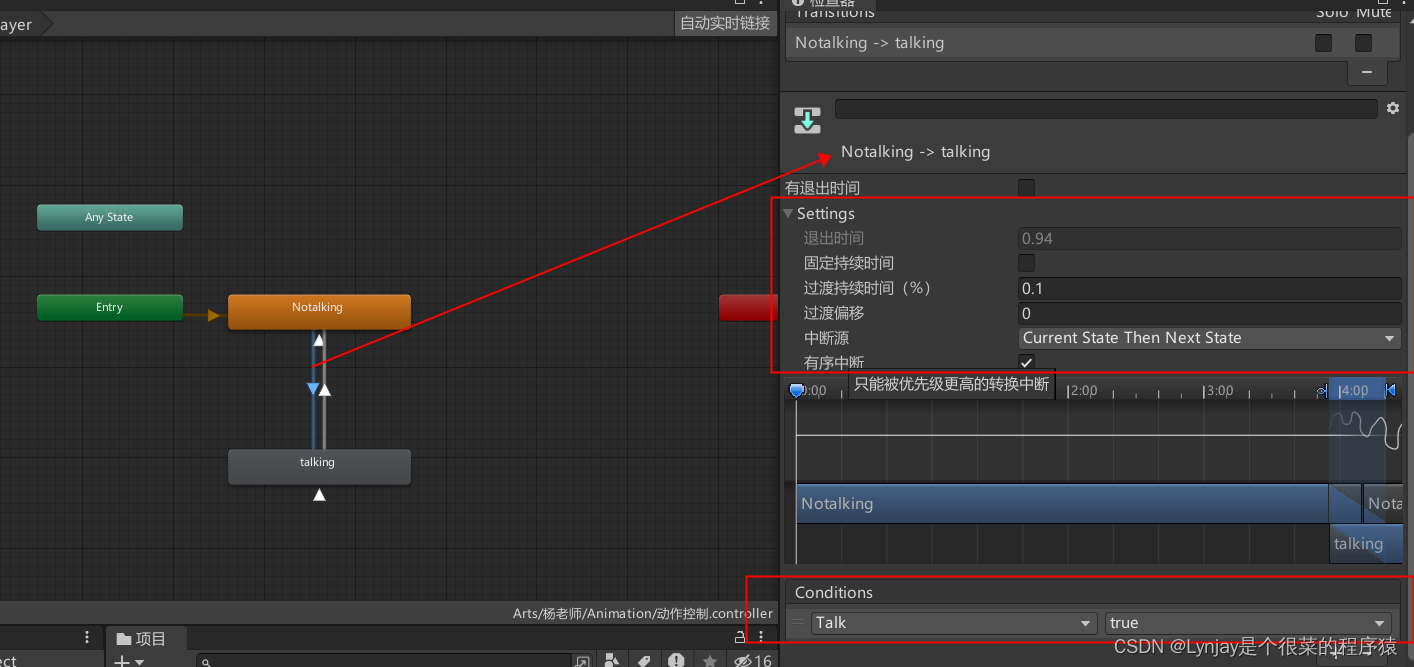
(3)设置Notalking→talking过渡动画的属性和出发布尔值的条件
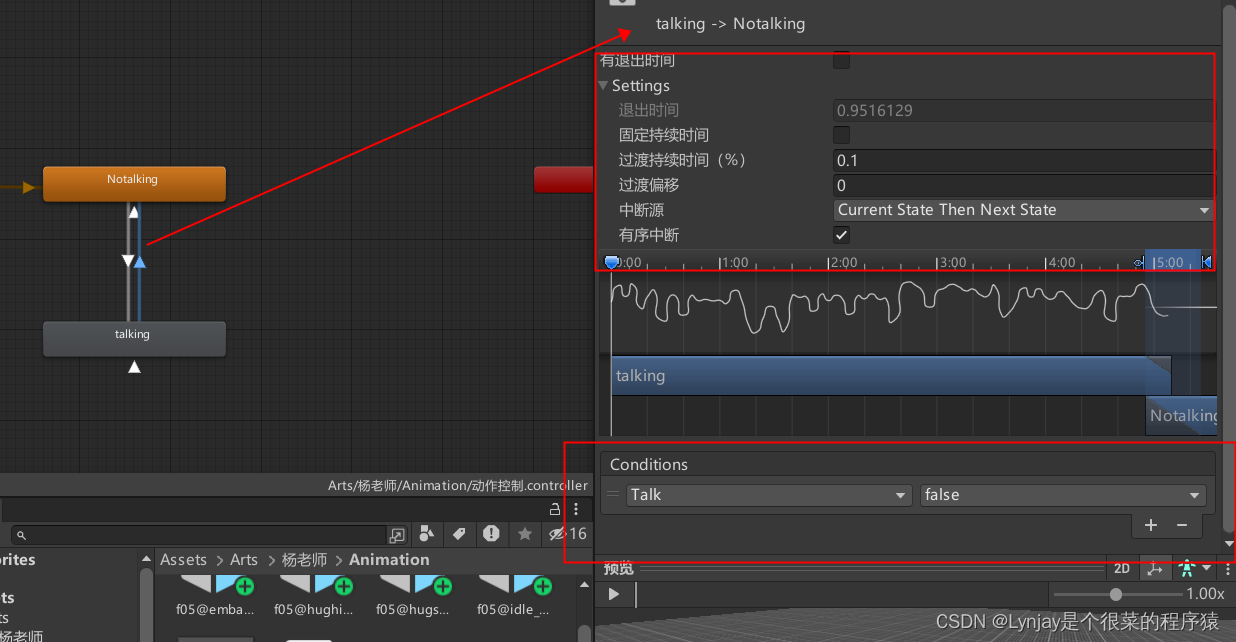
(4)设置talking→Notalking过渡动画的属性和出发布尔值的条件


 503
503


 被折叠的 条评论
为什么被折叠?
被折叠的 条评论
为什么被折叠?
 到【灌水乐园】发言


