


consul相关
https://www.consul.io/downloads
https://www.cnpython.com/pypi/python-consul2
https://github.com/hashicorp/consul
参考文章:https://www.rondochen.com/python-consul-demo/
参考文章:https://realpython.com/fastapi-python-web-apis/
参考文章:https://fastapi.tiangolo.com/zh/tutorial/bigger-applications/
参考文章:https://blog.csdn.net/LIFENG0402/article/details/124353303
参考文章:https://bbs.huaweicloud.com/blogs/251487
参考文章:https://cloud.tencent.com/developer/news/625934
consul
搭建
实际上consul搭建比较简单,而且官方网址也提供的不同系统的安装。这里主要是贴官方的安装方法(本人测试环境是win,不用安装。实际生产时再补充细节。)
这里只贴两个常用的系统。
官方下载网址:https://www.consul.io/downloads
Ubuntu/Debian
wget -O- https://apt.releases.hashicorp.com/gpg | gpg --dearmor | sudo tee /usr/share/keyrings/hashicorp-archive-keyring.gpg
echo "deb [signed-by=/usr/share/keyrings/hashicorp-archive-keyring.gpg] https://apt.releases.hashicorp.com $(lsb_release -cs) main" | sudo tee /etc/apt/sources.list.d/hashicorp.list
sudo apt update && sudo apt install consul
Centos/RHEL
sudo yum install -y yum-utils
sudo yum-config-manager --add-repo https://rpm.releases.hashicorp.com/RHEL/hashicorp.repo
sudo yum -y install consul
启动
启动指令
./consul agent -dev
或者指定参数
./consul agent -dev -client 0.0.0.0 -ui
启动后弹出的信息
==> Starting Consul agent...
           Version: '1.12.2'
           Node ID: '07f82929-0888-485b-6893-f42e1e3e8a37'
         Node name: 'DESKTOP-4OK46KC'
        Datacenter: 'dc1' (Segment: '<all>')
            Server: true (Bootstrap: false)
       Client Addr: [127.0.0.1] (HTTP: 8500, HTTPS: -1, gRPC: 8502, DNS: 8600)
      Cluster Addr: 127.0.0.1 (LAN: 8301, WAN: 8302)
           Encrypt: Gossip: false, TLS-Outgoing: false, TLS-Incoming: false, Auto-Encrypt-TLS: false

==> Log data will now stream in as it occurs:
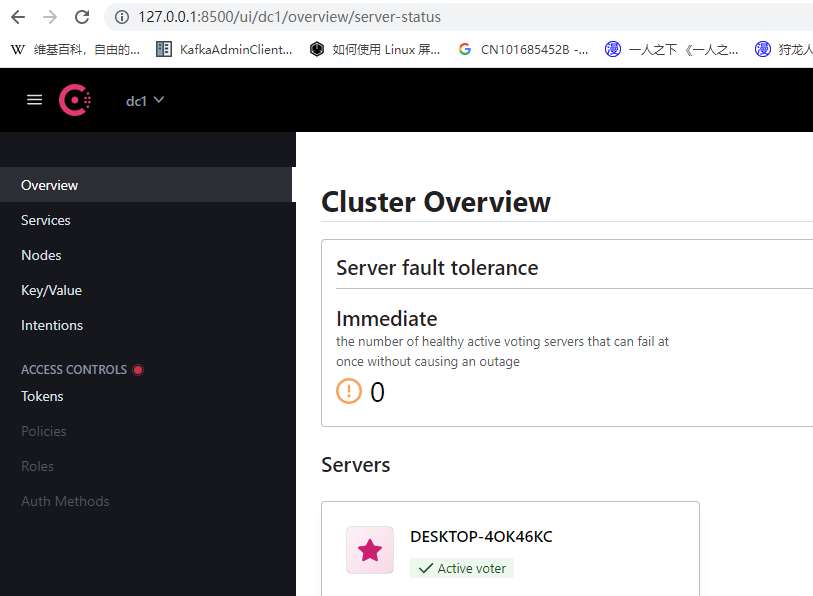
在本机上查看界面。
注册服务
python-consul2文档:https://python-consul2.readthedocs.io/en/latest/
首先,安装连接consul 的py包,这里采用的是python-consul2,安装指令如下pip install python-consul2
然后py代码如下:
import consul


# 初始化 Consul 服务
cursor = consul.Consul(host='127.0.0.1', port=8500)

# 注册服务到 Consul
name = 'api_server'
cursor.agent.service.register(
    name=name , address='127.0.0.1', port=5000,
    # 心跳检查:间隔:5s,超时:30s,注销:30s
    check=consul.Check().tcp('127.0.0.1', 5000, '5s', '30s', '30s'),
    tags=["v1"],
    service_id=name + "_1"
)

cursor.agent.service.register(
    name=name , address='127.0.0.1', port=5001,
    # 心跳检查:间隔:5s,超时:30s,注销:30s
    check=consul.Check().tcp('127.0.0.1', 5001, '5s', '30s', '30s'),
    tags=["v1"],
    service_id=name + "_2"
)

# 获取服务状态
checks = cursor.agent.checks()
status = checks.get('service:test-service').get('Status')
print(status)
>>> critical
>>> 127.0.0.1:5000
# 注销服务
status = cursor.agent.service.deregister("test-service")
print(status)
>>> True
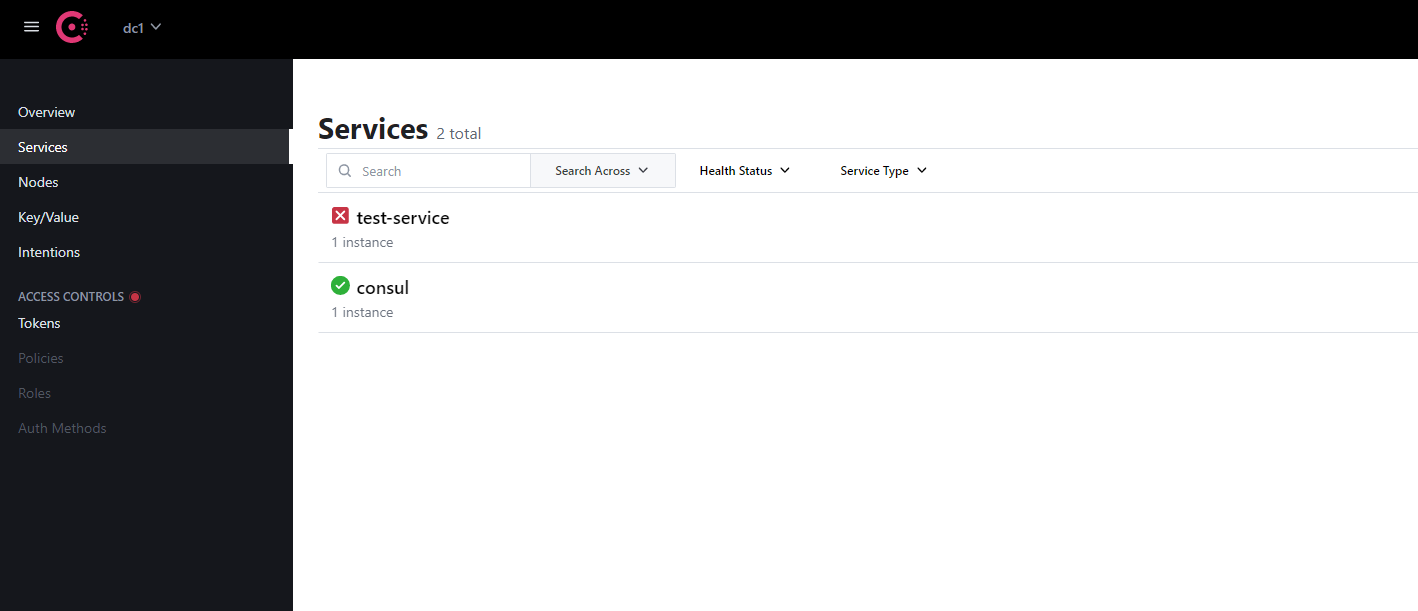
页面显示(这个底层服务是没有做的,所以显示为错误)
注册k/v
# 添加 kv 数据
result = cursor.kv.put('key', 'test-value')
print(result)

# 获取 kv 数据
_, result = cursor.kv.get('key')
result = result.get('Value').decode('utf-8')
print(result)
>>> True
>>> test-value
# 删除 kv 数据
result = cursor.kv.delete('key')
print(result)
>>> True
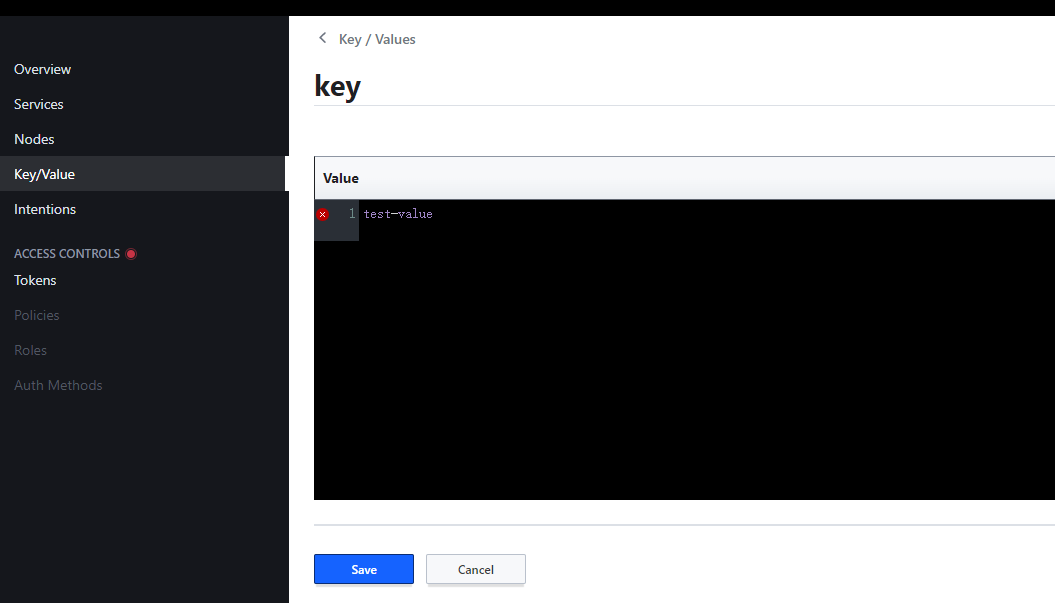
页面显示
FastAPI
官方网址:https://fastapi.tiangolo.com/zh/
安装
python -m pip install fastapi uvicorn[standard]
也可以(直接用all有些不用的包可能安装不上)
pip install fastapi[all]
或
pip install fastapi
pip install uvicorn[standard]
如果是在win下,基于 cython 的依赖项、Uvloop 和 Httptools 是不可安装的。所以使用下面的替换。
pip install uvicorn
20220816补充记录
官方文章:https://fastapi.tiangolo.com/deployment/server-workers/
在使用uvicorn进行生产时,在运行一段时间后会整个api奔溃。所以官方文档后改用gunicorn。
pip install "uvicorn[standard]" gunicorn
开发
建立一个main.py的文件,其内容为
# -*- coding:utf-8 -*-
# author: cyz
# time: 2022/7/14 14:53
import os, sys

sys.path.append(os.path.join(os.path.dirname(os.path.abspath(__file__)), '..'))
# os.chdir(os.path.dirname(os.path.abspath(__file__)))

from fastapi import Depends, FastAPI, APIRouter

from dependencies import get_query_token, get_token_header

# api信息配置
app = FastAPI(
    # dependencies=[Depends(get_token_header)],
    # servers=[
    #     {"url": "https://www.aaa.com", "description": "自定义请求域名"},
    # ],
    responses={404: {"description": "Not found"}},
    title="Qhdata Api",
    version="0.0.1",
    description="Das Dritte Reich",
)

# 最外层路径
router = APIRouter(
    prefix="/api/v1",
    # dependencies=[Depends(get_token_header)],
    responses={404: {"description": "Not found"}},
)

from routers import area, company

# 其他路径信息
router.include_router(area.router)
router.include_router(company.router)

app.include_router(router)

@app.get("/")
async def root():
    return {"message": "Hello Bigger Applications!"}
然后在文件所在目录启动cmd,使用下面语句启动
uvicorn main:app --reload --host 0.0.0.0 --port 8000 --no-access-log
或者
python -m uvicorn main:app --reload --host 0.0.0.0 --port 8000
uvicorn官方网址:https://www.uvicorn.org/
上面有详细的启动指令。
gunicorn的启动语句
https://docs.gunicorn.org/en/latest/settings.html
python -m gunicorn main:app --workers 4 --worker-class uvicorn.workers.UvicornWorker --bind 0.0.0.0:80
–workers:要使用的工作进程的数量,每个将运行一个 Uvicorn 工作人员,在本例中为 4 个工作人员。
–worker-class:在工作进程中使用的与 Gunicorn 兼容的工作类。
–bind: 这告诉 Gunicorn 要监听的 IP 和端口,使用冒号 ( 😃 分隔 IP 和端口。
如果您直接运行 Uvicorn,而不是–bind 0.0.0.0:80(Gunicorn 选项),您将使用–host 0.0.0.0and --port 80
–timeout 30:超时,默认30秒。建议直接设置0,不是的话会经超时重启服务。.
特殊情况:
在启动中可能会遇到一下错误:
ImportError: cannot import name 'ParamSpec' from 'typing_extensions' (/usr/local/lib/python3.8/dist-packages/typing_extensions.py)
该错误修复方法是将FastAPI版本退回0.74.1。
pip install --upgrade fastapi==0.74.1
reload为开发时方便开发,正式部署时不使用该参数。
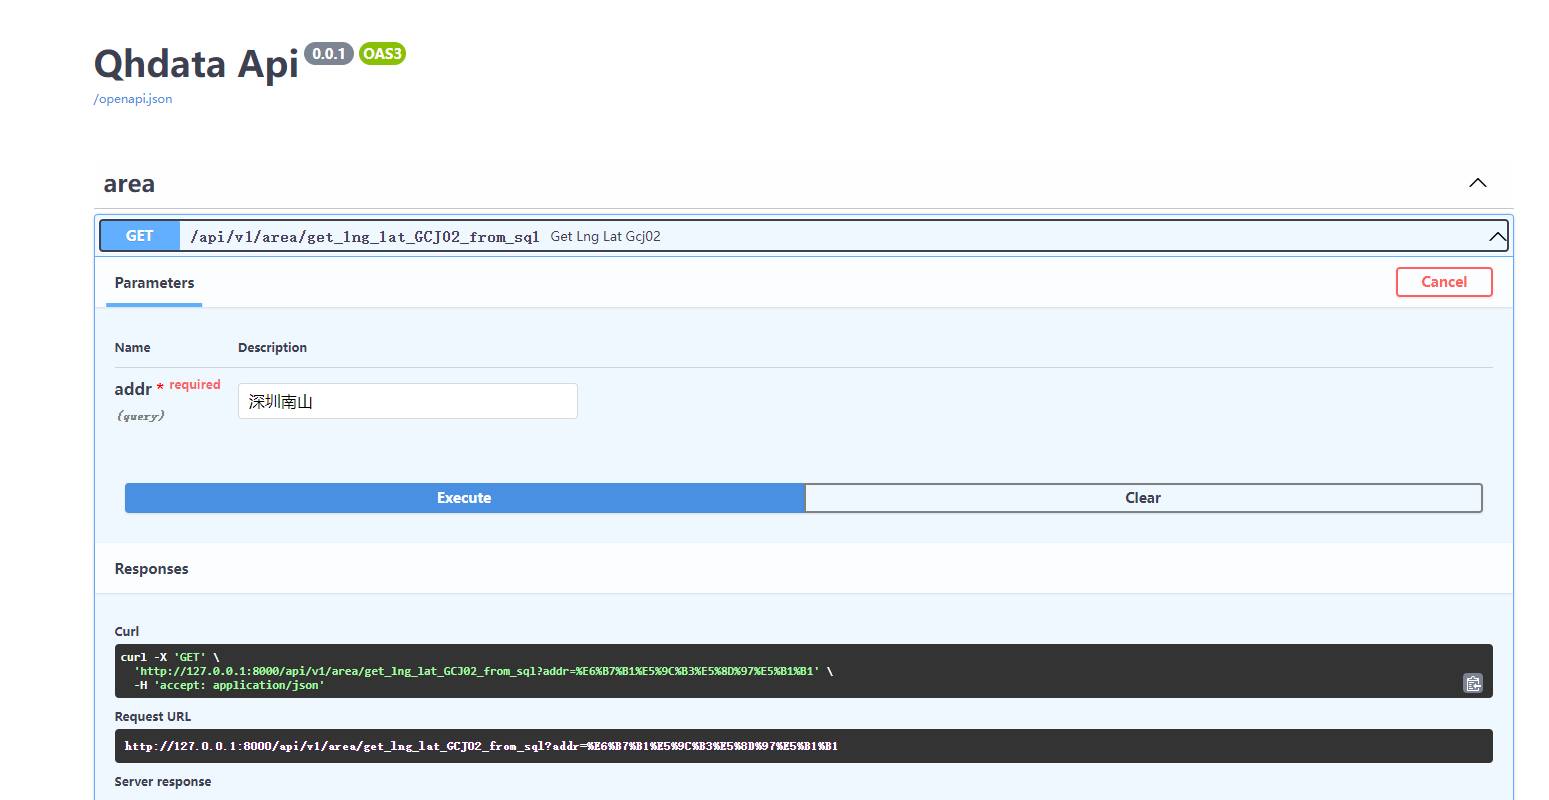
运行后可以到http://127.0.0.1:8000/docs看到api的信息
20230731错误记录
页面出现Could not render N, see the console,原因为fastapi不知道做了什么升级导致的内部错误。将版本设置为0.95.1即可解决。
离线设置
参考文章:https://segmentfault.com/a/1190000038697800
参考文章:https://cloud.tencent.com/developer/news/625934
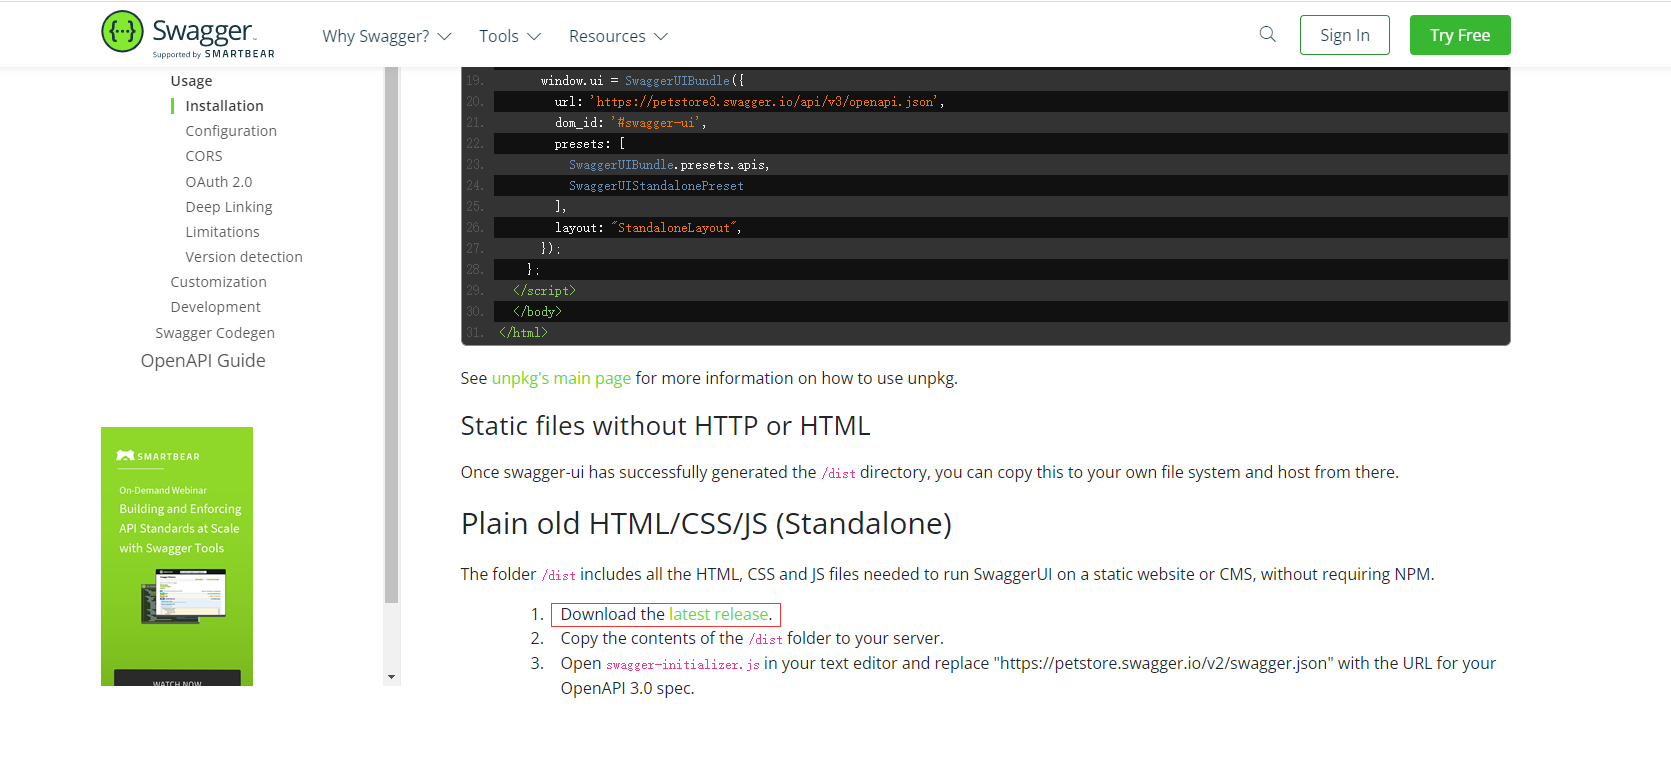
首先,到swagger的github上下载对应的文件。
文件连接:https://github.com/swagger-api/swagger-ui/tree/master/dist
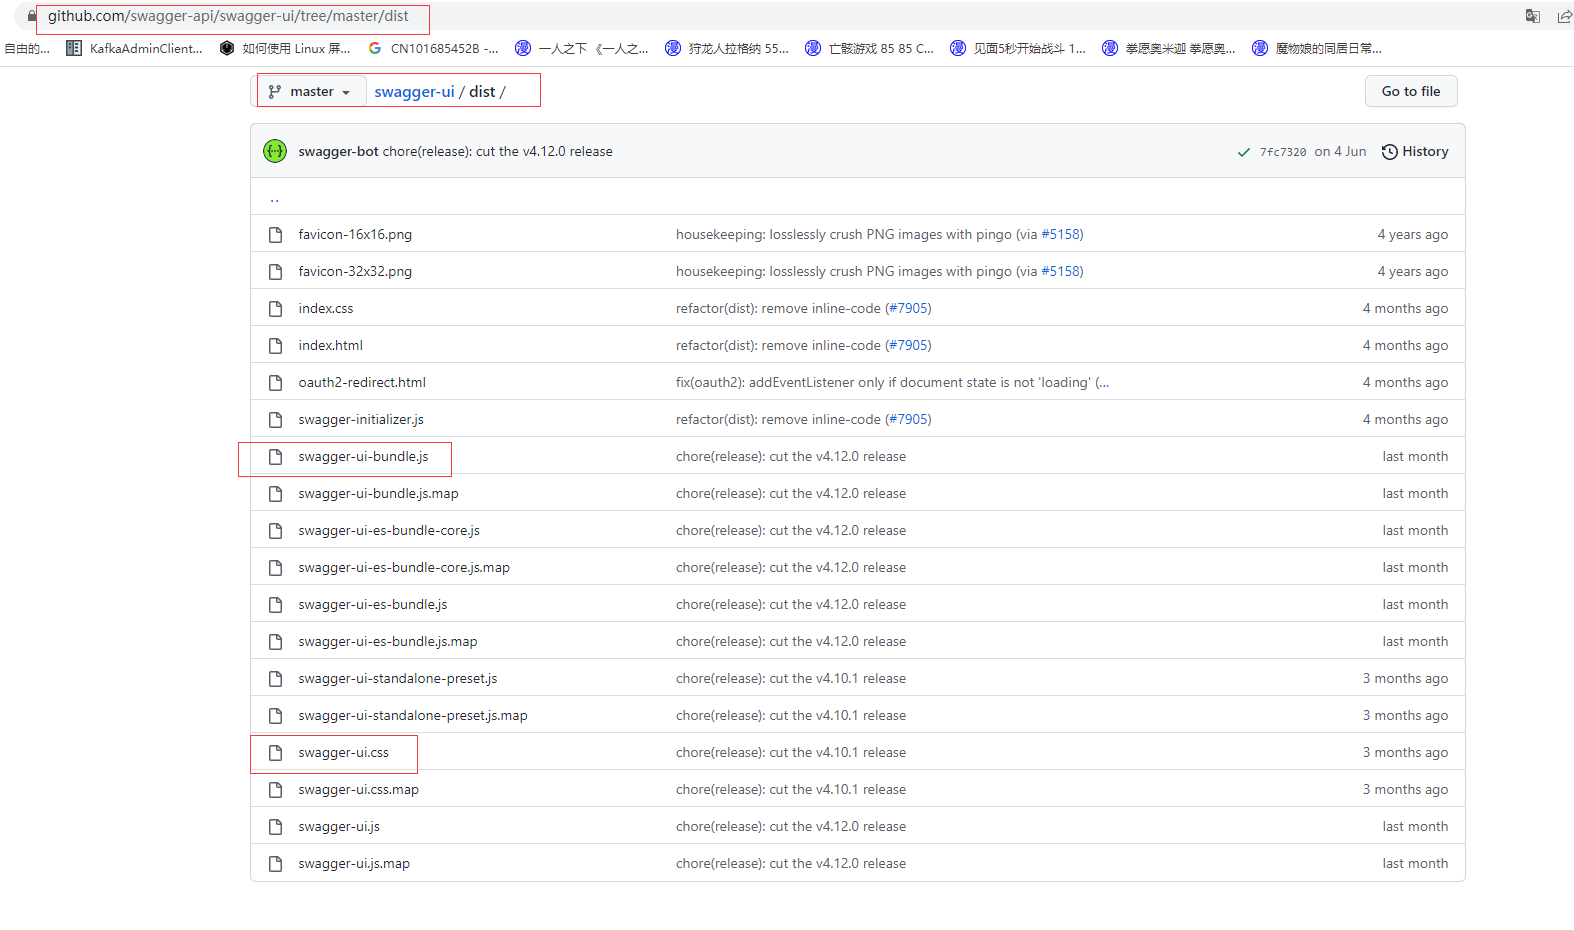
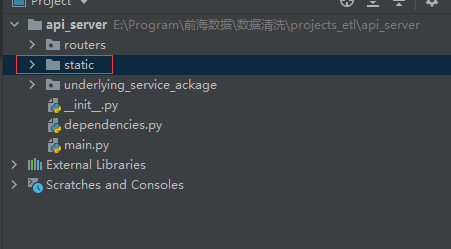
将swagger-ui.css与swagger-ui-bundle.js放到static文件夹下面(不过我个人感觉全拉也可以,我这里时全部都拉下来了)。
或者到官网直接找最新连接也可以。
官网:https://swagger.io/docs/open-source-tools/swagger-ui/usage/installation/
工程结构如下
然后在代码中添加对应设置
from fastapi.openapi.docs import (
    get_redoc_html,
    get_swagger_ui_html,
    get_swagger_ui_oauth2_redirect_html,
)
from fastapi.staticfiles import StaticFiles
app.mount("/static", StaticFiles(directory=f"static"), name="static")

# doc设置
@app.get("/docs", include_in_schema=False)
async def custom_swagger_ui_html():
    return get_swagger_ui_html(
        openapi_url=app.openapi_url,
        title=app.title + " - Swagger UI",
        oauth2_redirect_url=app.swagger_ui_oauth2_redirect_url,
        swagger_js_url="/static/swagger-ui-bundle.js",
        swagger_css_url="/static/swagger-ui.css",
    )


@app.get(app.swagger_ui_oauth2_redirect_url, include_in_schema=False)
async def swagger_ui_redirect():
    return get_swagger_ui_oauth2_redirect_html()


@app.get("/redoc", include_in_schema=False)
async def redoc_html():
    return get_redoc_html(
        openapi_url=app.openapi_url,
        title=app.title + " - ReDoc",
        redoc_js_url="/static/redoc.standalone.js",
    )
roter文件设置
参考文章:https://fastapi.tiangolo.com/async/
参考文章:https://github.com/tiangolo/fastapi/issues/603
参考文章:https://stackoverflow.com/questions/70123888/using-async-def-vs-def-in-fastapi-and-testing-blocking-calls
# -*- coding:utf-8 -*-
# author: cyz
# time: 2022/7/14 14:58
import os, sys

sys.path.append(os.path.join(os.path.dirname(os.path.abspath(__file__)), '..'))
# os.chdir(os.path.dirname(os.path.abspath(__file__)))

from fastapi import APIRouter, Depends, HTTPException
from typing import List, Union, Dict, AnyStr
from pydantic import BaseModel
import pandas as pd

from dependencies import get_token_header
from underlying_service_ackage import getLngLat, standardAreaCode  # 底层功能包


router = APIRouter(
    prefix="/area",  # 统一前置路径
    tags=["area"],
    # dependencies=[Depends(get_token_header)],
    responses={404: {"description": "Not found"}},
)

# **************设置总线程数,不设置这默认为cpu*5数量***************
from concurrent.futures import ThreadPoolExecutor
import asyncio

loop = asyncio.get_running_loop()
loop.set_default_executor(
    ThreadPoolExecutor(max_workers=30)
)
# ************************************************************

class SpiderAddrItem(BaseModel):
    addr: Union[List[str]] = []
    lng_lat: Union[List[str]] = []

@router.get("/get_lng_lat_GCJ02_from_sql", summary="地址获得经纬度", description="基于地址文本直接从数据库中抽取对应的经纬度信息")  # 具体路径
async def get_lng_lat_GCJ02(addr: str):
    # return [{"username": "Rick"}, {"username": "Morty"}]
    return getLngLatGCJ02(addr)

@router.post("/get_lng_lat_GCJ021", summary="地址获得经纬度", description="基于地址文本直接从数据库中抽取对应的经纬度信息")  # 具体路径
async def get_lng_lat_GCJ021(addr: Union[Dict[AnyStr, List[str]], List[str]]):
    # return [{"username": "Rick"}, {"username": "Morty"}]
    if isinstance(addr, dict):
        if b"addr" not in addr.keys():
            raise HTTPException(status_code=400, detail="body必须含有addr")
        addr = addr[b"addr"]
    if isinstance(addr, list):
        if addr == []:
            raise HTTPException(status_code=400, detail="addr不能为空list")
        return getLngLatGCJ02(addr)


@router.post("/get_lng_lat_spider", summary="地址获得经纬度", description="基于地址文本在腾讯百度高德中爬取数据")  # 具体路径
async def get_lng_lat_spider(addr: Union[List[str], Dict[AnyStr, List[str]], Dict[AnyStr, str]]):
    loop = asyncio.get_running_loop()
    if isinstance(addr, dict):
        if b"addr" not in addr.keys():
            raise HTTPException(status_code=400, detail="body必须含有addr")
        addr = addr[b"addr"]
    if isinstance(addr, str):
        addr = [addr]
    if isinstance(addr, list):
        if addr == []:
            raise HTTPException(status_code=400, detail="addr不能为空list")
    result = pd.DataFrame()
    for i in addr:
        # ======================<
        # res = getLngLat(i)
        # ======================>
        res = await loop.run_in_executor(None, getLngLat, i)
        res["addr"] = i
        result = result.append(res)
    print(datetime.now().strftime("%Y-%m-%d %H:%M:%S"), " get_lng_lat_spider完成的数据量: ", len(addr))
    print(f"数据内容为: ", result.to_dict(orient="records"))
    return result.to_dict(orient="records")


@router.post("/get_dim_admin_area", summary="经纬度获得行政区划", description="基于经纬度找到所在最小行政区划")  # 具体路径
def get_area_code(lng_lat: Union[List[str], Dict[AnyStr, List[str]], Dict[AnyStr, str]]):
    if isinstance(lng_lat, dict):
        if b"lng_lat" not in lng_lat.keys():
            raise HTTPException(status_code=400, detail="body必须含有lng_lat")
        lng_lat = lng_lat[b"lng_lat"]
    if isinstance(lng_lat, str):
        lng_lat = [lng_lat]
    if isinstance(lng_lat, list):
        if lng_lat == []:
            raise HTTPException(status_code=400, detail="lng_lat不能为空list")
    result = pd.DataFrame()
    for i in lng_lat:
        tmp = standardAreaCode(i, model=0)
        result = result.append(tmp, ignore_index=True)
    print(datetime.now().strftime("%Y-%m-%d %H:%M:%S"), " get_dim_admin_area完成的数据量: ", len(lng_lat))
    print(f"数据内容为: ", result.to_dict(orient="records"))
    return result.to_dict(orient="records")
对于使用async def与def:
async def: IO-bound/very short
def: No awaitin the function/CPU-bound task
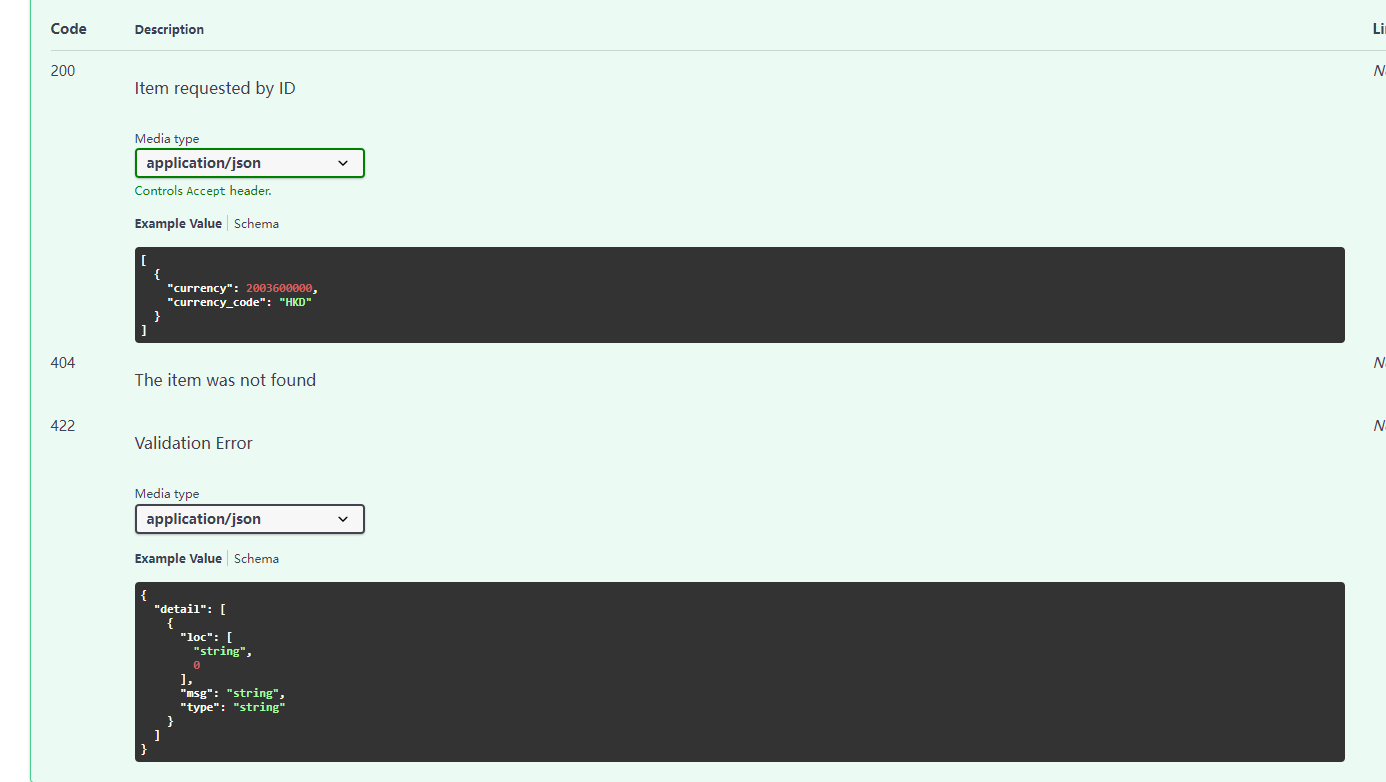
请求样例与返回样例
@router.post("/get_currency", summary="获取货币币值与单位", description="根据货币中文表达,获取对应的币值与单位",
responses={
404: {"description": "The item was not found"},
200: {
"description": "Item requested by ID",
"content": {
"application/json": {
"example": [{"currency": 2003600000, "currency_code": "HKD"}]
}
},
},
},
) # 具体路径
async def get_currency(item: Union[
List[str], str, Dict[AnyStr, List[str]], Dict[AnyStr, AnyStr]
] = Body(default=None,
examples={
"normal": {
"summary": "A normal example",
"description": "A **normal** item works correctly.",
"value": {"currency": "20.036亿港元"}
},
"simple": {
"summary": "A simple example",
"description": "A **simple** item works correctly.",
"value": ["20.036亿港元"]
},
},
)
):
if isinstance(item, dict):
if b"currency" not in item.keys():
raise HTTPException(status_code=400, detail="body必须含有currency")
item = item[b"currency"]
if isinstance(item, bytes) or isinstance(item, str):
item = [item.decode()]
if item == []:
raise HTTPException(status_code=400, detail="currency不能为空list 或 None")
res = []
print(item)
for i in item:
currency = ccc.getCurrency(i)
currency_code = ccc.getCurrencyCode(i)
res.append([currency, currency_code])
res = pd.DataFrame(res, columns=["currency", "currency_code"])
return res.to_dict(orient="records")
class CurrencyItem(BaseModel):
currency: str
date: str
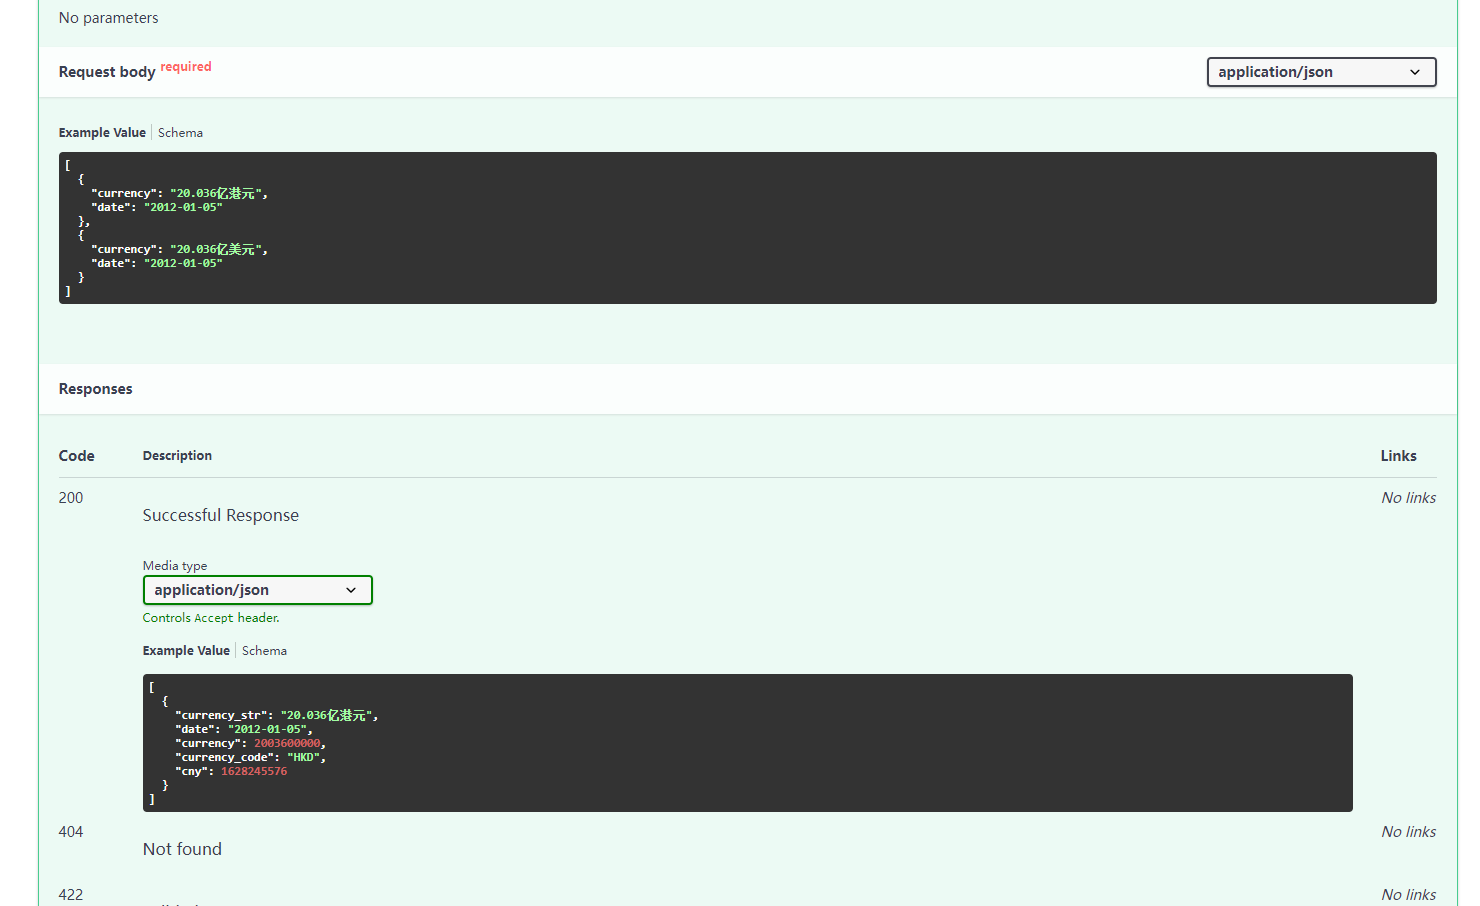
@router.post("/get_cny", summary="获取货币对应的人民币值", description="根据货币中文表达,获取对应的人民币值",
responses={
200: {
"content": {
"application/json": {
"example": [{
"currency_str": "20.036亿港元",
"date": "2012-01-05",
"currency": 2003600000,
"currency_code": "HKD",
"cny": 1628245576
},]
}
},
},
},
)
async def get_cny(item: Union[
List[CurrencyItem], CurrencyItem] = Body(
default=None,
example=[
{"currency": "20.036亿港元", "date": "2012-01-05"},
{"currency": "20.036亿美元", "date": "2012-01-05"}
],
)):
if isinstance(item, CurrencyItem):
item = [item]
item = [i.dict() for i in item]
item = pd.DataFrame().from_dict(item)
item.columns = ["submoney_ori", "date"]
res = ccc.run1(item, currency_str="submoney_ori", date="date")
return res.to_dict(orient="records")
页面效果
多种请求样例
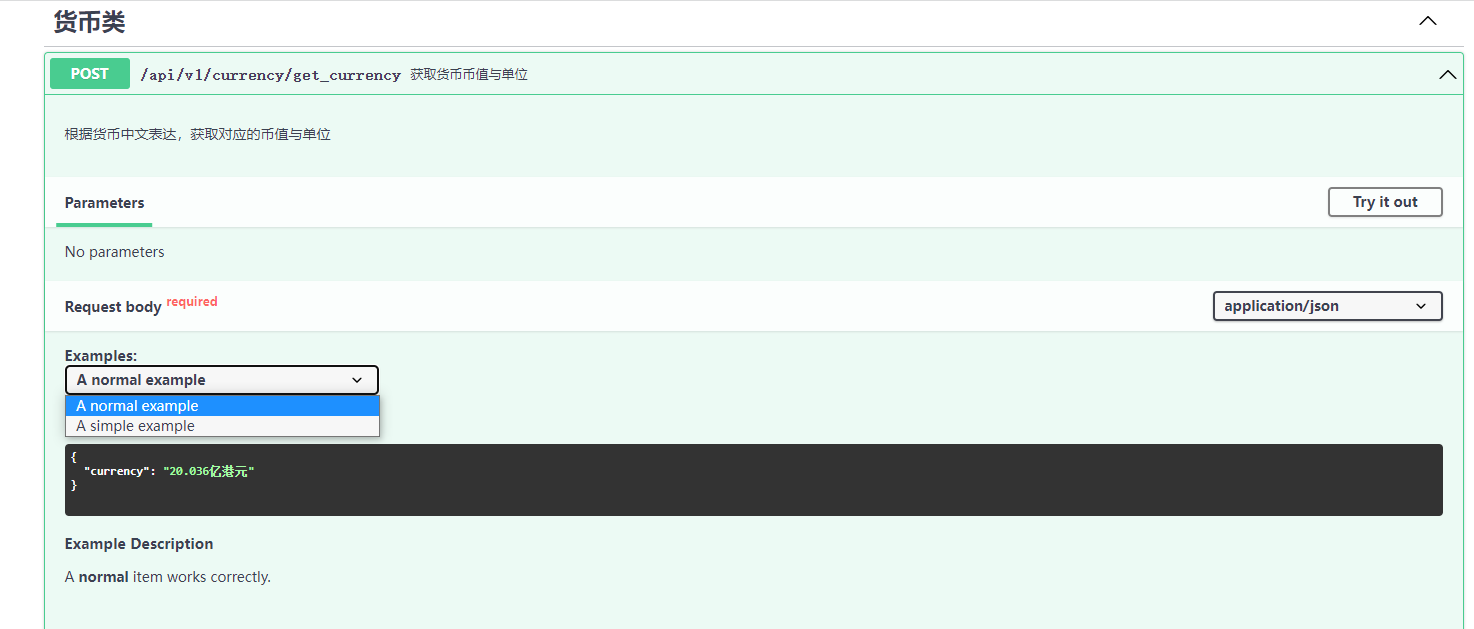
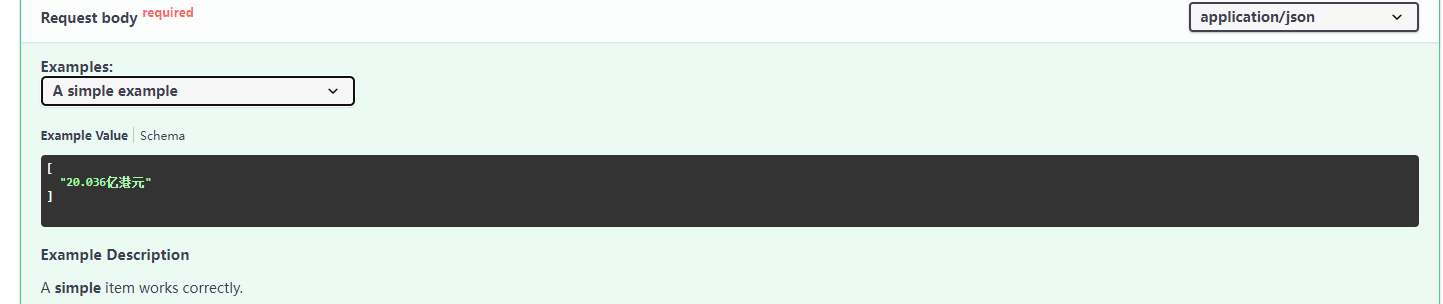
单种请求样例
20220908补充:
https://github.com/encode/starlette/discussions/1843
https://github.com/tiangolo/fastapi/issues/4649
发现fastapi存在内存不释放的问题。现在升级后的配置
fastapi == 0.82.0
starlette == 0.19.1
uvicorn == 0.18.3
继续探查是否有这个问题。
HAProxy
官方网址:http://www.haproxy.org/
官方网址:https://www.haproxy.com/
服务器环境:Ubuntu 20.04.4
HAProxy版本:2.6
安装
参考文章:https://www.haproxy.com/blog/how-to-install-haproxy-on-ubuntu/
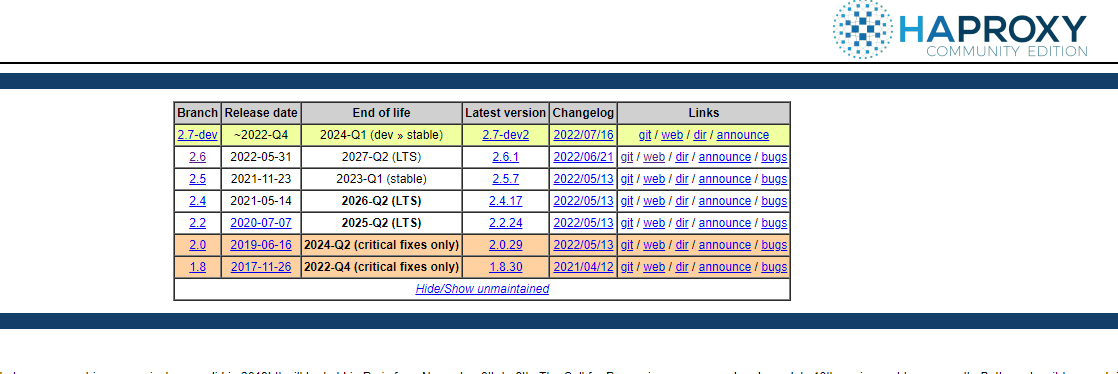
首先,可以到https://haproxy.debian.net/中直接查询你所需要的安装语句。
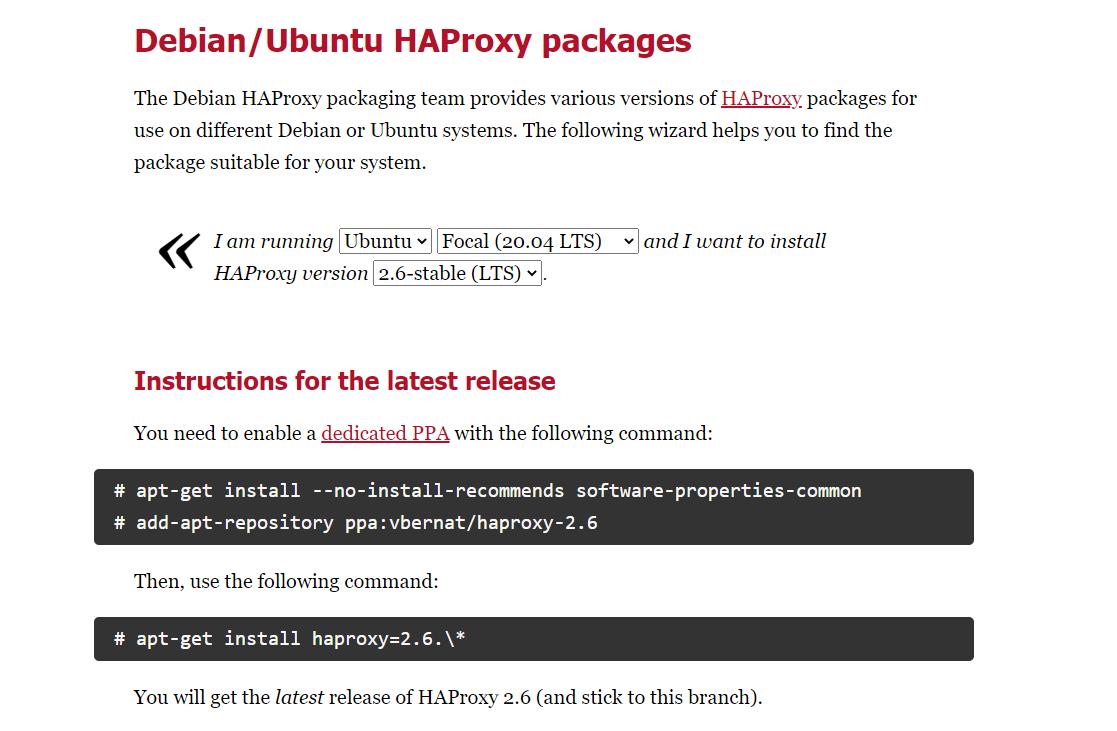
这里我以我所用的服务器为例,使用的是最新的长期支持版本。具体的版本信息可以到http://www.haproxy.org/中查看。
安装截图如下:

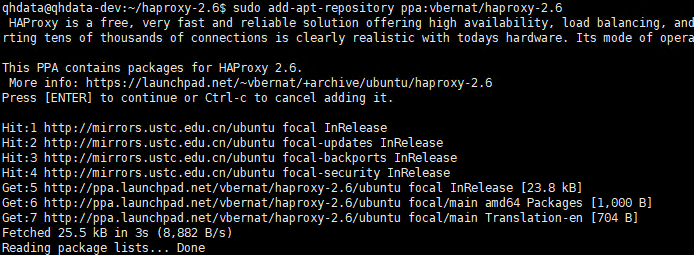
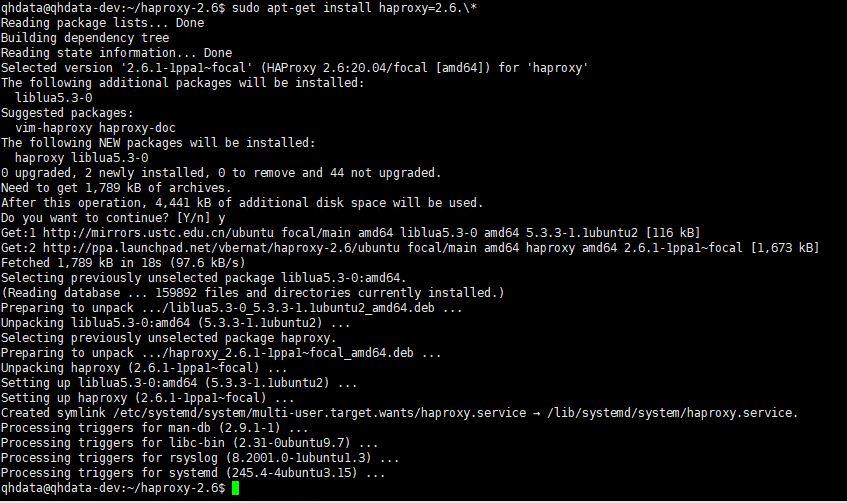
添加=2.6.\*到最后告诉apt我们要在 2.6 分支中维护最新版本的 HAProxy,因此如果该分支中将来有更新,您将在执行apt upgrade即可。
然后输入haproxy -v查询安装好的版本。

进行更新和升级,以确保您拥有最新的软件包和任何安全修复程序:
sudo apt update && sudo apt upgrade -y
配置
参考文章:https://www.haproxy.com/blog/haproxy-configuration-basics-load-balance-your-servers/
参考文章:https://www.linuxe.cn/post-379.html
参考文章:https://www.haproxy.com/blog/using-haproxy-as-an-api-gateway-part-1/
参考文章:https://cloud.tencent.com/developer/article/1644907
参考文章:https://www.haproxy.com/blog/circuit-breaking-haproxy/
参考文章:https://www.cnblogs.com/yanjieli/p/10601819.html
参考文章:https://serverfault.com/questions/940268/using-multiple-conditionals-in-haproxy-use-backend
首先,配置文件一般在/etc/haproxy/haproxy.cfg或者/etc/hapee-{version}/hapee-lb.cfg,如果是用Docker,则此文件将作为卷挂载到路径/usr/local/etc/haproxy/haproxy.cfg的容器中。
配置如下:
global  #全局属性
	log /dev/log	local0  #全局日志配置,Haproxy通过rsyslog将日志发到指定日志服务器,这里传给了本机
	log /dev/log	local1 notice
	chroot /var/lib/haproxy
	stats socket /run/haproxy/admin.sock mode 660 level admin
	stats timeout 30s
	user haproxy
	group haproxy
	daemon #以后台形式运行harpoxy
	pidfile /etc/haproxy/haproxy.pid  #haproxy 进程PID文件

	# Default SSL material locations
	ca-base /etc/ssl/certs
	crt-base /etc/ssl/private

	# See: https://ssl-config.mozilla.org/#server=haproxy&server-version=2.0.3&config=intermediate
        ssl-default-bind-ciphers ECDHE-ECDSA-AES128-GCM-SHA256:ECDHE-RSA-AES128-GCM-SHA256:ECDHE-ECDSA-AES256-GCM-SHA384:ECDHE-RSA-AES256-GCM-SHA384:ECDHE-ECDSA-CHACHA20-POLY1305:ECDHE-RSA-CHACHA20-POLY1305:DHE-RSA-AES128-GCM-SHA256:DHE-RSA-AES256-GCM-SHA384
        ssl-default-bind-ciphersuites TLS_AES_128_GCM_SHA256:TLS_AES_256_GCM_SHA384:TLS_CHACHA20_POLY1305_SHA256
        ssl-default-bind-options ssl-min-ver TLSv1.2 no-tls-tickets

defaults
	log	global
	mode http  #运行模式,分tcp(四层)或者http(七层)两种模式,默认是tcp模式
	option	httplog
	option	dontlognull
        timeout connect 30s  #成功连接到一台服务器的最长等待时间,不写单位的话默认是毫秒
        timeout client  4s  #客户端发送数据最长等待时间
        timeout server  30s  #服务端回应客户端数据发送的最长时间
		timeout check   10s  #设置每次对后端服务器检测超时的时间
	errorfile 400 /etc/haproxy/errors/400.http
	errorfile 403 /etc/haproxy/errors/403.http
	errorfile 408 /etc/haproxy/errors/408.http
	errorfile 500 /etc/haproxy/errors/500.http
	errorfile 502 /etc/haproxy/errors/502.http
	errorfile 503 /etc/haproxy/errors/503.http
	errorfile 504 /etc/haproxy/errors/504.http

frontend api_gateway  #定义前端节点的名字
	bind *:8000  #Haproxy服务所监听的IP与端口
	# acl addr_ner_path path_beg /api/v1/area/get_addr_Ner /api/v1/area/get_lng_lat_from_addr_similer  # 两个条件都符合的情况 ,AND
	acl addr_ner_path path_beg /api/v1/area/get_addr_Ner  # 使用命名 ACL,多次指定同一个 ACL 名称会导致条件的逻辑 OR
	acl addr_ner_path path_beg /api/v1/area/get_lng_lat_from_addr_similer
	acl company_path path_beg /api/v1/company/get_ind_code
	acl company_path path_beg /api/v1/company/get_pro_code
	acl docs_path path_beg /docs
	acl redoc_path path_beg /redoc
	use_backend api_server_addr_ner if addr_ner_path
	use_backend api_server_company if company_path
	# use_backend api_server_docs if { path_beg /docs } { path_beg /redoc } # 两个条件都符合的情况 ,AND
	http-request deny if docs_path || redoc_path  # 两者的请求都会被拒绝
	default_backend api_server_simple #Haproxy默认引用的后端服务器组

backend api_server_simple
	balance roundrobin #定义负载均衡调度算法,对于快速和简短的 API 调用,请使用roundrobin算法,对于寿命更长的 websocket,使用leastconn算法,对于后端服务器经过优化以处理特定功能的服务,请使用uri算法
	option  httpchk GET / #检查后端节点页面状态码是否为200,如果异常就不再将请求送给该服务器,除了GET外还可以使用HEAD
	server  server_55_8000_simple 192.168.1.55:8000 weight 5 check inter 2m downinter 1m rise 2 fall 3 maxconn 1000 observe layer4 error-limit 10 on-error mark-down
	server  server_56_8000_simple 192.168.1.56:8000 weight 5 check inter 2m downinter 1m rise 2 fall 3 maxconn 1000 observe layer4 error-limit 10 on-error mark-down
	# weight 权重,默认为1,最大为256,0不参与负载
    # 主动健康检查
	# check 开启健康检查
    # inter 检查之间的间隔(默认为毫秒,但您可以使用s后缀设置秒)。
	# downinter 服务器已经处于关闭状态时的检查间隔。
    # rise 健康检查通过了多少次认为该服务器可用,fall则相反
	# maxconn HAProxy 应该同时向服务器打开多少个连接。
	# 被动健康检查
	# observe layer4 监控 TCP 错误的实时流量。
	# observe layer7 监控 HTTP 错误的实时流量。
	# error-limit 50 如果连续错误达到50,则触发错误操作。
	# on-error mark-down 达到错误限制时该怎么办:将服务标记为关闭。
	# fastinter: 表示立即按照fastinter的检测延时进行。
	# fail-check: 表示改次error作为一次检测;
	# sudden-death: 表示模仿一次fatal,如果紧接着一次fail则置server为down;
	# mark-down: 表示直接把server置为down状态
	# slowstart 20s 在服务器恢复并重新联机后,这会在 20 秒内逐渐向其发送流量,直到达到 maxconn 的 100%。

backend api_server_addr_ner
	balance leastconn
	# roundrobin:表示简单的轮循,即客户端每访问一次,请求轮循跳转到后端不同的节点机器上
	# static-rr:基于权重轮循,根据权重轮循调度到后端不同节点
	# leastconn:加权最少连接,表示最少连接者优先处理
	# source:表示根据请求源IP,这个跟Nginx的IP_hash机制类似,使用其作为解决session问题的一种方法
	# uri:表示根据请求的URL,调度到后端不同的服务器
	# url_param:表示根据请求的URL参数来进行调度
	# hdr(name):表示根据HTTP请求头来锁定每一次HTTP请求
	# rdp-cookie(name):表示根据cookie(name)来锁定并哈希每一次TCP请求
	option  httpchk GET / #检查后端节点页面状态码是否为200,如果异常就不再将请求送给该服务器,除了GET外还可以使用HEAD
	timeout server 60m # 独立的后端超时机制
	server server_55_8001_addr_ner 192.168.1.55:8001 weight 5 check inter 2m downinter 1m rise 2 fall 3 maxconn 1000 observe layer4 error-limit 10 on-error mark-down

backend api_server_company
	option  httpchk GET / #检查后端节点页面状态码是否为200,如果异常就不再将请求送给该服务器,除了GET外还可以使用HEAD
	server server_56_8001_company 192.168.1.56:8001 weight 5 check inter 2m downinter 1m rise 2 fall 3 maxconn 1000 observe layer4 error-limit 10 on-error mark-down

backend api_server_docs
	balance roundrobin
	option  httpchk GET / #检查后端节点页面状态码是否为200,如果异常就不再将请求送给该服务器,除了GET外还可以使用HEAD
	server server_55_8000_simple 192.168.1.55:8000 weight 5 check inter 2m downinter 1m rise 2 fall 3 maxconn 1000 observe layer4 error-limit 10 on-error mark-down
	server server_56_8000_simple 192.168.1.56:8000 weight 5 check inter 2m downinter 1m rise 2 fall 3 maxconn 1000 observe layer4 error-limit 10 on-error mark-down
	server server_55_8001_addr_ner 192.168.1.55:8001 weight 5 check inter 2m downinter 1m rise 2 fall 3 maxconn 1000 observe layer4 error-limit 10 on-error mark-down
	server server_56_8001_company 192.168.1.56:8001 weight 5 check inter 2m downinter 1m rise 2 fall 3 maxconn 1000 observe layer4 error-limit 10 on-error mark-down

listen admin_stats  #Haproxy状态监控页面配置
    bind 0.0.0.0:9188
    mode http
    stats refresh 30s  #监控页面自动刷新时间
    stats uri /status  #监控页面的地址
    stats auth admin:admin123  #登录监控页面的账号密码
    stats hide-version  #隐藏版本号
    stats admin if TRUE  #可在监控页面上手动启动或关闭后端服务器
关于负载均衡leastconn模式的一些补充,来自于https://serverfault.com/questions/457506/ha-proxy-roundrobin-vs-leastconn
HTTP / HTTPS
对于 HTTP,活动连接意味着服务器正忙于处理请求。连接与负载成正比。您要选择活动连接(正在进行的请求)最少的服务器。用于leastconnHTTP(S) 流量。
想象一个有两台 HTTP 服务器的场景,其中一台服务器处理请求的速度较慢(可能它超载,可能它的硬件较旧)。
roundrobin将在两台服务器之间分配一半的请求。这是非常低效的,更快的服务器应该花费更多。更糟糕的是,较慢的服务器可能会过载,随着更多请求的进入,它会变得更慢,并且可能随时开始丢弃请求。你不想要那个。
leastconn会检测到服务器不均匀。较慢的服务器保持连接的时间更长,它的连接数更高。leastconn考虑到这一点,并更喜欢另一台服务器。
根据我的经验,包括我专门为中型到大型网站进行性能测试的角色。leastconn可以达到roundrobinHTTP(S) 的 300% 的效率。roundrobin不公平地分配连接,它会导致高负载不稳定。
DNS 请求
(让我们忽略 HAProxy 不支持 UDP 并且 UDP 连接较少)。
最后一个例子。DNS 是一个简单的协议。客户端发送单个 UDP 消息来请求域,DNS 服务器在单个消息中回复。
在这种情况下,没有真正的联系。即使有,它也会立即关闭(理论上)。
在这些情况下计算连接数是没有意义的,对于leastconn. 一个简单的roundrobin可以分发消息。
一个常见的误解
人们有时认为他们不应该使用leastconn短期连接(类似于上一个示例)。甚至 HAProxy 文档也对此具有误导性
leastconn
          Use of this algorithm is recommended where very long sessions are
          expected, such as LDAP, SQL, TSE, etc... but is not very well
          suited for protocols using short sessions such as HTTP.
          [misleading advice, should ignore it]
在现实世界中,short connections不是一回事。
应用程序建立在 TCP 之上。消息是按顺序传递和处理的。当服务器速度慢或过载时,“短”连接会变得更长。如果有(更多)连接,则可能有一些(更多)工作正在完成。连接数和连接持续时间各不相同且有意义。
考虑一个基本的 HTTP 服务器。一些资产需要几毫秒,一些 API 调用需要几秒钟,一个页面可能需要任何时间来加载其中的任何数量的请求,等等。请求不是短暂的,它们的生命周期取决于哪个服务器上正在处理的内容。leastconn了解正在进行的活动并调整分布,这正是您想要的负载均衡器。
HAProxy 文档对此是错误的。堆叠连接也是服务器即将出现故障的明确标志。leastconn 很好地补充了主动健康检查,在事实发生之前将请求定向到其他服务器。
运行
设置好了,使用haproxy -f /etc/haproxy/haproxy.cfg启动即可。
错误情况:如果出现错误信息Missing LF on last line, file might have been truncated at position 3.,一般是最后一样不是空回车符,直接添加一空行即可。
如果在运行中需要修改cfg文件,则修改后运行service haproxy reload即可。
或者systemctl start haproxy -f /etc/haproxy/haproxy.cfg启动,systemctl status haproxy来查看运行状态,systemctl stop haproxy停止,systemctl restart haproxy重启动,systemctl reload haproxy重新载入。
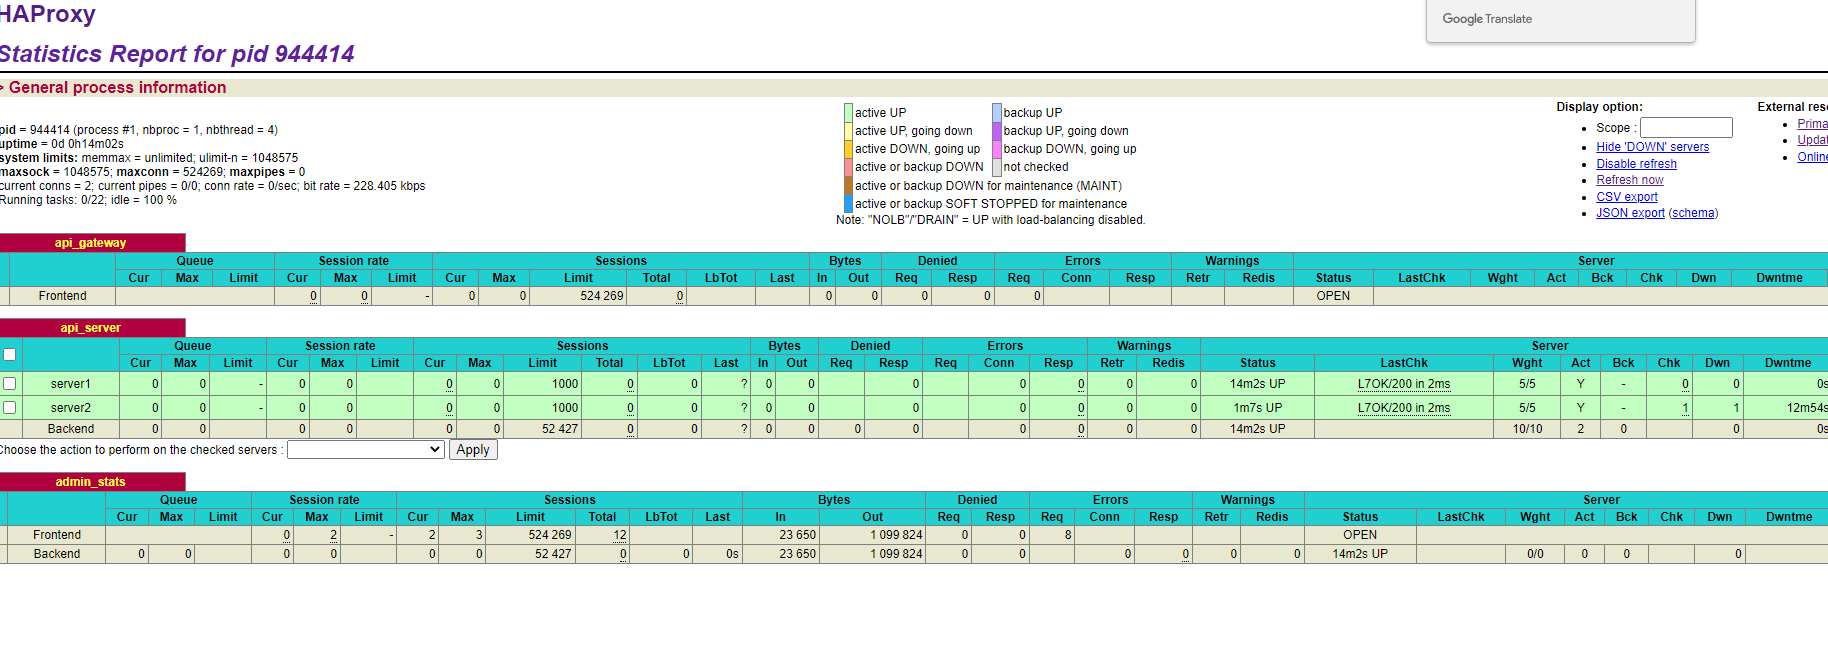
监控
监控页面http://127.0.0.1:9188/status
查看监听的端口netstat -antup | grep -i 8000
supervisord配置
官方文章:https://www.uvicorn.org/deployment/#gunicorn
配置样例
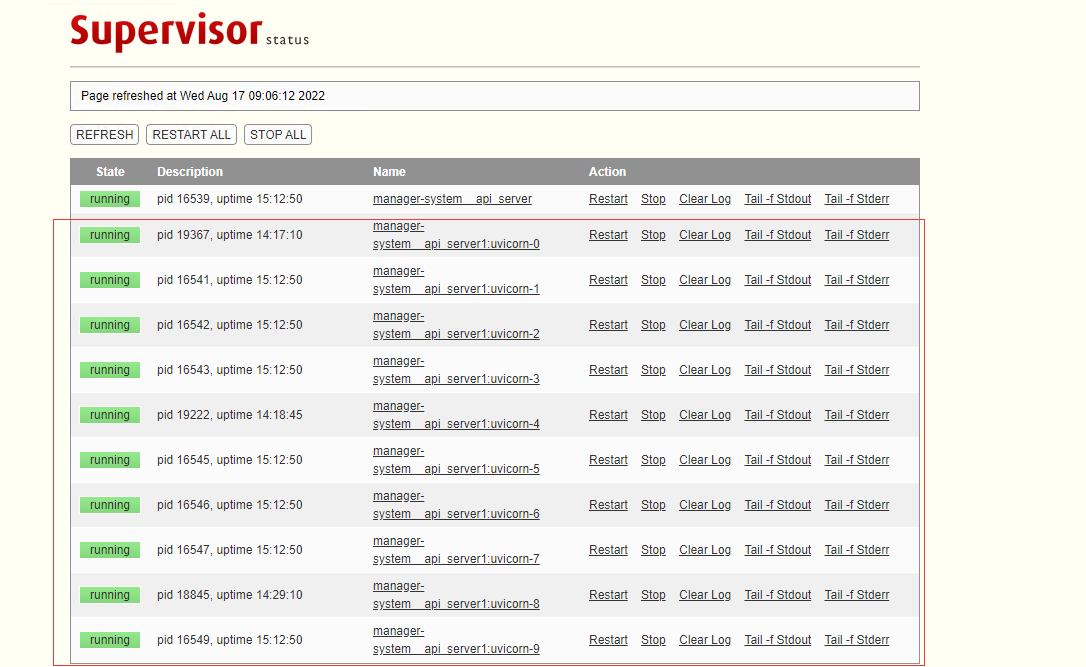
supervisord + uvicorn
[supervisord]
[fcgi-program:manager-system__api_server1]
socket=tcp://0.0.0.0:8001
command = python3 -m uvicorn --fd 0 main:app
directory = /data/cn/qhdata/python/git/projects_etl/projects_etl/api_servers/api_server1/
numprocs=10
process_name=uvicorn-%(process_num)d
autostart = true
autorestart = true
startretries = 3
user = qhdata
priority = 1
redirect_stderr = true
stdout_logfile_maxbytes = 20MB
stdout_logfile_backups = 0
stdout_logfile = /home/qhdata/supervisord/log/manager-system__api_server1.log
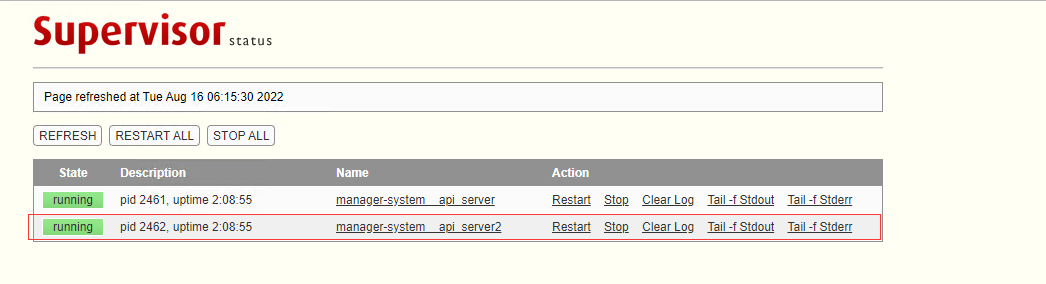
supervisord + gunicorn
[program:manager-system__api_server2]
command = python3 -m gunicorn main:app --worker-class uvicorn.workers.UvicornWorker --bind 0.0.0.0:8001 --timeout 3600 --workers 4
directory = /data/cn/qhdata/python/git/projects_etl/projects_etl/api_servers/api_server2/
autostart = true
autorestart = true
startretries = 3
user = qhdata
priority = 1
redirect_stderr = true
stdout_logfile_maxbytes = 20MB
stdout_logfile_backups = 0
stdout_logfile = /home/qhdata/supervisord/log/manager-system__api_server2.log
第2种写法容易出现在重启程序时候自进程没有被杀死导致端口被占用。如果出现端口被占用,可以使用sudo fuser -k 5000/tcp直接杀死占用端口的程序。


 1233
1233


 被折叠的 条评论
为什么被折叠?
被折叠的 条评论
为什么被折叠?
 到【灌水乐园】发言


