


一、LinearLayout的概述
线性布局(LinearLayout)主要以水平或垂直方式来排列界面中的控件。并将控件排列到一条直线上。在线性布局中,如果水平排列,垂直方向上只能放一个控件,如果垂直排列,水平方向上也只能方一个控件。
使用线性布局,需要将布局节点改成LinearLayout,基本格式如下:
<?xml version="1.0" encoding="utf-8"?>
<LinearLayout xmlns:android="http://schemas.android.com/apk/res/android"
    android:layout_width="match_parent"
    android:layout_height="match_parent">

    ......

</LinearLayout>
二、LinearLayout常用属性
常用到的属性简单归纳一下:
属性1:android:orientation 指定线性布局的方向(水平或者垂直)
属性2:android:width 线性布局的容器宽度
属性3:android:height 线性布局的容器高度
属性4:android:background 线性布局的背景
属性5:android:gravity 线性布局中,子容器相对于父容器所在的位置
2.0 常见属性
2.属性值:
android:width="xxxdp" 指定线性布局的容器宽度为:xxxdp
android:width="wrap_content" 指定线性布局的容器宽度为:根据容器内容宽度大小来填充屏幕宽度
android:width="match_parent" 指定线性布局的容器宽度为:撑满整个屏幕宽度
3.属性值:
android:height="xxxdp" 指定线性布局的容器高度为:xxxdp
android:height="wrap_content" 指定线性布局的容器高度为:根据容器内容高度大小来填充屏幕高度
android:height="match_parent" 指定线性布局的容器高度为:撑满整个屏幕高度
4.属性值:
android:background="#000" 指定线性布局的背景为:黑色(rgb颜色)
android:background="@android:color/black" 指定线性布局的背景为:黑色(引用android系统自带的原始黑色)
andrid:background="@color/colorPrimary" 指定线性布局的背景为:(根据res/color.xml 中的colorPrimary所定义的颜色设置)
2.1 orientation 属性
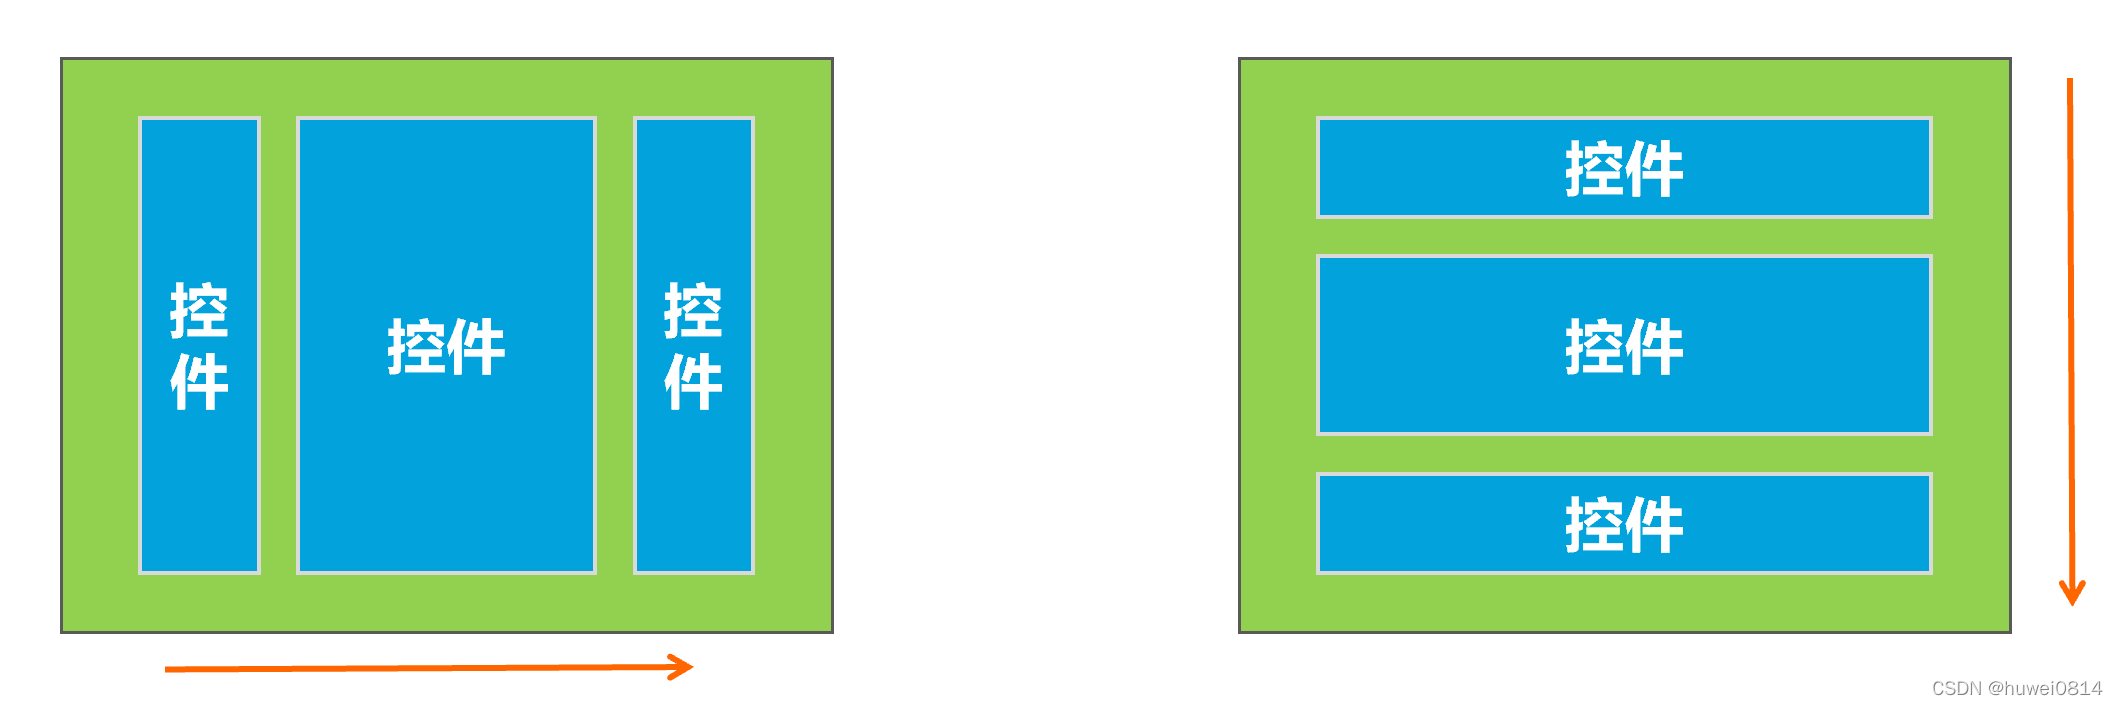
在线性布局中,控件排列有水平和垂直两个方向,控件排列方向由android:orientation属性来控制,该属性需要加在LinearLayout标记的属性中。属性值:
android:orientation="horizontal" 指定线性布局方向:水平
android:orientation="vertical" 指定线性布局方向:垂直


从上图可以看出,将orientation属性值设置成为vertical控件将从垂直方向从上往下排列,将orientation属性值设置成为horizontal,控件将从水平方向从左往右排列。
2.2 gravity 属性
android:gravity="center" 指定线性布局中,子容器相对于父容器所在的位置为:正中心
android:gravity="cente_verticalr" 指定线性布局中,子容器相对于父容器所在的位置为:垂直方向的正中心
android:gravity="center_horizontal" 指定线性布局中,子容器相对于父容器所在的位置为:水平方向的正中心
android:gravity="left" 指定线性布局中,子容器相对于父容器所在的位置为:最左边(默认)
android:gravity="right" 指定线性布局中,子容器相对于父容器所在的位置为:最右边
android:gravity="top" 指定线性布局中,子容器相对于父容器所在的位置为:最上方(默认)
android:gravity="bottom" 指定线性布局中,子容器相对于父容器所在的位置为:最下方

如上图:使用gravity属性值right|bottom,将LinearLayout布局中的控件放置于相对于父容器的右侧下方。

线性方向:水平,可以通过控件的android:layout_gravity属性的值来改变控件在垂直方向上的位置。
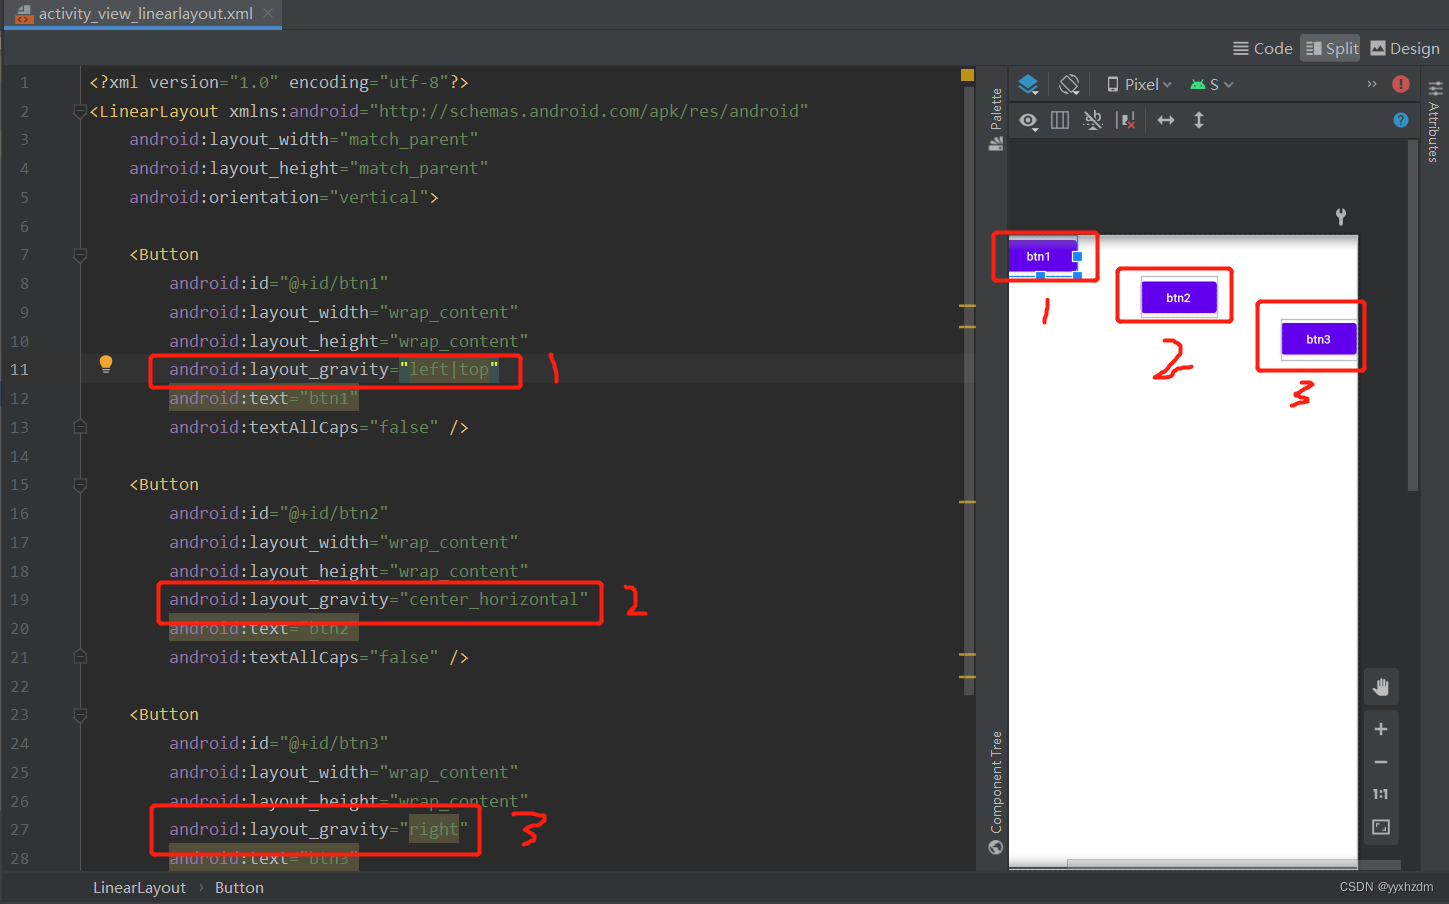
同理,线性方向:垂直,可以通过控件的android:layout_gravity属性的值来改变控件在水平方向上的位置。
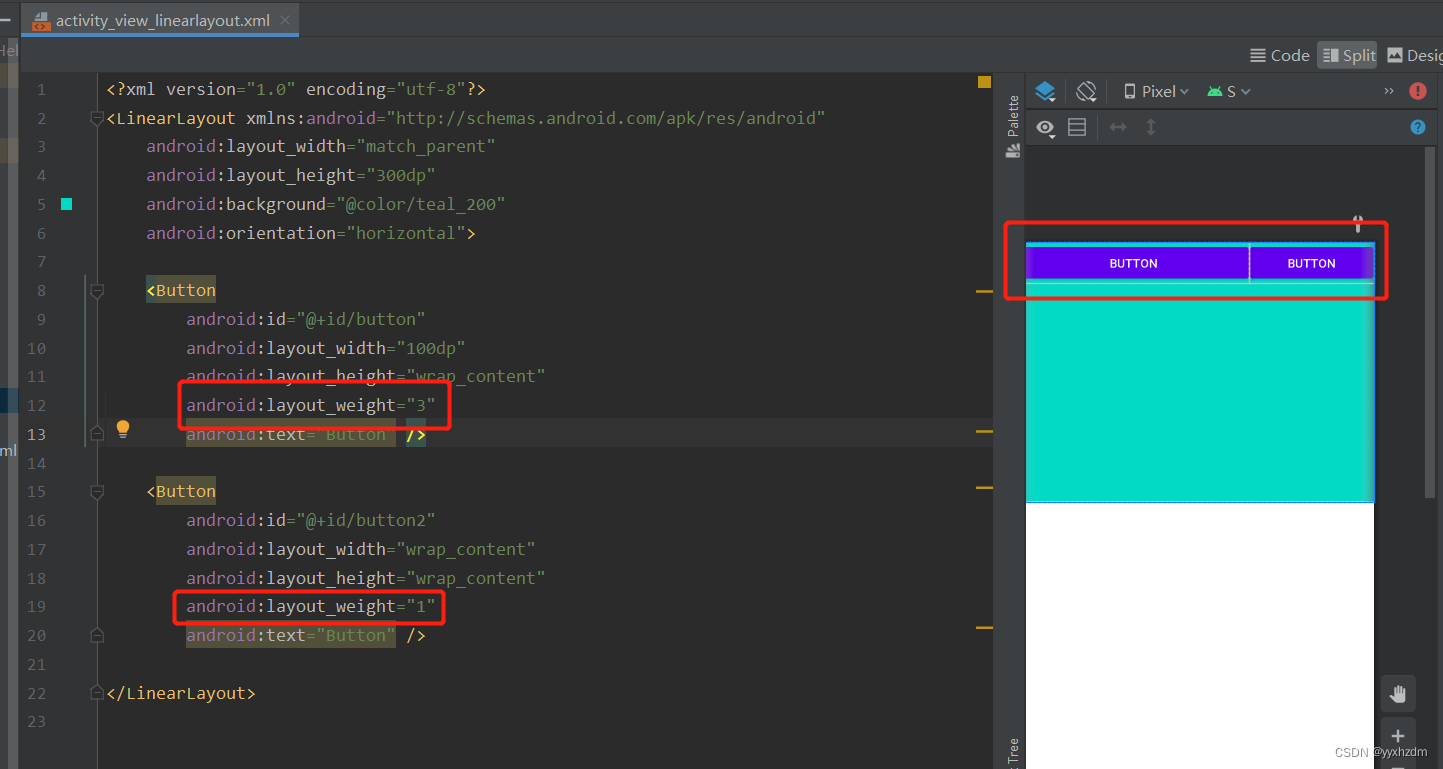
2.3 layout_weight 属性
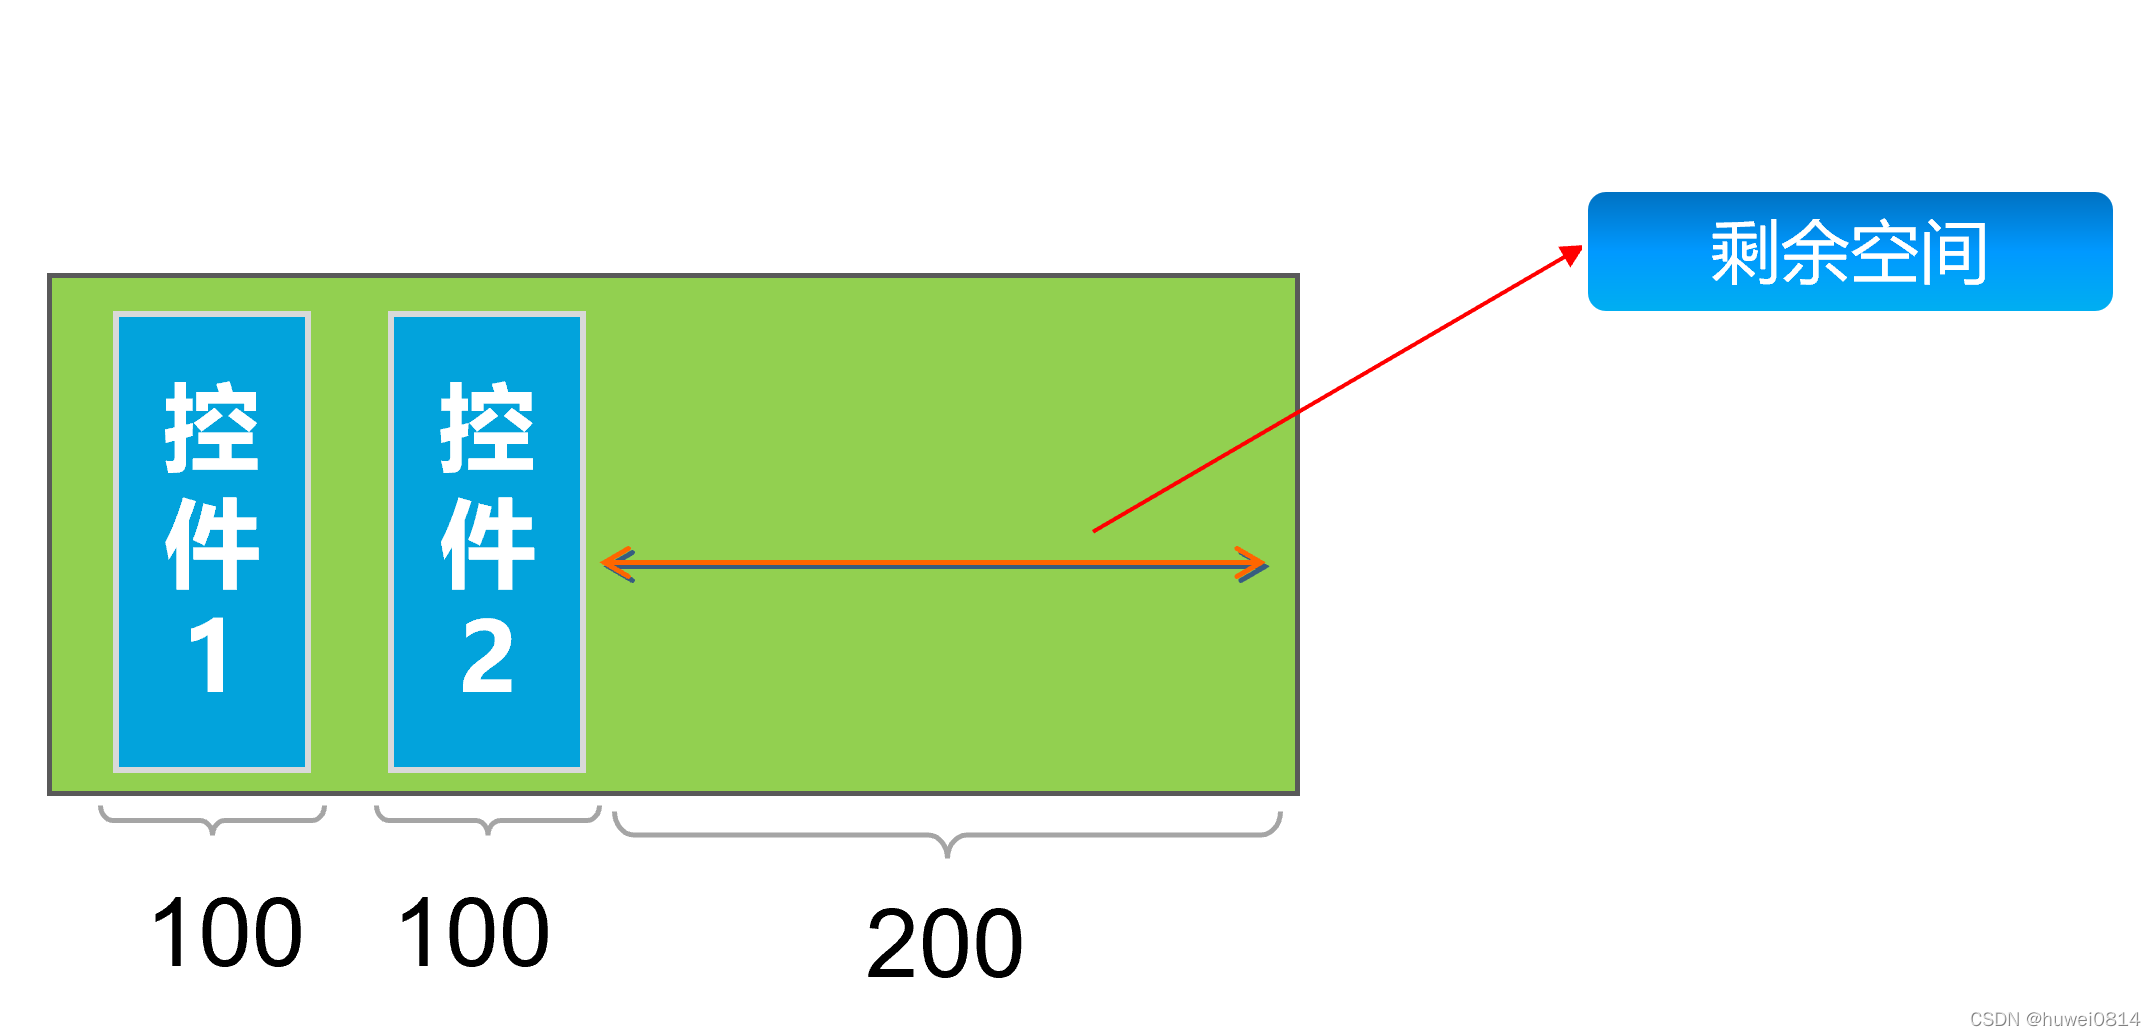
LinearLayout中另外一个常用的属性是layout_weight ,该属性需要加在LinearLayout的子控件中。其作用是分配线性布局中的剩余空间到该控件上。
如下图所示,在控件没有添加layout_weight 属性时,控件未占满线性布局的区域会空出来。

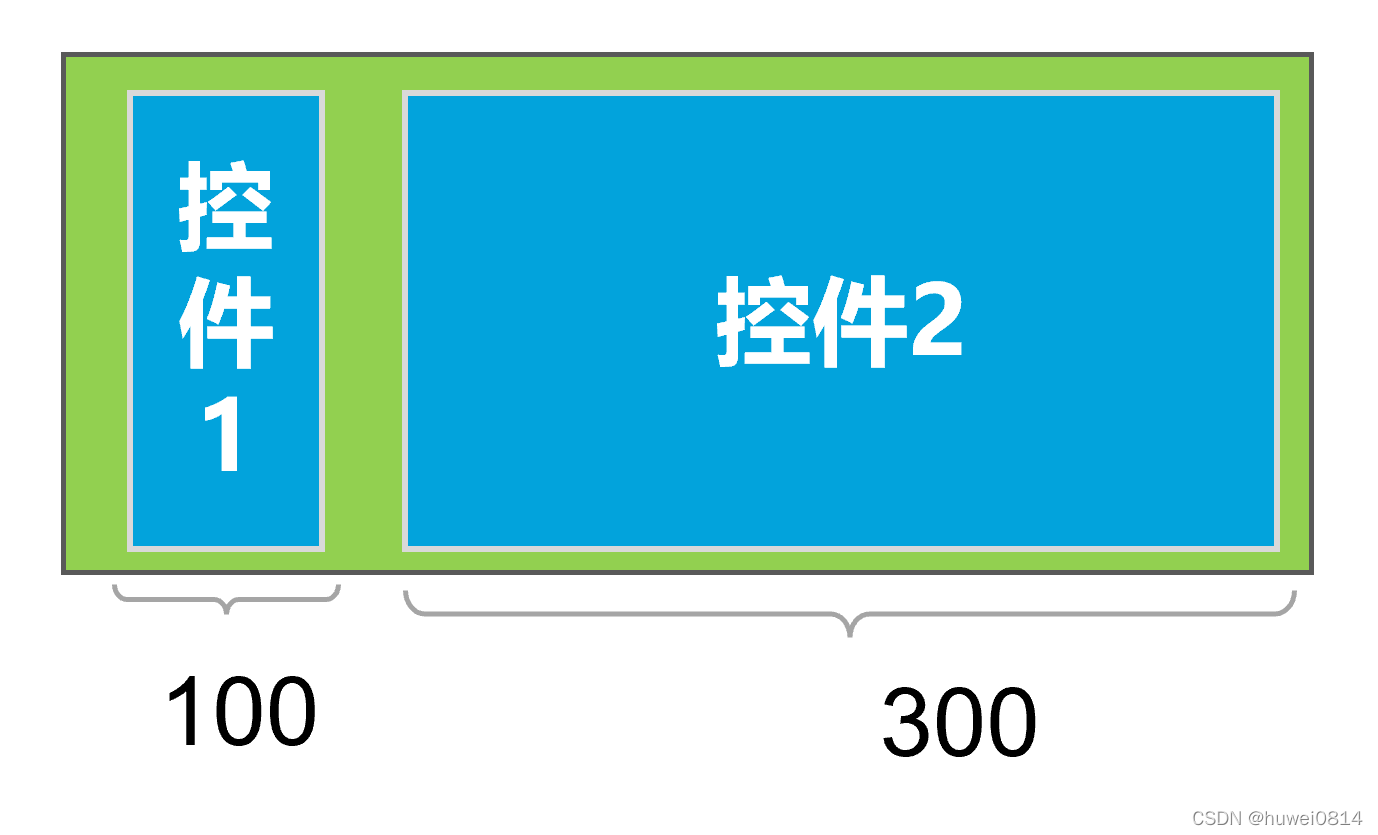
给控件button2加上android:layout_weight="1"后,会把线性布局剩余空间全部占满。
 如果给
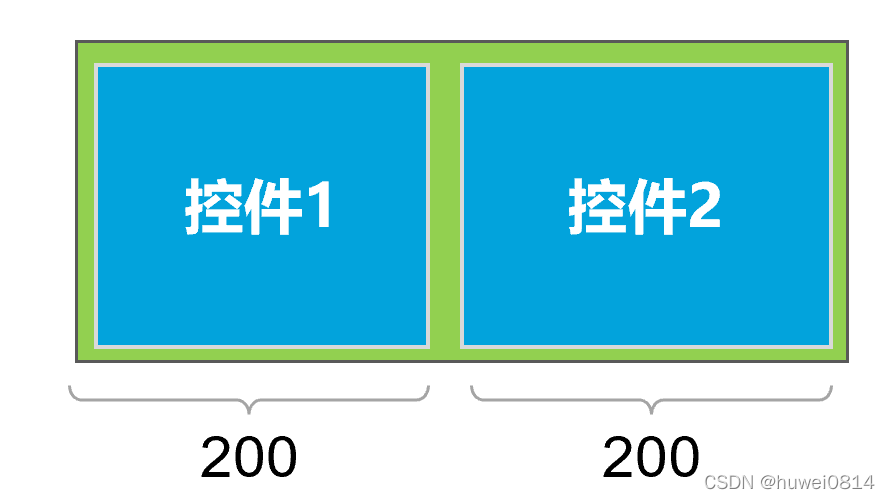
如果给button1和button2都加上android:layout_weight="1",则两个控件均匀分配剩余空间。

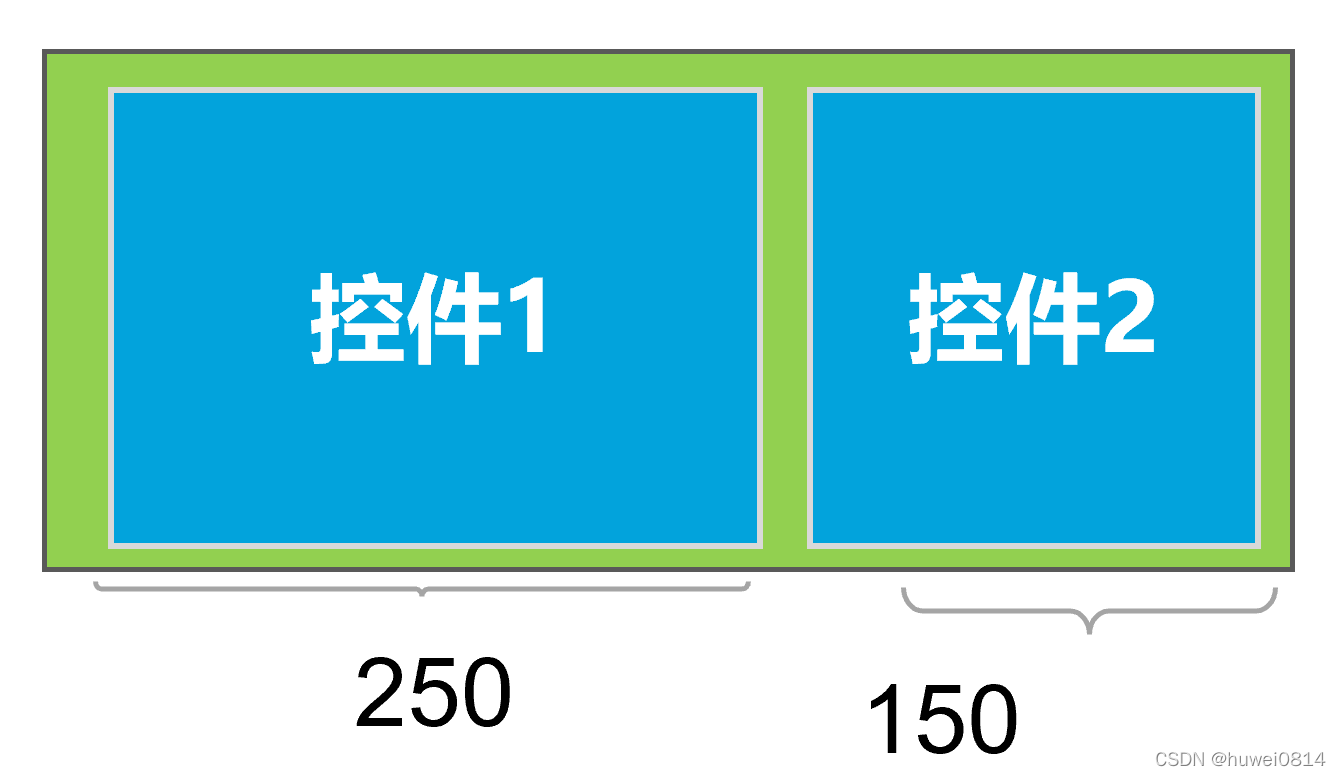
如果给button1加上android:layout_weight="3",button2加上android:layout_weight="1",则会实现将剩余的空间button1:button2会按照3:1的比例来分配这些剩余的空间。


 540
540


 被折叠的 条评论
为什么被折叠?
被折叠的 条评论
为什么被折叠?
 到【灌水乐园】发言


