canvas是什么
HTML5 元素用于图形的绘制,通过脚本 (通常是JavaScript)来完成.
标签只是图形容器,您必须使用脚本(就是js代码)来绘制图形。
你可以通过多种方法使用 canvas 绘制路径,盒、圆、字符以及添加图像。
创建画布 默认的画布大小是(300 * 150)
<body>
    <canvas id="canvas">hello canvas</canvas>
</body>
注意 !
给画布设置大小,不能通过css样式进行设置的,因为这相当于按比例缩放画布, 必须通过canvas对象本身的属性width 和 height 进行设置, 也就是在标签内进行设置
<canvas id="canvas" width="500" height="500">hello canvas</canvas>
获取dom对象
const canvas = document.getElementById('canvas');
创建画笔 ctx 创建一个2d的绘画环境
const ctx = canvas.getContext('2d')
基础使用
画一个填充的矩形和描边的矩形
 <style>
        #canvas {
            border: 1px solid red;
        }
    </style>
</head>

<body>
    <canvas id="canvas" width="300" height="300">hello </canvas>
</body>
<script>
    //  canvas 的基本操作
    //  获取dom对象
    const canvas = document.querySelector("#canvas");
    //  创建画笔  ctx  创建一个2d的绘画环境
    const ctx = canvas.getContext('2d')
        //  开始绘画
        //画一个填充的矩形  ctx.fillRect(x, y, width, height)
    ctx.fillRect(60, 60, 100, 100)
        //画一个描边的矩形
    ctx.strokeRect(10, 10, 50, 50)
</script>

画线段
<script>
    //  canvas 的基本操作
    //  获取dom对象
    const canvas = document.querySelector("#canvas");
    //  创建画笔  ctx  创建一个2d的绘画环境
    const ctx = canvas.getContext('2d')
        //  ============= 3. 画线段
    ctx.beginPath(); //开始绘画路径
    //  moveTo(x, y)  把画笔移动到指定的坐标点
    ctx.moveTo(10, 100);
    //  lineTo(x, y) 移动到指定的点  可以有多个
    ctx.lineTo(300, 400)
    ctx.lineTo(300, 40);
    ctx.closePath(); //闭合路径,实现完美闭合,不是凑数字
    ctx.strokeStyle = 'green' //设置描边颜色
    ctx.lineWidth = 10 //设置描边粗细
    ctx.stroke(); //  画线  stroke() 描边()
    //当你设置描边粗细,及颜色时,要写在画线这一步的前面
    //fill()填充
    ctx.fillStyle = 'red' //设置填充颜色
    ctx.fill(); //执行填充
</script>

画圆
  ctx.arc(x, y, r, startAngle, endAngle, boolean)
   x , y: 圆心坐标   r 圆的半径  startAngle, endAngle 圆的起点和终点(单位数弧度)
    boolean : 顺时针false和逆时针true
  ctx.arc(50, 50, 50, 0, Math.PI * 2)//这是一个半径为50的圆
弧度和角度的换算
2 * Math.PI = 360° Math.PI / 180 = 1°
<script>
    //  获取dom对象
    const canvas = document.querySelector("#canvas");
    //  创建画笔  ctx  创建一个2d的绘画环境
    const ctx = canvas.getContext('2d');
    //====画圆
    //  ctx.arc(x, y, r, startAngle, endAngle, boolean)
    //  x , y: 圆心坐标   r 圆的半径  startAngle, endAngle 圆的起点和终点(单位数弧度)  boolean : 顺时针false和逆时针true
    ctx.beginPath(); //开始绘画路径
    ctx.strokeStyle = 'red';
    ctx.arc(60, 60, 50, Math.PI / 3, Math.PI, true);
    ctx.stroke() //画线
        //=====第二个圆
    ctx.beginPath();
    ctx.strokeStyle = 'red';
    ctx.lineWidth = 5
    ctx.arc(200, 200, 50, Math.PI / 3, Math.PI, false)
    ctx.stroke();
    //设置填充及颜色
    ctx.fillStyle = 'green';
    ctx.fill()
</script>

canvas实现动画
canvas 实现动画的原理:
1. 需要通过 计时器 实现动画, 画一次删一次
2. 通过计时器实现,画一次覆盖一层遮罩层
canvas 清空画布:
ctx.clearRect(x, y, width, height)
计时器时间 16.7ms 原理:
电脑的刷新频率: 1秒钟 刷新 60次 1000ms = 60次 1000ms / 60 = 1次
<script>
    const ctx = document.querySelector("#canvas").getContext('2d');
    ctx.beginPath();
    ctx.fillStyle = "red";
    ctx.arc(10, 250, 20, 0, Math.PI * 2);
    ctx.fill();
    // ctx.clearRect(0, 0, 500, 500);//清空画布
    //动画实现(1)=========画一次删一次
    /* let x = 10;
     let timer = setInterval(() => {//定时器
             ctx.clearRect(0, 0, 500, 500);
             ctx.beginPath();
             ctx.fillStyle = "green";
             ctx.arc(x, 250, 20, 0, Math.PI * 2);
             ctx.fill();
             x += 10;
         }, 16.7)*/
    //动画实现(2)   通过覆盖遮罩层实现
    let x = 10;
    let time = setInterval(() => {
        ctx.beginPath();
        ctx.fillStyle = 'rgba(255, 255, 255, 0.1)'; //设置填充的颜色并且透明有拖尾效果
        ctx.fillRect(0, 0, 500, 500); //画一个填充的矩形
        ctx.fill();
        //不停的改变位置画圆
        ctx.beginPath();
        ctx.fillStyle = "green"; //填充颜色
        ctx.arc(x, 250, 20, 0, Math.PI * 2);
        ctx.fill();
        x += 10;
    }, 16.7)
</script>

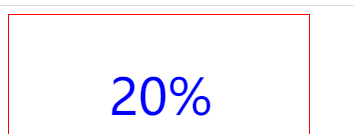
绘制显示文字
ctx.fillText(“要显示的文字”, 横坐标, 纵坐标)//fillText(填充的文字)/strokeText(描边文字)
<script>
    //获取dom对象并创建画笔
    const ctx = document.getElementById('canvas').getContext('2d');
    ctx.beginPath()
    ctx.font = '50px 微软雅黑'
    ctx.lineWidth = '2'; //设置描边粗细
    ctx.fillStyle = 'blue' //填充颜色
        //  ctx.strokeText('25%', 100, 100)//绘制描边的文字
    ctx.fillText("20%", 100, 100)
</script>

百分比动画
<script>
    //获取dom对象并创建画笔
    const ctx = document.getElementById('canvas').getContext('2d');

    //  画一个圆环
    function circle() {
        ctx.beginPath()
        ctx.arc(250, 250, 100, 0, Math.PI * 2);
        ctx.strokeStyle = 'blue'
        ctx.lineWidth = '50'
        ctx.stroke()
    }

    //  显示百分比  弧线
    function precent(n) {
        console.log(n);
        ctx.beginPath();
        // ctx.arc(250, 250, 100, Math.PI / 2, Math.PI);
        //  起点和终点的弧度值  圆 :弧度 2 * Math.PI , 均分为100分  n 代表具体的份数
        ctx.arc(250, 250, 100, Math.PI / 2, Math.PI / 2 + Math.PI * 2 / 100 * n);
        ctx.lineWidth = '50'
        ctx.strokeStyle = 'red'
        ctx.stroke()
    }
    //绘制文字
    function text(n) {
        ctx.beginPath()
        ctx.font = '50px 微软雅黑'
        ctx.fillStyle = 'red'
        ctx.fillText(`${n.toFixed(2)}%`, 100, 100)
    }
    let speed = 0.1;
    let rad = Math.PI * 2 / 100
    let time = setInterval(() => {
        ctx.clearRect(0, 0, 500, 500) //清空画布
        circle(); //画圆环
        precent(speed); //显示弧线
        text(speed); //绘制文字

        // 满足条件 清除计时器
        if (speed >= 30) {
            clearInterval(time)
        }
        speed += 0.1

    }, 16.7)
</script>

canvas实现绘图
canvas实现绘图方式: ctx.drawImage()
方法1: ctx.drawImage(imgObj, x, y) : 在画布指定的坐标点(x, y) 开始绘制图片
方法2: ctx.drawImage(imgObj, x, y, width, height) : 在画布指定的坐标点(x, y) 开始绘制指定大小的图片 (图片整体缩放)
方法3: ctx.drawImage(imgObj, sx, sy, swidth, sheight, x, y, width, height)
sx, sy : 从何处开始裁剪图片(slice) (开始裁剪图片的坐标点)
swidth, sheight : 裁剪多大的一个区域
x, y, 把裁剪的区域 从指定的坐标点显示
width, height : 设置显示的大小
<img src="./img.jpg" alt="" class="pic">
    <canvas id="canvas" width="500" height="500"></canvas>
    <script>
        const canvas = document.getElementById('canvas')
        const ctx = canvas.getContext('2d')
        const pic = document.querySelector('.pic')
            //  图片资源加载的问题 (时间)
        pic.onload = function() {
            // ctx.drawImage(pic, 0, 0)
            ctx.drawImage(pic, 0, 0, 500, 500)
                // ctx.drawImage(pic, 600, 0, 200, 200, 0, 0, 500, 500)
        }
    </script>

canvas绘制视频
  <style>
        canvas {
            border: 1px solid red;
        }

        .video {
            width: 500px;
        }
    </style>
</head>

<body>
    <!-- 绘制视频时: 需要在视频标签上添加  autoplay muted 两个属性才可以 -->
    <video src="./video.mp4" class="video" controls autoplay muted></video>
    <canvas id="canvas" width="500" height="500"></canvas>
    <script>
        //获取dom对象
        const canvas = document.querySelector('#canvas')
        const video = document.querySelector('.video')
        const ctx = canvas.getContext('2d') //创建画笔
            //  针对视频比较特殊   canplay 事件: 视频加载完毕可以开始播放时触发该事件
        video.oncanplay = function() {
                ctx.drawImage(video, 0, 0, 500, 500);
                // canvas实现绘图方式:  ctx.drawImage()
            }
            //  timeupdate 事件在音频/视频(audio/video)的播放位置发生改变时触发。
        video.ontimeupdate = function() {
            // console.log(1);
            //  视频都改变一帧画一帧
            ctx.drawImage(video, 0, 0, 500, 500)
        }
    </script>
</body>


 199
199


 被折叠的 条评论
为什么被折叠?


