AI换脸(支持视频换脸,支持cpu、低算力)【附代码】

可直接选择一张人脸去替换另一张图片或者视频中的人脸。本项目仅提供人脸替换部分,不需要数据集,不用训练!

目录

项目说明

环境说明

准备工作

如何使用

免责声明


项目说明

本项目参考源码:GitHub - s0md3v/roop: one-click deepfake (face swap)

因上述代码在实际使用中有些问题,因此本人原项目代码中做出了调整,可以在低版本的torch以及低算力的硬件上使用,支持windows环境中使用。

部分项目资源我将会上传至我的云盘供大家下载。

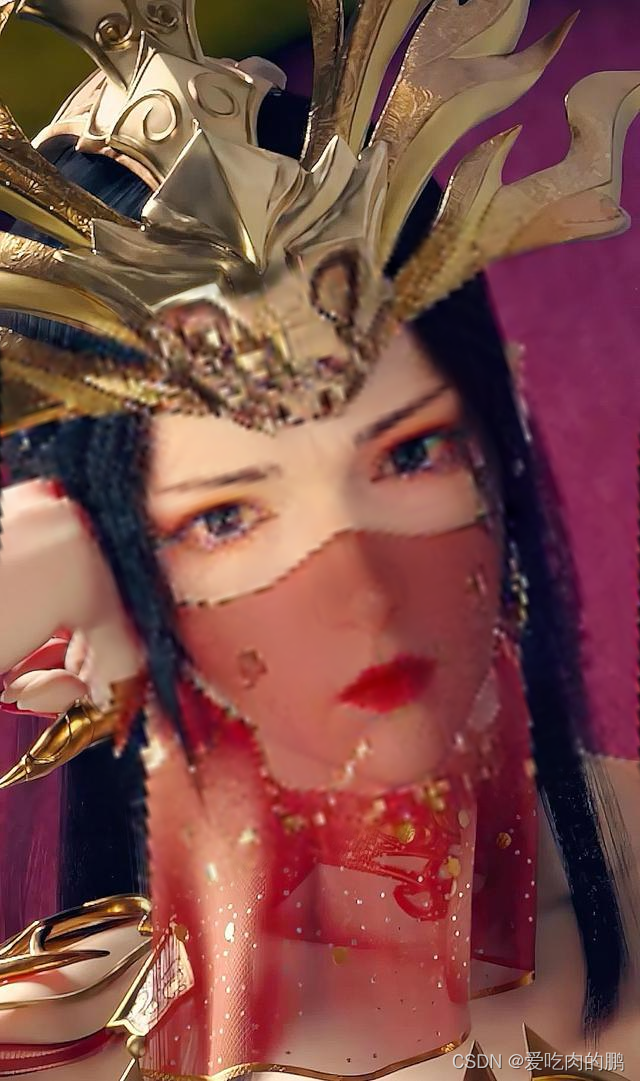
换脸后的人脸图片质量还是比较模糊的,所以大家仅供娱乐学习即可。

环境说明

numpy>=1.21.6

opencv-python==4.7.0.72

onnx==1.11.0

insightface==0.7.3

psutil==5.9.5

tk==0.1.0

pillow>=9.1.1

torch>=1.7.0

onnxruntime-gpu==1.6.0

cuda:10.2

windows 10

onnxruntime-gpu要和自己的cuda版本对应

我的GPU是1650 4G的,仅用CPU也是可以推理的。


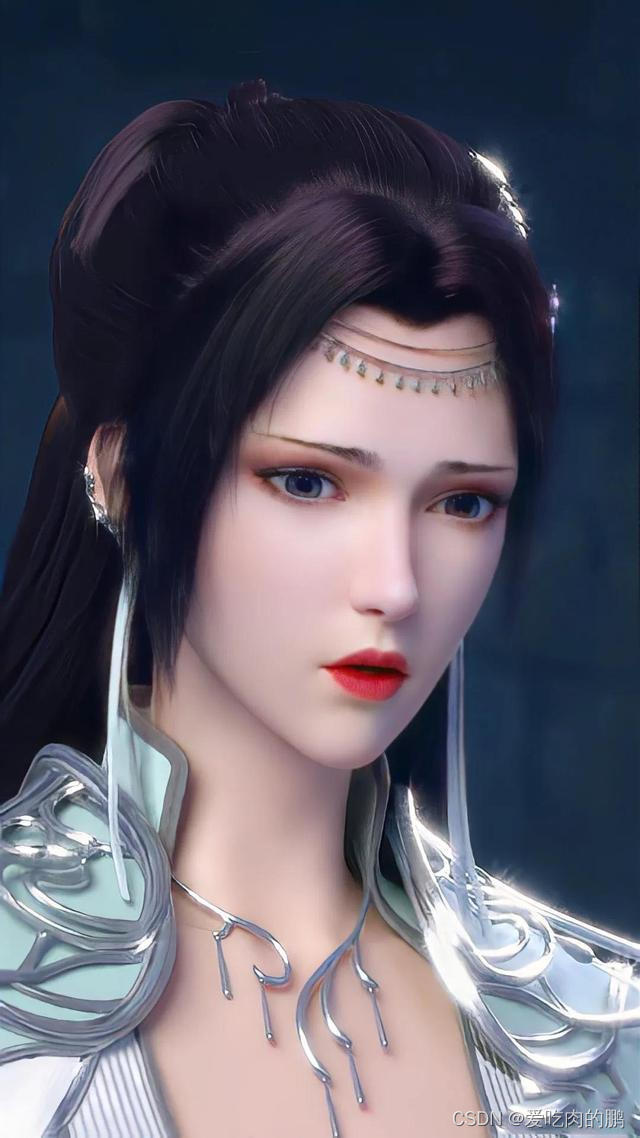
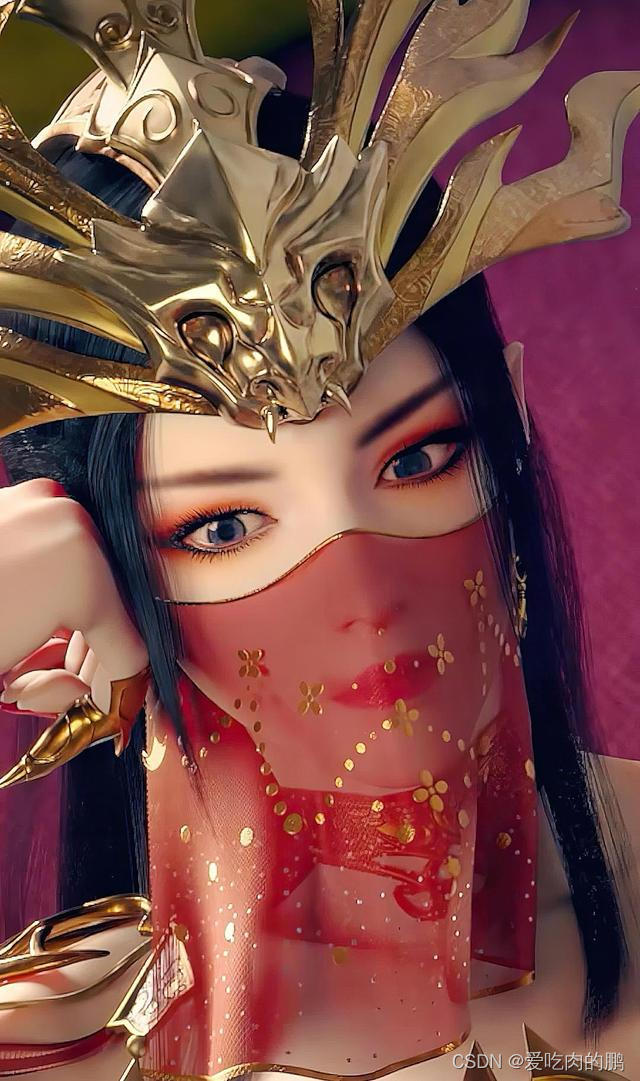
下面可以给出效果图。拿我喜欢的斗破苍穹为例,将云昀的脸换到美杜莎女王脸上。

云韵

美杜莎

换脸后的美杜莎

在来看看视频效果~

AI换脸【美杜莎换脸云韵】

准备工作

下载代码:git clone https://github.com/YINYIPENG-EN/AI_face_swap.git

1.将inswapper_128.onnx权重放在目录下。

2.将buffalo_l.zip下载后解压至models文件下。

models/

|-- buffalo_l

| |-- 1k3d68.onnx

| |-- 2d106det.onnx

| |-- det_10g.onnx

| |-- genderage.onnx

| `-- w600k_r50.onnx

3.找到core/config.py,修改第12行人脸检测权重路径。我这里是F盘的roop。所以我的buffalo_l存放在F:/roop/models/下。

FACE_ANALYSER=insightface.app.FaceAnalysis(name='buffalo_l',root='F:/roop/',providers=core.globals.providers)

4.ffmpeg安装。将ffmpeg-6.0-full_build.7z解压,将bin下的ffmpeg.exe添加至环境变量。将然后将ffmpeg.exe复制一个到你pytorch环境下【和torch下的python在一个目录中即可】

权重路径:

链接:百度网盘 请输入提取码

提取码:yypn

如何使用

python run.py

如果是想用用GPU

python run.py --gpu

然后会出来一个GUI界面。

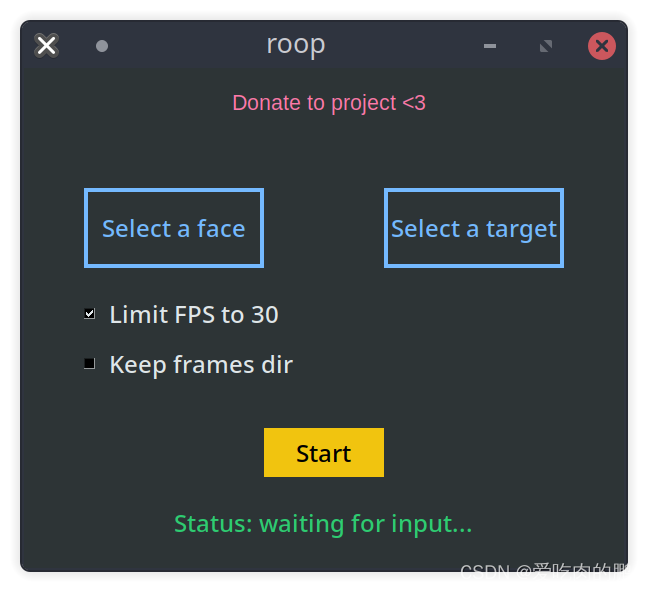
Select a face 是用来选择source人脸的【仅支持图片】,Select a target是要替换的人脸【支持图片和视频】。然后点击Start即可

程序运行的时间和你硬件以及内存有关系,所以耐心等待。如果你的硬件环境比较差,可能会意外退出。

视频检测会限制在30FPS【够用了】。

免责声明

比这个更好的deepfake软件已经存在,这只是我为学习人工智能而创建的一个爱好项目。用户应该使用这个程序来学习编程并真诚地使用该软件。用户在使用自己的脸之前必须征得相关人员的同意,并且在网上发布内容时不得隐瞒这是一个深度伪造的事实。我不对最终用户的恶意行为负责。

Better deepfake software than this already exist, this is just a hobby project I created to learn about AI. Users are expected to use this program for learning programming and using the software in good faith. Users must get consent from the concerned people before using their face and must not hide the fact that it is a deepfake when posting content online. I am not responsible for malicious behaviour of end-users.

视频AI是一项非常复杂的任务,需要涉及到计机视觉、深度学习等多个领域的知识。下面是一些大致的步骤和代码示例,但是这只是一个简单的演示,实际应用还需要更多细节的处理和优化。 1. 选取目标和源视频,并用OpenCV提取视频中的人区域 ``` import cv2 # 读取视频 cap = cv2.VideoCapture('target_video.mp4') # 创建人识别器 face_detector = cv2.CascadeClassifier('haarcascade_frontalface_alt.xml') # 初始化视频编解码器 fourcc = cv2.VideoWriter_fourcc(*'mp4v') # 获取视频帧率和尺寸 fps = cap.get(cv2.CAP_PROP_FPS) frame_size = (int(cap.get(cv2.CAP_PROP_FRAME_WIDTH)), int(cap.get(cv2.CAP_PROP_FRAME_HEIGHT))) # 创建输出视频 out = cv2.VideoWriter('output.mp4', fourcc, fps, frame_size) while True: # 读取一帧视频 ret, frame = cap.read() if not ret: break # 人检测 gray = cv2.cvtColor(frame, cv2.COLOR_BGR2GRAY) faces = face_detector.detectMultiScale(gray, scaleFactor=1.1, minNeighbors=5, minSize=(30, 30)) # 画出人区域 for (x, y, w, h) in faces: cv2.rectangle(frame, (x, y), (x+w, y+h), (0, 255, 0), 2) # TODO: 提取人区域 # 写入输出视频 out.write(frame) cap.release() out.release() ``` 2. 对目标和源视频中的人区域进行对齐和特征提取 ``` import numpy as np import dlib import face_recognition # 加载人对齐器 predictor = dlib.shape_predictor('shape_predictor_68_face_landmarks.dat') # 加载人特征提取器 encoder = dlib.face_recognition_model_v1('dlib_face_recognition_resnet_model_v1.dat') # 提取人特征 def extract_face_feature(img, bbox): # 对齐人 shape = predictor(img, bbox) face_chip = dlib.get_face_chip(img, shape) # 提取特征 feature = encoder.compute_face_descriptor(face_chip) return np.array(feature) # 目标和源视频中的人特征 target_faces = [] source_faces = [] # 读取目标视频中的人区域 cap = cv2.VideoCapture('target_video.mp4') while True: ret, frame = cap.read() if not ret: break for (x, y, w, h) in target_faces: bbox = dlib.rectangle(left=x, top=y, right=x+w, bottom=y+h) feature = extract_face_feature(frame, bbox) target_faces.append((bbox, feature)) cap.release() # 读取源视频中的人区域 cap = cv2.VideoCapture('source_video.mp4') while True: ret, frame = cap.read() if not ret: break for (x, y, w, h) in source_faces: bbox = dlib.rectangle(left=x, top=y, right=x+w, bottom=y+h) feature = extract_face_feature(frame, bbox) source_faces.append((bbox, feature)) cap.release() ``` 3. 对目标视频中的人区域进行替 ``` # 使用KNN法匹配目标和源视频中的人特征 from sklearn.neighbors import NearestNeighbors n_neighbors = 1 knn = NearestNeighbors(n_neighbors=n_neighbors) knn.fit([f for _, f in source_faces]) for i, (bbox, feature) in enumerate(target_faces): # 找到最近的源视频中的人特征 distances, indices = knn.kneighbors([feature]) j = indices[0][0] source_bbox, _ = source_faces[j] # 仿射变 M, _ = cv2.estimateAffinePartial2D(bbox.rect.astype(np.float32), source_bbox.rect.astype(np.float32)) # 替目标视频中的人区域 cap = cv2.VideoCapture('target_video.mp4') out = cv2.VideoWriter('output.mp4', fourcc, fps, frame_size) while True: ret, frame = cap.read() if not ret: break warped = cv2.warpAffine(frame, M, frame_size) mask = np.zeros_like(frame) cv2.fillPoly(mask, [source_bbox.rect.astype(np.int32)], (255, 255, 255)) mask = cv2.warpAffine(mask, M, frame_size) out_frame = np.where(mask == 0, frame, warped) out.write(out_frame) cap.release() out.release() ``` 注意:以上代码仅供参考,实际应用需要更多细节的处理和优化。
评论 11
添加红包

请填写红包祝福语或标题

红包个数最小为10个

红包金额最低5元

当前余额3.43前往充值 >
需支付:10.00
成就一亿技术人!
领取后你会自动成为博主和红包主的粉丝 规则
hope_wisdom
发出的红包

打赏作者

爱吃肉的鹏

你的鼓励将是我创作的最大动力

¥1 ¥2 ¥4 ¥6 ¥10 ¥20
扫码支付:¥1
获取中
扫码支付

您的余额不足,请更换扫码支付或充值

打赏作者

实付
使用余额支付
点击重新获取
扫码支付
钱包余额 0

抵扣说明:

1.余额是钱包充值的虚拟货币,按照1:1的比例进行支付金额的抵扣。
2.余额无法直接购买下载,可以购买VIP、付费专栏及课程。

余额充值