


Chat-GAN复现
论文地址:https://ieeexplore.ieee.org/document/9667243
代码地址:https://github.com/zengchen233/Chat-GAN (代码我是自己实现的)
训练过程

模型框架
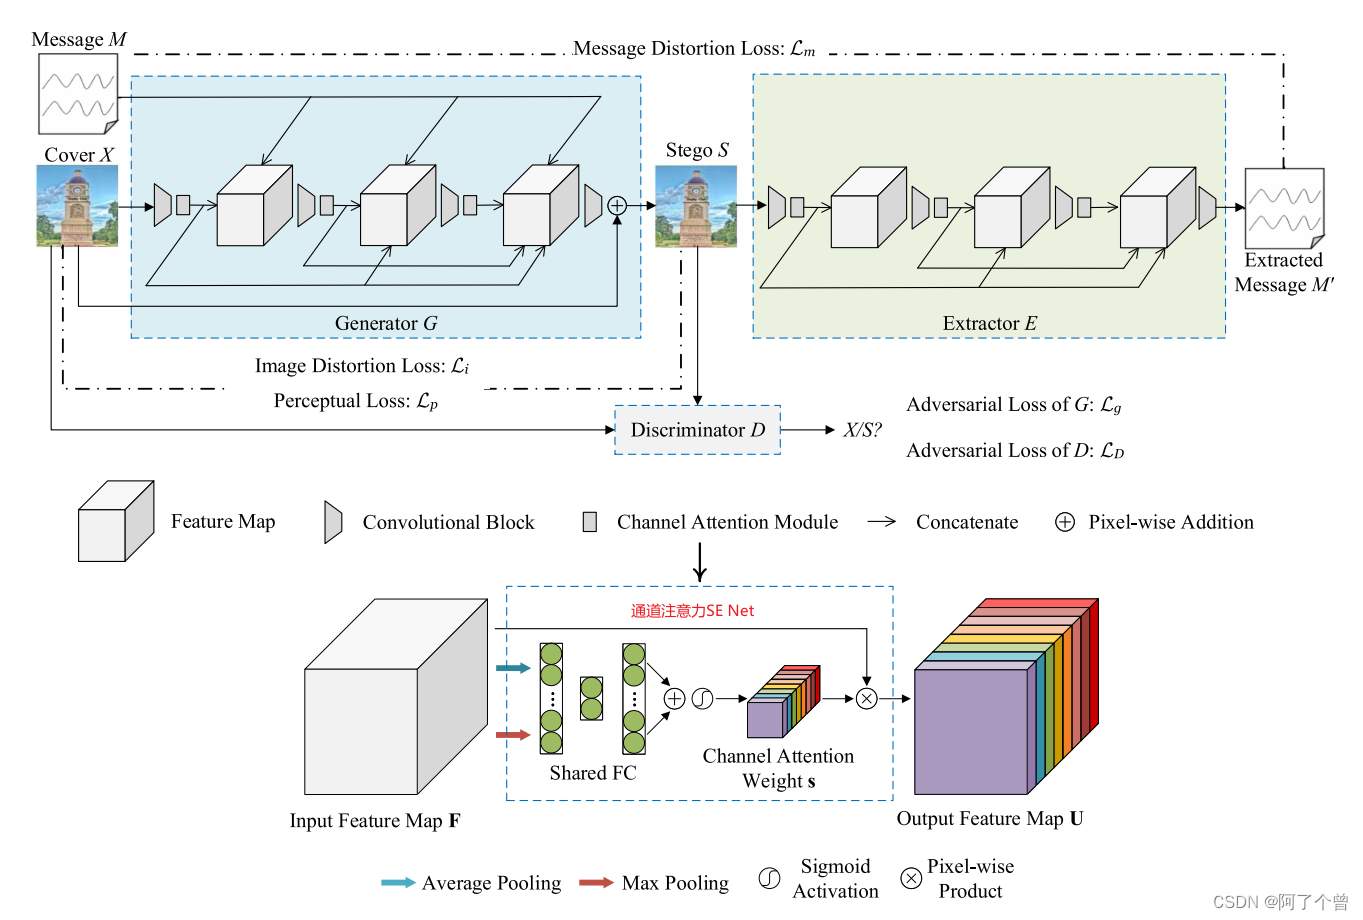
生成器

class ConvBlock(nn.Module):
    def __init__(self, in_channels, out_channels):
        super(ConvBlock, self).__init__()
        self.in_channels = in_channels
        self.out_channels = out_channels
        self.ConvBlock = nn.Sequential(
            nn.Conv2d(in_channels=self.in_channels, out_channels=self.out_channels, kernel_size=3, stride=1, padding=1),
            nn.BatchNorm2d(self.out_channels),
            nn.LeakyReLU(negative_slope=1e-2, inplace=True)
        )

    def forward(self, x):
        return self.ConvBlock(x)

class NetG(nn.Module):
    def __init__(self, img_channels=3, msg_channels=1):
        super(NetG, self).__init__()
        self.c1 = ConvBlock(in_channels=img_channels, out_channels=32)
        self.ca1 = Channel_Attention(channels=32)
        self.c2 = ConvBlock(in_channels=32 + msg_channels, out_channels=32)
        self.ca2 = Channel_Attention(channels=32)
        self.c3 = ConvBlock(in_channels=32 + 32 + msg_channels, out_channels=32)
        self.ca3 = Channel_Attention(channels=32)
        self.c4 = ConvBlock(in_channels=32 + 32 + 32 + msg_channels, out_channels=img_channels)

    def forward(self, x, msg):
        origin_x = x
        x1 = self.ca1(self.c1(x))
        x = torch.cat([x1, msg], dim=1)
        x2 = self.ca2(self.c2(x))
        x = torch.cat([x, x2], dim=1)
        x3 = self.ca3(self.c3(x))
        x = torch.cat([x, x3], dim=1)
        x4 = self.c4(x)
        s = origin_x + x4
        return s
通道注意力
class Channel_Attention(nn.Module):
    def __init__(self, channels, ratio=16):
        super(Channel_Attention, self).__init__()
        self.avg_pool = nn.AdaptiveAvgPool2d(output_size=1)
        self.max_pool = nn.AdaptiveMaxPool2d(output_size=1)
        self.shared_MLP = nn.Sequential(
            nn.Linear(in_features=channels, out_features=channels // ratio, bias=False),
            nn.ReLU(inplace=True),
            nn.Linear(in_features=channels // ratio, out_features=channels, bias=False),
            nn.Sigmoid()
        )

    def forward(self, x):
        b, c, _, _ = x.size()
        avg_pool = self.avg_pool(x).view(b, c)
        max_pool = self.max_pool(x).view(b, c)

        avg_out = self.shared_MLP(avg_pool)
        max_out = self.shared_MLP(max_pool)

        out = (avg_out + max_out).view(b, c, 1, 1)
        return out * x
提取器
class NetE(nn.Module):
    def __init__(self, img_channels=3):
        super(NetE, self).__init__()
        self.c1 = ConvBlock(in_channels=img_channels, out_channels=32)
        self.ca1 = Channel_Attention(channels=32)
        self.c2 = ConvBlock(in_channels=32, out_channels=32)
        self.ca2 = Channel_Attention(channels=32)
        self.c3 = ConvBlock(in_channels=32 + 32, out_channels=32)
        self.ca3 = Channel_Attention(channels=32)
        self.c4 = nn.Sequential(
            nn.Conv2d(in_channels=32 + 32 + 32, out_channels=1, kernel_size=3, stride=1, padding=1),
            nn.BatchNorm2d(1),
            nn.Sigmoid()
        )

    def forward(self, s):
        s1 = self.ca1(self.c1(s))
        s2 = self.ca2(self.c2(s1))
        s = torch.cat([s1, s2], dim=1)
        s3 = self.ca3(self.c3(s))
        s = torch.cat([s, s3], dim=1)
        m = self.c4(s)
        return m
判别器
论文中采用的是XuNet,通过修改高通滤波器和卷积的通道数使得XuNet可以判别三通道图像,对这些我不是很懂,只能照猫画虎进行修改:
class ImageProcessing(nn.Module):
    """Computes convolution with KV filter over the input tensor for 3-channel images."""

    def __init__(self):
        """Constructor"""
        super(ImageProcessing, self).__init__()
        # 创建一个3通道的卷积核,每个通道对应一个5x5的索贝尔边缘检测核
        self.kv_filter = torch.tensor(
            [
                [-1.0, 2.0, -2.0, 2.0, -1.0],
                [2.0, -6.0, 8.0, -6.0, 2.0],
                [-2.0, 8.0, -12.0, 8.0, -2.0],
                [2.0, -6.0, 8.0, -6.0, 2.0],
                [-1.0, 2.0, -2.0, 2.0, -1.0],
            ],
            dtype=torch.float32
        ) / 12.0
        # print("kv_filter:", self.kv_filter.shape)
        self.kv_filter = self.kv_filter.repeat(1, 3, 1, 1).cuda()
        # print("kv_filter:",self.kv_filter.shape)

    def forward(self, inp):
        """Returns tensor convolved with KV filter for each channel independently"""
        # 由于卷积核现在是3通道的,可以直接应用于三通道图像,不需要调整padding或stride
        # print("in shape:",inp.shape)
        return F.conv2d(inp, self.kv_filter, stride=1, padding=2)

class Xu_ConvBlock(nn.Module):
    """This class returns building block for XuNet class."""

    def __init__(
            self,
            in_channels: int,
            out_channels: int,
            kernel_size: int,
            activation: str = "relu",
            abs: str = False,
    ) -> None:
        super(Xu_ConvBlock, self).__init__()

        if kernel_size == 5:
            self.padding = 2
        else:
            self.padding = 0

        if activation == "tanh":
            self.activation = nn.Tanh()
        else:
            self.activation = nn.ReLU()

        self.abs = abs
        self.conv = nn.Conv2d(
            in_channels,
            out_channels,
            kernel_size,
            stride=1,
            padding=self.padding,
            bias=False,
        )
        self.batch_norm = nn.BatchNorm2d(out_channels)
        self.pool = nn.AvgPool2d(kernel_size=5, stride=2, padding=2)

    def forward(self, inp: Tensor) -> Tensor:
        """Returns conv->batch_norm."""
        if self.abs:
            return self.pool(
                self.activation(self.batch_norm(torch.abs(self.conv(inp))))
            )
        return self.pool(self.activation(self.batch_norm(self.conv(inp))))

class NetD(nn.Module):
    """Implementation of XuNet."""
    """This class returns XuNet model."""

    def __init__(self):
        super(NetD, self).__init__()
        self.layer1 = Xu_ConvBlock(
            1, 8, kernel_size=5, activation="tanh", abs=True
        )
        self.layer2 = Xu_ConvBlock(8, 16, kernel_size=5, activation="tanh")
        self.layer3 = Xu_ConvBlock(16, 32, kernel_size=1)
        self.layer4 = Xu_ConvBlock(32, 64, kernel_size=1)
        self.layer5 = Xu_ConvBlock(64, 128, kernel_size=1)
        self.gap = nn.AdaptiveAvgPool2d(output_size=1)
        self.fully_connected = nn.Sequential(
            nn.Linear(in_features=128, out_features=128),
            nn.Dropout(p=0.4),
            nn.ReLU(inplace=True),
            nn.Linear(in_features=128, out_features=1),
            # nn.LogSoftmax(dim=1),
        )
        self.init_weights()

    def forward(self, image):
        """Returns logit for the given tensor."""
        with torch.no_grad():
            # print("image shape:",image.shape)
            out = ImageProcessing()(image)
            # print("out shape:",out.shape)
        out = self.layer1(out)
        out = self.layer2(out)
        out = self.layer3(out)
        out = self.layer4(out)
        out = self.layer5(out)
        out = self.gap(out)
        # print(out.shape)
        out = out.view(out.size(0), -1)
        # print(out.size(0))
        out = self.fully_connected(out)
        # print(out)
        return out
训练结果
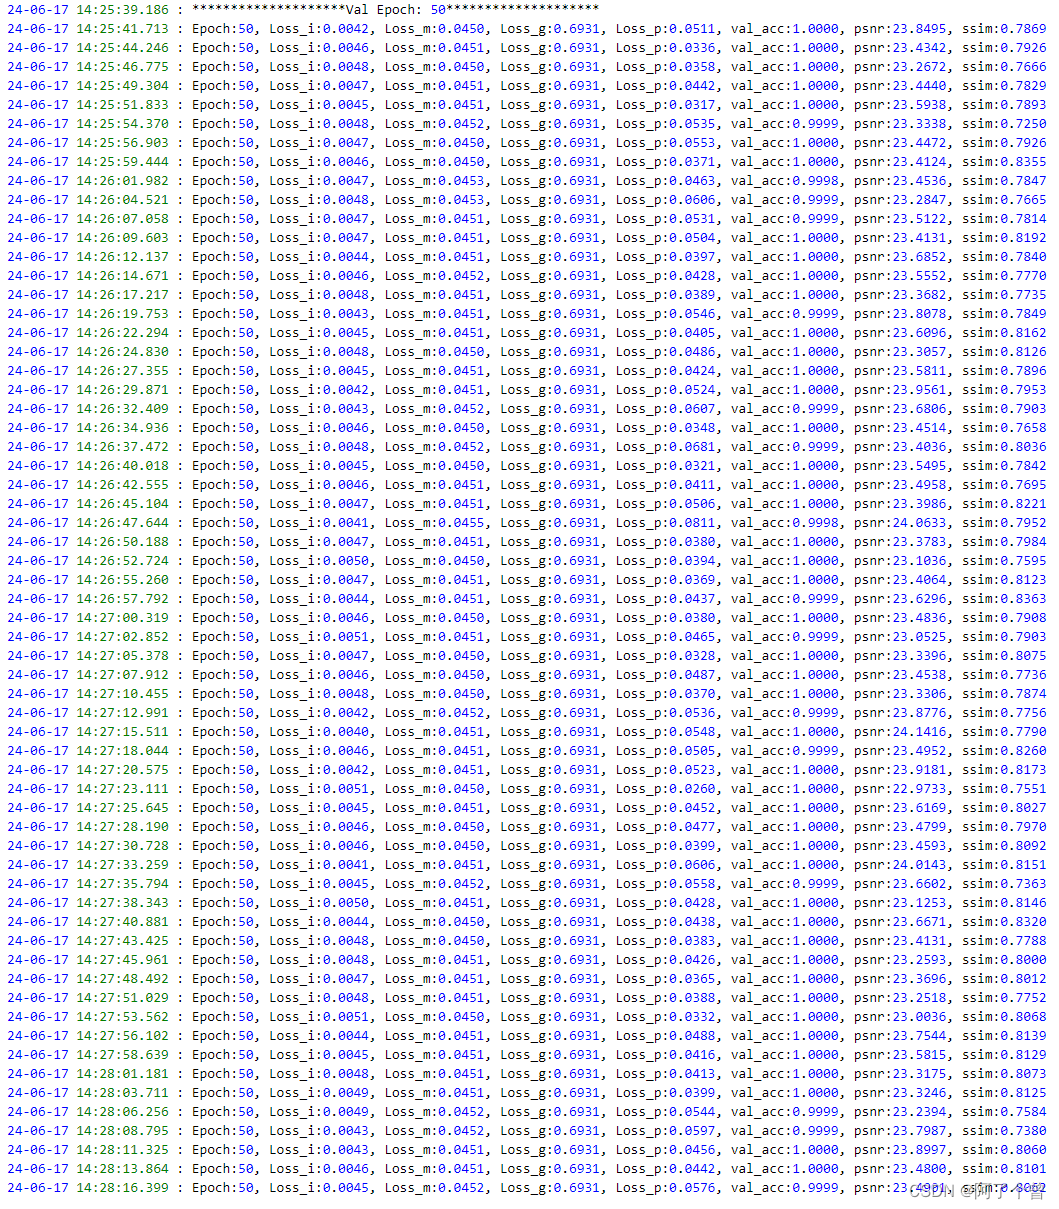
这是第50轮的验证结果,不知道为什么Loss_g以及Loss_D的结果都一直不变,可能是这里有问题,有没有dalao能解决一下这里的问题,真的我哭死,搞了一个星期了。
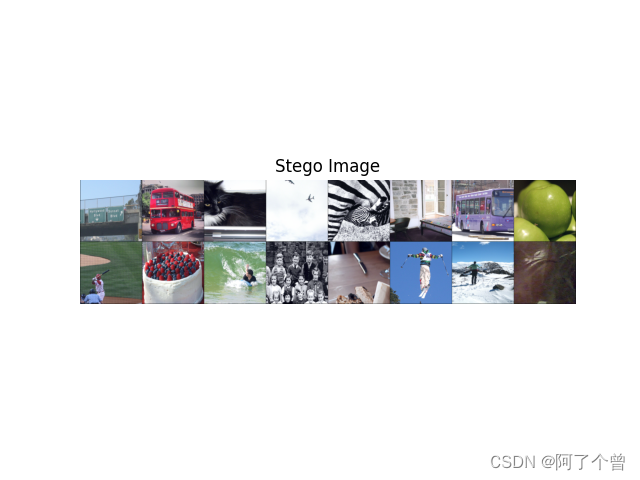
生成图像质量对比:

我的分享就到这里了,接下来的改进就靠大家了,加油兄弟们,奥里给!


 980
980


 被折叠的 条评论
为什么被折叠?
被折叠的 条评论
为什么被折叠?
 到【灌水乐园】发言


