


SwitchPreference简介
SwitchPreference 是 Android 中的一个 UI 组件,用于在应用程序的设置界面中显示开关按钮,并允许用户切换某些功能或选项的状态。SwitchPreference 继承自 Preference 类,因此可以像其他首选项一样在 PreferenceScreen 中使用。当用户切换开关按钮的状态时,应用程序可以使用 OnPreferenceChangeListener 监听器来捕获状态更改事件,并相应地更新应用程序的设置。
PreferenceScreen是什么?
PreferenceScreen 是 Android 中的一个 UI 组件,它提供了一种结构化的方式来呈现应用程序的设置选项。它是 Preference 类的子类,可以包含多个 Preference 类的实例,例如 CheckBoxPreference、EditTextPreference 等。当用户点击 PreferenceScreen 中的某个选项时,会进入一个新的 PreferenceScreen 或者打开一个 Dialog,让用户进行相应的设置。
在实现 PreferenceScreen 的时候,需要在布局文件中使用 PreferenceScreen 标签,如下所示:
<PreferenceScreen xmlns:android="http://schemas.android.com/apk/res/android">
    <!-- 包含多个 Preference 类的实例 -->
</PreferenceScreen>
在 java 代码中,可以使用 PreferenceFragment 或者 PreferenceActivity 来管理 PreferenceScreen。
PreferenceFragment 是一个 Fragment,它可以被添加到 Activity 中。在 PreferenceFragment 中,可以通过调用 addPreferencesFromResource(int) 方法来加载一个 PreferenceScreen 布局文件。例如:
public class MyPreferenceFragment extends PreferenceFragment {
    @Override
    public void onCreate(Bundle savedInstanceState) {
        super.onCreate(savedInstanceState);
        addPreferencesFromResource(R.xml.preferences);
    }
}
PreferenceActivity 是一个 Activity,它继承自 ListActivity。在 PreferenceActivity 中,可以通过调用 addPreferencesFromResource(int) 方法来加载一个 PreferenceScreen 布局文件。例如:
public class MyPreferenceActivity extends PreferenceActivity {
    @Override
    public void onCreate(Bundle savedInstanceState) {
        super.onCreate(savedInstanceState);
        addPreferencesFromResource(R.xml.preferences);
    }
}
需要注意的是,从 Android 11 开始,推荐使用 PreferenceFragmentCompat 替代 PreferenceFragment。PreferenceFragmentCompat 是一个兼容库,可以在 Android 4.0 及以上版本中使用。
自定义SwitchPreference布局
Dem:一个activity中包含一个PreferenceScreen,PreferenceScreen中有一个SwitchPreference,SwitchPreference使用自定义布局,从左到右分别是switch、title、icon
定义自定义布局"custom_switch_preference.xml"
<LinearLayout xmlns:android="http://schemas.android.com/apk/res/android"
    android:layout_width="match_parent"
    android:layout_height="wrap_content"
    android:minHeight="?android:attr/listPreferredItemHeight"
    android:gravity="center_vertical"
    android:paddingStart="?android:attr/listPreferredItemPaddingStart"
    android:paddingEnd="?android:attr/listPreferredItemPaddingEnd">

    <Switch
        android:id="@android:id/switch_widget"
        android:layout_width="wrap_content"
        android:layout_height="wrap_content"
        android:focusable="false"
        android:clickable="false"
        android:layout_gravity="center_vertical" />

    <LinearLayout
        android:layout_width="wrap_content"
        android:layout_height="wrap_content"
        android:orientation="vertical"
        android:gravity="center_vertical"
        android:layout_marginStart="16dp">

        <TextView
            android:id="@+android:id/title"
            android:layout_width="wrap_content"
            android:layout_height="wrap_content"
            android:textAppearance="?android:attr/textAppearanceListItem"
            android:textColor="?android:attr/textColorPrimary"
            android:singleLine="true"
            android:ellipsize="marquee" />

        <TextView
            android:id="@+android:id/summary"
            android:layout_width="wrap_content"
            android:layout_height="wrap_content"
            android:textAppearance="?android:attr/textAppearanceListItemSecondary"
            android:textColor="?android:attr/textColorSecondary"
            android:singleLine="true"
            android:ellipsize="marquee" />

    </LinearLayout>

    <ImageView
        android:id="@+android:id/icon"
        android:layout_width="wrap_content"
        android:layout_height="wrap_content"
        android:layout_marginStart="16dp"
        android:layout_marginEnd="16dp"
        android:layout_gravity="center_vertical" />

</LinearLayout>
创建PreferenceScreen文件中使用这个自定义布局:
<PreferenceScreen xmlns:android="http://schemas.android.com/apk/res/android">

    <SwitchPreference
        android:key="switch_preference"
        android:title="Switch Preference"
        android:icon="@drawable/ic_launcher"
        android:widgetLayout="@layout/custom_switch_preference" />

</PreferenceScreen>
最后,在你的Activity中加载这个PreferenceScreen:略
运行结果:
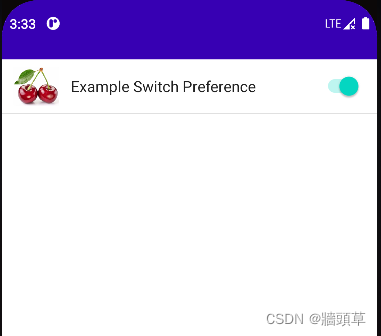
问题:布局的顺序与我们想要的效果相反?
原因:此处显示的图片和文字是PreferenceScreen中设置的,而非自定义布局中的。按钮是自定义布局中的
修改方案:自定义SwitchPreference
自定义SwitchPreference
创建自定义SwitchPreference
public class CustomSwitchPreference extends SwitchPreference {


    private Drawable drawable;
    private String title;

    public CustomSwitchPreference(Context context, AttributeSet attrs, int defStyleAttr, int defStyleRes) {
        super(context, attrs, defStyleAttr, defStyleRes);
        setWidgetLayoutResource(R.layout.custom_switch_preference);
    }

    public CustomSwitchPreference(Context context, AttributeSet attrs, int defStyleAttr) {
        this(context, attrs, defStyleAttr, 0);
    }

    public CustomSwitchPreference(Context context, AttributeSet attrs) {
        this(context, attrs, android.R.attr.switchPreferenceStyle);
        TypedArray a = context.obtainStyledAttributes(attrs, R.styleable.CustomSwitchPreference);
        title  = a.getString(R.styleable.CustomSwitchPreference_title);
        drawable = a.getDrawable(R.styleable.CustomSwitchPreference_icon);
        a.recycle();
    }

    public CustomSwitchPreference(Context context) {
        this(context, null);
    }

    @Override
    protected void onBindView(View view) {
        super.onBindView(view);
        TextView titleView = view.findViewById(R.id.title);
        ImageView iconView = view.findViewById(R.id.icon);
        if (titleView != null) {
            titleView.setText(title);
        }
        if (iconView != null) {
            iconView.setImageDrawable(drawable);
        }
    }
}
在attrs.xml文件中添加自定义属性:
<resources>
<declare-styleable name="CustomSwitchPreference">
<attr name="title" format="string" />
<attr name="icon" format="reference" />
</declare-styleable>
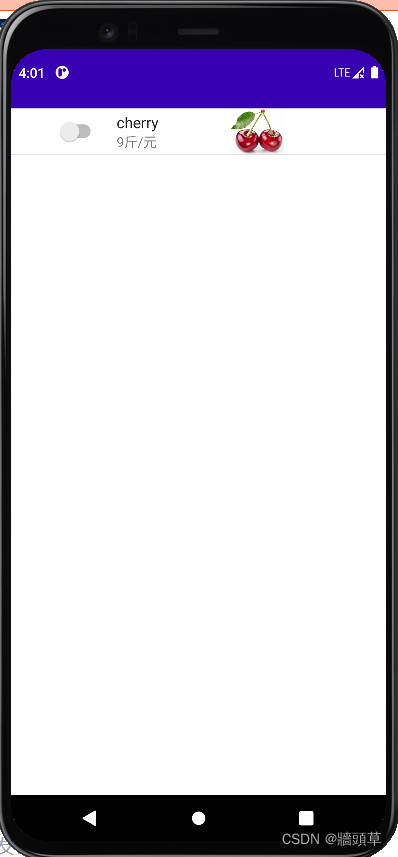
</resources>修改PreferenceScreen文件中使用这个自定义SwitchPreference:并删除title和icon属性
<PreferenceScreen xmlns:android="http://schemas.android.com/apk/res/android">
    <com.example.mvvm.preference.CustomSwitchPreference
        android:key="example_switch_preference"
        xmlns:app="http://schemas.android.com/apk/res-auto"
        app:title = "cherry"
        app:icon = "@drawable/cherry"
        android:defaultValue="true" />
</PreferenceScreen>
运行结果


 1万+
1万+


 被折叠的 条评论
为什么被折叠?
被折叠的 条评论
为什么被折叠?
 到【灌水乐园】发言


