


本篇文章要完成的内容是统计饮食记录卡片的开发,黑马视频时长都达到了惊人的55分18秒,我会尽量的精简其内容的同时保证本篇文章的质量,减少屏幕前你的阅读量及完成本部分所需时间
一、布局分析
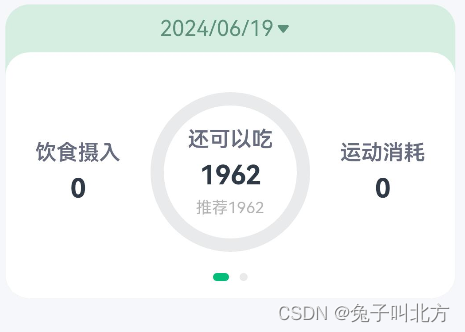
通过图片我们可以看出整体是一个列式的布局
1.日期选择部分
为一个日期展示以及下拉框,点击下拉框时弹出日期选择,当我选择不同的日期时它会展示不同日期和当前日期下的统计信息
2.统计信息的部分
①热量统计
整体为行式布局,饮食摄入、推荐摄入、运动消耗三部分,其中推荐摄入还有一个环形进度条
②营养素统计
同样为行式布局,碳水、蛋白质、脂肪三部分,每部分都存在一个环形进度条
3.穿梭切换卡片部分
左右滑动可以在热量统计卡片与营养素统计之间来回切换
二、关键技术
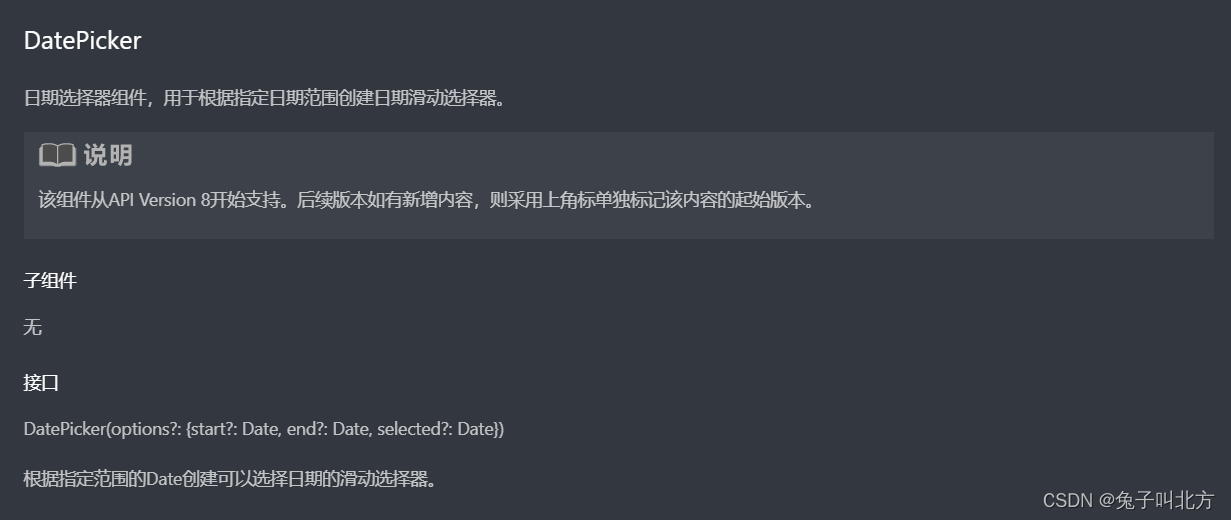
1.DatePicker日期选择器组件
由于我们弹出日期选择部分后需要进行选择,而这个部分刚好ArkUI就又可以为我们提供一个这样功能的组件
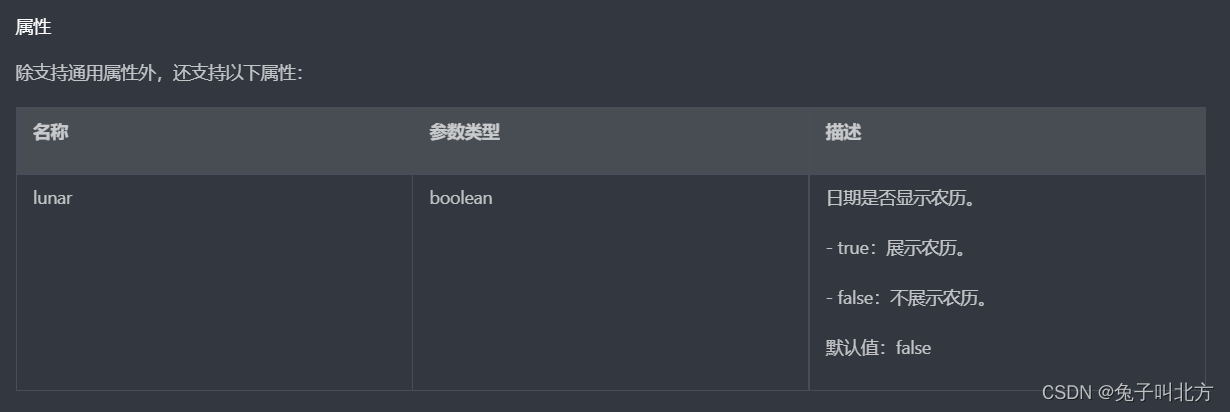
我们可以通过查看API来了解一下它的使用方法:
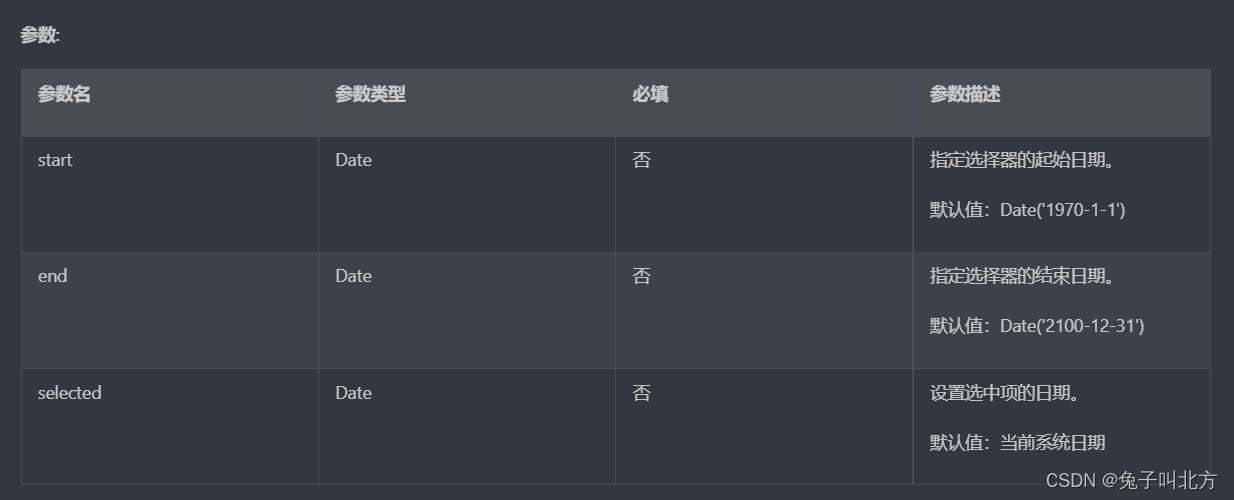
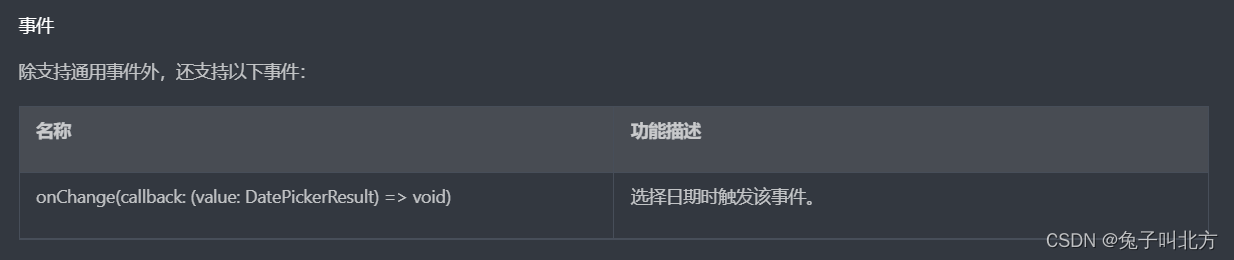
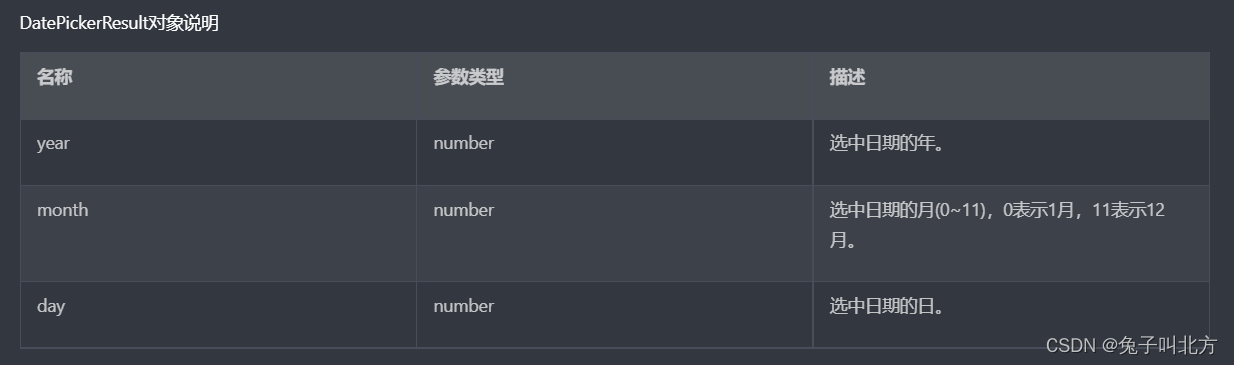
值得注意的是,组件中的月份是0到11,所以在正式开发的过程中需要将月份加一
2.AppStorage全局存储组件
由于我们在日期选择弹窗中有一个保存的按钮,我们保存了用户选择时间后我们需要将这个时间进行全局存储,它里面有一个叫SetOrCreate的新建或存储的命令,书写方式如下
AppStorage.SetOrCreate('selectedDate', this.selectedDate.getTime())
注意:存储数据时不要把日期存进去,否则在做日期监控的过程中会出现问题,我们存储它所对应的毫秒值,用getTime去将日期时间转换为毫秒值
在读取AppStorage的值时可以使用@StorageLink(双向绑定)或者@StorageProp(单向绑定)
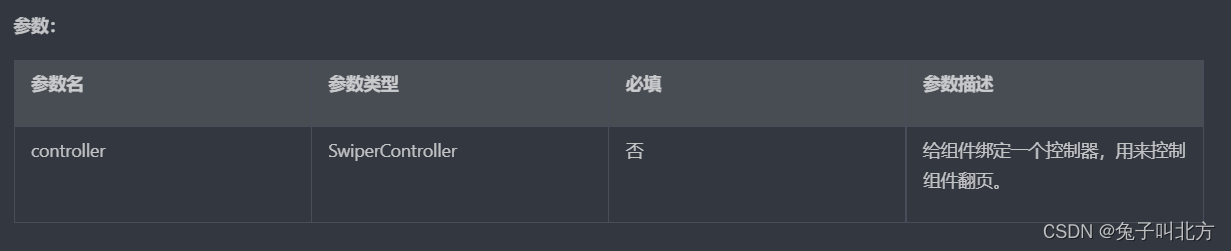
3.Swiper滑块视图容器
Swiper滑块视图容器就是我们在布局分析中提到的穿梭切换卡片的部分,它可以为子组件提供滑动轮播显示的能力
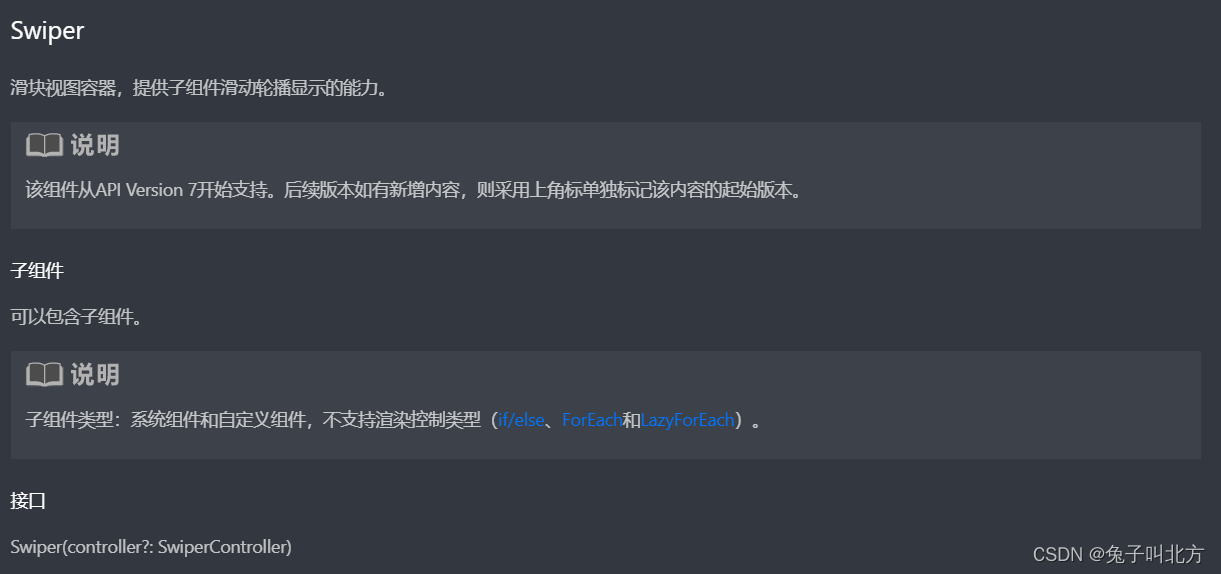
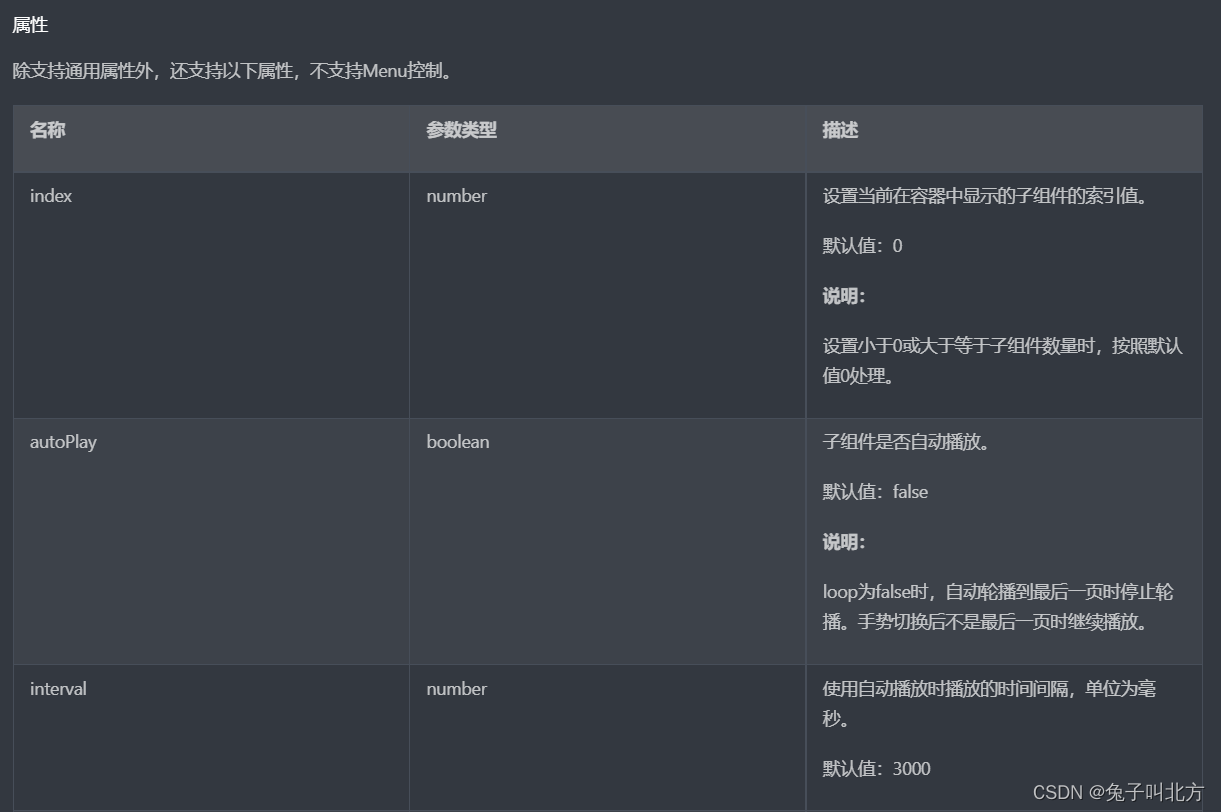
它的属性是真的数不过来的多,甚至提供了自动轮播功能,有想要深入了解的同学可以去查看一下它的api文档
三、正式开发
同样我们还是一样的创建组件提高代码的可读性
1.统计卡片基础部分
如下图创建

根据布局分析写出大体代码
@Component
export default struct StatsCard {

  build() {
    Column(){
      // 1.日期信息
      Row(){
        Text('2024/01/25')
          .fontColor($r('app.color.secondary_color'))
        Image($r('app.media.ic_public_spinner'))
          .width(20)
          .fillColor($r('app.color.secondary_color'))
      }
      .padding(CommonConstants.SPACE_8)
      .onClick(() => this.controller.open())

      // 2.统计信息

    }
    .width(CommonConstants.THOUSANDTH_940)
    .backgroundColor($r('app.color.stats_title_bgc'))
    .borderRadius(CommonConstants.DEFAULT_18)
  }
}
2.日期选择弹窗
如下图创建

根据分析写出弹窗代码
@CustomDialog
export default struct DatePickDialog {
  controller: CustomDialogController
  selectedDate: Date = new Date()
  build() {
    Column({space: CommonConstants.SPACE_12}){
      // 1.日期选择器
      DatePicker({
        start: new Date('2004-02-29'),//用户注册时间
        end: new Date(),
        selected: this.selectedDate
      })
        .onChange((value: DatePickerResult) => {
          this.selectedDate.setFullYear(value.year, value.month, value.day)
        })
      // 2.按钮
      Row({space:CommonConstants.SPACE_12}){
        Button('取消')
          .width(120)
          .backgroundColor($r('app.color.light_gray'))
          .onClick(() => this.controller.close())
        Button('确定')
          .width(120)
          .backgroundColor($r('app.color.primary_color'))
          .onClick(() => {
            // 1.保存日期到全局存储
            AppStorage.SetOrCreate('selectedDate', this.selectedDate.getTime())
            // 2.关闭窗口
            this.controller.close()
          })
      }
    }
    .padding(CommonConstants.SPACE_12)
  }
}
日期选择弹窗完成后我们在统计卡片中让他展示出来,在统计卡片中做以下修改:
@Component
export default struct StatsCard {

  @StorageProp('selectedDate') selectedDate: number = DateUtil.beginTimeOfDay(new Date())

  controller: CustomDialogController = new CustomDialogController({
    builder: DatePickDialog({selectedDate: new Date(this.selectedDate)})//回写到弹窗
  })
  build() {
    Column(){
      // 1.日期信息
      Row(){
        Text(DateUtil.formatDate(this.selectedDate))
          .fontColor($r('app.color.secondary_color'))
        Image($r('app.media.ic_public_spinner'))
          .width(20)
          .fillColor($r('app.color.secondary_color'))
      }
      .padding(CommonConstants.SPACE_8)
      .onClick(() => this.controller.open())

      // 2.统计信息

    }
    .width(CommonConstants.THOUSANDTH_940)
    .backgroundColor($r('app.color.stats_title_bgc'))
    .borderRadius(CommonConstants.DEFAULT_18)
  }
}
注意:当我们想要将读取的selectedDate并将它初始化为今天时我们就不可以单纯的将当前日期用getTime()来转换为毫秒值,因为我们日期选择弹窗显示的日期只有年月日的零时零分零秒,而当前日期它会精确到时分秒,为了在以后的日期判断时不出现错误(例如中间不到24小时)我们读取的时间应该也是今天的零时零分零秒
那么为了解决这个问题黑马特意建了另外一个组件DateUtil,它的功能为获取今天的开始日期
3.DateUtil
class DateUtil{

  formatDate(num: number): string{
    let date = new Date(num)
    let year = date.getFullYear()
    let month = date.getMonth()+1
    let day = date.getDate()
    let m = month < 10 ? '0' + month : month
    let d = day < 10 ? '0' + day : day
    return `${year}/${m}/${d}`
  }

  beginTimeOfDay(date: Date){
    let d = new Date(date.getFullYear(), date.getMonth(), date.getDate())
    return d.getTime()
  }
}

let dateUtil = new DateUtil()

export default dateUtil as DateUtil
4.统计信息部分
根据我们需要的样式来书写一下统计信息部分,分别新建以下两个组件,这一部分没什么好说的就是布局
①热量统计部分
@Component
export default struct CalorieStats {
  intake: number//摄入
  expend: number//消耗
  recommend: number = CommonConstants.RECOMMEND_CALORIE//推荐

  remainCalorie(){
    return this.recommend - this.intake + this.expend
  }

  build() {
    Row({space: CommonConstants.SPACE_6}){
      // 1.饮食摄入
      this.StatsBuilder({label: '饮食摄入', value: this.intake})
      // 2.还可以吃
      Stack(){
        // 2.1.进度条
        Progress({
          value: this.intake,
          total: this.recommend,
          type: ProgressType.Ring
        })
          .width(120)
          .style({strokeWidth: CommonConstants.DEFAULT_10})
          .color($r('app.color.primary_color'))
        // 2.2.统计数据
        this.StatsBuilder({label: '还可以吃', value: this.remainCalorie(),tips: `推荐${this.recommend}`})
      }
      // 3.运动消耗
      this.StatsBuilder({label: '运动消耗', value: this.expend})
    }
    .width('100%')
    .justifyContent(FlexAlign.SpaceEvenly)
    .padding({top: 30, bottom: 35})
  }

  @Builder StatsBuilder({label: string, value: number, tips?: string}){
    Column({space: CommonConstants.SPACE_6}){
      Text(label)
        .fontColor($r('app.color.gray'))
        .fontWeight(CommonConstants.FONT_WEIGHT_600)
      Text(value.toFixed(0))
        .fontSize(20)
        .fontWeight(CommonConstants.FONT_WEIGHT_700)
      if(tips){
        Text(tips)
          .fontSize(12)
          .fontColor($r('app.color.light_gray'))
      }
    }
  }
}
②营养素统计部分
@Component
export default struct NutrientStats {
  carbon: number
  protein: number
  fat: number

  recommendCarbon: number = CommonConstants.RECOMMEND_CARBON
  recommendProtein: number = CommonConstants.RECOMMEND_PROTEIN
  recommendFat: number = CommonConstants.RECOMMEND_FAT

  build() {
    Row({space: CommonConstants.SPACE_6}){
      this.StatsBuilder({
        label: '碳水化合物',
        value: this.carbon,
        recommend: this.recommendCarbon,
        color: $r('app.color.carbon_color')
      })
      this.StatsBuilder({
        label: '蛋白质',
        value: this.protein,
        recommend: this.recommendProtein,
        color: $r('app.color.protein_color')
      })
      this.StatsBuilder({
        label: '脂肪',
        value: this.fat,
        recommend: this.recommendFat,
        color: $r('app.color.fat_color')
      })
    }
    .width('100%')
    .justifyContent(FlexAlign.SpaceEvenly)
    .padding({top: 30, bottom: 35})
  }

  @Builder StatsBuilder({label: string, value: number, recommend: number, color: ResourceStr}){
    Column({space: CommonConstants.SPACE_6}){
      Stack(){
        Progress({
          value: value,
          total: recommend,
          type: ProgressType.Ring
        })
          .width(95)
          .style({strokeWidth: CommonConstants.DEFAULT_6})
          .color(color)
        Column({space: CommonConstants.SPACE_6}){
          Text('摄入推荐')
            .fontSize(12)
            .fontColor($r('app.color.gray'))
          Text(`${value.toFixed(0)}/${$$.recommend.toFixed(0)}`)
            .fontSize(18)
            .fontWeight(CommonConstants.FONT_WEIGHT_600)
        }
      }
      Text(`${label}(克)`)
        .fontSize(12)
        .fontColor($r('app.color.light_gray'))
    }
  }
}
四、功能测试
等你写完这些代码我想你有点累了,不过没关系,接下来是最激动人心的测试环节


当你耐心完成这一部分后,OK后面不会有比这篇文章更长的了(黑马的视频也不会有比这期还长的了)
OK,我们下篇文章接着讲,我们这里附上黑马程序员饮食记录统计卡片的视频链接,文章配合视频更好理解哦。


 2004
2004

 被折叠的 条评论
为什么被折叠?
被折叠的 条评论
为什么被折叠?
 到【灌水乐园】发言


