


前言
调用训练好的卷积神经网络(CNN)模型进行人脸检测。
模型下载链接:http://dlib.net/files/mmod_human_face_detector.dat.bz2
程序
注:使用了opencv和dlib,需要自行配置环境。
# -*- coding: utf-8 -*-
import sys
import dlib
import cv2
# 导入cnn模型
cnn_face_detector = dlib.cnn_face_detection_model_v1(sys.argv[1])
for f in sys.argv[2:]:
# opencv 读取图片,并显示
img = cv2.imread(f, cv2.IMREAD_COLOR)
# opencv的bgr格式图片转换成rgb格式
b, g, r = cv2.split(img)
img2 = cv2.merge([r, g, b])
# 进行检测
dets = cnn_face_detector(img, 1)
# 打印检测到的人脸数
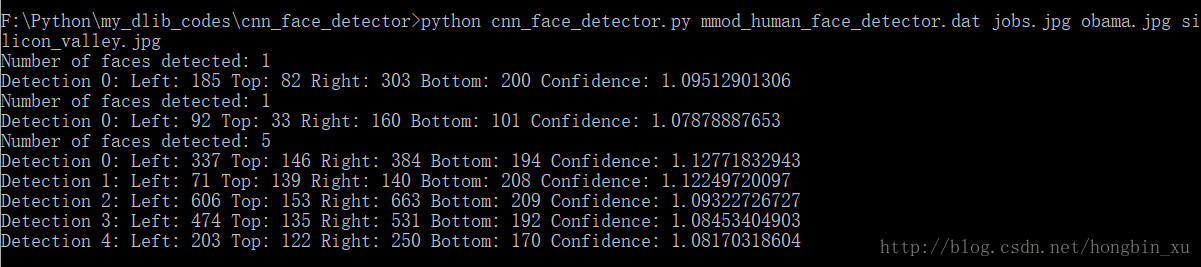
print("Number of faces detected: {}".format(len(dets)))
# 遍历返回的结果
# 返回的结果是一个mmod_rectangles对象。这个对象包含有2个成员变量:dlib.rectangle类,表示对象的位置;dlib.confidence,表示置信度。
for i, d in enumerate(dets):
face = d.rect
print("Detection {}: Left: {} Top: {} Right: {} Bottom: {} Confidence: {}".format(i, face.left(), face.top(), face.right(), d.rect.bottom(), d.confidence))
# 在图片中标出人脸
left = face.left()
top = face.top()
right = face.right()
bottom = face.bottom()
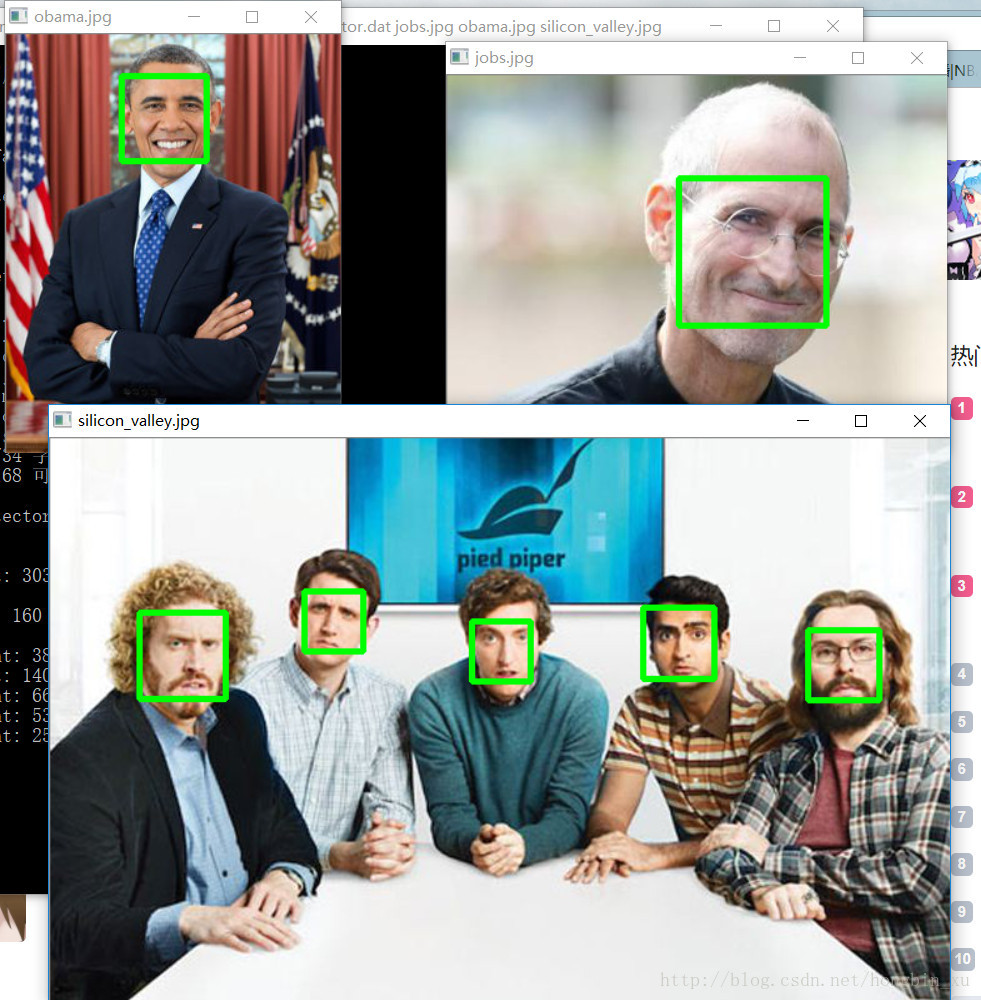
cv2.rectangle(img, (left, top), (right, bottom), (0, 255, 0), 3)
cv2.namedWindow(f, cv2.WINDOW_AUTOSIZE)
cv2.imshow(f, img)
k = cv2.waitKey(0)
cv2.destroyAllWindows()程序中已经有注释,也可以参考python dlib学习(一):人脸检测。
运行结果
命令行下,输入:
python cnn_face_detector.py mmod_human_face_detector.dat jobs.jpg obama.jpg silicon_valley.jpg目录下有以下文件:

结果截图:
(运行速度有点慢,要多等一下)
虽然dlib也支持cuda,怕我的笔记本扛不住还是用的CPU跑的。
官方例程
#!/usr/bin/python
# The contents of this file are in the public domain. See LICENSE_FOR_EXAMPLE_PROGRAMS.txt
#
#   This example shows how to run a CNN based face detector using dlib.  The
#   example loads a pretrained model and uses it to find faces in images.  The
#   CNN model is much more accurate than the HOG based model shown in the
#   face_detector.py example, but takes much more computational power to
#   run, and is meant to be executed on a GPU to attain reasonable speed.
#
#   You can download the pre-trained model from:
#       http://dlib.net/files/mmod_human_face_detector.dat.bz2
#
#   The examples/faces folder contains some jpg images of people.  You can run
#   this program on them and see the detections by executing the
#   following command:
#       ./cnn_face_detector.py mmod_human_face_detector.dat ../examples/faces/*.jpg
#
#
# COMPILING/INSTALLING THE DLIB PYTHON INTERFACE
#   You can install dlib using the command:
#       pip install dlib
#
#   Alternatively, if you want to compile dlib yourself then go into the dlib
#   root folder and run:
#       python setup.py install
#   or
#       python setup.py install --yes USE_AVX_INSTRUCTIONS --yes DLIB_USE_CUDA
#   if you have a CPU that supports AVX instructions, you have an Nvidia GPU
#   and you have CUDA installed since this makes things run *much* faster.
#
#   Compiling dlib should work on any operating system so long as you have
#   CMake and boost-python installed.  On Ubuntu, this can be done easily by
#   running the command:
#       sudo apt-get install libboost-python-dev cmake
#
#   Also note that this example requires scikit-image which can be installed
#   via the command:
#       pip install scikit-image
#   Or downloaded from http://scikit-image.org/download.html.

import sys
import dlib
from skimage import io

if len(sys.argv) < 3:
    print(
        "Call this program like this:\n"
        "   ./cnn_face_detector.py mmod_human_face_detector.dat ../examples/faces/*.jpg\n"
        "You can get the mmod_human_face_detector.dat file from:\n"
        "    http://dlib.net/files/mmod_human_face_detector.dat.bz2")
    exit()

cnn_face_detector = dlib.cnn_face_detection_model_v1(sys.argv[1])
win = dlib.image_window()

for f in sys.argv[2:]:
    print("Processing file: {}".format(f))
    img = io.imread(f)
    # The 1 in the second argument indicates that we should upsample the image
    # 1 time.  This will make everything bigger and allow us to detect more
    # faces.
    dets = cnn_face_detector(img, 1)
    '''
    This detector returns a mmod_rectangles object. This object contains a list of mmod_rectangle objects.
    These objects can be accessed by simply iterating over the mmod_rectangles object
    The mmod_rectangle object has two member variables, a dlib.rectangle object, and a confidence score.

    It is also possible to pass a list of images to the detector.
        - like this: dets = cnn_face_detector([image list], upsample_num, batch_size = 128)

    In this case it will return a mmod_rectangless object.
    This object behaves just like a list of lists and can be iterated over.
    '''
    print("Number of faces detected: {}".format(len(dets)))
    for i, d in enumerate(dets):
        print("Detection {}: Left: {} Top: {} Right: {} Bottom: {} Confidence: {}".format(
            i, d.rect.left(), d.rect.top(), d.rect.right(), d.rect.bottom(), d.confidence))

    rects = dlib.rectangles()
    rects.extend([d.rect for d in dets])

    win.clear_overlay()
    win.set_image(img)
    win.add_overlay(rects)
    dlib.hit_enter_to_continue()


 被折叠的 条评论
为什么被折叠?
被折叠的 条评论
为什么被折叠?
 到【灌水乐园】发言


