


 本文介绍如何使用OpenCV和dlib实现在视频流中实时检测和计数眨眼次数的方法,包括利用眼睛纵横比(EAR)概念及SVM分类。
前言
我们要使用opencv和dlib实现在视频流中实时检测和计数眨眼次数。
参考论文:Real-Time Eye Blink Detection using Facial Landmarks
作者在这篇文章中提出了一个眼睛纵横比(eye aspect ratio (EAR))的概念,通过计算这个EAR的数值,我们可以判断眼睛是张开还是闭合,从而检测眨眼动作。
首先,参考别人翻译的这篇文章OpenCV/Python/dlib眨眼检测,我稍微修改了一下代码,实现了初步检测;后面会进一步使用若干帧中检测到的EAR组成一个特征向量,送到一个SVM中来进行分类。
眼睛纵横比(EAR)
在讨论EAR之前,先看看68个人脸特征点:
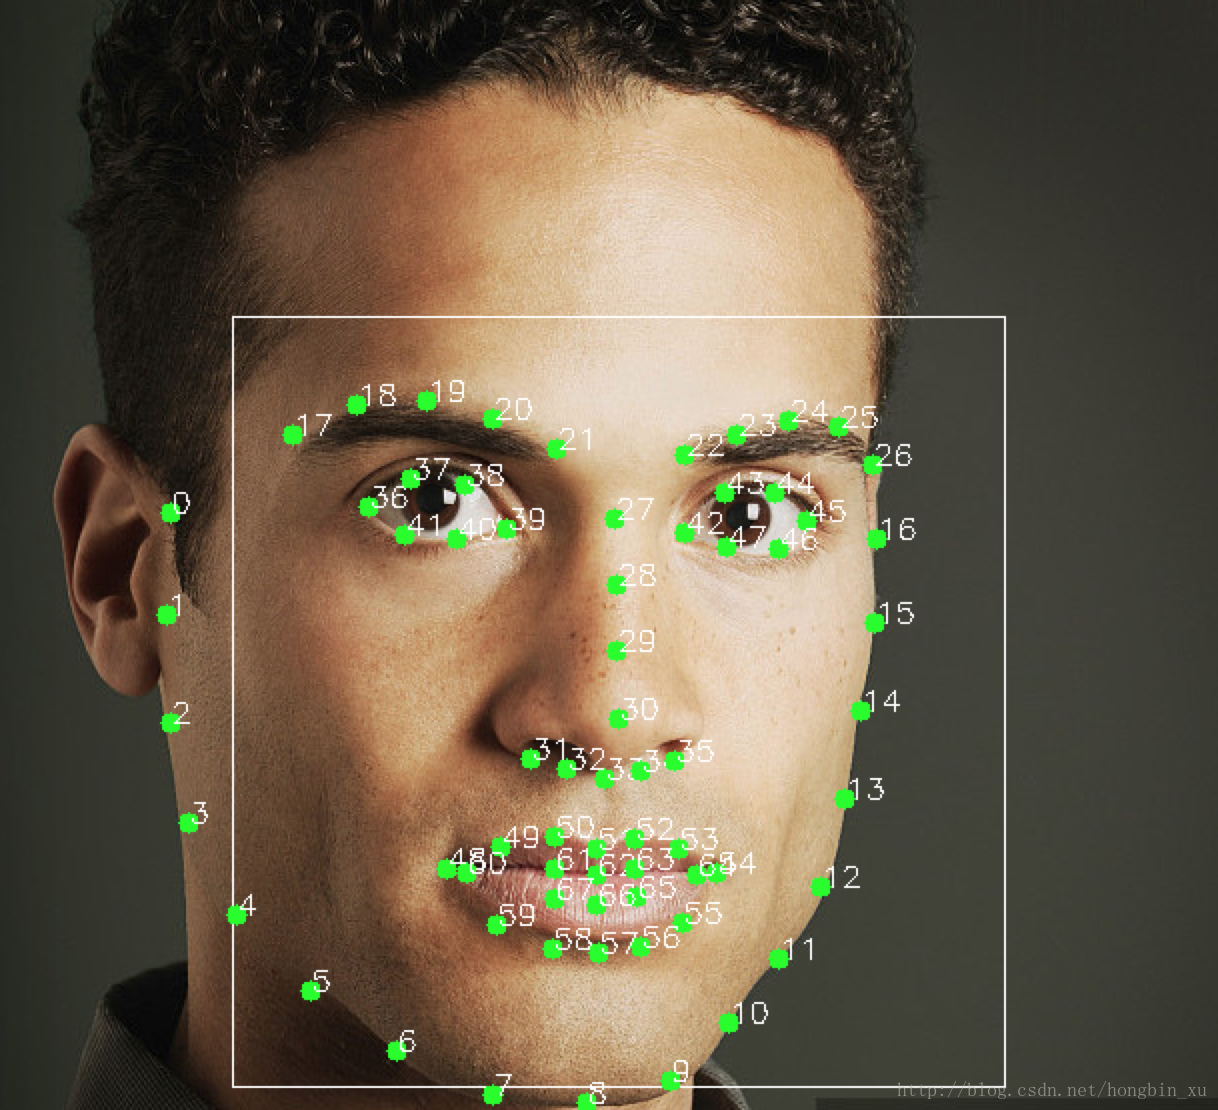
人脸特征点检测本身的算法是很复杂的,dlib中给出了相关的实现。程序实现可以参考我以前的博客:python dlib学习(二):人脸特征点标定。想深入研究的可以参考这篇论文。
从图中我们可以看到左眼和右眼分别对应了6个特征点,我们后面的讨论都是基于这6个特征点来进行。
论文中国给出的EAR定义的图片如下:
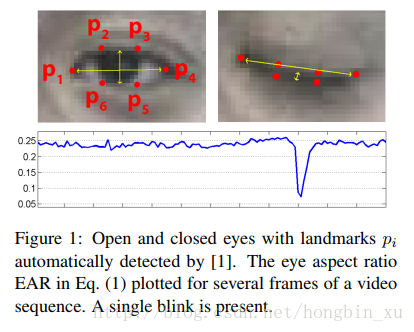
上图中的6个特征点
p1
、
p2
、
p3
、
p4
、
p5
、
p6
是人脸特征点中对应眼睛的6个特征点。
我们想关注的重点是:这些点在眼睛睁开和闭合时,彼此坐标之间的关系。
如图中直线所示,我们可以看出,长宽比在眼睛睁开和闭合时会有所不同。
顺理成章地,我们可以导出EAR的方程:
分子中计算的是眼睛的特征点在垂直方向上的距离,分母计算的是眼睛的特征点在水平方向上的距离。由于水平点只有一组,而垂直点有两组,所以分母乘上了2,以保证两组特征点的权重相同。
接下来看看,上面的那个表格。我们不难发现,EAR在眼睛睁开时是基本保持不变的,在小范围内会上下浮动,然而,当眼睛闭合时,EAR会迅速下降。这也就是我们进行眨眼检测的原理,十分简单。当然想了解更详细的内容还是请查阅论文。
程序实现
程序1:直接使用阈值判断
导入模块
#coding=utf-8
import numpy as np
import cv2
import dlib
from scipy.spatial import distance
import os
from imutils import face_utils
导入检测器
shape_predictor_68_face_landmarks.dat这个模型文件我是存放在当前目录下的model文件夹中的。
pwd = os.getcwd()# 获取当前路径
model_path = os.path.join(pwd, 'model')# 模型文件夹路径
shape_detector_path = os.path.join(model_path, 'shape_predictor_68_face_landmarks.dat')# 人脸特征点检测模型路径

detector = dlib.get_frontal_face_detector()# 人脸检测器
predictor = dlib.shape_predictor(shape_detector_path)# 人脸特征点检测器
定义一些参数
EYE_AR_THRESH = 0.3# EAR阈值
EYE_AR_CONSEC_FRAMES = 3# 当EAR小于阈值时,接连多少帧一定发生眨眼动作

# 对应特征点的序号
RIGHT_EYE_START = 37 - 1
RIGHT_EYE_END = 42 - 1
LEFT_EYE_START = 43 - 1
LEFT_EYE_END = 48 - 1EYE_AR_THRESH是判断阈值,默认为0.3。如果EAR大于它,则认为眼睛是睁开的;如果EAR小于它,则认为眼睛是闭上的。
EYE_AR_CONSEC_FRAMES表示的是,当EAR小于阈值时,接连多少帧一定发生眨眼动作。只有小于阈值的帧数超过了这个值时,才认为当前眼睛是闭合的,即发生了眨眼动作;否则则认为是误操作。
RIGHT_EYE_START、RIGHT_EYE_END、LEFT_EYE_START、LEFT_EYE_END:这几个都对应了人脸特征点中对应眼睛的那几个特征点的序号。由于list中默认从0开始,为保持一致,所以减一。
处理视频流
frame_counter = 0# 连续帧计数
blink_counter = 0# 眨眼计数
cap = cv2.VideoCapture(1)
while(1):
    ret, img = cap.read()# 读取视频流的一帧

    gray = cv2.cvtColor(img, cv2.COLOR_BGR2GRAY)# 转成灰度图像
    rects = detector(gray, 0)# 人脸检测
    for rect in rects:# 遍历每一个人脸
        print('-'*20)
        shape = predictor(gray, rect)# 检测特征点
        points = face_utils.shape_to_np(shape)# convert the facial landmark (x, y)-coordinates to a NumPy array
        leftEye = points[LEFT_EYE_START:LEFT_EYE_END + 1]# 取出左眼对应的特征点
        rightEye = points[RIGHT_EYE_START:RIGHT_EYE_END + 1]# 取出右眼对应的特征点
        leftEAR = eye_aspect_ratio(leftEye)# 计算左眼EAR
        rightEAR = eye_aspect_ratio(rightEye)# 计算右眼EAR
        print('leftEAR = {0}'.format(leftEAR))
        print('rightEAR = {0}'.format(rightEAR))

        ear = (leftEAR + rightEAR) / 2.0# 求左右眼EAR的均值

        leftEyeHull = cv2.convexHull(leftEye)# 寻找左眼轮廓
        rightEyeHull = cv2.convexHull(rightEye)# 寻找右眼轮廓
        cv2.drawContours(img, [leftEyeHull], -1, (0, 255, 0), 1)# 绘制左眼轮廓
        cv2.drawContours(img, [rightEyeHull], -1, (0, 255, 0), 1)# 绘制右眼轮廓

        # 如果EAR小于阈值,开始计算连续帧,只有连续帧计数超过EYE_AR_CONSEC_FRAMES时,才会计做一次眨眼
        if ear < EYE_AR_THRESH:
            frame_counter += 1
        else:
            if frame_counter >= EYE_AR_CONSEC_FRAMES:
                blink_counter += 1
            frame_counter = 0

        # 在图像上显示出眨眼次数blink_counter和EAR
        cv2.putText(img, "Blinks:{0}".format(blink_counter), (10, 30), cv2.FONT_HERSHEY_SIMPLEX, 0.7, (0,0,255), 2)
        cv2.putText(img, "EAR:{:.2f}".format(ear), (300, 30), cv2.FONT_HERSHEY_SIMPLEX, 0.7, (0,0,255), 2)


    cv2.imshow("Frame", img)

    if cv2.waitKey(1) & 0xFF == ord("q"):
        break

cap.release()
cv2.destroyAllWindows()
运行结果
注:我测试时,我的摄像头只有30帧,如果按照我们通常眨眼的速度,眨眼速度实在太快摄像头根本来不及捕捉,更别说检测到了。所以,如果你的摄像头帧数不够,检测时眨眼放慢点,那样效果会好一点。还有,尽量别戴眼镜,眼睛反光可能会导致检测眼睛轮廓时出错,计算出的结果自然也是错的。

程序2:使用SVM来划分特征向量
这一部分相对要麻烦一点,我们需要自己采集数据,并训练SVM模型,随后才能在程序中读取模型来使用。
采集数据
导入包
#coding=utf-8
import numpy as np
import os
import dlib
import cv2
from scipy.spatial import distance
from imutils import face_utils
import pickle
队列(特征向量)
VECTOR_SIZE = 3
def queue_in(queue, data):
    ret = None
    if len(queue) >= VECTOR_SIZE:
        ret = queue.pop(0)
    queue.append(data)
return ret, queueVECTOR_SIZE表示你的特征向量维度多少,我默认取了3维的。注意你采集数据程序中的VECTOR_SIZE要和其他程序中一致。用了一个队列简单实现,比较简单不做赘述。
采集数据前准备
这些都与前面程序1中的一样,不做赘述。
def eye_aspect_ratio(eye):
    # print(eye)
    A = distance.euclidean(eye[1], eye[5])
    B = distance.euclidean(eye[2], eye[4])
    C = distance.euclidean(eye[0], eye[3])
    ear = (A + B) / (2.0 * C)
    return ear

pwd = os.getcwd()
model_path = os.path.join(pwd, 'model')
shape_detector_path = os.path.join(model_path, 'shape_predictor_68_face_landmarks.dat')

detector = dlib.get_frontal_face_detector()
predictor = dlib.shape_predictor(shape_detector_path)

cv2.namedWindow("frame", cv2.WINDOW_AUTOSIZE)

cap = cv2.VideoCapture(0)

# 对应特征点的序号
RIGHT_EYE_START = 37 - 1
RIGHT_EYE_END = 42 - 1
LEFT_EYE_START = 43 - 1
LEFT_EYE_END = 48 - 1
采集眼睛睁开时的样本
print('Prepare to collect images with your eyes open')
print('Press s to start collecting images.')
print('Press e to end collecting images.')
print('Press q to quit')
flag = 0
txt = open('train_open.txt', 'wb')
data_counter = 0
ear_vector = []
while(1):
    ret, frame = cap.read()
    key = cv2.waitKey(1)
    if key & 0xFF == ord("s"):
        print('Start collecting images.')
        flag = 1
    elif key & 0xFF == ord("e"):
        print('Stop collecting images.')
        flag = 0
    elif key & 0xFF == ord("q"):
        print('quit')
        break

    if flag == 1:
        gray = cv2.cvtColor(frame, cv2.COLOR_BGR2GRAY)
        rects = detector(gray, 0)
        for rect in rects:
            shape = predictor(gray, rect)
            points = face_utils.shape_to_np(shape)# convert the facial landmark (x, y)-coordinates to a NumPy array
            # points = shape.parts()
            leftEye = points[LEFT_EYE_START:LEFT_EYE_END + 1]
            rightEye = points[RIGHT_EYE_START:RIGHT_EYE_END + 1]
            leftEAR = eye_aspect_ratio(leftEye)
            rightEAR = eye_aspect_ratio(rightEye)
            # print('leftEAR = {0}'.format(leftEAR))
            # print('rightEAR = {0}'.format(rightEAR))

            ear = (leftEAR + rightEAR) / 2.0

            leftEyeHull = cv2.convexHull(leftEye)
            rightEyeHull = cv2.convexHull(rightEye)
            cv2.drawContours(frame, [leftEyeHull], -1, (0, 255, 0), 1)
            cv2.drawContours(frame, [rightEyeHull], -1, (0, 255, 0), 1)

            ret, ear_vector = queue_in(ear_vector, ear)
            if(len(ear_vector) == VECTOR_SIZE):
                # print(ear_vector)
                # input_vector = []
                # input_vector.append(ear_vector)

                txt.write(str(ear_vector))
                txt.write('\n')
                data_counter += 1
                print(data_counter)

            cv2.putText(frame, "EAR:{:.2f}".format(ear), (10, 30), cv2.FONT_HERSHEY_SIMPLEX, 0.7, (0,0,255), 2)

    cv2.imshow("frame", frame)
txt.close()这一部分与程序1中也很类似,都是读取视频流,识别人脸特征点,计算EAR。可以通过按键控制:按q键退出;按s键,开始采集信息,采集时请保证眼睛睁开,随后会将计算得到的ear组成的特征向量写入train_open.txt文件中;按e键,停止采集信息,眼睛闭合休息时用。
采集数据时真的是比较尴尬,因为眼睛对着摄像头睁久了真的很累,我只能循环按s键和e键来断断续续地采集。
采集眼睛闭合时的样本
print('-'*40)
print('Prepare to collect images with your eyes close')
print('Press s to start collecting images.')
print('Press e to end collecting images.')
print('Press q to quit')
flag = 0
txt = open('train_close.txt', 'wb')
data_counter = 0
ear_vector = []
while(1):
    ret, frame = cap.read()
    key = cv2.waitKey(1)
    if key & 0xFF == ord("s"):
        print('Start collecting images.')
        flag = 1
    elif key & 0xFF == ord("e"):
        print('Stop collecting images.')
        flag = 0
    elif key & 0xFF == ord("q"):
        print('quit')
        break

    if flag == 1:
        gray = cv2.cvtColor(frame, cv2.COLOR_BGR2GRAY)
        rects = detector(gray, 0)
        for rect in rects:
            shape = predictor(gray, rect)
            points = face_utils.shape_to_np(shape)# convert the facial landmark (x, y)-coordinates to a NumPy array
            # points = shape.parts()
            leftEye = points[LEFT_EYE_START:LEFT_EYE_END + 1]
            rightEye = points[RIGHT_EYE_START:RIGHT_EYE_END + 1]
            leftEAR = eye_aspect_ratio(leftEye)
            rightEAR = eye_aspect_ratio(rightEye)
            # print('leftEAR = {0}'.format(leftEAR))
            # print('rightEAR = {0}'.format(rightEAR))

            ear = (leftEAR + rightEAR) / 2.0

            leftEyeHull = cv2.convexHull(leftEye)
            rightEyeHull = cv2.convexHull(rightEye)
            cv2.drawContours(frame, [leftEyeHull], -1, (0, 255, 0), 1)
            cv2.drawContours(frame, [rightEyeHull], -1, (0, 255, 0), 1)

            ret, ear_vector = queue_in(ear_vector, ear)
            if(len(ear_vector) == VECTOR_SIZE):
                # print(ear_vector)
                # input_vector = []
                # input_vector.append(ear_vector)

                txt.write(str(ear_vector))
                txt.write('\n')

                data_counter += 1
                print(data_counter)

            cv2.putText(frame, "EAR:{:.2f}".format(ear), (10, 30), cv2.FONT_HERSHEY_SIMPLEX, 0.7, (0,0,255), 2)

    cv2.imshow("frame", frame)
txt.close()程序结构跟前面采集眼睛睁开时的样本的程序一模一样,唯一的区别就是这次采集的数据不一样。采集时可以通过键盘按键控制:按q键退出;按s键开始采集图像,并计算EAR,并将特征向量保存到train_close.txt文件中,采集时注意眼睛闭合后再采集;按e结束采集。循环按s键和e键控制采集。
关闭摄像头和窗口
cap.release()
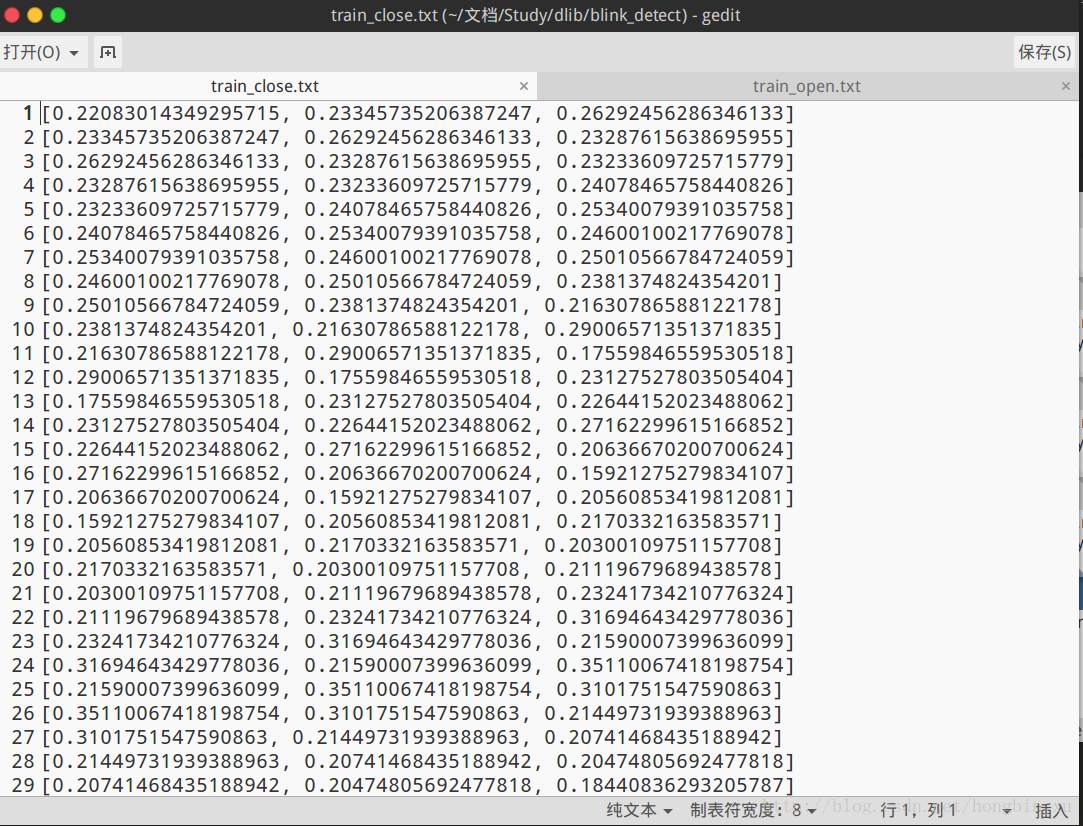
cv2.destroyAllWindows()运行结果
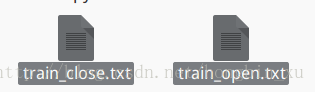
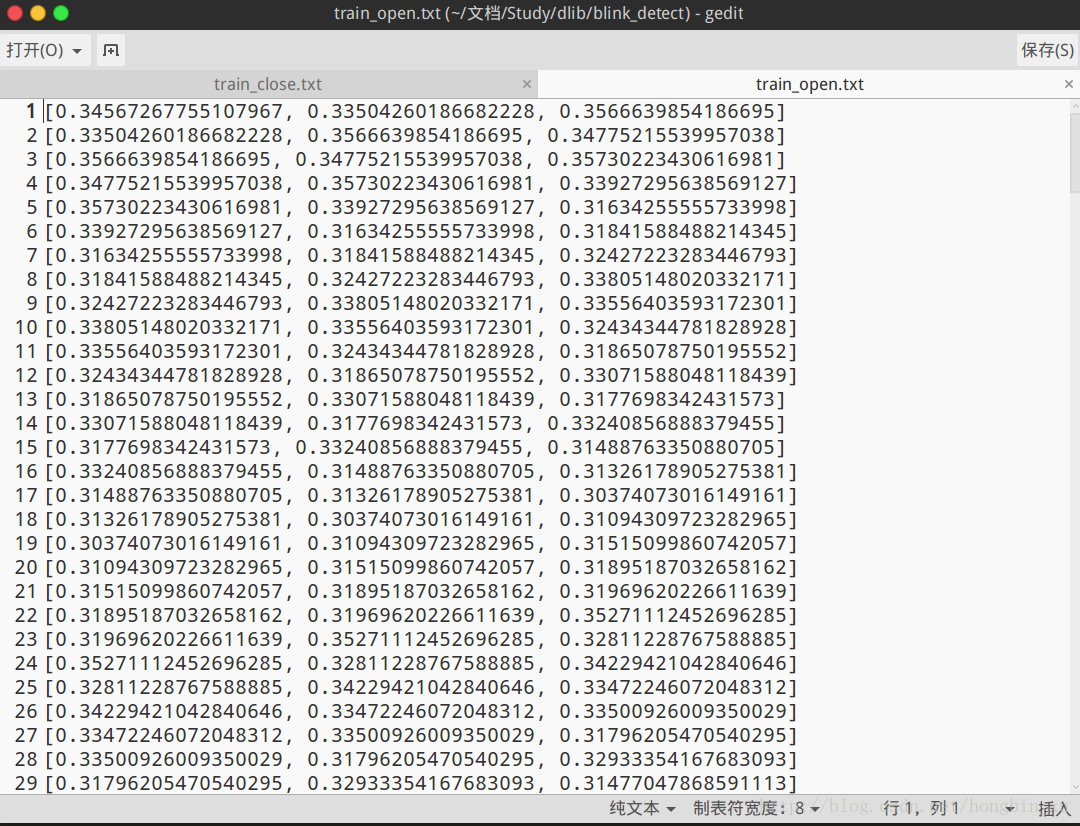
采集结束后会生成两个文本文件:train_close.txt、train_open.txt。两个文件分别对应眼睛闭合和睁开时,EAR构成的特征向量,即SVM的负样本和正样本。
这里的数据维度是前面自己定的,可以改变的。
训练SVM
导入包
import numpy as np
from sklearn import svm
from sklearn.externals import joblib
解析数据
train = []
labels = []

print('Reading train_open.txt...')
line_ctr = 0
for txt_str in train_open_txt.readlines():
    temp = []
    # print(txt_str)
    datas = txt_str.strip()
    datas = datas.replace('[', '')
    datas = datas.replace(']', '')
    datas = datas.split(',')
    print(datas)
    for data in datas:
        # print(data)
        data = float(data)
        temp.append(data)
    # print(temp)
    train.append(temp)
    labels.append(0)

print('Reading train_close.txt...')
line_ctr = 0
temp = []
for txt_str in train_close_txt.readlines():
    temp = []
    # print(txt_str)
    datas = txt_str.strip()
    datas = datas.replace('[', '')
    datas = datas.replace(']', '')
    datas = datas.split(',')
    print(datas)
    for data in datas:
        # print(data)
        data = float(data)
        temp.append(data)
    # print(temp)
    train.append(temp)
    labels.append(1)

for i in range(len(labels)):
    print("{0} --> {1}".format(train[i], labels[i]))

train_close_txt.close()
train_open_txt.close()

# print(train)
# print(labels)
从两个txt文件中解析数据,提取出特征向量,放入列表train中,同时并把对应的标签放入列表labels中。程序写的很简单,就不注释了。
训练并保存模型
clf = svm.SVC(C=0.8, kernel='linear', gamma=20, decision_function_shape='ovo')
clf.fit(train, labels)
joblib.dump(clf, "ear_svm.m")这里使用sickit-learn中的svm模块,SVM本身实现还是比较复杂的,但是这里为了简便就直接调用实现好的api函数了。
稍微介绍一下参数:
C=0.8表示软间隔;
kernel='linear'表示采用线性核;kernel='rbf'时(default),为高斯核,gamma值越小,分类界面越连续;gamma值越大,分类界面越“散”;
decision_function_shape='ovr',表示one v rest,即一个类别与其他类别划分,多分类;decision_function_shape='ovo',表示one v one,即一个类别与另一个类别划分,二分类;
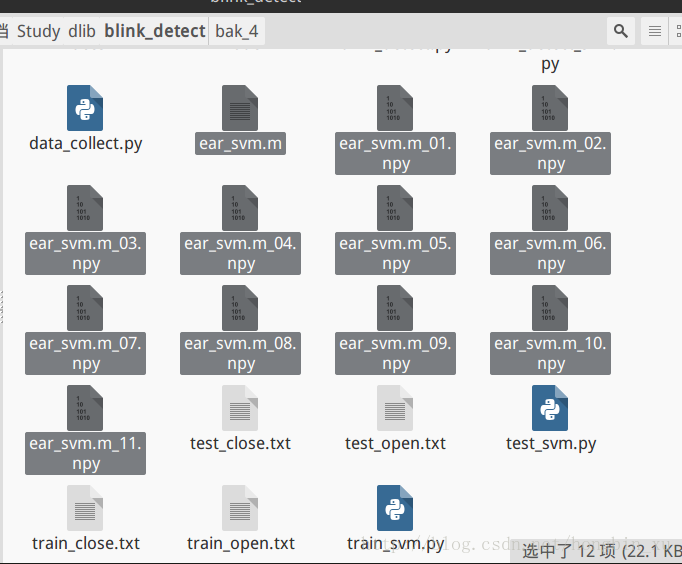
使用joblib模块,我们会将模型文件保存到当前文件夹中。
测试准确率
一般来说我们还需要另外准备一部分测试集,来对我们的模型进行评估。考虑到篇幅可能过大,删去了那一部分。直接取几个样本简单测试一下,看下输出。
print('predicting [[0.34, 0.34, 0.31]]')
res = clf.predict([[0.34, 0.34, 0.31]])
print(res)

print('predicting [[0.19, 0.18, 0.18]]')
res = clf.predict([[0.19, 0.18, 0.18]])
print(res)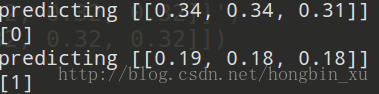
这种做法其实并不严谨,正确的做法是我们要像前面一样另外采集一组测试集,或是从已经采集好的数据中分出一部分作为测试集,随后计算准确率进行评估。考虑到篇幅限制,这里只给出了思路,程序实现无非就是那前面的代码改一改。
进行实时检测
这一段的代码跟程序1很类似,唯一的区别就是检测部分采用了SVM。下面就直接贴代码了。
注意一点,就是所有的程序中的VECTOR_SIZE一定要保持一致,因为这是你的特征向量的维度。
程序实现
#coding=utf-8
import numpy as np
import cv2
import dlib
from scipy.spatial import distance
import os
from imutils import face_utils
from sklearn import svm
from sklearn.externals import joblib

VECTOR_SIZE = 3
def queue_in(queue, data):
    ret = None
    if len(queue) >= VECTOR_SIZE:
        ret = queue.pop(0)
    queue.append(data)
    return ret, queue

def eye_aspect_ratio(eye):
    # print(eye)
    A = distance.euclidean(eye[1], eye[5])
    B = distance.euclidean(eye[2], eye[4])
    C = distance.euclidean(eye[0], eye[3])
    ear = (A + B) / (2.0 * C)
    return ear

pwd = os.getcwd()
model_path = os.path.join(pwd, 'model')
shape_detector_path = os.path.join(model_path, 'shape_predictor_68_face_landmarks.dat')

detector = dlib.get_frontal_face_detector()
predictor = dlib.shape_predictor(shape_detector_path)

# 导入模型
clf = joblib.load("ear_svm.m")

EYE_AR_THRESH = 0.3# EAR阈值
EYE_AR_CONSEC_FRAMES = 3# 当EAR小于阈值时,接连多少帧一定发生眨眼动作

# 对应特征点的序号
RIGHT_EYE_START = 37 - 1
RIGHT_EYE_END = 42 - 1
LEFT_EYE_START = 43 - 1
LEFT_EYE_END = 48 - 1

frame_counter = 0
blink_counter = 0
ear_vector = []
cap = cv2.VideoCapture(1)
while(1):
    ret, img = cap.read()

    gray = cv2.cvtColor(img, cv2.COLOR_BGR2GRAY)
    rects = detector(gray, 0)
    for rect in rects:
        print('-'*20)
        shape = predictor(gray, rect)
        points = face_utils.shape_to_np(shape)# convert the facial landmark (x, y)-coordinates to a NumPy array
        # points = shape.parts()
        leftEye = points[LEFT_EYE_START:LEFT_EYE_END + 1]
        rightEye = points[RIGHT_EYE_START:RIGHT_EYE_END + 1]
        leftEAR = eye_aspect_ratio(leftEye)
        rightEAR = eye_aspect_ratio(rightEye)
        print('leftEAR = {0}'.format(leftEAR))
        print('rightEAR = {0}'.format(rightEAR))

        ear = (leftEAR + rightEAR) / 2.0

        leftEyeHull = cv2.convexHull(leftEye)
        rightEyeHull = cv2.convexHull(rightEye)
        cv2.drawContours(img, [leftEyeHull], -1, (0, 255, 0), 1)
        cv2.drawContours(img, [rightEyeHull], -1, (0, 255, 0), 1)

        ret, ear_vector = queue_in(ear_vector, ear)
        if(len(ear_vector) == VECTOR_SIZE):
            print(ear_vector)
            input_vector = []
            input_vector.append(ear_vector)
            res = clf.predict(input_vector)
            print(res)

            if res == 1:
                frame_counter += 1
            else:
                if frame_counter >= EYE_AR_CONSEC_FRAMES:
                    blink_counter += 1
                frame_counter = 0

        cv2.putText(img, "Blinks:{0}".format(blink_counter), (10, 30), cv2.FONT_HERSHEY_SIMPLEX, 0.7, (0,0,255), 2)
        cv2.putText(img, "EAR:{:.2f}".format(ear), (300, 30), cv2.FONT_HERSHEY_SIMPLEX, 0.7, (0,0,255), 2)


    cv2.imshow("Frame", img)

    if cv2.waitKey(1) & 0xFF == ord("q"):
        break

cap.release()
cv2.destroyAllWindows()
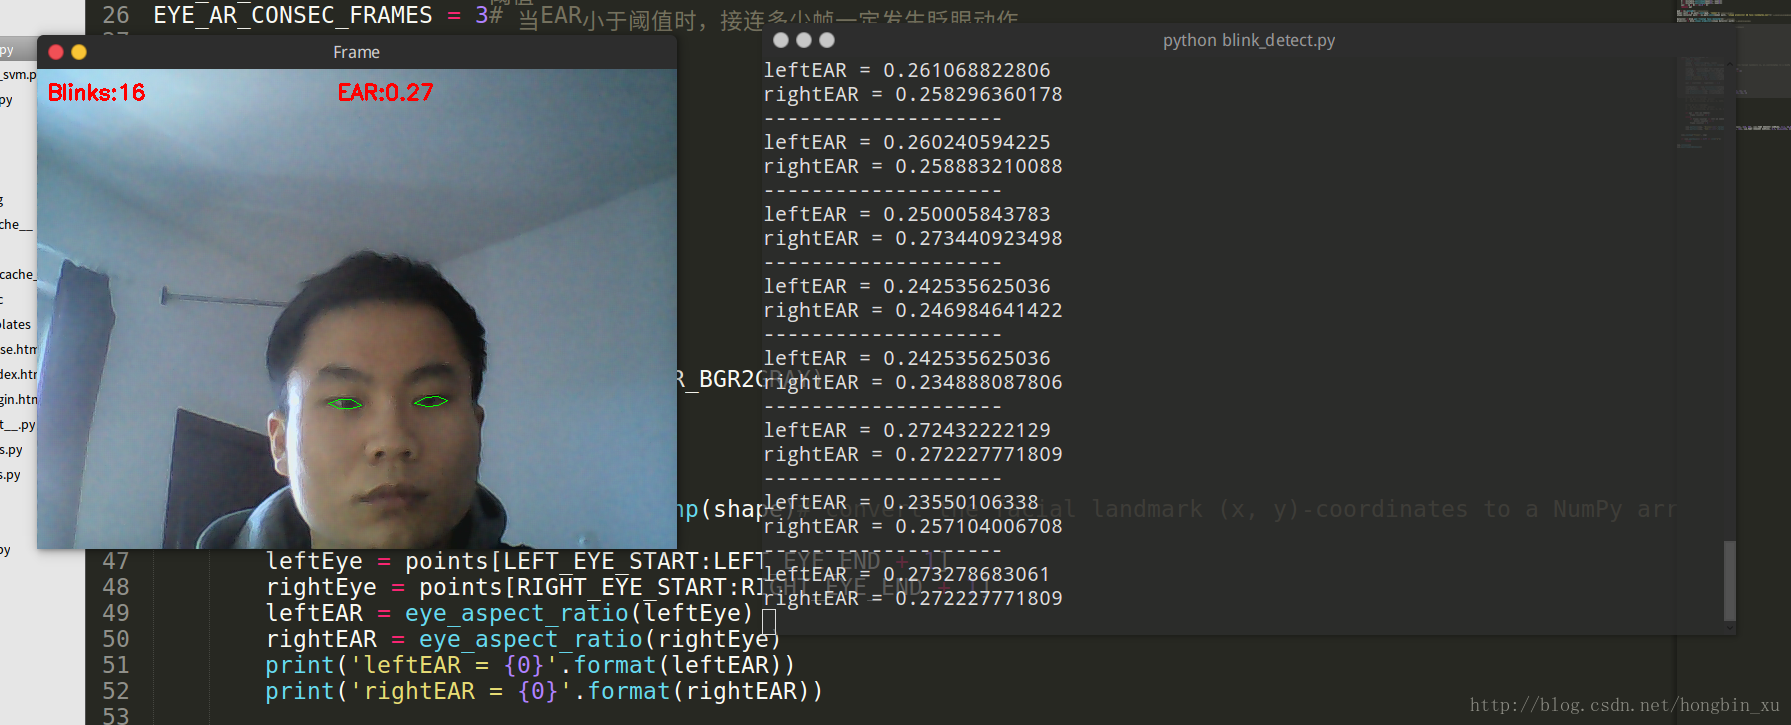
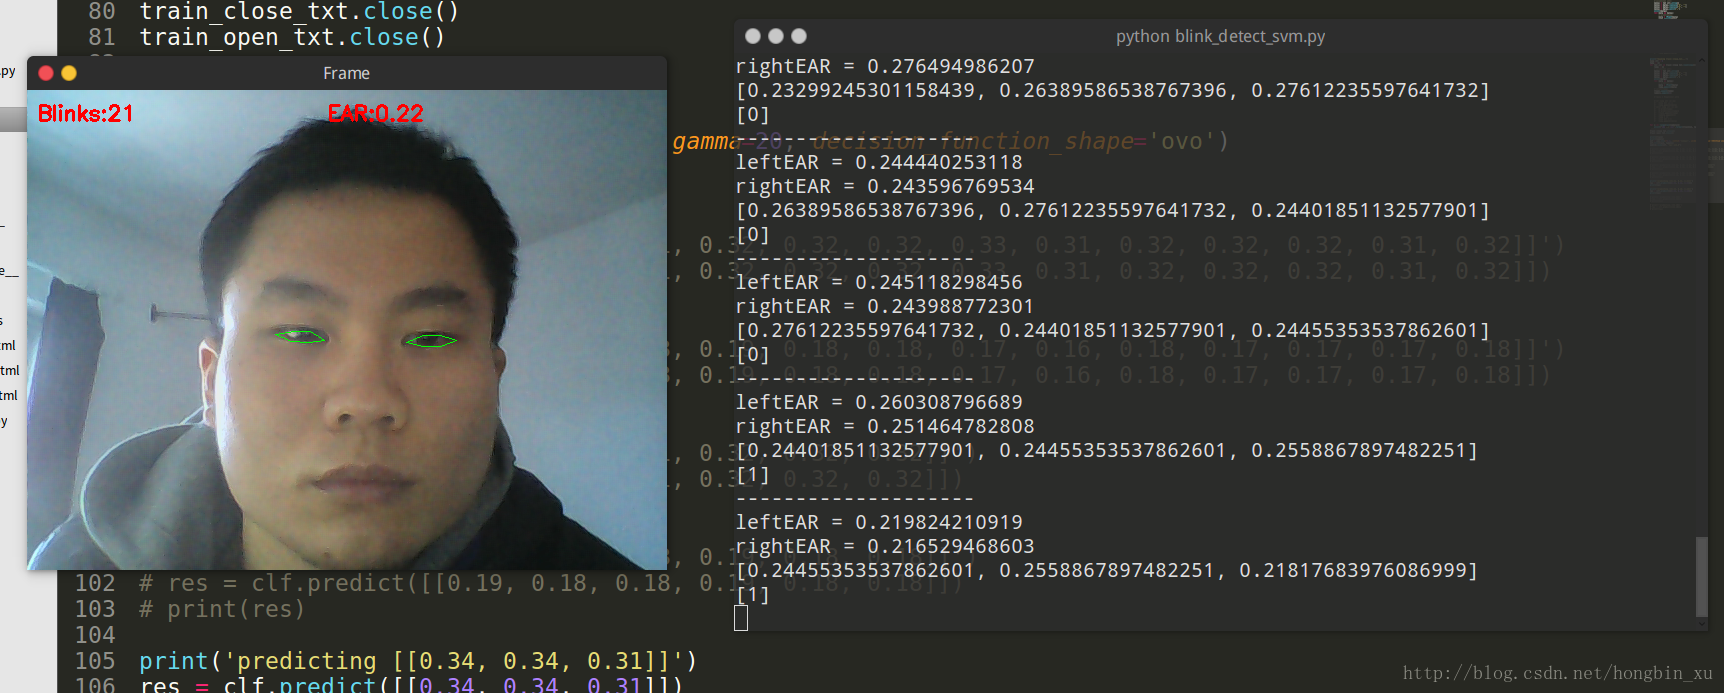
运行结果
注:论文的原作者说使用眼长宽比(第 N-6 帧到第 N + 6帧)的13维特征向量,然后将该特征向量馈送到线性SVM分类,可以实现更好的效果。我尝试了13维的情况,发现延迟太厉害,在你眨眼之后,要过一下子才能检测到。因为我们是一帧一帧计算EAR然后才送入特征向量更新的,在摄像头帧数低时,可能还是要使用低一些维度的特征向量,所以在程序中我是用了3维的特征向量。
后记
本来只是看了下论文,打算玩一下眨眼检测的。结果在调试程序过程中还是遇到了不少坑,不知不觉就花了不少时间。尤其是选择特征向量维度时,我试了3维、6维、13维等的特征向量,每次都是专门采集了1000多组正样本和1000多组负样本,训练结果是3维的比较好。更大的原因还是我的摄像头帧率太低吧,理论上来说,维度更高能得到更高的准确率,但是由于帧率低导致特征向量更新太慢,以致于延迟过长。
完整工程下载:http://download.csdn.net/download/hongbin_xu/10200655


 2460
2460

 被折叠的 条评论
为什么被折叠?
被折叠的 条评论
为什么被折叠?
 到【灌水乐园】发言


