


 本文对比了Kinect V1和V2在获取及显示彩色图像帧上的不同方法,V2的彩色分辨率提升至1920x1080。介绍了V1的NuiImageStreamOpen和V2的ColorFrameSource、ColorFrameReader的使用,并展示了如何用OpenCV处理V2的彩色数据并进行显示。代码示例展示了在VS2012和OpenCV中实现这一过程。
~~有兴趣的小伙伴,加kinect算法交流群:462964980。
V1彩色分辨率:640x480
V2彩色分辨率:1920x1080
1,打开彩色图像帧的方式
对于V1: 使用NuiImageStreamOpen方法打开
- hr = m_PNuiSensor->NuiImageStreamOpen(
- NUI_IMAGE_TYPE_COLOR,NUI_IMAGE_RESOLUTION_640x480,0, 2,
- m_hNextColorFrameEvent,&m_hColorStreamHandle);
- if( FAILED( hr ) )
- {
- cout<<"Could notopen image stream video"<<endl;
- return hr;
- }
- 这种方式可以设置分辨率
对于V2:
- 首先使用 m_pKinectSensor->Open();//打开Kinect
- if (SUCCEEDED(hr))
- {
- hr =m_pKinectSensor->get_ColorFrameSource(&pColorFrameSource);
- }
- 方法get_ColorFrameSource打开彩色帧的源。
- 然后使用 if (SUCCEEDED(hr))
- {
- hr =pColorFrameSource->OpenReader(&m_pColorFrameReader);
- }
- SafeRelease(pColorFrameSource);
- 方法OpenReader打开彩色帧读取器。
2,更新彩色帧的方式
对于V1:使用NuiImageStreamGetNextFrame方法
- NuiImageStreamGetNextFrame(m_hColorStreamHandle,0, &pImageFrame);//得到该帧数据
对于V2:使用AcquireLatestFrame方法
- if (!m_pColorFrameReader)
- {
- return;
- }
- IColorFrame* pColorFrame = NULL;
- RESULT hr =m_pColorFrameReader->AcquireLatestFrame(&pColorFrame);
3,数据的处理方式
对于V1:这种数据获取方式比较明朗看到数据内部结构,
- INuiFrameTexture *pTexture =pImageFrame->pFrameTexture;
- NUI_LOCKED_RECT LockedRect;
- pTexture->LockRect(0, &LockedRect,NULL, 0);//提取数据帧到LockedRect,它包括两个数据对象:pitch每行字节数,pBits第一个字节地址
- if( LockedRect.Pitch != 0 )
- {
- cvZero(colorImage);
- for (int i=0; i<480; i++)
- {
- uchar* ptr =(uchar*)(colorImage->imageData+i*colorImage->widthStep);
- BYTE * pBuffer =(BYTE*)(LockedRect.pBits)+i*LockedRect.Pitch;//每个字节代表一个颜色信息,直接使用BYTE
- for (int j=0; j<640; j++)
- {
- ptr[3*j] =pBuffer[4*j];//内部数据是4个字节,0-1-2是BGR,第4个现在未使用
- ptr[3*j+1] =pBuffer[4*j+1];
- ptr[3*j+2] =pBuffer[4*j+2];
- }
- }
- //cvWriteFrame(wr_color,colorImage);
- cvShowImage("colorImage", colorImage);//显示图像
得到的最终形式可以用OpenCV显示。
对于V2: 这种数据的内部结构是神马样子呢?然后如何用OpenCV显示出图像数据呢?待查…
- RGBQUAD* m_pColorRGBX;//彩色数据存储位置
- m_pColorRGBX(NULL)//构造函数初始化
- // create heap storage for color pixel data in RGBXformat
- m_pColorRGBX = new RGBQUAD[cColorWidth *cColorHeight];
- //下边就是AcquireLatestFrame之后处理数据
- INT64 nTime = 0;
- IFrameDescription* pFrameDescription =NULL;
- int nWidth = 0;
- int nHeight = 0;
- ColorImageFormat imageFormat = ColorImageFormat_None;
- UINT nBufferSize = 0;
- RGBQUAD *pBuffer = NULL;
- if (SUCCEEDED(hr))
- {
- if (imageFormat == ColorImageFormat_Bgra)
- {
- hr =pColorFrame->AccessRawUnderlyingBuffer(&nBufferSize, reinterpret_cast<BYTE**>(&pBuffer));
- }
- else if (m_pColorRGBX)
- {
- pBuffer = m_pColorRGBX;
- nBufferSize = cColorWidth *cColorHeight * sizeof(RGBQUAD);
- hr = pColorFrame->CopyConvertedFrameDataToArray(nBufferSize,reinterpret_cast<BYTE*>(pBuffer), ColorImageFormat_Bgra);
- }
- else
- {
- hr = E_FAIL;
- }
- }
- if (SUCCEEDED(hr))
- {
- ProcessColor(nTime, pBuffer,nWidth, nHeight);
- }
感觉目前得到的pBuffer就是存储的彩色数据,问题是如何用OpenCV来显示呢?
4,OpenCV显示
- <span style="white-space:pre"> </span>int width = 0;
- int height = 0;
- pDescription->get_Width( &width ); // 1920
- pDescription->get_Height( &height ); // 1080
- unsigned int bufferSize = width * height * 4 * sizeof( unsigned char );
- //创建尺寸为height x width 的4通道8位图像
- Mat bufferMat( height, width, CV_8UC4 );
- Mat colorMat( height / 2, width / 2, CV_8UC4 );
- while( 1 ){
- // 更新彩色帧
- IColorFrame* pColorFrame = nullptr;
- hResult = pColorReader->AcquireLatestFrame( &pColorFrame );
- if( SUCCEEDED( hResult ) ){
- hResult = pColorFrame->CopyConvertedFrameDataToArray( bufferSize, reinterpret_cast<BYTE*>( bufferMat.data ), ColorImageFormat::ColorImageFormat_Bgra );
- if( SUCCEEDED( hResult ) ){
- resize( bufferMat, colorMat, cv::Size(), 0.5, 0.5 );
- }
- }
- SafeRelease( pColorFrame );
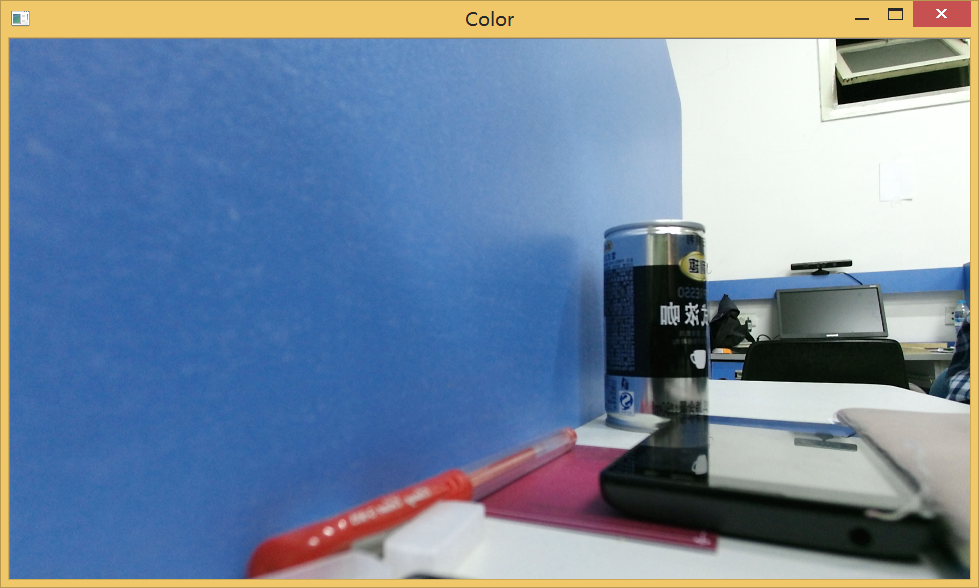
- imshow( "Color", colorMat );
其中用到kinect的CopyConvertedFrameDataToArray函数,将图像帧转换为矩阵数据用来显示。
5,V2+VS2012+OpenCV代码
- #include <Windows.h>
- #include <Kinect.h>
- #include <opencv2/opencv.hpp>
- using namespace std;
- using namespace cv;
- //释放接口需要自己定义
- template<class Interface>
- inline void SafeRelease( Interface *& pInterfaceToRelease )
- {
- if( pInterfaceToRelease != NULL ){
- pInterfaceToRelease->Release();
- pInterfaceToRelease = NULL;
- }
- }
- int main( int argc, char **argv[] )
- {
- //OpenCV中开启CPU的硬件指令优化功能函数
- setUseOptimized( true );
- // 打开kinect
- IKinectSensor* pSensor;
- HRESULT hResult = S_OK;
- hResult = GetDefaultKinectSensor( &pSensor );
- if( FAILED( hResult ) ){
- cerr << "Error : GetDefaultKinectSensor" << std::endl;
- return -1;
- }
- hResult = pSensor->Open();
- if( FAILED( hResult ) ){
- cerr << "Error : IKinectSensor::Open()" << std::endl;
- return -1;
- }
- // 彩色帧源
- IColorFrameSource* pColorSource;
- hResult = pSensor->get_ColorFrameSource( &pColorSource );
- if( FAILED( hResult ) ){
- cerr << "Error : IKinectSensor::get_ColorFrameSource()" << std::endl;
- return -1;
- }
- //彩色帧读取
- IColorFrameReader* pColorReader;
- hResult = pColorSource->OpenReader( &pColorReader );
- if( FAILED( hResult ) ){
- cerr << "Error : IColorFrameSource::OpenReader()" << std::endl;
- return -1;
- }
- // Description
- IFrameDescription* pDescription;
- hResult = pColorSource->get_FrameDescription( &pDescription );
- if( FAILED( hResult ) ){
- cerr << "Error : IColorFrameSource::get_FrameDescription()" << std::endl;
- return -1;
- }
- int width = 0;
- int height = 0;
- pDescription->get_Width( &width ); // 1920
- pDescription->get_Height( &height ); // 1080
- unsigned int bufferSize = width * height * 4 * sizeof( unsigned char );
- //创建尺寸为height x width 的4通道8位图像
- Mat bufferMat( height, width, CV_8UC4 );
- Mat colorMat( height / 2, width / 2, CV_8UC4 );
- while( 1 ){
- // 更新彩色帧
- IColorFrame* pColorFrame = nullptr;
- hResult = pColorReader->AcquireLatestFrame( &pColorFrame );
- if( SUCCEEDED( hResult ) ){
- hResult = pColorFrame->CopyConvertedFrameDataToArray( bufferSize, reinterpret_cast<BYTE*>( bufferMat.data ), ColorImageFormat::ColorImageFormat_Bgra );
- if( SUCCEEDED( hResult ) ){
- resize( bufferMat, colorMat, cv::Size(), 0.5, 0.5 );
- }
- }
- SafeRelease( pColorFrame );
- imshow( "Color", colorMat );
- if( waitKey( 30 ) == VK_ESCAPE ){
- break;
- }
- }
- SafeRelease( pColorSource );
- SafeRelease( pColorReader );
- SafeRelease( pDescription );
- if( pSensor ){
- pSensor->Close();
- }
- SafeRelease( pSensor );
- return 0;
- }
分辨率是大大的提高了啊~~


 1913
1913

 被折叠的 条评论
为什么被折叠?
被折叠的 条评论
为什么被折叠?
 到【灌水乐园】发言


