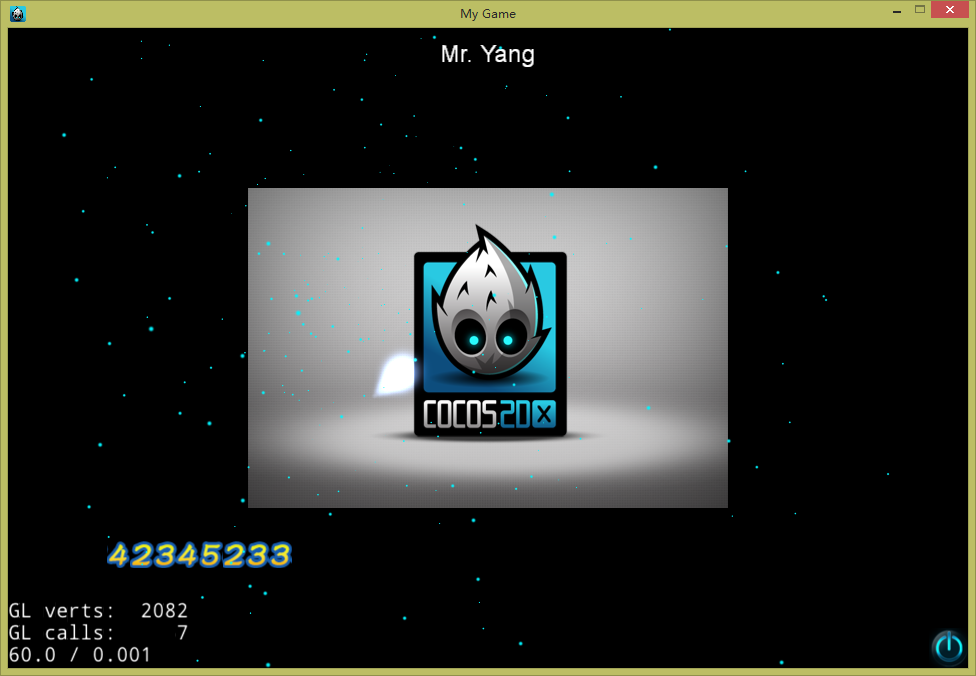
游戏开始中一般都会使用到粒子效果,可以把这些粒子效果的加载和获取都放到一个全局单例的粒子管理器ParticleManager中进行管理,以键值对的形式放到管理器中的map容器里
粒子管理器头文件ParticleManager.h
#include "cocos2d.h"
class ParticleManager
{
public:
	~ParticleManager();
	void addParticle(std::string key, std::string value);
	cocos2d::ParticleSystemQuad* getParticle(std::string key);
	static ParticleManager* getInstance();
private:
	ParticleManager();
	static ParticleManager* instance;
	std::map<std::string, cocos2d::ParticleSystemQuad*> particleMap;
};
粒子管理器源文件ParticleManager.cpp
#include "ParticleManager.h"
USING_NS_CC;

ParticleManager* ParticleManager::instance = NULL;

ParticleManager::ParticleManager()
{
	particleMap.clear();
}


ParticleManager::~ParticleManager()
{
	particleMap.clear();
	CCLOG("delete particleManager");
}

void ParticleManager::addParticle(std::string key, std::string value)
{
	auto paricle = ParticleSystemQuad::create(value);
	particleMap[key] = paricle;
}

ParticleSystemQuad* ParticleManager::getParticle(std::string key)
{
	auto temp = particleMap.find(key)->second;
	if (temp != NULL)
	{
		return temp;
	}
	return NULL;
}

ParticleManager*ParticleManager::getInstance()
{
	if (instance == NULL) instance = new ParticleManager();
	return instance;
}
加载粒子效果,一般在游戏前加载好需要用到的粒子效果,游戏时就可以直接用,这里演示加载两个粒子效果
//加载粒子效果
	auto pm = ParticleManager::getInstance();
	pm->addParticle("vani", "vanishingPoint.plist");
	pm->addParticle("emis", "menuEmission.plist");
获取粒子效果
auto pm = ParticleManager::getInstance();
	auto vvv = pm->getParticle("vani");
	vvv->setAnchorPoint(Point(0.5f, 0.5f));
	vvv->setPosition(Point(400, 400));
	this->addChild(vvv, 1, 1);
效果

Cocos2dx 3.0rc 对particle粒子的加工封装,最大限度减少粒子的生产,提高效率
新建一个效果类,作为粒子的加工类,主要是为了方便加工不同的粒子,根据传入参数layer和position,在特定层的特定坐标上显示粒子效果。
总体的思路是:游戏主界面初始化时在init()方法里调用EffetcManager里的静态方法setLayer()将游戏layer set进静态成员_effectLayer,然后游戏时调用createExplosion传入Poin坐标参数,如果效果池里面有效果对象,则直接取出来用,没有则新生成一个,就可以实现在特定层的特定坐标显示效果。效果使用完之后,回收到效果池中,供下一次使用。
新建一个效果管理类
头文件Effects.h
class EffectManager
{
public:
	static void createExplosion(Point pos); //设置小爆炸效果的显示坐标
    static void createBigExplosion(Point pos);//设置大爆炸效果的显示坐标
    static void setLayer(Node* layer);//设置要显示的layer
    static Vector<SmallExplosion*> _smallExplPool;//存放小爆炸效果的容器
	static Vector<BigExplosion*> _bigExplPool;;//存放大爆炸效果的容器
protected:
    static Node* _effectLayer;
};
源文件Effects.cpp
Node* EffectManager::_effectLayer = nullptr;
Vector<SmallExplosion*> EffectManager::_smallExplPool;
Vector<BigExplosion*> EffectManager::_bigExplPool;

void EffectManager::createExplosion(Point pos)
{
	if (!_effectLayer)//如果没有设置要显示的层,直接返回
	{
		return;
	}
	SmallExplosion* explosion = nullptr;
	if (!_smallExplPool.empty())//如果小爆炸效果池不为空,则从爆炸池中取出来
	{
		explosion = _smallExplPool.back();//取出最后一个元素
		_smallExplPool.popBack();//同时清楚最后一个元素,防止同一个效果同时被使用两次
	}
	else//否则创建新的小爆炸
	{
		explosion = SmallExplosion::create();
		explosion->retain();//引用加1,因为显示完后还要再利用,不能让内存自动回收
	}
	explosion->createExplosion(_effectLayer, pos);
}

void EffectManager::createBigExplosion(Point pos)
{
	if (!_effectLayer)
	{
		return;
	}
	BigExplosion* explosion = nullptr;
	if (!_bigExplPool.empty())
	{
		explosion = _bigExplPool.back();
		_bigExplPool.popBack();
	}
	else
	{
		explosion = BigExplosion::create();
		explosion->retain();
	}
	explosion->createExplosion(_effectLayer, pos);
}

//再游戏主界面会调用这个静态方法,把主界面set进去
void EffectManager::setLayer(Node *layer)
{
	_effectLayer = layer;
新建爆炸效果类
头文件:Explosion.h
class SmallExplosion : public cocos2d::Node{
public:
    CREATE_FUNC(SmallExplosion);
    bool init();
    void createExplosion(Node* _effectLayer, cocos2d::Point pos);
private:
    void recycle(float dt);
    cocos2d::ParticleSystemQuad* part1;
    cocos2d::ParticleSystemQuad* part2;

};

class BigExplosion : public cocos2d::Node{
public:
    CREATE_FUNC(BigExplosion);
    bool init();
    void createExplosion(Node* _effectLayer,cocos2d::Point pos);
    cocos2d::ParticleSystemQuad* part1;
    cocos2d::ParticleSystemQuad* part2;
    cocos2d::ParticleSystemQuad* part3;
private:
    void recycle(float dt);
};
源文件:Explosion.cpp
//小爆炸初始化
bool SmallExplosion::init(){

    auto part1_frame=SpriteFrameCache::getInstance()->getSpriteFrameByName("toonSmoke.png");
    ValueMap vm1=ParticleManager::getInstance()->GetPlistData("toonSmoke");
    part1 = ParticleSystemQuad::create(vm1,part1_frame);
    this->addChild(part1);
    auto part2_frame=SpriteFrameCache::getInstance()->getSpriteFrameByName("toonFlare.png");
    ValueMap vm2=ParticleManager::getInstance()->GetPlistData("flare");
    part2 = ParticleSystemQuad::create(vm2,part2_frame);
    this->addChild(part2);
    part1->setTotalParticles(10);
    part1->setEmissionRate(9999999999);
    part2->setTotalParticles(3);
    part2->setEmissionRate(9999999999);
    part1->setRotation3D(Vertex3F(30,0,0));
    part2->setRotation3D(Vertex3F(30,0,0));
    return true;
}

//产生小爆炸,传入的参数是需要显示爆炸的节点,和坐标
void SmallExplosion::createExplosion(Node* _effectLayer, Point pos){
    part1->setTotalParticles(8);
    part1->setEmissionRate(9999999999);
    part1->setScale(0.7);
    part2->setTotalParticles(5);
    part2->setEmissionRate(9999999999);
    _effectLayer->addChild(this,7);
    part1->setRotation3D(Vertex3F(30,0,0));
    part2->setRotation3D(Vertex3F(30,0,0));
    this->setPosition(pos);
	//爆炸后1.5秒消失
    this->scheduleOnce(schedule_selector(SmallExplosion::recycle), 1.5);
}

//小爆炸回收
void SmallExplosion::recycle(float dt){
    this->removeFromParentAndCleanup(false);
    EffectManager::_smallExplPool.pushBack(this);//加回容器里,达到循环利用的效果
}

//大爆炸初始化
bool BigExplosion::init(){
    auto part1_frame=SpriteFrameCache::getInstance()->getSpriteFrameByName("toonSmoke.png");
    ValueMap vm1=ParticleManager::getInstance()->GetPlistData("toonSmoke");
    part1 = ParticleSystemQuad::create(vm1,part1_frame);
    this->addChild(part1);
    auto part2_frame=SpriteFrameCache::getInstance()->getSpriteFrameByName("toonGlow.png");
    ValueMap vm2=ParticleManager::getInstance()->GetPlistData("glow");
    part2 = ParticleSystemQuad::create(vm2,part2_frame);
    this->addChild(part2);
    auto part3_frame=SpriteFrameCache::getInstance()->getSpriteFrameByName("toonFlare2.png");
    ValueMap vm3=ParticleManager::getInstance()->GetPlistData("debris");
    part3 = ParticleSystemQuad::create(vm3,part3_frame);
    this->addChild(part3);
    part1->setTotalParticles(10);
    part1->setEmissionRate(9999999999);
    part2->setTotalParticles(3);
    part2->setEmissionRate(9999999999);
    part3->setTotalParticles(20);
    part3->setEmissionRate(9999999999);
    part3->setScale(1.5);
    part1->setRotation3D(Vertex3F(30,0,0));
    part2->setRotation3D(Vertex3F(30,0,0));
    part3->setRotation3D(Vertex3F(30,0,0));
    return true;
}

//产生大爆炸,传入的参数是需要显示爆炸的节点,和坐标
void BigExplosion::createExplosion(Node *_effectLayer, Point pos){
    _effectLayer->addChild(this,6);
    part1->resetSystem();
    part2->resetSystem();
    part3->resetSystem();
    setPosition(pos);
    this->scheduleOnce(schedule_selector(BigExplosion::recycle), 1.2);
}
//大爆炸回收
void BigExplosion::recycle(float dt){
    this->removeFromParentAndCleanup(false);
    EffectManager::_bigExplPool.pushBack(this);
}
最后,在游戏主界面初始化方法init()里把该layer设置进EffectManager类里,调用这个静态方法staticvoidsetLayer(Node*layer);//设置要显示的layer,如下
EffectManager::setLayer(this);//设置爆炸效果
然后在controll里就可以调用爆炸效果的方法,直接传入一个坐标就可以在该坐标显示爆炸效果,顺便加个音效,也可以把音效封装进爆炸效果里。
EffectManager::createExplosion(b->getPosition());
CocosDenshion::SimpleAudioEngine::getInstance()->playEffect("boom2.mp3");


 332
332

 被折叠的 条评论
为什么被折叠?


