


1.1 软件准备
Arduino IDE
官方下载链接:https://www.arduino.cc/download_handler.php
或者Arduino社区资源:http://www.arduino.cn/thread-5838-1-1.html
建议下载最新版的安装文件,免安装的不会关联.ino文件,每次都要选有点麻烦。Visual Studio
虽然官方的Arduino IDE是根正苗红的编译软件,但是实际上也没人用这个编,连代码高亮等基础功能都没有。建议配合万能的Visual Studio使用,事半功倍。这个建议下载Visual Studio 2015 community版本,免费而且该有的功能都有了。当然,最新的2017RC也可以,但是才出的是不是就要更新,麻烦,据说稳定性也还不太可以。只需要安装一个Arduino插件即可实现在VS中编译运行Arduino。
官网链接:https://www.visualstudio.com/zh-hans/thank-you-downloading-visual-studio/?sku=Community&rel=15Multiwii v2.4源代码
开源飞控程序,已经更新到2.4版本了,直接看最新的就行了。此开源程序被托管在了GoogleCode上
官方下载链接:https://code.google.com/archive/p/multiwii/FTDI USB转串口工具
因为MWC飞控板是通过串口和上位机(可以理解为控制平台,譬如你的计算机)通信的,而现在的笔记本电脑都不配备串口,所以需要这个软件来进行转换。
官方链接:http://www.ftdichip.com/Drivers/CDM/CDM21226_Setup.zipJava环境
按照自己电脑,去官网下载最新的Jre或者JDK。Jre是java运行环境,jdk是完整的Java 开发套装,自然也包括了java环境。
Jre官网链接:http://www.oracle.com/technetwork/java/javase/downloads/jre8-downloads-2133155.html
JDK官网链接:http://www.oracle.com/technetwork/java/javase/downloads/jdk8-downloads-2133151.html
1.2 硬件准备
硬件需求很简单,到目前为止,你只需要一块MWC的飞控板,例如我的Cirus AIOP,而且要清楚知道你的飞控板的型号,所带的传感器类型。
当然,还有一根数据线,接口类型得和你的板子下载借口相同,买飞控板都有送,一般用来连接安卓手机的数据线就可以。
2 开始旅程
好的,到这里,你已经准备好了所有的行囊,武器装备,可以开始踏上这条没有尽头的旅程了。
将步骤分为一下几个部分:
2.1 USB转串口驱动安装
用数据线连接飞控板和电脑,打开FTDI程序,按程序一步步安装就行,不会有什么问题。
若安装成功,可以在电脑的设备管理器里看到端口COM X(X根据每个电脑不同都会有所不同,我的就是com3)
2.2 安装Arduino
依照安装程序即可,记住安装路径
2.3 安装Java,配置环境
教程很多,随意百度,在此就不再赘述了。
http://jingyan.baidu.com/article/fea4511a12b158f7bb9125b9.html
http://www.runoob.com/java/java-environment-setup.html
2.4 VS环境配置
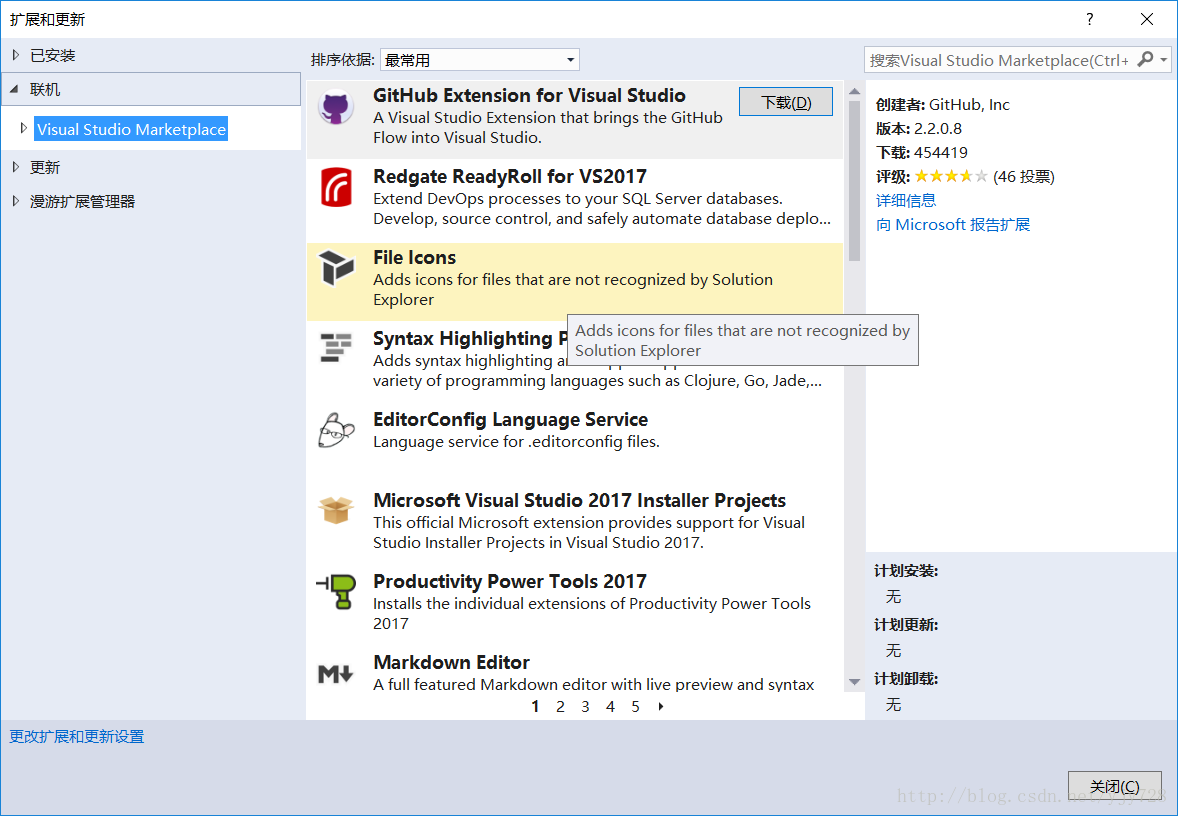
打开Visual Studio——工具——扩展与更新
左边选择联机,然后在右上方的搜索框里输入arduino,
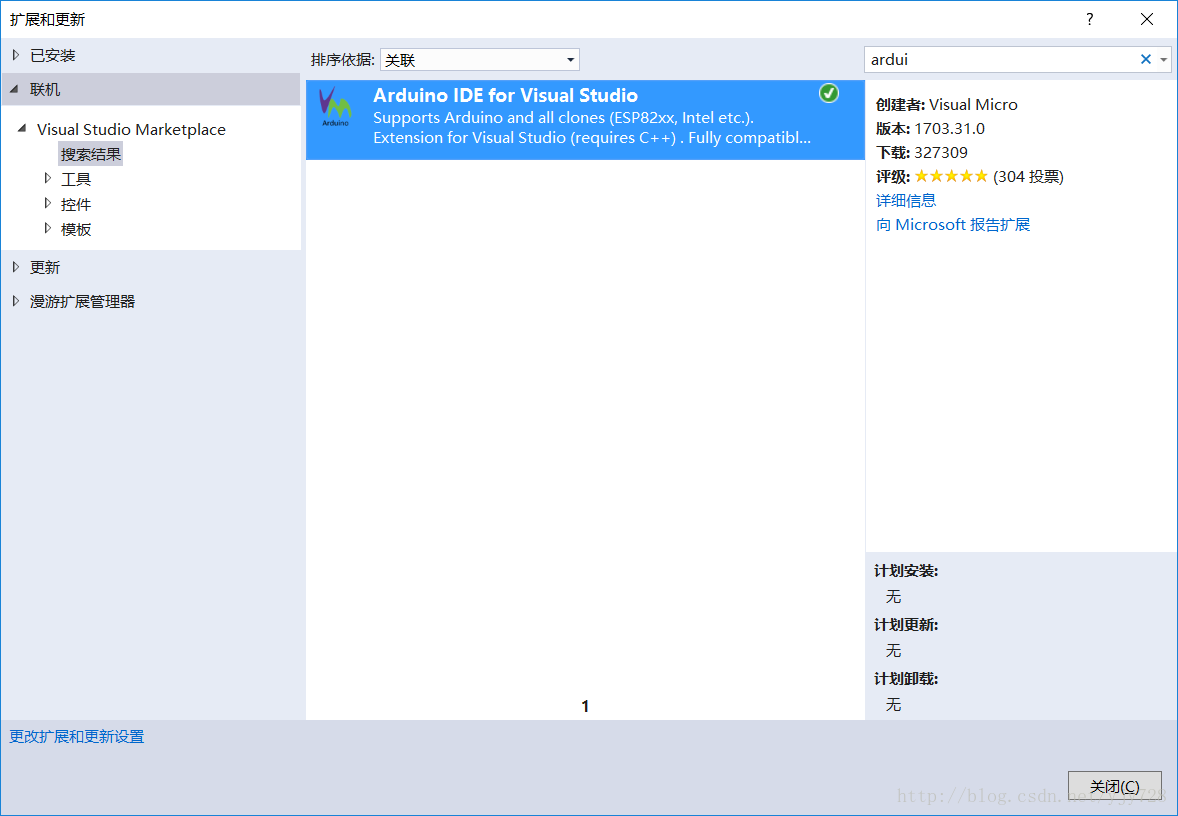
点击安装,结束后重启VS,就能看到多了一栏,依次点击vMicro——General——Configure Ide Locatios
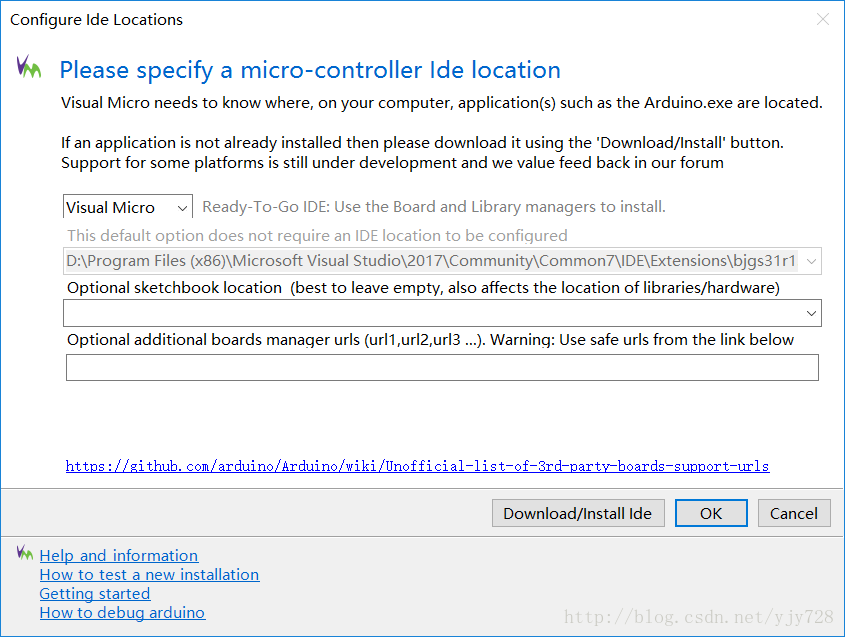
下拉框里选择Arduino1.6/1.8,将下面的第一个路径栏选到你安装的Arduino目录,按ok结束配置。
接下来定位到工具栏

第一个选择Arduino1.6/1.8,第二个依据你飞控板的型号选择,像我的就是Mega2560,第三个下拉框如果什么都没有,那就是你的USB转串口驱动没装好。若显示COM X即表示驱动已安装完毕。
至此,大功告成。
3 验证程序
3.1 Arduino IDE
现尝试在原生环境下编译
打开Arduino,设置同上,按自己飞控和电脑情况具体配置
工具——开发板——(Mega2560),
工具——处理器——(Mega2560),
工具——端口——(COM3)
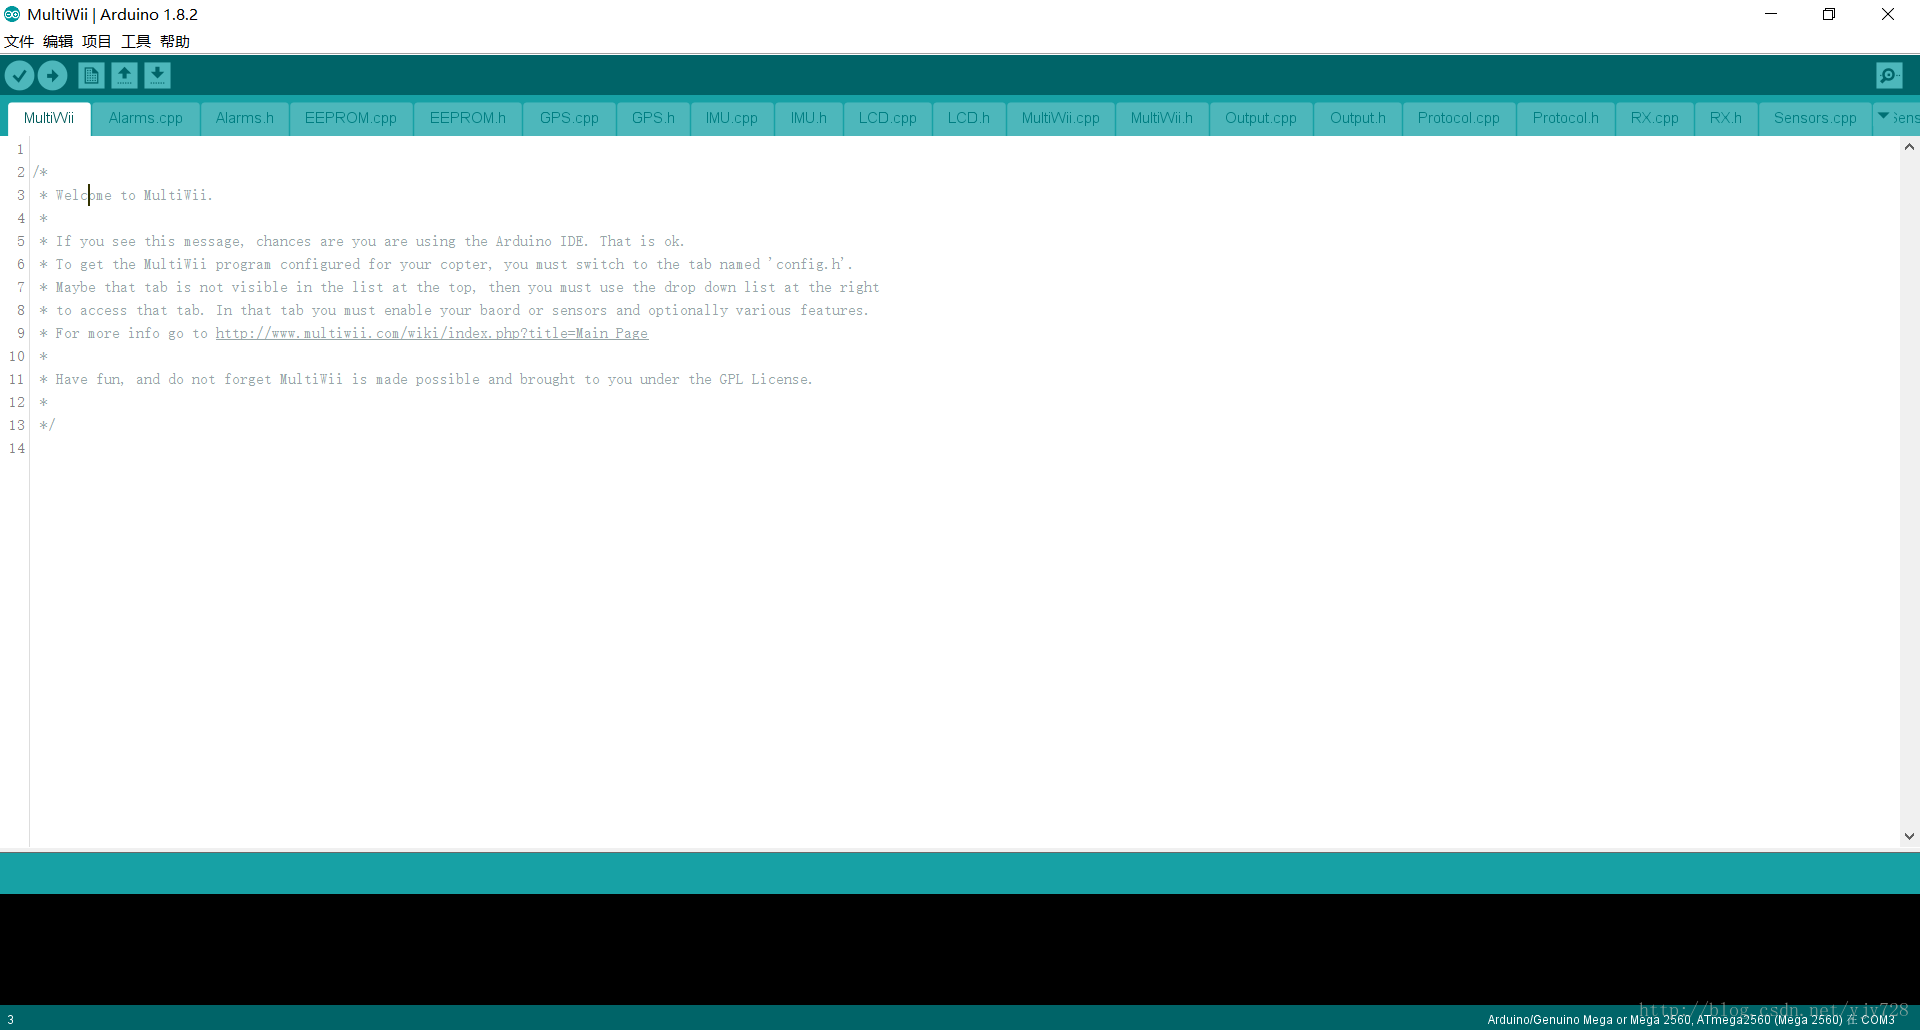
文件——打开——(你解压后的Multiwii目录下的Multiwii.ino文件)
http://www.cnblogs.com/Tranquilty/p/4848853.html
在这里,我们要按照自己的情况来设置,
3.1.1 选择飞行器类型
/**************************    The type of multicopter    ****************************/
    //#define GIMBAL
    //#define BI
    //#define TRI
    //#define QUADP
    #define QUADX
    //#define Y4
    //#define Y6
    //#define HEX6
    //#define HEX6X
    //#define HEX6H  // New Model
    //#define OCTOX8
    //#define OCTOFLATP
    //#define OCTOFLATX
    //#define FLYING_WING
    //#define VTAIL4
    //#define AIRPLANE
    //#define SINGLECOPTER
    //#define DUALCOPTER
    //#define HELI_120_CCPM
    //#define HELI_90_DEG
这里选择了QUADX,即X型四轴;
3.1.2 选择飞控类型
    /***************************    Combined IMU Boards    ********************************/
      /* if you use a specific sensor board:
         please submit any correction to this list.
           Note from Alex: I only own some boards, for other boards, I'm not sure, the info was gathered via rc forums, be cautious */
      //#define FFIMUv1         // first 9DOF+baro board from Jussi, with HMC5843                   <- confirmed by Alex
      //#define FFIMUv2         // second version of 9DOF+baro board from Jussi, with HMC5883       <- confirmed by Alex
      //#define FREEIMUv1       // v0.1 & v0.2 & v0.3 version of 9DOF board from Fabio
      //#define FREEIMUv03      // FreeIMU v0.3 and v0.3.1
      //#define FREEIMUv035     // FreeIMU v0.3.5 no baro
      //#define FREEIMUv035_MS  // FreeIMU v0.3.5_MS                                                <- confirmed by Alex
      //#define FREEIMUv035_BMP // FreeIMU v0.3.5_BMP
      //#define FREEIMUv04      // FreeIMU v0.4 with MPU6050, HMC5883L, MS561101BA                  <- confirmed by Alex
      //#define FREEIMUv043     // same as FREEIMUv04 with final MPU6050 (with the right ACC scale)
      //#define NANOWII         // the smallest multiwii FC based on MPU6050 + pro micro based proc <- confirmed by Alex
      //#define PIPO            // 9DOF board from erazz
      //#define QUADRINO        // full FC board 9DOF+baro board from witespy  with BMP085 baro     <- confirmed by Alex
      //#define QUADRINO_ZOOM   // full FC board 9DOF+baro board from witespy  second edition
      //#define QUADRINO_ZOOM_MS// full FC board 9DOF+baro board from witespy  second edition       <- confirmed by Alex
      //#define ALLINONE        // full FC board or standalone 9DOF+baro board from CSG_EU
      //#define AEROQUADSHIELDv2
      //#define ATAVRSBIN1      // Atmel 9DOF (Contribution by EOSBandi). requires 3.3V power.
      //#define SIRIUS          // Sirius Navigator IMU                                             <- confirmed by Alex
      //#define SIRIUSGPS       // Sirius Navigator IMU  using external MAG on GPS board            <- confirmed by Alex
      //#define SIRIUS600       // Sirius Navigator IMU  using the WMP for the gyro
      //#define SIRIUS_AIR      // Sirius Navigator IMU 6050 32U4 from MultiWiiCopter.com           <- confirmed by Alex
      //#define SIRIUS_AIR_GPS  // Sirius Navigator IMU 6050 32U4 from MultiWiiCopter.com with GPS/MAG remote located
      //#define SIRIUS_MEGAv5_OSD //  Paris_Sirius™ ITG3050,BMA280,MS5611,HMC5883,uBlox  http://www.Multiwiicopter.com <- confirmed by Alex
      //#define MINIWII         // Jussi's MiniWii Flight Controller                                <- confirmed by Alex
      //#define MICROWII        // MicroWii 10DOF with ATmega32u4, MPU6050, HMC5883L, MS561101BA from http://flyduino.net/
      //#define CITRUSv2_1      // CITRUS from qcrc.ca
      //#define CHERRY6DOFv1_0
      //#define DROTEK_10DOF    // Drotek 10DOF with ITG3200, BMA180, HMC5883, BMP085, w or w/o LLC
      //#define DROTEK_10DOF_MS // Drotek 10DOF with ITG3200, BMA180, HMC5883, MS5611, LLC
      //#define DROTEK_6DOFv2   // Drotek 6DOF v2
      //#define DROTEK_6DOF_MPU // Drotek 6DOF with MPU6050
      //#define DROTEK_10DOF_MPU//
      //#define MONGOOSE1_0     // mongoose 1.0    http://store.ckdevices.com/
      //#define CRIUS_LITE      // Crius MultiWii Lite
      //#define CRIUS_SE        // Crius MultiWii SE
      //#define CRIUS_SE_v2_0   // Crius MultiWii SE 2.0 with MPU6050, HMC5883 and BMP085
      //#define OPENLRSv2MULTI  // OpenLRS v2 Multi Rc Receiver board including ITG3205 and ADXL345
      //#define BOARD_PROTO_1   // with MPU6050 + HMC5883L + MS baro
      //#define BOARD_PROTO_2   // with MPU6050 + slave  MAG3110 + MS baro
      //#define GY_80           // Chinese 10 DOF with  L3G4200D ADXL345 HMC5883L BMP085, LLC
      //#define GY_85           // Chinese 9 DOF with  ITG3205 ADXL345 HMC5883L LLC
      //#define GY_86           // Chinese 10 DOF with  MPU6050 HMC5883L MS5611, LLC
      //#define GY_88 // Chinese 10 DOF with MPU6050 HMC5883L BMP085, LLC
      //#define GY_521          // Chinese 6  DOF with  MPU6050, LLC
      //#define INNOVWORKS_10DOF // with ITG3200, BMA180, HMC5883, BMP085 available here http://www.diymulticopter.com
      //#define INNOVWORKS_6DOF // with ITG3200, BMA180 available here http://www.diymulticopter.com
      //#define MultiWiiMega    // MEGA + MPU6050+HMC5883L+MS5611 available here http://www.diymulticopter.com
      //#define PROTO_DIY       // 10DOF mega board
      //#define IOI_MINI_MULTIWII// www.bambucopter.com
      //#define Bobs_6DOF_V1     // BobsQuads 6DOF V1 with ITG3200 & BMA180
      //#define Bobs_9DOF_V1     // BobsQuads 9DOF V1 with ITG3200, BMA180 & HMC5883L
      //#define Bobs_10DOF_BMP_V1 // BobsQuads 10DOF V1 with ITG3200, BMA180, HMC5883L & BMP180 - BMP180 is software compatible with BMP085
      //#define FLYDUINO_MPU       // MPU6050 Break Out onboard 3.3V reg
      #define CRIUS_AIO_PRO
      //#define DESQUARED6DOFV2GO  // DEsquared V2 with ITG3200 only
      //#define DESQUARED6DOFV4    // DEsquared V4 with MPU6050
      //#define LADYBIRD
      //#define MEGAWAP_V2_STD     // available here: http://www.multircshop.com                    <- confirmed by Alex
      //#define MEGAWAP_V2_ADV
      //#define HK_MultiWii_SE_V2  // Hobbyking board with MPU6050 + HMC5883L + BMP085
      //#define HK_MultiWii_328P   // Also labeled "Hobbybro" on the back.  ITG3205 + BMA180 + BMP085 + NMC5583L + DSM2 Connector (Spektrum Satellite)
      //#define RCNet_FC           // RCNet FC with MPU6050 and MS561101BA  http://www.rcnet.com
      //#define RCNet_FC_GPS       // RCNet FC with MPU6050 + MS561101BA + HMC5883L + UBLOX GPS http://www.rcnet.com
      //#define FLYDU_ULTRA        // MEGA+10DOF+MT3339 FC
      //#define DIYFLYING_MAGE_V1  // diyflying 10DOF mega board with MPU6050 + HMC5883L + BMP085 http://www.indoor-flying.hk
      //#define MultiWii_32U4_SE         // Hextronik MultiWii_32U4_SE
      //#define MultiWii_32U4_SE_no_baro // Hextronik MultiWii_32U4_SE without the MS561101BA to free flash-memory for other functions
      //#define Flyduino9DOF       // Flyduino 9DOF IMU MPU6050+HMC5883l
      //#define Nano_Plane         // Multiwii Plane version with tail-front LSM330 sensor http://www.radiosait.ru/en/page_5324.html
在这里找到你的飞控板类型,如果是买的现成的集成板,一般这里面就能直接找到,如果找到了,跳过下一步,如果没有,直接看下一步。
3.1.3 选择传感器类型
*************************    independent sensors    ********************************/
      /* leave it commented if you already checked a specific board above */
      /* I2C gyroscope */
      //#define WMP
      //#define ITG3050
      //#define ITG3200
      //#define MPU3050
      //#define L3G4200D
      //#define MPU6050       //combo + ACC
      //#define LSM330        //combo + ACC

      /* I2C accelerometer */
      //#define MMA7455
      //#define ADXL345
      //#define BMA020
      //#define BMA180
      //#define BMA280
      //#define LIS3LV02
      //#define LSM303DLx_ACC
      //#define MMA8451Q

      /* I2C barometer */
      //#define BMP085
      //#define MS561101BA

      /* I2C magnetometer */
      //#define HMC5843
      //#define HMC5883
      //#define AK8975
      //#define MAG3110

      /* Sonar */ // for visualization purpose currently - no control code behind
      //#define SRF02 // use the Devantech SRF i2c sensors
      //#define SRF08
      //#define SRF10
      //#define SRF23
这里分别选择你的陀螺仪,加速度计,气压计,地磁计,声呐型号,取消注释。没有的话就保留注释。
接下来,编译(验证)——上传,显示上传成功就代表完成了。
3.1.4 上位机GUI
打开解压缩的Multiwii2.4文件夹,打开MultiWiiConf——application.windows64(按照自己操作系统来,32位打开application.windows32)
不能打开说明java环节没有配置好。
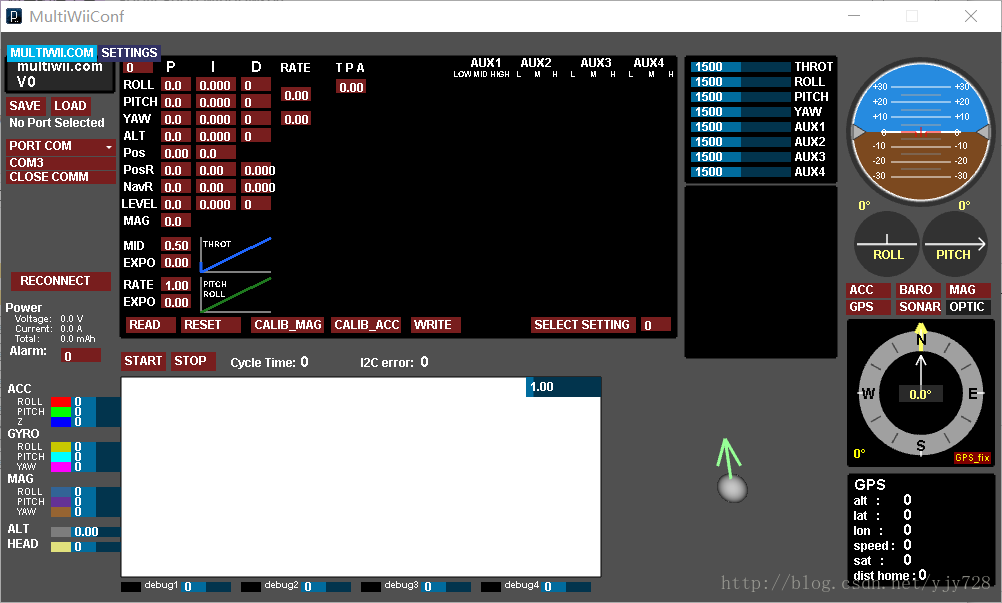
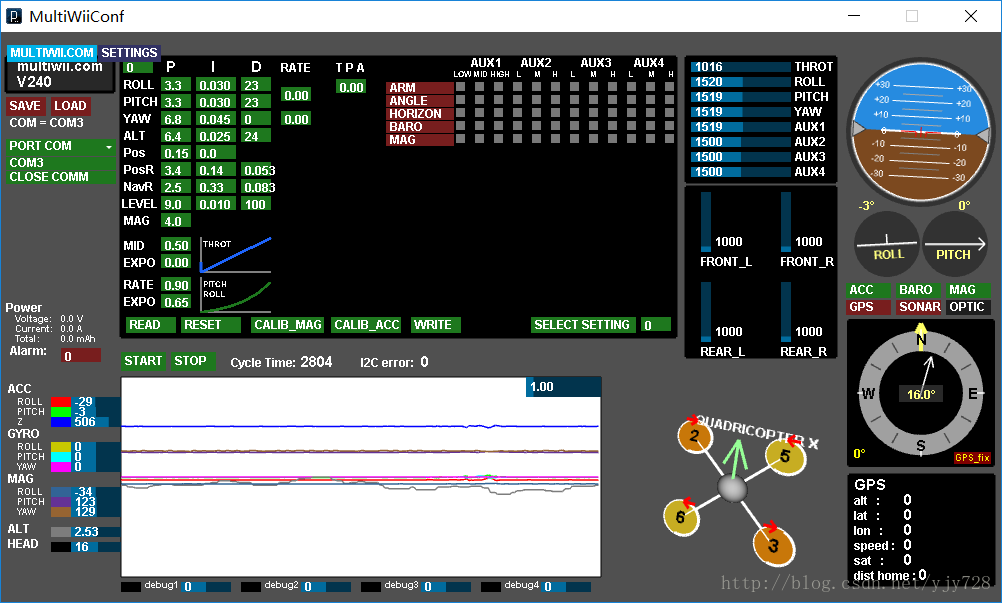
这就是上位机界面。
点击COM3——START 就能看到飞控板被激活了,当然现在只是简单的读取里面传感器的数据,PID等设置的参数。
3.2 VS环境下编译
与Arduino下完全相同,vMicro——Open Existing Arduino Project——Multiwii.ino
Build——Upload
等待上传成功即可,打开上位机GUI步骤同上。
Tips
1. 同一个串口不能被同时占用,所以当打开串口失败是,看看是不是有别的软件正在使用串口。
2. 至此只是简单得走完了一个流程,看到自己的“输入”有了相应的“响应”应该会激励你的学习动力。


 5299
5299


 被折叠的 条评论
为什么被折叠?
被折叠的 条评论
为什么被折叠?
 到【灌水乐园】发言


