


平时工作忙,也没有太多时间写博客,最近研究ardupilot源码,做了个实验,往源码里面加一条测试指令,作为调试方法的验证,特记录一下。
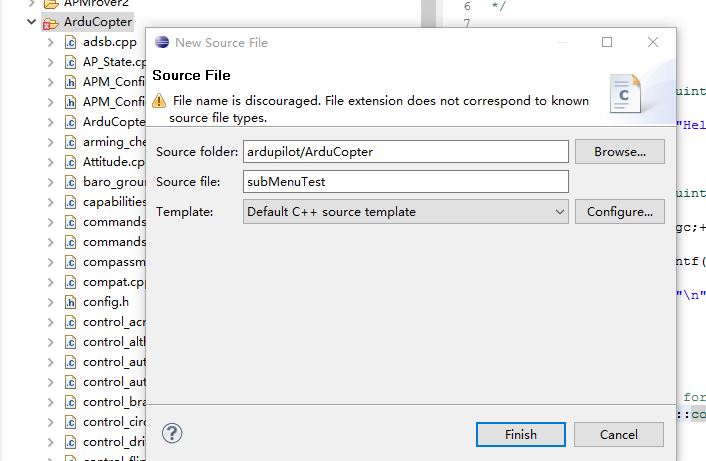
1.在ArduCopter文件里,新建subMenuTest.cpp源文件,用来实现指令所进行的操作。如图:
2.在新建的文件中,添加以下代码:
/*
 * subMenuTest.cpp
 *
 *  Created on: 2016-4-29
 *      Author: zwk
 */

//#include<AP_Menu.h>
#include "Copter.h"

//当键入指令test时,执行对应的操作函数menuTest,此函数统一在Copter.h文件中定义。
int8_t Copter::menuTest(uint8_t argc,const Menu::arg *argv)
{
    hal.console->printf("Hello World\n");
    return 0;
}
//当键入指令tell时,执行对应的操作函数menuTell,此函数统一在Copter.h文件中定义。
int8_t Copter::menuTell(uint8_t argc,const Menu::arg *argv)
{
    for(int i = 0;i < argc;++i)
    {
        hal.console->printf("%s ",argv[i].str);
    }
    hal.console->printf("\n");
    return 0;


}

//command function table for the subMenuTest Menu
static const struct Menu::command subMenuTestCommands[] = {
        {"test",            MENU_FUNC(menuTest)},           //menuTest为指令test对应的操作函数
        {"tell",            MENU_FUNC(menuTell)},           //menuTell为指令tell对应的操作函数
};
// Create the subMenuTest object.
MENU(subMenuTest,"subMenuTest",subMenuTestCommands);

//当键入指令subMenuTest时,执行对应的操作函数subMenuTest_mode,此函数统一在Copter.h文件中定义。
int8_t Copter::subMenuTest_mode(uint8_t argc,const Menu::arg *argv)
{
    hal.console->printf("Commands:\n"
                        "test\n"
                        "tell"
                        "\n");
    subMenuTest.set_limits(100,100);
    subMenuTest.run();
    return 0;
}
3.打开文件system.cpp,分别在main_menu_help和main_menu_commands函数中,将新建的指令subMenuTest添加进去。代码如下
(1)main_menu_help函数
// This is the help function
int8_t Copter::main_menu_help(uint8_t argc, const Menu::arg *argv)
{
    cliSerial->printf("Commands:\n"
                         "  logs\n"
                         "  setup\n"
                         "  test\n"
                         "  subMenuTest"
                         "  reboot\n"
                         "\n");
    return(0);
}
(2)main_menu_commands函数
// Command/function table for the top-level menu.
const struct Menu::command main_menu_commands[] = {
//   command        function called
//   =======        ===============
    {"logs",                MENU_FUNC(process_logs)},
    {"setup",               MENU_FUNC(setup_mode)},
    {"test",                MENU_FUNC(test_mode)},
    {"subMenuTest",         MENU_FUNC(subMenuTest_mode)},
    {"reboot",              MENU_FUNC(reboot_board)},
    {"help",                MENU_FUNC(main_menu_help)},
};
4.打开Copter.h文件,在合适的地方,添加新增指令对应函数的声明,代码为:
    int8_t subMenuTest_mode(uint8_t argc,const Menu::arg *argv);
    int8_t menuTest(uint8_t argc,const Menu::arg *argv);
    int8_t menuTell(uint8_t argc,const Menu::arg *argv);
5.此时,添加指令的代码部分基本完成,后面对整个工程进行编译,依次点击makeTarget中的px4-clean和px4-v2,编译过程如图所示:
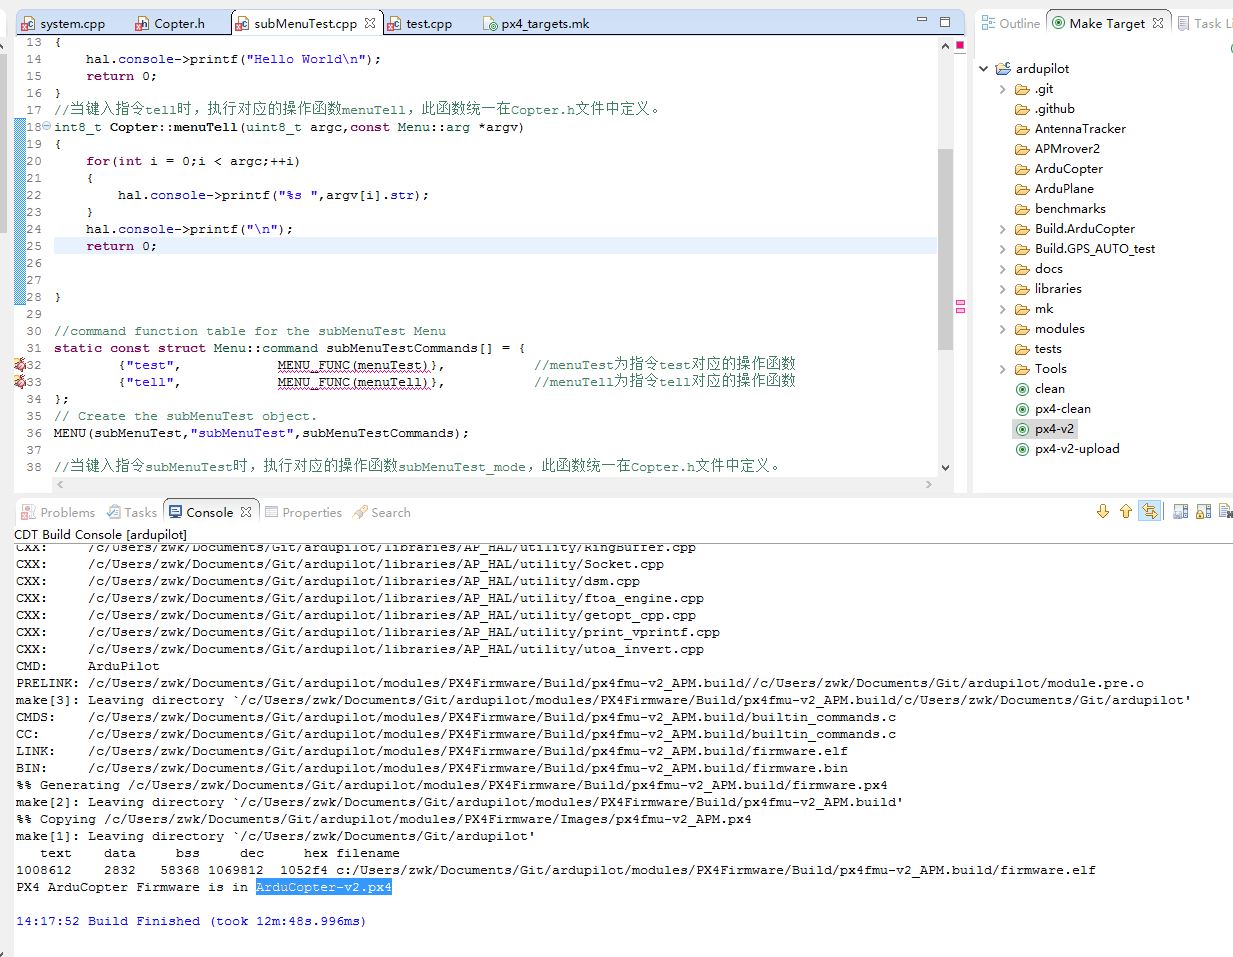
楼主电脑限制,编译时间比较长。。
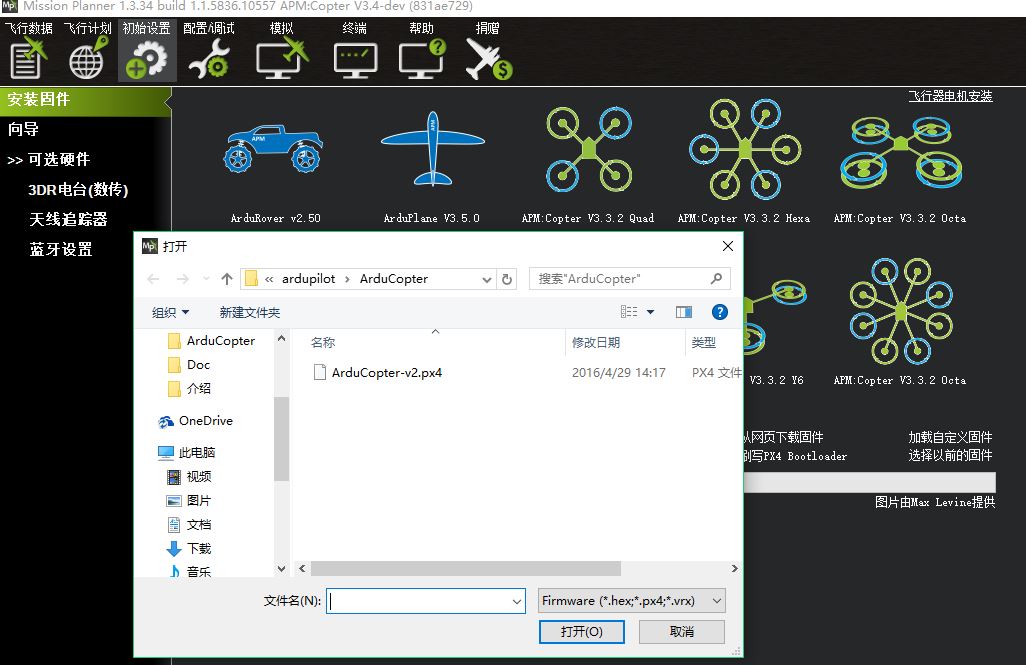
6.打开MissionPlaner,下载编译好的固件(下载固件时不能连接mavlink),如图:
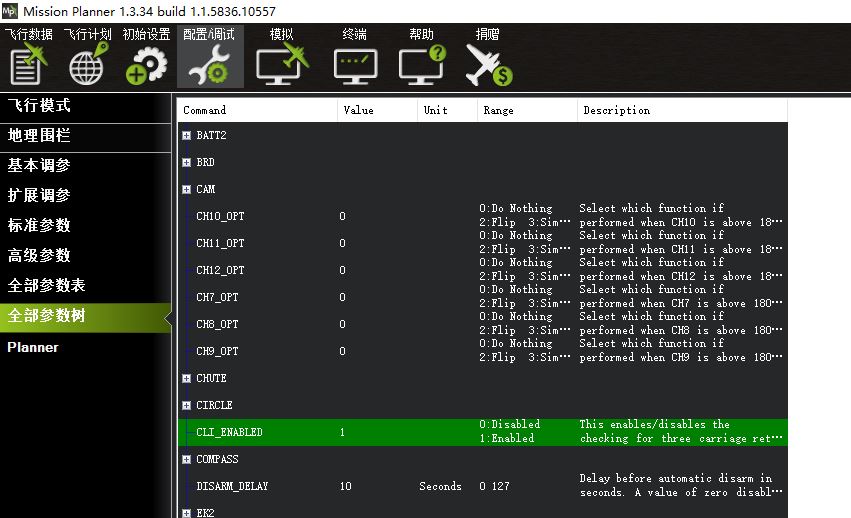
7.修改参数。MissionPlane中,如果要使用终端模块进行调试的话,要使参数CLI_ENABLED的值为1=Enabled.不然终端调试出来的数据是乱码。设置方法如图所示:
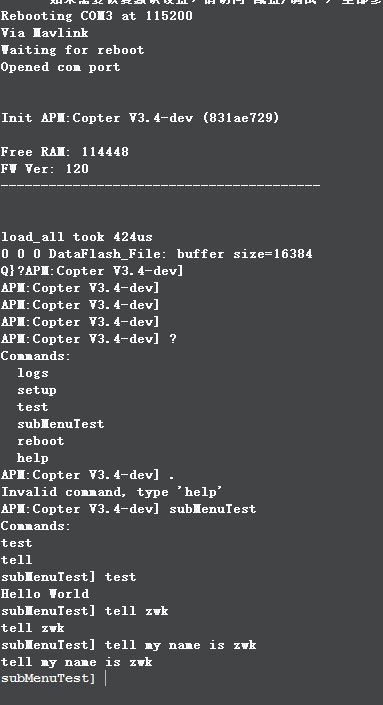
8.参数修改后,重新连接飞控到电脑,打开终端,电机连接,即可进入终端控制模式。下面是我根据新加的指令,做的一些测试。
最后,这些方法也是我在google上学习后加以修改的,如果有什么不对的地方,还望大家能够包含并批评指正。


 1万+
1万+


 被折叠的 条评论
为什么被折叠?
被折叠的 条评论
为什么被折叠?
 到【灌水乐园】发言


