


串口链接:https://pan.baidu.com/s/10jYlSG29KPTNXGO0PGdPtQ?pwd=jsd0
提取码:jsd0
TTL转串口(CH340)需要三根线,TXD(发送端),RXD(接收端),GND(地线)
openmv与串口接线方式
串口的TXD(发送端)与openmv的RXD(接收端)进行匹配,置于openmv的接收端是哪个端口自己设定
串口的RXD(接收端)同理与openmv发送数据的那个端口进行连接
GND接到对应的GND
目录
一、接线
我这里是按照星瞳科技的来,用的也是星瞳科技的源码
TTL转串口TXD端---P5(视觉RXD端)
TTL转串口RXD端---P4(视觉TXD端)
GND---GND
按照以上接好线之后可以下载本博文最上方的安装包安装串口,也可以自行到星瞳科技官网下载
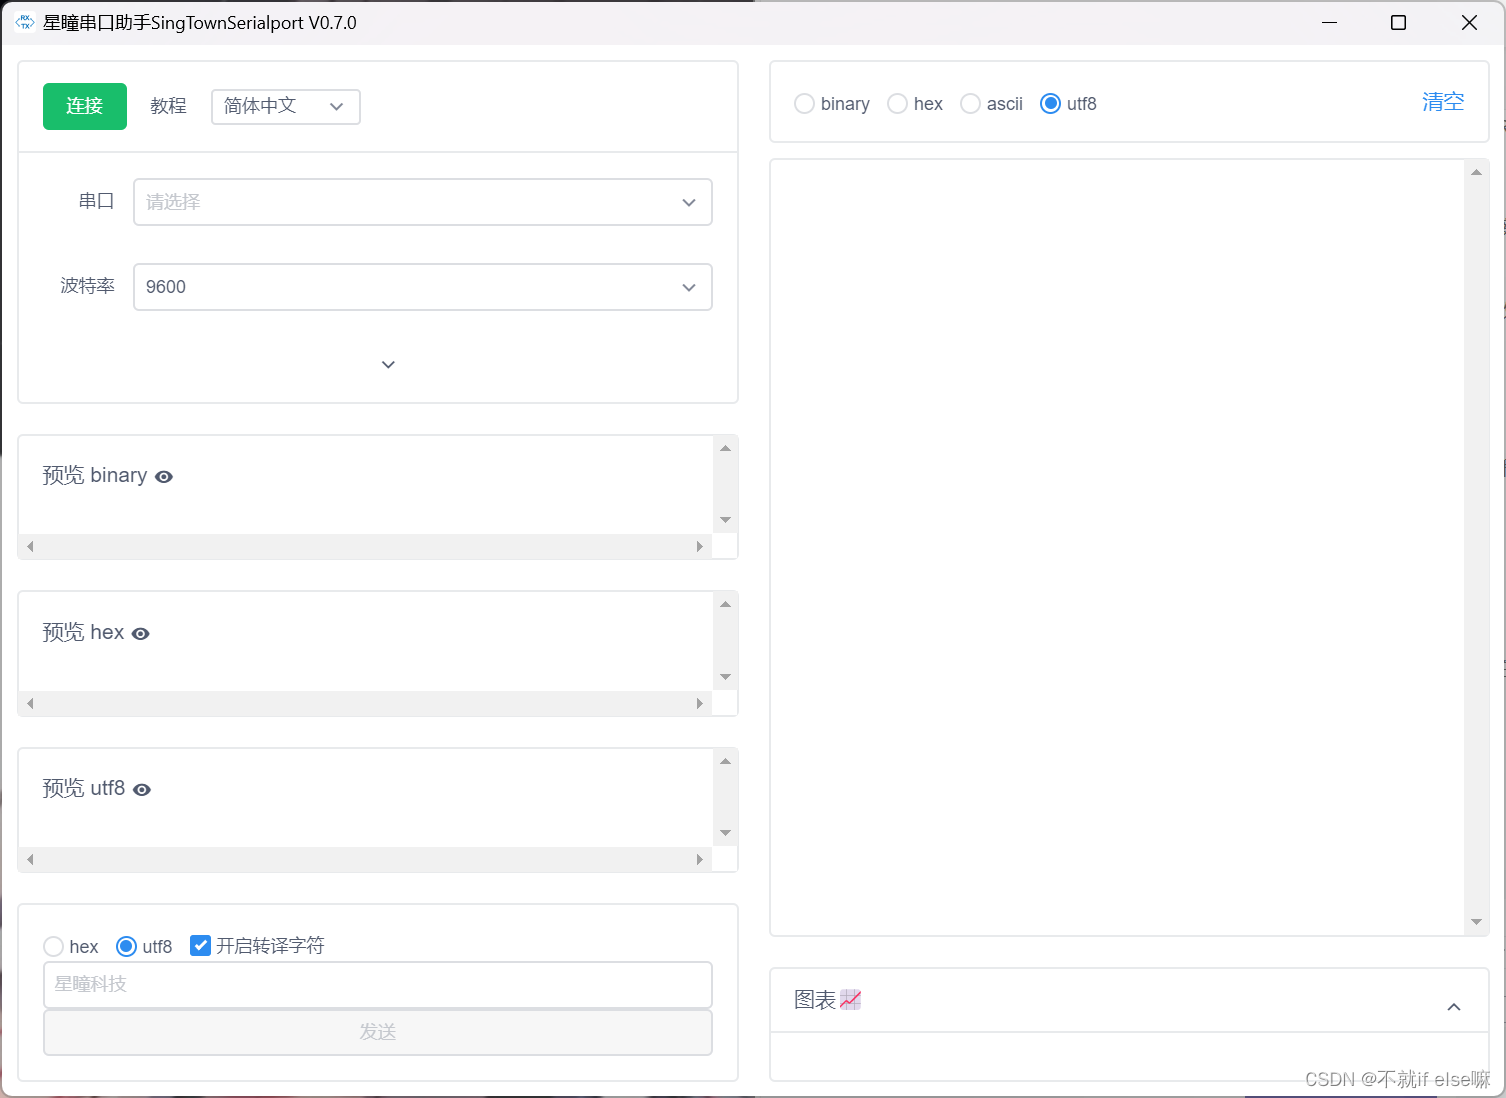
打开串口之后一般是默认这个界面
二、串口查看
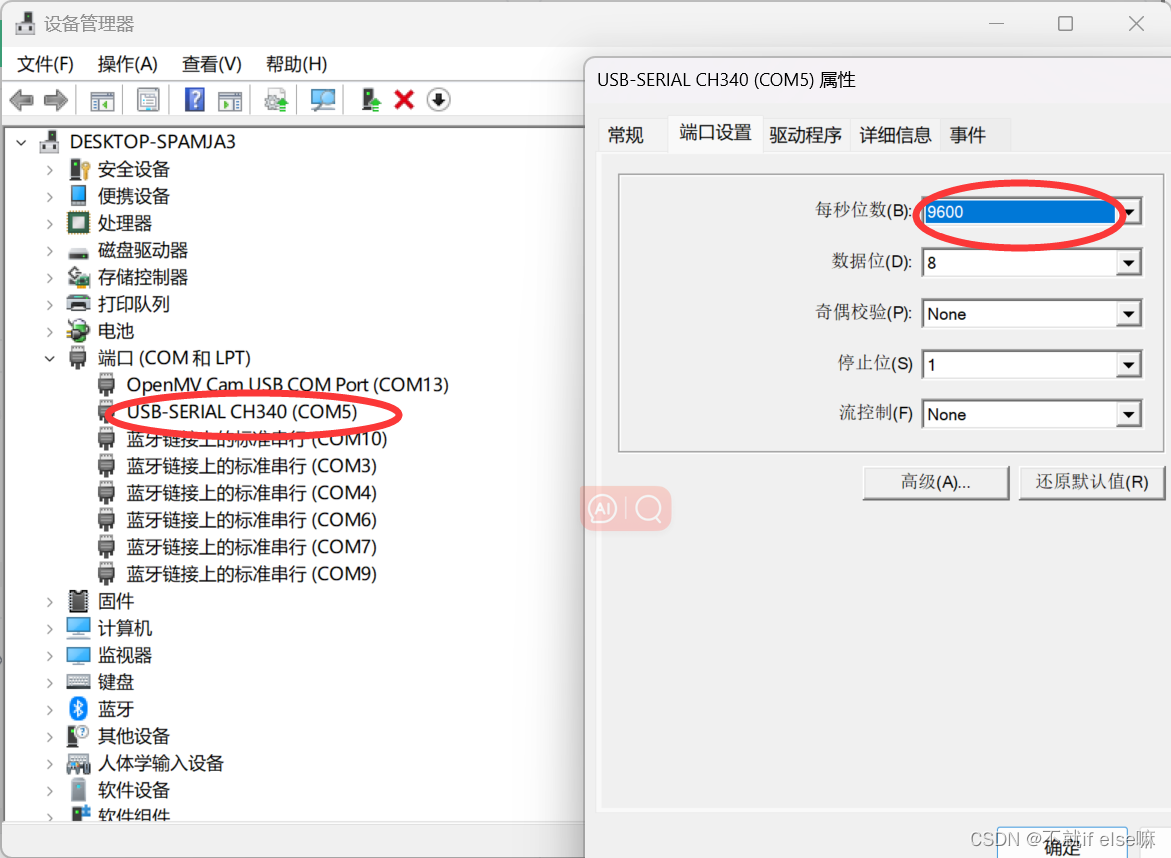
注意openmv和TTL所用到的端口不一样,这里打开串口也是打开TTL转串口的那个口,怎么找到端口,首先在电脑应用搜索"设备管理器"---"端口”找到USB这个所对应的口,然后双击找到端口设置,就可以查看波特率,我这里是COM5波特率为9600,串口查看我的一个博客里有讲到openmv如何进入终端-CSDN博客
配置好以上操作之后,接下来就是代码环节
三、发送数据
这个代码是向串口发送”Hello World"这里自己设定了以下波特率19200,所以在打开串口时需要设置波特率为19200
# This work is licensed under the MIT license.
# Copyright (c) 2013-2023 OpenMV LLC. All rights reserved.
# https://github.com/openmv/openmv/blob/master/LICENSE
#
# UART Control
#
# This example shows how to use the serial port on your OpenMV Cam. Attach pin
# P4 to the serial input of a serial LCD screen to see "Hello World!" printed
# on the serial LCD display.

import time
from pyb import UART

# Always pass UART 3 for the UART number for your OpenMV Cam.
# The second argument is the UART baud rate. For a more advanced UART control
# example see the BLE-Shield driver.
uart = UART(3, 19200, timeout_char=1000)

while True:
    uart.write("Hello World!\r")
    time.sleep_ms(1000)
串口出现这个界面就说明已经能够成功发送数据了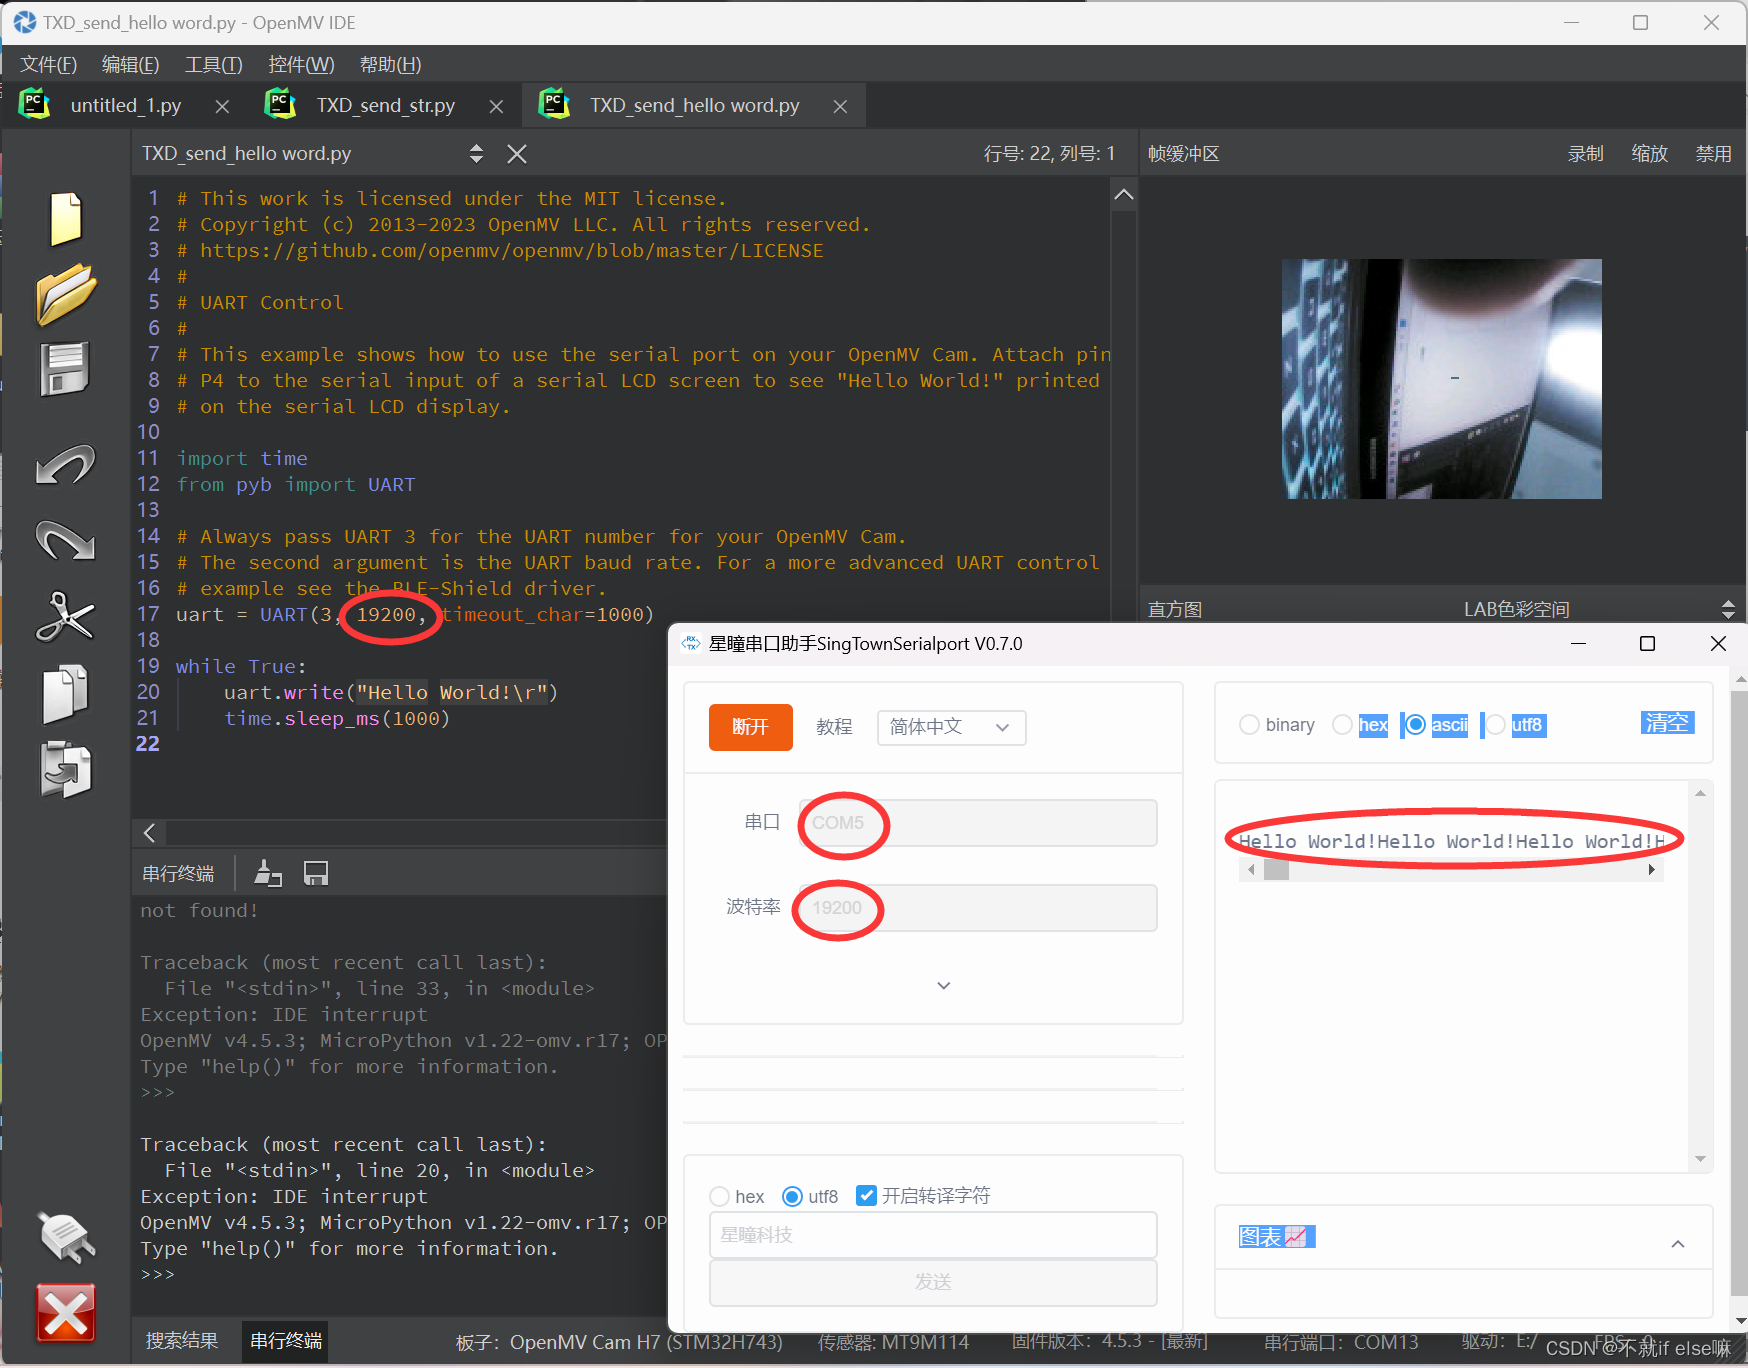
四、接收数据
代码如下:
# This work is licensed under the MIT license.
# Copyright (c) 2013-2023 OpenMV LLC. All rights reserved.
# https://github.com/openmv/openmv/blob/master/LICENSE
#
# UART Control
#
# This example shows how to use the serial port on your OpenMV Cam. Attach pin
# P4 to the serial input of a serial LCD screen to see "Hello World!" printed
# on the serial LCD display.

import time
from pyb import UART

# Always pass UART 3 for the UART number for your OpenMV Cam.
# The second argument is the UART baud rate. For a more advanced UART control
# example see the BLE-Shield driver.
uart = UART(3, 9600, timeout_char=1000)

while(True):
    if uart.any():
        a=uart.readline().decode().strip()#strip删掉回车和换行
        #readline 传送某一个字符;decode 将某一个字符变成字符串
        print(a)
#    uart.write("Hello World!\r")
#    time.sleep_ms(1000)
这里的波特率设置的是9600,所以我在串口助手里要设定波特率为9600再打开对应的端口,这里就可以向openmv发送数据了,我这里发送了一个hello world对应的openmv接收到的也是hello world,他这里是一个字符一个字符传送的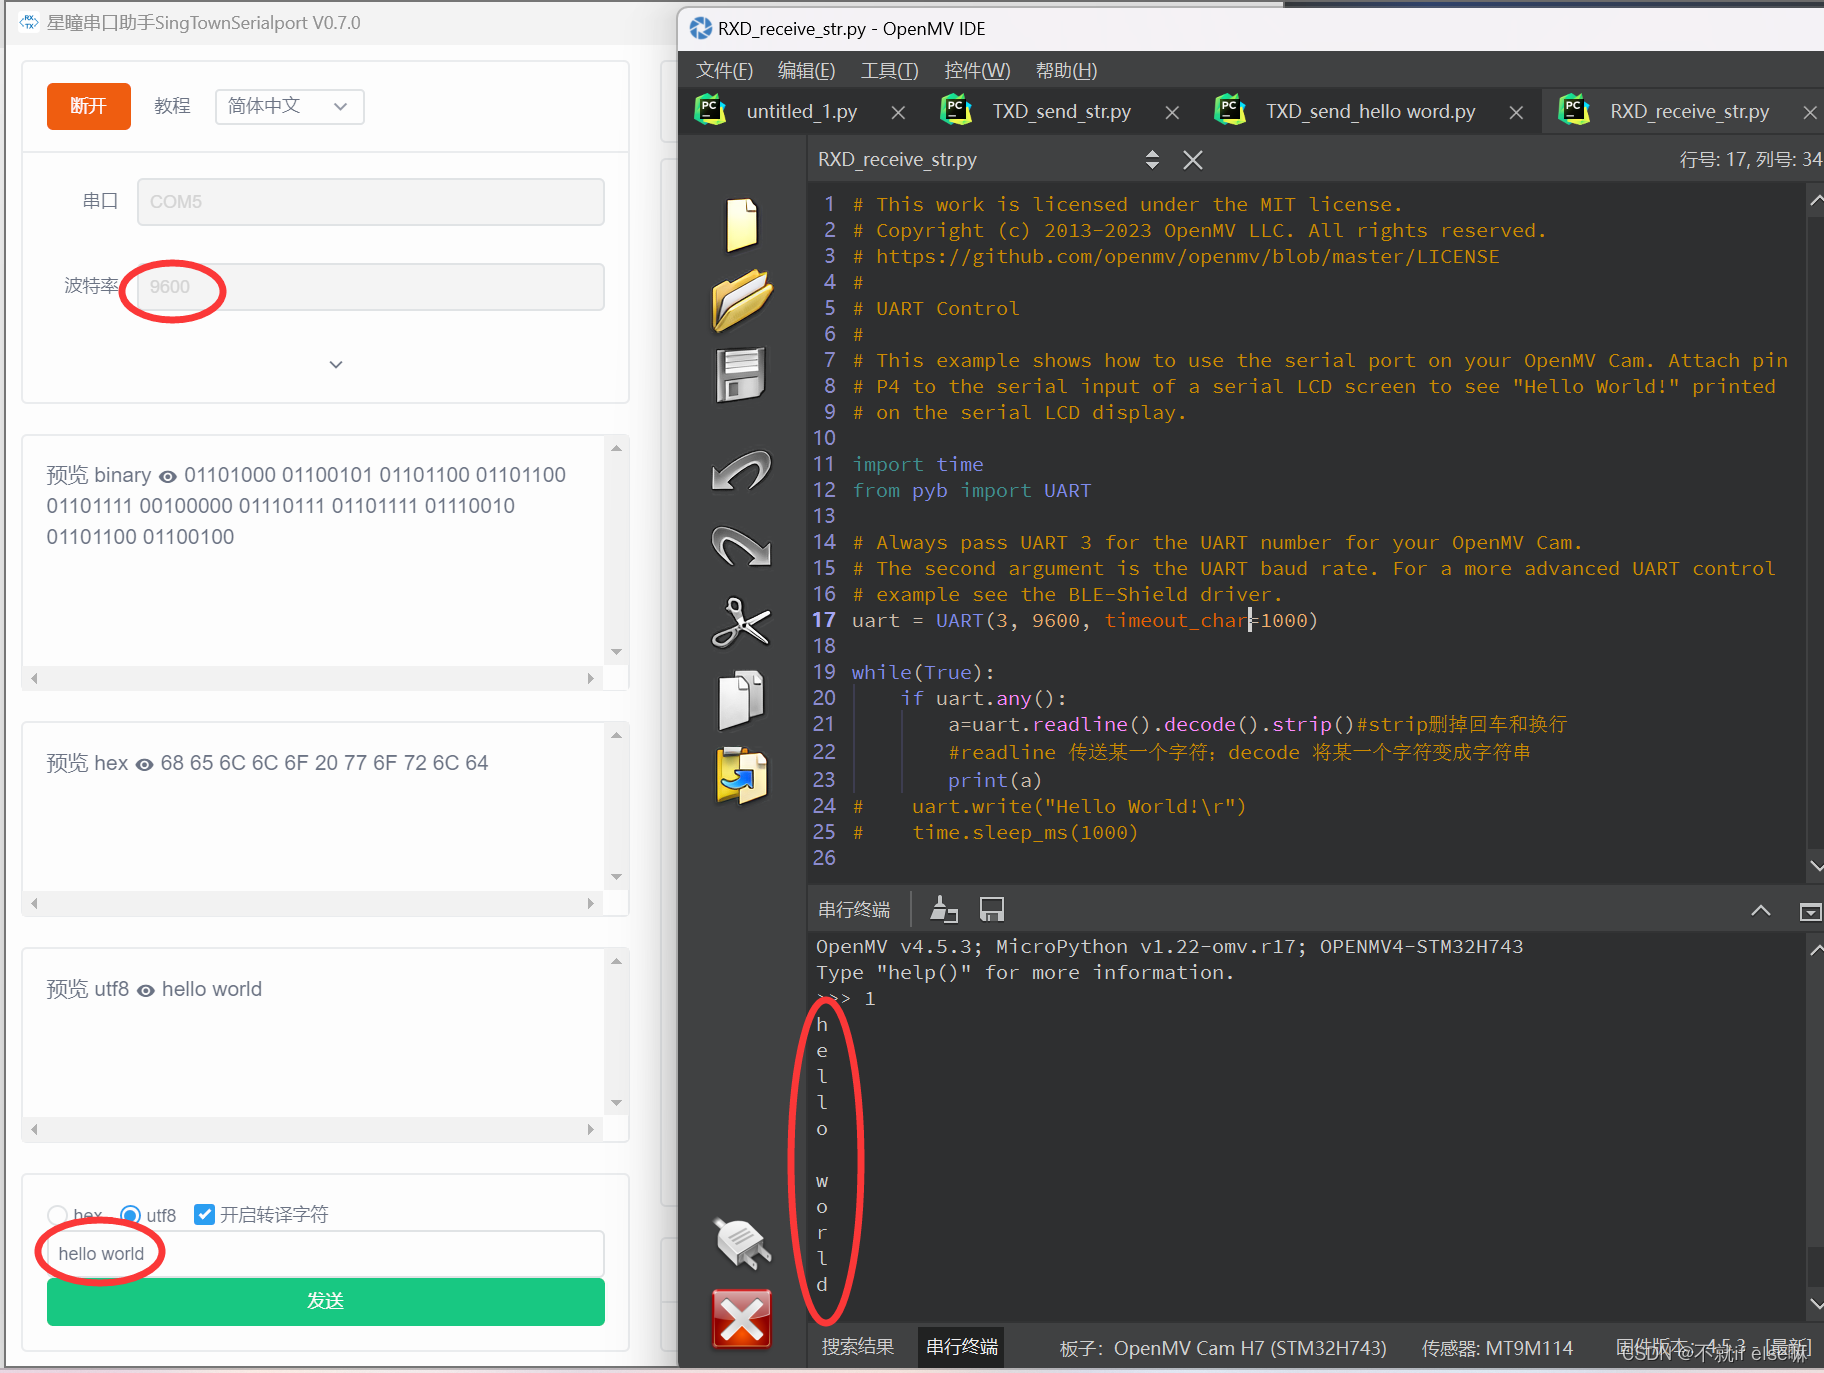
以上就是openmv串口收发数据的全过程


 2万+
2万+

 被折叠的 条评论
为什么被折叠?
被折叠的 条评论
为什么被折叠?
 到【灌水乐园】发言


