首先回顾一下本次美赛的C题:

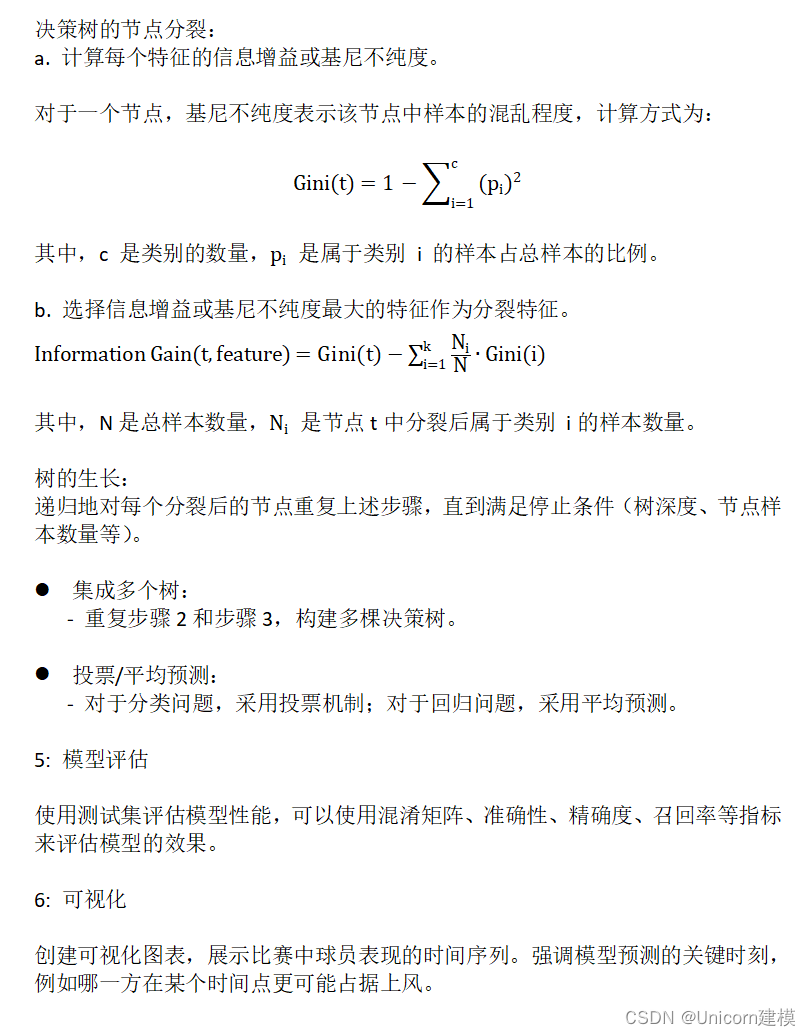
问题1的解决思路如下:


python示例代码:
import pandas as pd
import matplotlib.pyplot as plt
from sklearn.ensemble import RandomForestClassifier
from sklearn.model_selection import train_test_split
from sklearn.metrics import accuracy_score, confusion_matrix

# 读取数据集
data = pd.read_csv('Wimbledon_featured_matches.csv')

# 选择一个比赛(match_id为示例值)
match_id = '2023-wimbledon-1701'
selected_match = data[data['match_id'] == match_id]

# 提取关键时间序列特征
time_series_features = ['set_no', 'game_no', 'point_no', 'server', 'receiver', 'winner']

# 创建时间序列数据
time_series_data = selected_match[time_series_features]

# 按照时间顺序排序
time_series_data = time_series_data.sort_values(by=['set_no', 'game_no', 'point_no'])

# 特征工程
X = time_series_data[['set_no', 'game_no', 'point_no']]
y = time_series_data['winner']

# 划分训练集和测试集
X_train, X_test, y_train, y_test = train_test_split(X, y, test_size=0.2, random_state=42)

# 随机森林模型建立
model = RandomForestClassifier(n_estimators=100, random_state=42)
model.fit(X_train, y_train)

# 模型预测
y_pred = model.predict(X_test)

# 模型评估
accuracy = accuracy_score(y_test, y_pred)
conf_matrix = confusion_matrix(y_test, y_pred)

print(f'Accuracy: {accuracy}')
print(f'Confusion Matrix:\n{conf_matrix}')

# 时间序列可视化
plt.figure(figsize=(12, 6))

# 绘制比赛过程的折线图
plt.plot(time_series_data['point_no'], time_series_data['server'], label='Server')
plt.plot(time_series_data['point_no'], time_series_data['receiver'], label='Receiver')
plt.scatter(X_test['point_no'], y_pred, color='red', marker='x', label='Predicted Winner')

plt.title('Match Performance Time Series')
plt.xlabel('Point Number')
plt.ylabel('Player')
plt.legend()
plt.show()
matlab示例代码:
% 读取数据集
data = readtable('Wimbledon_featured_matches.csv');

% 选择一个比赛(match_id为示例值)
match_id = '2023-wimbledon-1701';
selected_match = data(data.match_id == match_id, :);

% 提取关键时间序列特征
time_series_features = {'set_no', 'game_no', 'point_no', 'server', 'receiver', 'winner'};
time_series_data = selected_match(:, time_series_features);

% 按照时间顺序排序
time_series_data = sortrows(time_series_data, {'set_no', 'game_no', 'point_no'});

% 特征工程
X = time_series_data{:, {'set_no', 'game_no', 'point_no'}};
y = time_series_data.winner;

% 划分训练集和测试集
rng(42);  % 设置随机种子以保证可复现性
[trainIdx, testIdx] = cvpartition(height(time_series_data), 'HoldOut', 0.2);
X_train = X(trainIdx, :);
y_train = y(trainIdx);
X_test = X(testIdx, :);
y_test = y(testIdx);

% 随机森林模型建立
model = TreeBagger(100, X_train, y_train, 'Method', 'classification', 'OOBPrediction', 'on');

% 模型预测
y_pred = predict(model, X_test);

% 模型评估
accuracy = sum(strcmp(y_pred, y_test)) / numel(y_test);
conf_matrix = confusionmat(y_test, y_pred);

fprintf('Accuracy: %.4f\n', accuracy);
disp('Confusion Matrix:');
disp(conf_matrix);

% 时间序列可视化
figure;
plot(time_series_data.point_no, time_series_data.server, 'DisplayName', 'Server');
hold on;
plot(time_series_data.point_no, time_series_data.receiver, 'DisplayName', 'Receiver');
scatter(X_test(:, 3), str2double(y_pred), 50, 'rx', 'DisplayName', 'Predicted Winner');
hold off;

title('Match Performance Time Series');
xlabel('Point Number');
ylabel('Player');
legend('Server', 'Receiver', 'Predicted Winner');
问题3可以采用支持向量机的思路建模:

python示例代码:
import pandas as pd
from sklearn.model_selection import train_test_split
from sklearn.preprocessing import StandardScaler
from sklearn.svm import SVC
from sklearn.metrics import accuracy_score

features = match_data[['feature1', 'feature2', ...]]
target = match_data['fluctuation']

# 数据标签处理,将波动作为目标变量,转换为二进制分类问题
target_binary = (target == '波动')  # 根据实际数据标签调整

# 数据拆分为训练集和测试集
train_features, test_features, train_target, test_target = train_test_split(features, target_binary, test_size=0.2, random_state=42)

# 特征缩放,使用 z-score 标准化
scaler = StandardScaler()
train_features_scaled = scaler.fit_transform(train_features)
test_features_scaled = scaler.transform(test_features)

# SVM 模型训练
svm_model = SVC(kernel='linear', C=1)
svm_model.fit(train_features_scaled, train_target)

# 模型预测
predictions = svm_model.predict(test_features_scaled)

# 模型评估
accuracy = accuracy_score(test_target, predictions)
print(f'SVM Model Accuracy: {accuracy:.4f}')
matlab示例代码:
features = match_data(:, {'feature1', 'feature2', ...});
target = match_data.fluctuation;

% 数据标签处理,将波动作为目标变量,转换为二进制分类问题
target_binary = (target == '波动');  % 根据实际数据标签调整

% 数据拆分为训练集和测试集
rng(42);  % 设置随机种子,确保结果可重复
[train_features, test_features, train_target, test_target] = splitData(features, target_binary, 0.8);

% 特征缩放,使用 z-score 标准化
train_features_scaled = zscore(train_features);
test_features_scaled = zscore(test_features);

% SVM 模型训练
svm_model = fitcsvm(train_features_scaled, train_target, 'KernelFunction', 'linear', 'BoxConstraint', 1);

% 模型预测
predictions = predict(svm_model, test_features_scaled);

% 模型评估
accuracy = sum(predictions == test_target) / length(test_target);
fprintf('SVM Model Accuracy: %.4f\n', accuracy);
查看完整思路如下:
【腾讯文档】2024美赛全题目深度解析(建模过程+代码实现+论文指导)
https://docs.qq.com/doc/DSG1LQWtOQ3lFWHNj


 972
972


 被折叠的 条评论
为什么被折叠?


