


2024.5.21 Tuesday
Continued from 【WEEK13】 【DAY1】Shiro Part 1【English Version】
Contents
- 15.3. Integrating with Spring Boot
- 15.3.1. Creating the shiro-springboot Module
- 15.3.2. Creating index.html
- 15.3.3. Creating the controller folder
- 15.3.4. Testing the Connection
- 15.3.5. Modifying pom.xml
- 15.3.6. Creating the config folder
- 15.3.7. Creating the user folder
- 15.3.8. Modifying MyController.java
- 15.3.9. Modifying index.html
- 15.3.10. Restart
15.3. Integrating with Spring Boot
15.3.1. Creating the shiro-springboot Module
(under the springboot-08-shiro directory)
As usual, modify the Maven, JDK, and Java versions in the settings, as well as the JDK and Java versions in Project Structure. Modify the version of the springframework to 2.7.13 in the pom.xml (it’s important to remember to do this, otherwise you will see an error like “class file has wrong version 61.0, should be 52.0” every time you restart; essentially, it’s not due to different JDK versions, but rather because the version of spring-boot-starter-parent is not compatible). Delete irrelevant files.

15.3.2. Creating index.html
<!DOCTYPE html>
<html lang="en">
<head>
    <meta charset="UTF-8">
    <title>Title</title>
</head>
<body>
<h1>Homepage</h1>
<p th:text="${msg}"></p>
</body>
</html>
15.3.3. Creating the controller folder
Create MyController.java
package com.P40.controller;

import org.springframework.stereotype.Controller;
import org.springframework.ui.Model;
import org.springframework.web.bind.annotation.RequestMapping;

@Controller
public class MyController {

    @RequestMapping({"/", "/index"})
    public String toIndex(Model model){
        model.addAttribute("msg","hello, Shiro");
        return "index";
    }
}
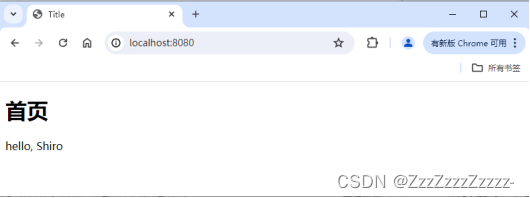
15.3.4. Testing the Connection
Run ShiroSpringbootApplication.java
Visit: http://localhost:8080/
15.3.5. Modifying pom.xml
Add dependency: Shiro-spring, do not use the current latest version 2.0.0, as it will cause errors.
Maven Repository: org.apache.shiro » shiro-spring (mvnrepository.com)
<!-- Package for integrating Shiro with Spring -->
<!-- https://mvnrepository.com/artifact/org.apache.shiro/shiro-spring -->
<dependency>
    <groupId>org.apache.shiro</groupId>
    <artifactId>shiro-spring</artifactId>
    <version>1.4.1</version>
</dependency>
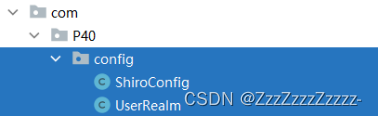
15.3.6. Creating the config folder
15.3.6.1. Creating ShiroConfig.java
package com.P40.config;

import org.apache.shiro.spring.web.ShiroFilterFactoryBean;
import org.apache.shiro.web.mgt.DefaultWebSecurityManager;
import org.springframework.beans.factory.annotation.Qualifier;
import org.springframework.context.annotation.Bean;
import org.springframework.context.annotation.Configuration;

@Configuration
public class ShiroConfig {
    // ShiroFilterFactoryBean
    @Bean
    public ShiroFilterFactoryBean getShiroFilterFactoryBean(@Qualifier("securityManager") DefaultWebSecurityManager defaultWebSecurityManager){
        ShiroFilterFactoryBean bean = new ShiroFilterFactoryBean();
        // What to configure: click to enter the source code of ShiroFilterFactoryBean to view
        // Set the security manager
        bean.setSecurityManager(defaultWebSecurityManager);
        return bean;
    }

    // DefaultWebSecurityManager
    @Bean(name = "securityManager") // Give this class an alias to facilitate calls from ShiroFilterFactoryBean
    public DefaultWebSecurityManager getDefaultWebSecurityManager(@Qualifier("userRealm") UserRealm userRealm){
        DefaultWebSecurityManager securityManager = new DefaultWebSecurityManager();
        // The default class name of DefaultWebSecurityManager is defaultWebSecurityManager, but it is modified to securityManager here

        // Associate UserRealm
        securityManager.setRealm(userRealm);
        return securityManager;
    }

    // Create a realm object, needs a custom class
    @Bean
    public UserRealm userRealm(){
        return new UserRealm();
    }

    // The order of creation is reversed (from realm -> DefaultWebSecurityManager -> ShiroFilterFactoryBean)
}
15.3.6.2. Creating UserRealm.java
package com.P40.config;

import org.apache.shiro.authc.AuthenticationException;
import org.apache.shiro.authc.AuthenticationInfo;
import org.apache.shiro.authc.AuthenticationToken;
import org.apache.shiro.authz.AuthorizationInfo;
import org.apache.shiro.realm.AuthorizingRealm;
import org.apache.shiro.subject.PrincipalCollection;

// UserRealm is a bean
// Custom UserRealm, it must inherit the AuthorizingRealm method, and then implement methods (alt+insert)
public class UserRealm extends AuthorizingRealm {
    // Authorization
    @Override
    protected AuthorizationInfo doGetAuthorizationInfo(PrincipalCollection principalCollection) {
        System.out.println("do doGetAuthorizationInfo Authorization");
        return null;
    }

    // Authentication
    @Override
    protected AuthenticationInfo doGetAuthenticationInfo(AuthenticationToken authenticationToken) throws AuthenticationException {
        System.out.println("do doGetAuthorizationInfo Authentication");
        return null;
    }
}
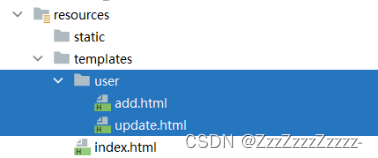
15.3.7. Creating the user folder
15.3.7.1. Creating add.html
<!DOCTYPE html>
<html lang="en">
<head>
    <meta charset="UTF-8">
    <title>Title</title>
</head>
<body>
<h1>add</h1>
</body>
</html>
15.3.7.2. Creating update.html
<!DOCTYPE html>
<html lang="en">
<head>
    <meta charset="UTF-8">
    <title>Title</title>
</head>
<body>
<h1>update</h1>
</body>
</html>
15.3.8. Modifying MyController.java
Adding controller methods to redirect to the add and update pages
package com.P40.controller;

import org.springframework.stereotype.Controller;
import org.springframework.ui.Model;
import org.springframework.web.bind.annotation.RequestMapping;

@Controller
public class MyController {

    @RequestMapping({"/", "/index"})
    public String toIndex(Model model){
        model.addAttribute("msg","hello, Shiro");
        return "index";
    }

    @RequestMapping("/user/add")
    public String add(){
        return "user/add";
    }

    @RequestMapping("/user/update")
    public String update(){
        return "user/update";
    }
}
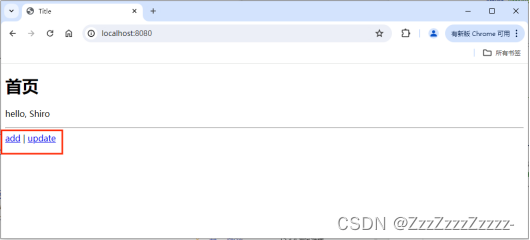
15.3.9. Modifying index.html
<!DOCTYPE html>
<html lang="en">
<head>
    <meta charset="UTF-8">
    <title>Title</title>
</head>
<body>
<h1>Homepage</h1>
<p th:text="${msg}"></p>

<hr>    <!-- Create a horizontal line in the HTML page -->
<a th:href="@{/user/add}">add</a>  |   <a th:href="@{/user/update}">update</a>
<!-- a tag defines a hyperlink for linking from one page to another -->
</body>
</html>
15.3.10. Restart


 927
927


 被折叠的 条评论
为什么被折叠?
被折叠的 条评论
为什么被折叠?
 到【灌水乐园】发言


