


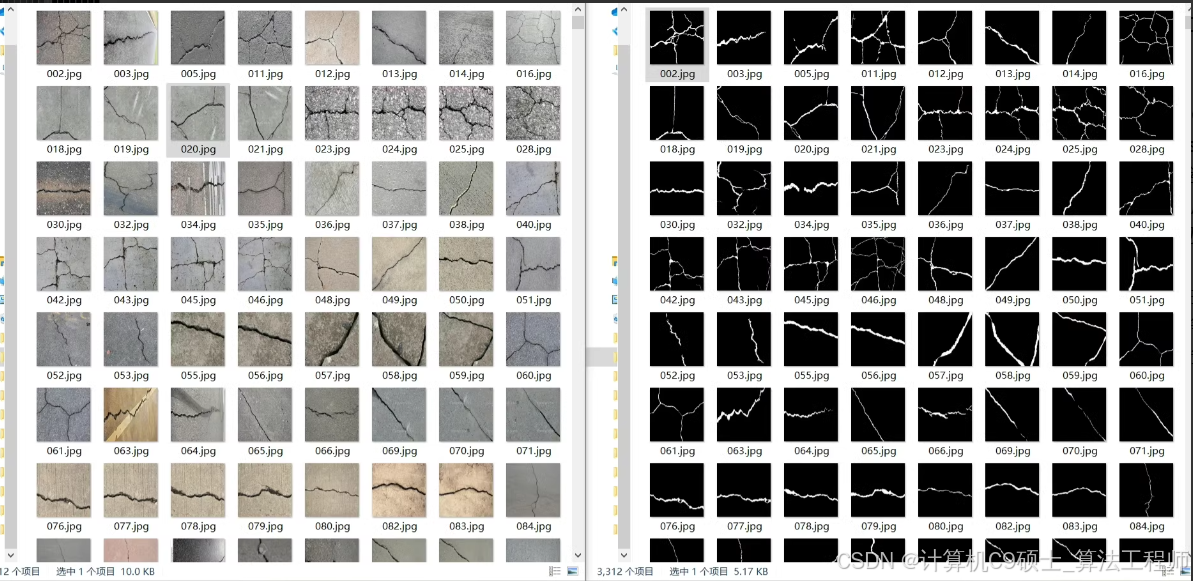
语义分割裂缝数据集,SCI测好用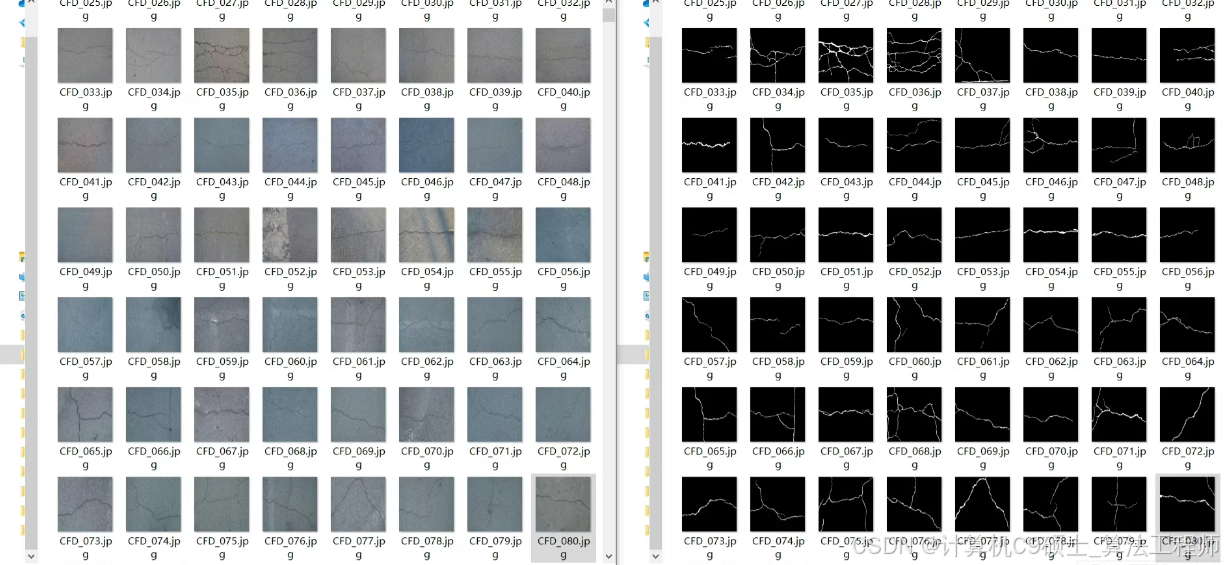
(混凝土,道路等)
Crack500 DeepCrack
concrete crack dataset CFD
cracktree200 crackforest等等数据集
总计1w+ 包括含有和不含裂缝图像标签
包括高精度原始图像,灰度图像标签
包括224像素值大小图像及标签
包括数据集数据增强操作(翻转,旋转,像素变换等)
提供对原始图像数据预处理操作代码(等比例缩放,裁剪,数据增强,随机抽取等)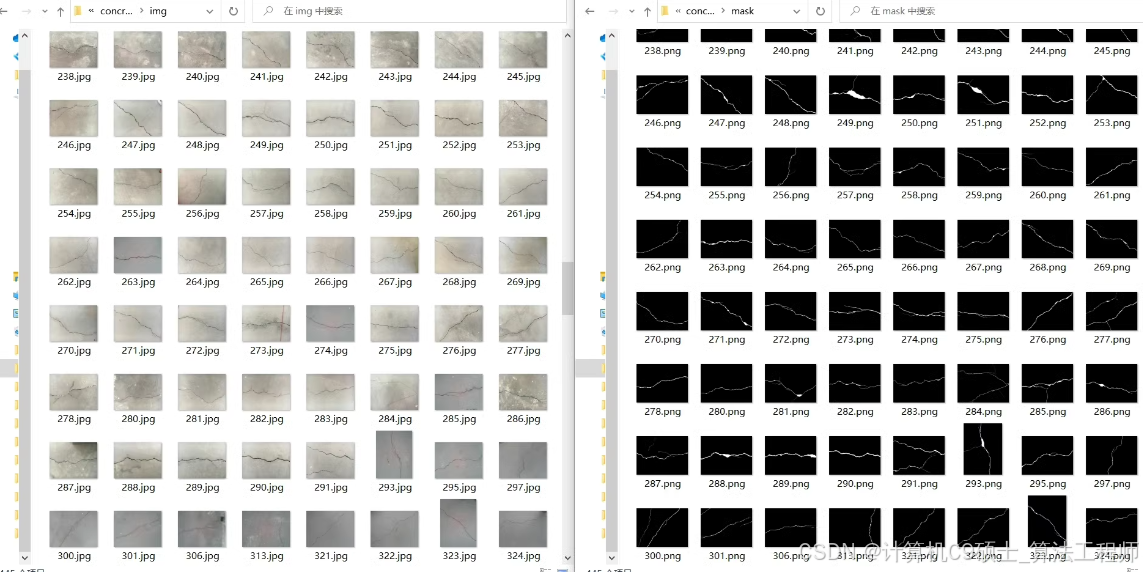
好的,针对裂缝检测的语义分割任务,我们将详细介绍如何准备数据、训练模型、评估模型和可视化结果。我们将使用多个裂缝数据集,包括Crack500、DeepCrack、Concrete Crack Dataset (CFD)、CrackTree200和CrackForest等,总计超过1万张图像。我们将使用U-Net模型进行语义分割任务,并提供完整的代码示例。
1. 环境准备
首先,确保你已经安装了必要的库和工具。你可以使用以下命令安装所需的库:
pip install torch torchvision
pip install numpy
pip install pandas
pip install matplotlib
pip install scikit-image
pip install albumentations
pip install tqdm
2. 数据准备
假设你的数据集目录结构如下:
crack_data/
├── images/
│   ├── train/
│   ├── val/
│   └── test/
├── masks/
│   ├── train/
│   ├── val/
│   └── test/
每个图像文件和对应的标签文件都以相同的文件名命名,例如 0001.jpg 和 0001.png。
3. 创建数据加载器
创建一个数据加载器来读取图像和标签。我们使用PyTorch的Dataset和DataLoader类。
import os
import torch
from torch.utils.data import Dataset, DataLoader
from PIL import Image
import numpy as np
import albumentations as A
from albumentations.pytorch import ToTensorV2

class CrackDataset(Dataset):
    def __init__(self, image_dir, mask_dir, transform=None):
        self.image_dir = image_dir
        self.mask_dir = mask_dir
        self.transform = transform
        self.images = os.listdir(image_dir)

    def __len__(self):
        return len(self.images)

    def __getitem__(self, index):
        img_path = os.path.join(self.image_dir, self.images[index])
        mask_path = os.path.join(self.mask_dir, self.images[index].replace('.jpg', '.png'))

        image = np.array(Image.open(img_path).convert("RGB"))
        mask = np.array(Image.open(mask_path).convert("L"), dtype=np.float32)
        mask[mask == 255.0] = 1.0

        if self.transform is not None:
            augmentations = self.transform(image=image, mask=mask)
            image = augmentations['image']
            mask = augmentations['mask']

        return image, mask

# 数据增强
transform = A.Compose(
    [
        A.Resize(height=224, width=224),
        A.Rotate(limit=35, p=1.0),
        A.HorizontalFlip(p=0.5),
        A.VerticalFlip(p=0.1),
        A.Normalize(
            mean=[0.485, 0.456, 0.406],
            std=[0.229, 0.224, 0.225],
            max_pixel_value=255.0,
        ),
        ToTensorV2(),
    ]
)

# 创建数据加载器
train_dataset = CrackDataset(
    image_dir="crack_data/images/train",
    mask_dir="crack_data/masks/train",
    transform=transform,
)

val_dataset = CrackDataset(
    image_dir="crack_data/images/val",
    mask_dir="crack_data/masks/val",
    transform=transform,
)

test_dataset = CrackDataset(
    image_dir="crack_data/images/test",
    mask_dir="crack_data/masks/test",
    transform=transform,
)

train_loader = DataLoader(train_dataset, batch_size=16, shuffle=True, num_workers=2)
val_loader = DataLoader(val_dataset, batch_size=16, shuffle=False, num_workers=2)
test_loader = DataLoader(test_dataset, batch_size=16, shuffle=False, num_workers=2)
4. 定义模型
使用U-Net模型进行语义分割。
import torch
import torch.nn as nn
import torch.nn.functional as F

class UNet(nn.Module):
    def __init__(self, in_channels=3, out_channels=1, features=[64, 128, 256, 512]):
        super(UNet, self).__init__()
        self.encoder = nn.ModuleList()
        self.decoder = nn.ModuleList()

        # Encoder
        for feature in features:
            self.encoder.append(DoubleConv(in_channels, feature))
            in_channels = feature

        # Bottleneck
        self.bottleneck = DoubleConv(features[-1], features[-1] * 2)

        # Decoder
        for feature in reversed(features):
            self.decoder.append(nn.ConvTranspose2d(feature * 2, feature, kernel_size=2, stride=2))
            self.decoder.append(DoubleConv(feature * 2, feature))

        self.final_conv = nn.Conv2d(features[0], out_channels, kernel_size=1)

    def forward(self, x):
        skip_connections = []

        for down in self.encoder:
            x = down(x)
            skip_connections.append(x)
            x = F.max_pool2d(x, kernel_size=2)

        x = self.bottleneck(x)
        skip_connections = skip_connections[::-1]

        for idx in range(0, len(self.decoder), 2):
            x = self.decoder[idx](x)
            skip_connection = skip_connections[idx // 2]

            if x.shape != skip_connection.shape:
                x = F.interpolate(x, size=skip_connection.shape[2:])

            concat_skip = torch.cat((skip_connection, x), dim=1)
            x = self.decoder[idx + 1](concat_skip)

        return self.final_conv(x)

class DoubleConv(nn.Module):
    def __init__(self, in_channels, out_channels):
        super(DoubleConv, self).__init__()
        self.conv = nn.Sequential(
            nn.Conv2d(in_channels, out_channels, 3, 1, 1, bias=False),
            nn.BatchNorm2d(out_channels),
            nn.ReLU(inplace=True),
            nn.Conv2d(out_channels, out_channels, 3, 1, 1, bias=False),
            nn.BatchNorm2d(out_channels),
            nn.ReLU(inplace=True),
        )

    def forward(self, x):
        return self.conv(x)
5. 训练模型
定义训练和验证函数。
import torch.optim as optim
from tqdm import tqdm

device = torch.device("cuda" if torch.cuda.is_available() else "cpu")

def train_fn(loader, model, optimizer, loss_fn, scaler):
    loop = tqdm(loader)
    for batch_idx, (data, targets) in enumerate(loop):
        data = data.to(device)
        targets = targets.unsqueeze(1).to(device)

        # Forward
        with torch.cuda.amp.autocast():
            predictions = model(data)
            loss = loss_fn(predictions, targets)

        # Backward
        optimizer.zero_grad()
        scaler.scale(loss).backward()
        scaler.step(optimizer)
        scaler.update()

        # Update tqdm loop
        loop.set_postfix(loss=loss.item())

def check_accuracy(loader, model, device="cuda"):
    num_correct = 0
    num_pixels = 0
    dice_score = 0
    model.eval()

    with torch.no_grad():
        for x, y in loader:
            x = x.to(device)
            y = y.to(device).unsqueeze(1)
            preds = torch.sigmoid(model(x))
            preds = (preds > 0.5).float()
            num_correct += (preds == y).sum()
            num_pixels += torch.numel(preds)
            dice_score += (2 * (preds * y).sum()) / ((preds + y).sum() + 1e-8)

    print(f"Got {num_correct}/{num_pixels} with acc {num_correct/num_pixels*100:.2f}")
    print(f"Dice score: {dice_score/len(loader)}")

    model.train()

def main():
    model = UNet(in_channels=3, out_channels=1).to(device)
    loss_fn = nn.BCEWithLogitsLoss()
    optimizer = optim.Adam(model.parameters(), lr=1e-4)
    scaler = torch.cuda.amp.GradScaler()

    for epoch in range(100):  # Number of epochs
        train_fn(train_loader, model, optimizer, loss_fn, scaler)
        check_accuracy(val_loader, model, device=device)

        # Save model
        checkpoint = {
            "state_dict": model.state_dict(),
            "optimizer": optimizer.state_dict(),
        }
        torch.save(checkpoint, f"unet_crack_segmentation_checkpoint.pth.tar")

if __name__ == "__main__":
    main()
6. 评估模型
评估模型在测试集上的性能。
def evaluate_model(test_loader, model, device="cuda"):
    model.eval()
    num_correct = 0
    num_pixels = 0
    dice_score = 0

    with torch.no_grad():
        for x, y in test_loader:
            x = x.to(device)
            y = y.to(device).unsqueeze(1)
            preds = torch.sigmoid(model(x))
            preds = (preds > 0.5).float()
            num_correct += (preds == y).sum()
            num_pixels += torch.numel(preds)
            dice_score += (2 * (preds * y).sum()) / ((preds + y).sum() + 1e-8)

    accuracy = num_correct / num_pixels * 100
    dice_score = dice_score / len(test_loader)
    print(f"Test Accuracy: {accuracy:.2f}%")
    print(f"Test Dice Score: {dice_score:.4f}")

# 评估模型
evaluate_model(test_loader, model, device=device)
7. 可视化预测结果
使用以下Python代码来可视化模型的预测结果。
import matplotlib.pyplot as plt

def visualize_predictions(loader, model, device="cuda", num_samples=5):
    model.eval()
    fig, ax = plt.subplots(num_samples, 3, figsize=(15, 5 * num_samples))

    with torch.no_grad():
        for i, (x, y) in enumerate(loader):
            x = x.to(device)
            y = y.to(device).unsqueeze(1)
            preds = torch.sigmoid(model(x))
            preds = (preds > 0.5).float()

            for j in range(min(num_samples, x.shape[0])):
                ax[j, 0].imshow(x[j].cpu().permute(1, 2, 0))
                ax[j, 1].imshow(y[j].cpu().squeeze(), cmap='gray')
                ax[j, 2].imshow(preds[j].cpu().squeeze(), cmap='gray')

            if i >= num_samples - 1:
                break

    plt.show()

# 可视化预测结果
visualize_predictions(test_loader, model, device=device)
8. 原始图像数据预处理
提供对原始图像数据的预处理操作代码,包括等比例缩放、裁剪、数据增强和随机抽取等。
import cv2
import random
import os
import numpy as np
from skimage.transform import resize

def preprocess_image(image_path, target_size=(224, 224)):
    image = cv2.imread(image_path)
    image = cv2.cvtColor(image, cv2.COLOR_BGR2RGB)

    # 等比例缩放
    h, w = image.shape[:2]
    if h > w:
        new_h = int(target_size[0] * h / w)
        new_w = target_size[1]
    else:
        new_w = int(target_size[1] * w / h)
        new_h = target_size[0]

    image = cv2.resize(image, (new_w, new_h), interpolation=cv2.INTER_AREA)

    # 裁剪
    h, w = image.shape[:2]
    start_x = (w - target_size[1]) // 2
    start_y = (h - target_size[0]) // 2
    image = image[start_y:start_y + target_size[0], start_x:start_x + target_size[1]]

    return image

def augment_image(image):
    # 随机水平翻转
    if random.random() < 0.5:
        image = cv2.flip(image, 1)

    # 随机垂直翻转
    if random.random() < 0.5:
        image = cv2.flip(image, 0)

    # 随机旋转
    angle = random.uniform(-35, 35)
    M = cv2.getRotationMatrix2D((image.shape[1] // 2, image.shape[0] // 2), angle, 1)
    image = cv2.warpAffine(image, M, (image.shape[1], image.shape[0]))

    # 随机亮度和对比度调整
    alpha = random.uniform(0.8, 1.2)
    beta = random.uniform(-20, 20)
    image = cv2.convertScaleAbs(image, alpha=alpha, beta=beta)

    return image

def save_preprocessed_images(image_dir, output_dir, target_size=(224, 224), num_samples=1000):
    os.makedirs(output_dir, exist_ok=True)
    image_files = os.listdir(image_dir)
    random.shuffle(image_files)

    for i, image_file in enumerate(image_files[:num_samples]):
        image_path = os.path.join(image_dir, image_file)
        image = preprocess_image(image_path, target_size)
        image = augment_image(image)

        output_path = os.path.join(output_dir, image_file)
        cv2.imwrite(output_path, cv2.cvtColor(image, cv2.COLOR_RGB2BGR))

# 示例
save_preprocessed_images("crack_data/images/train", "crack_data/preprocessed/train")


 700
700

 被折叠的 条评论
为什么被折叠?
被折叠的 条评论
为什么被折叠?
 到【灌水乐园】发言


